Adding Watercolor to Wood

IMG_2443.JPG

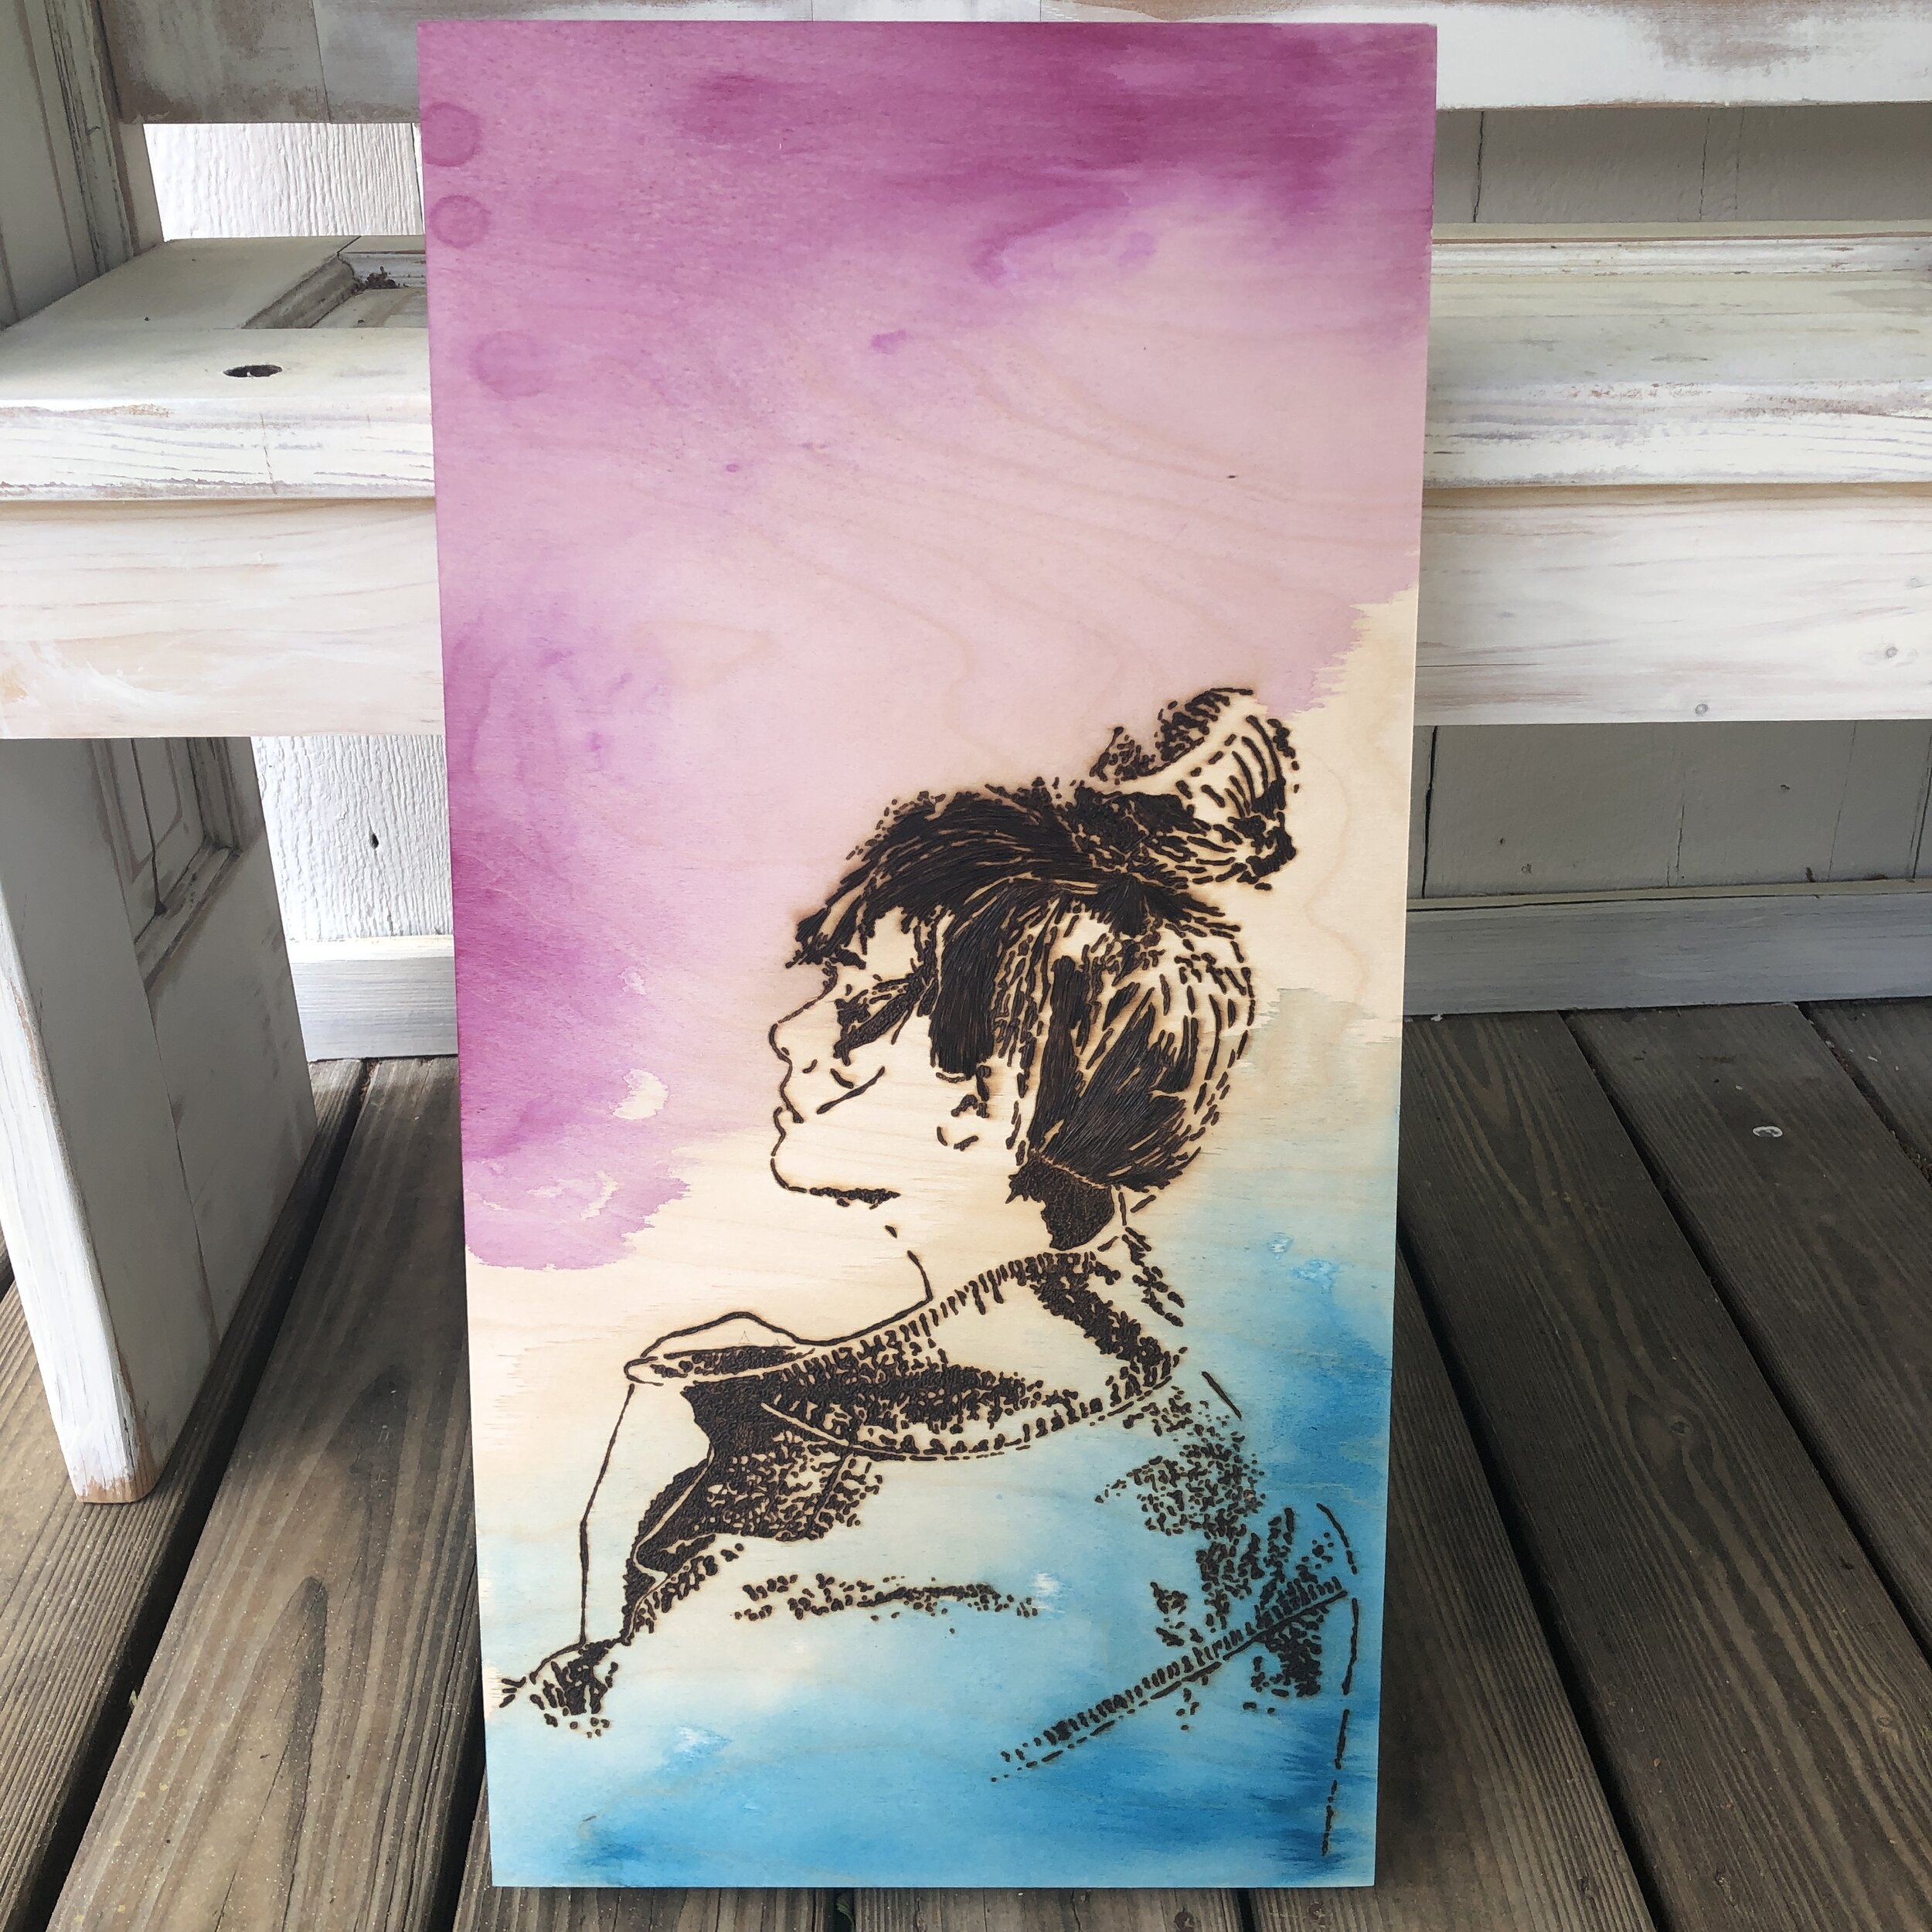
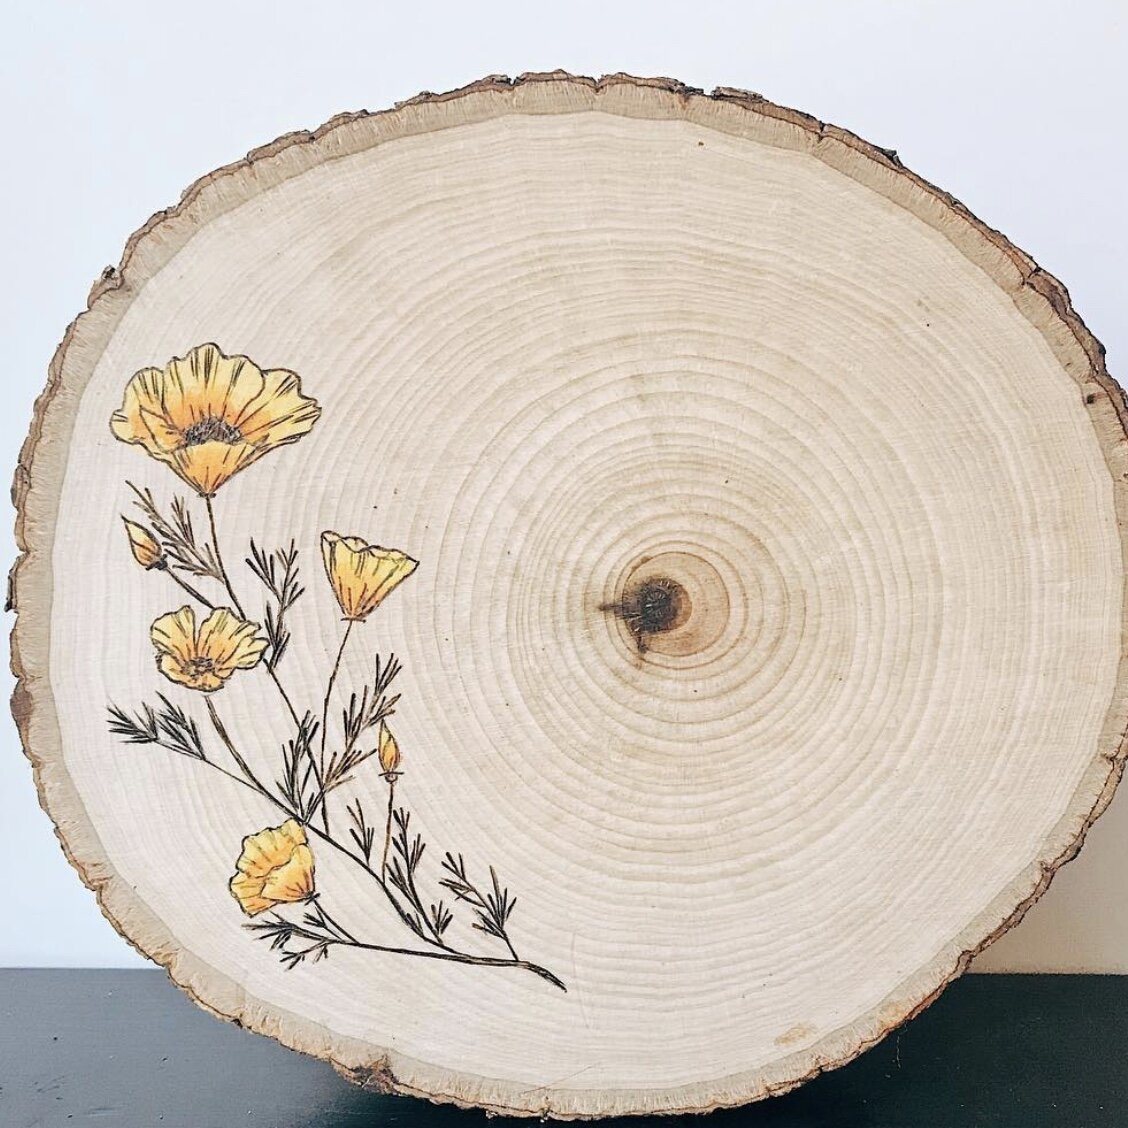
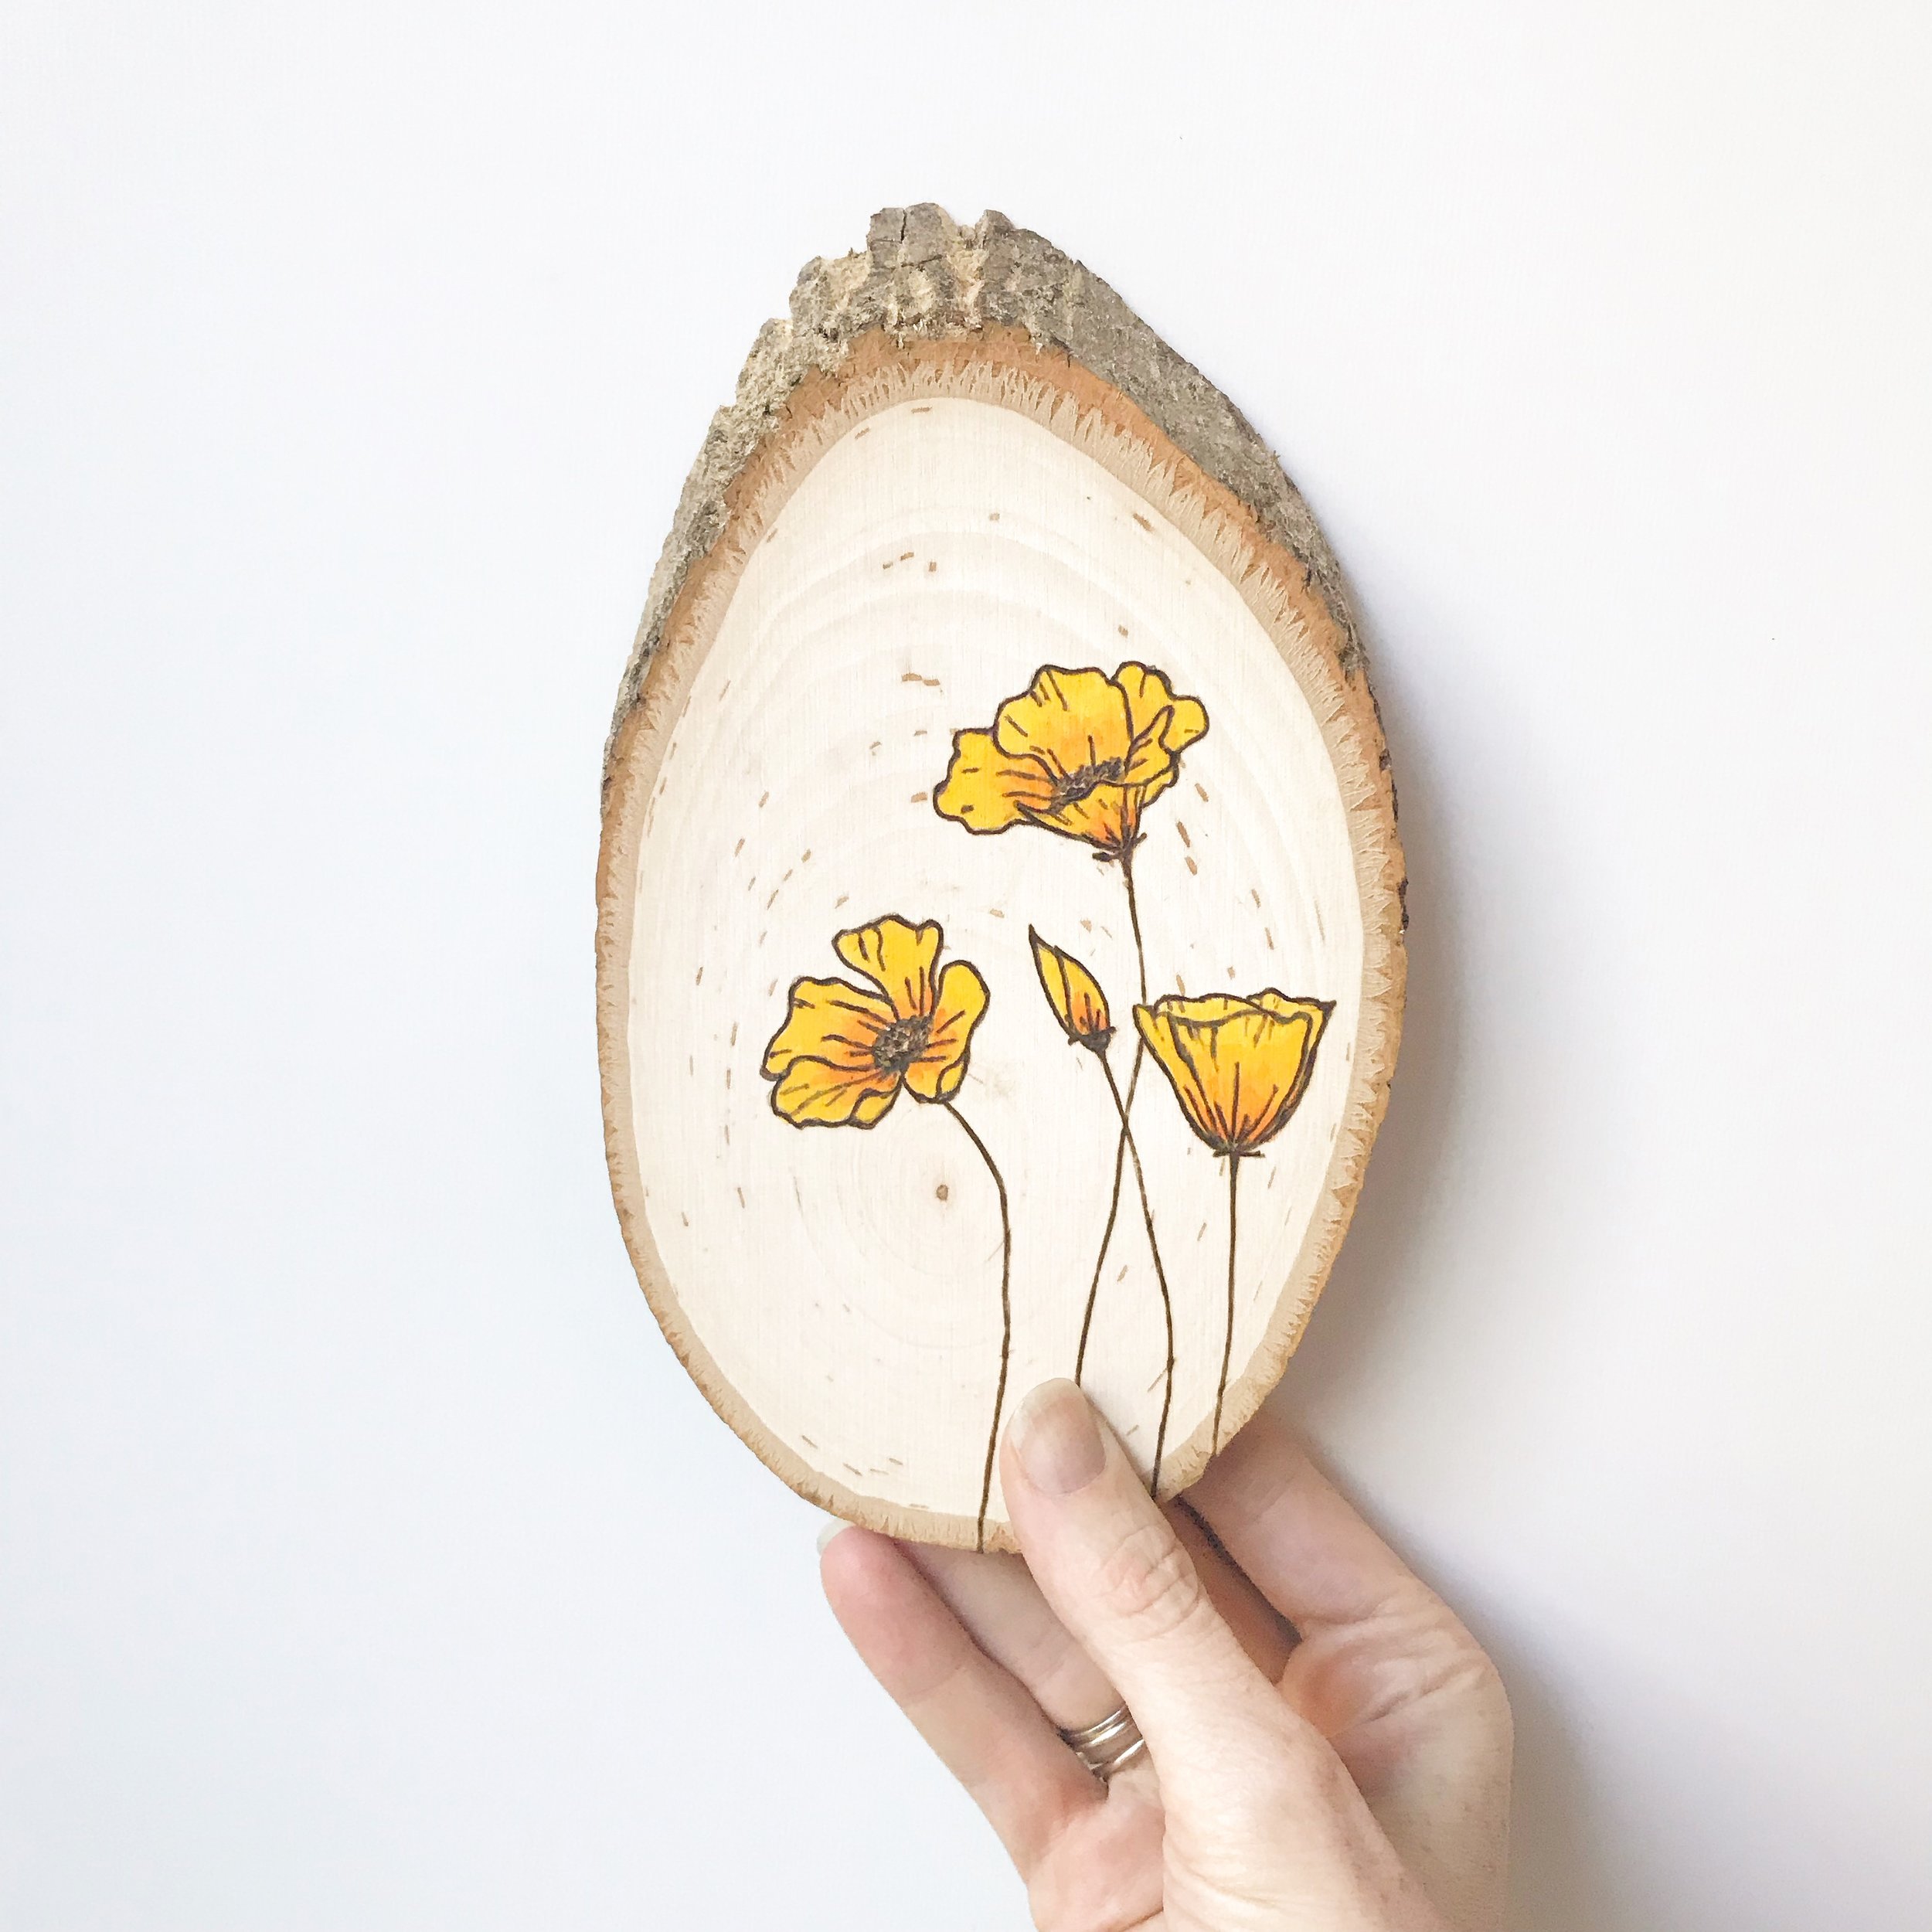
There are so many different ways to add color to wood, but watercolor is probably my favorite.

There are a couple things you are going to want to know before you start adding watercolour on wood.

It doesn’t act the same way that watercolor paper does. Where you place it, it will soak in and stick. You can’t blend as easily as you can on paper. Especially if you are adding wood to a dried piece of wood, that wood will soak it right up because it is very thirsty.

Be careful not to use too much water or you can split the wood. (Trust me, I have done this!) You will think you can create more blending by adding more water, which you can, but it can be at the coast of the entire piece.

I prefer to use water brush pens for my paintbrushes. These are paintbrushes that hold the water or water color in their handle, and you squeeze them to get water onto your brush. I love these, because I have more control over the amount of water I am using, and it saves me time from having to dip back into the water glass.

There are some preferred watercolor manufacturers that I love like Arteza and Windsor & Newton, but a cheap pallet of colors from your local craft store will do just fine. If you are looking for metallic pigments, I can not recommend Fine-Tec Paints enough.

In this quick 5 minute video I cover how to add watercolor to wood, and what to avoid. I talk about the tools and materials that I use, and some tips and tricks I have learned.

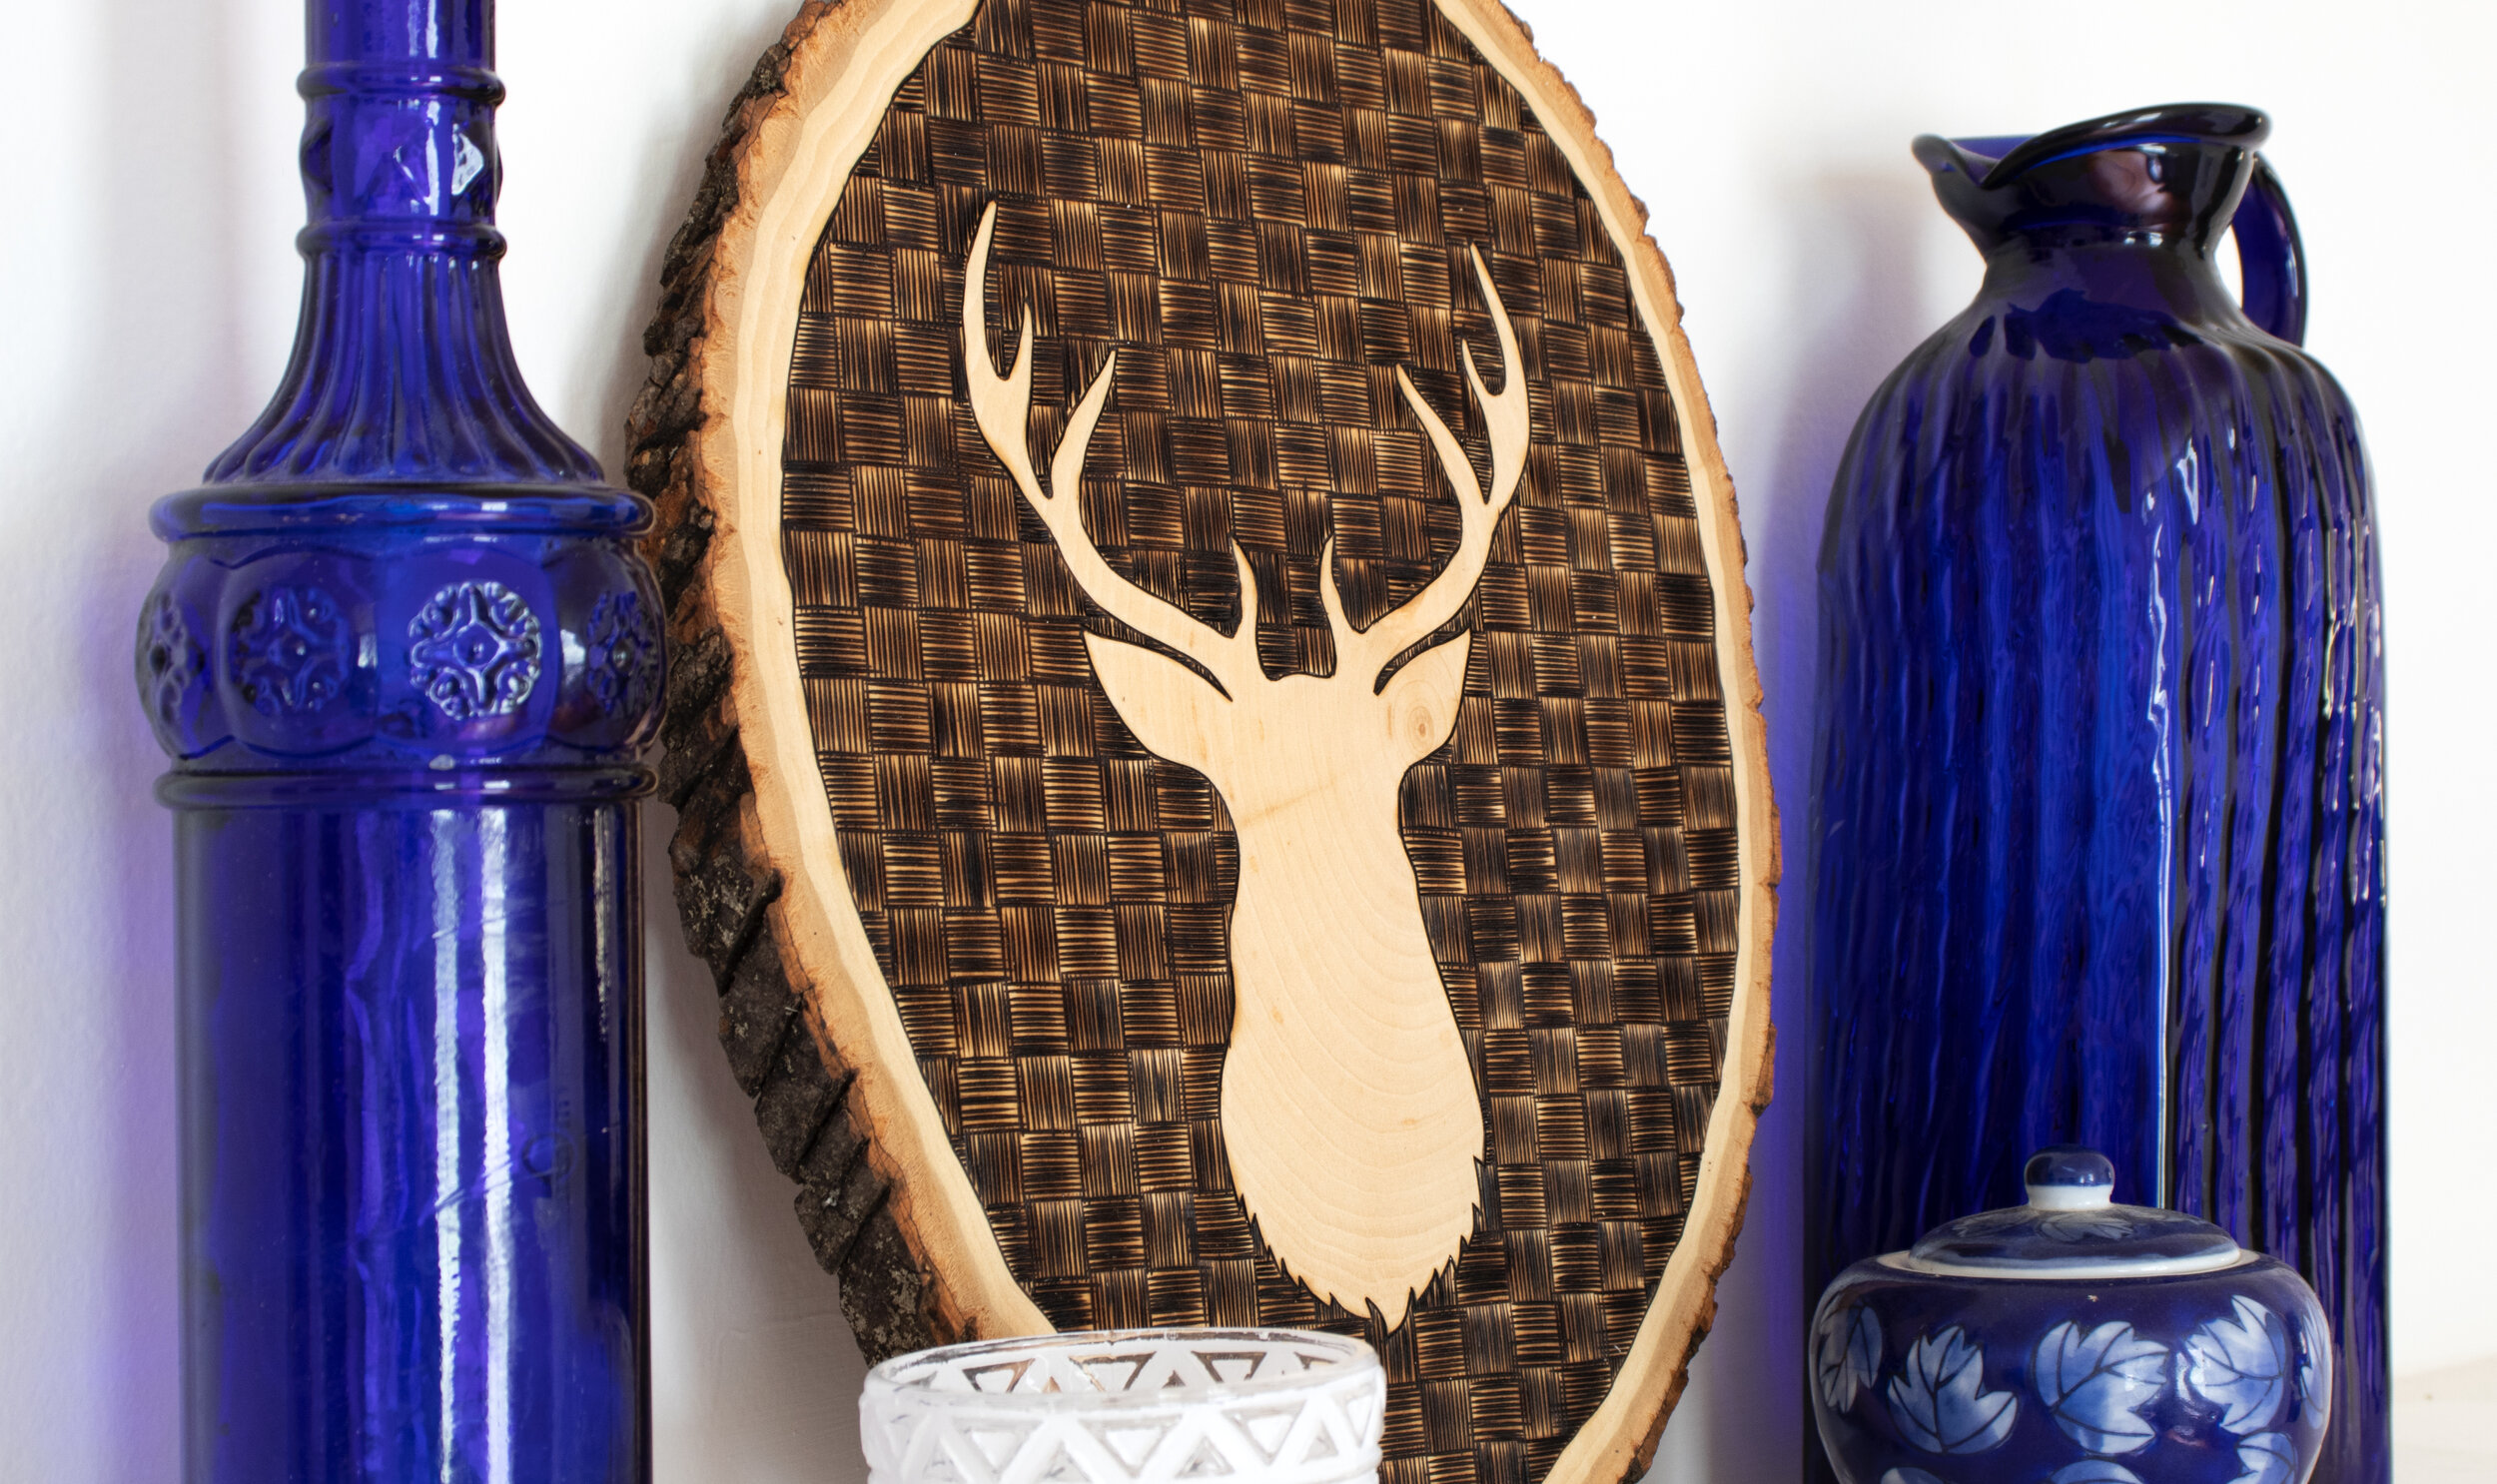
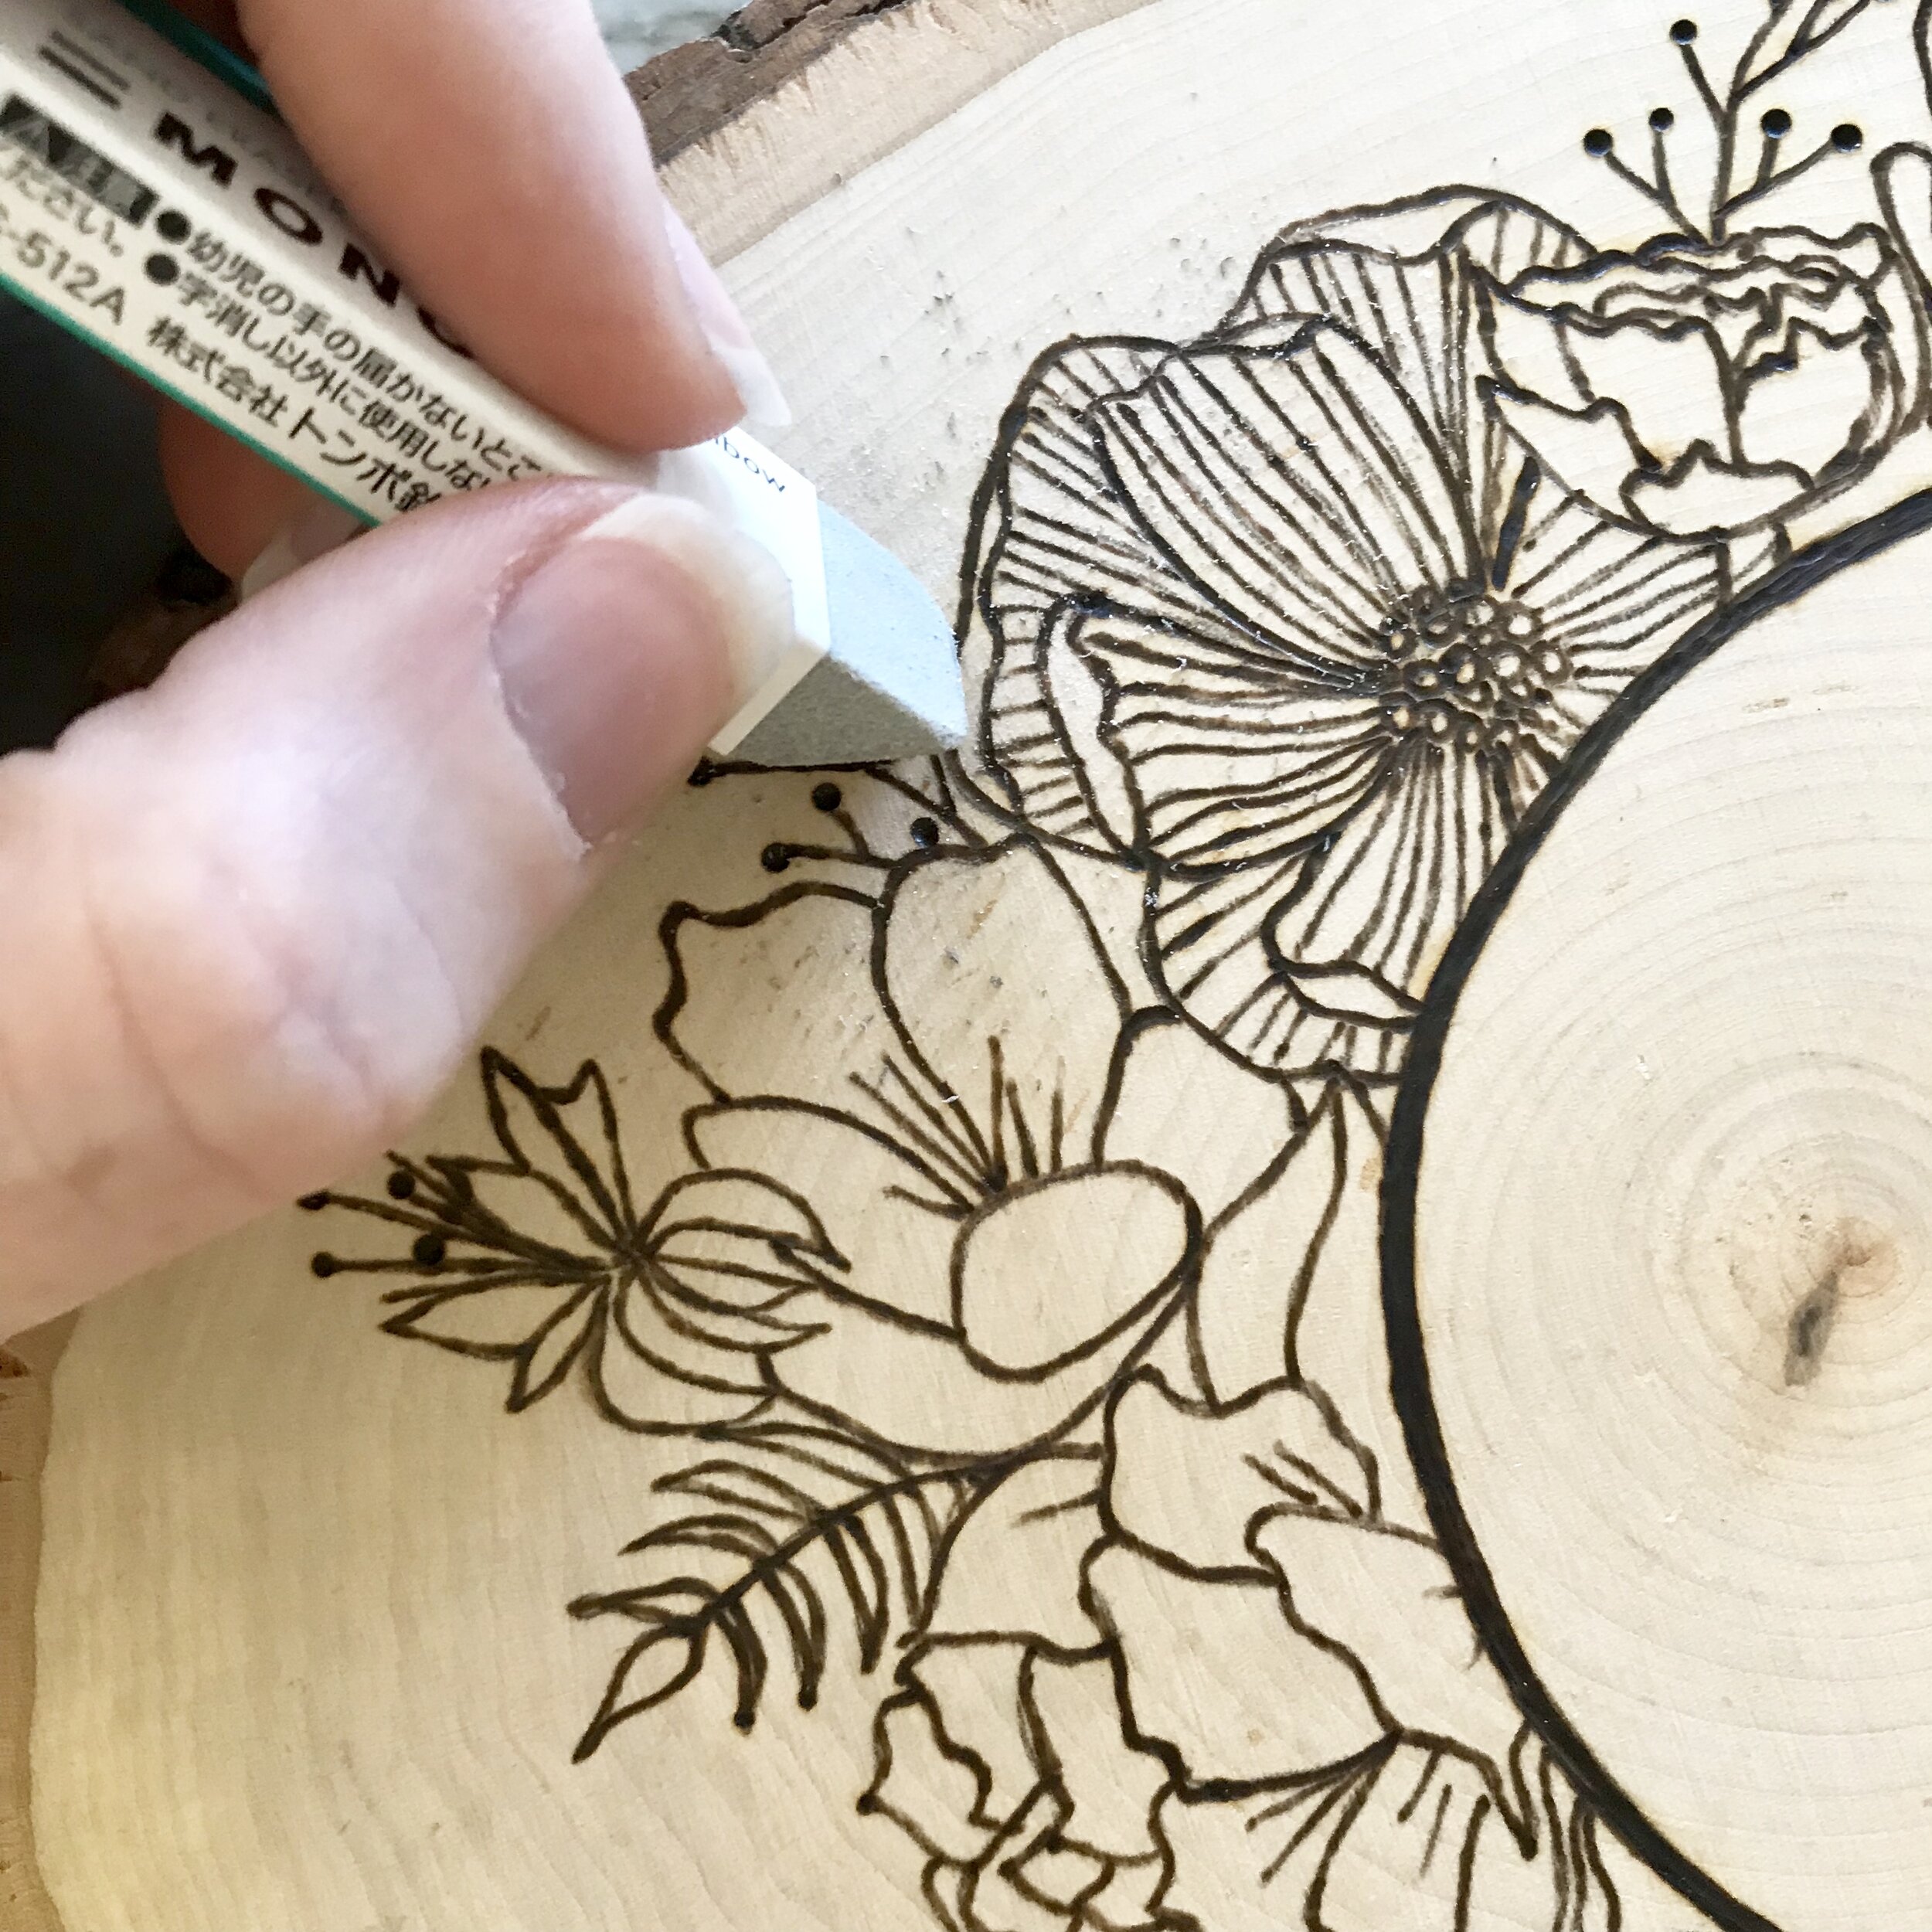
No matter how you choose to add color, please remember, color goes AFTER burning. Never woodburn over color! Never ever! You do not want to be breathing those fumes. Always wood burn first then add your mixed media.

Affiliate Links for the materials I used:
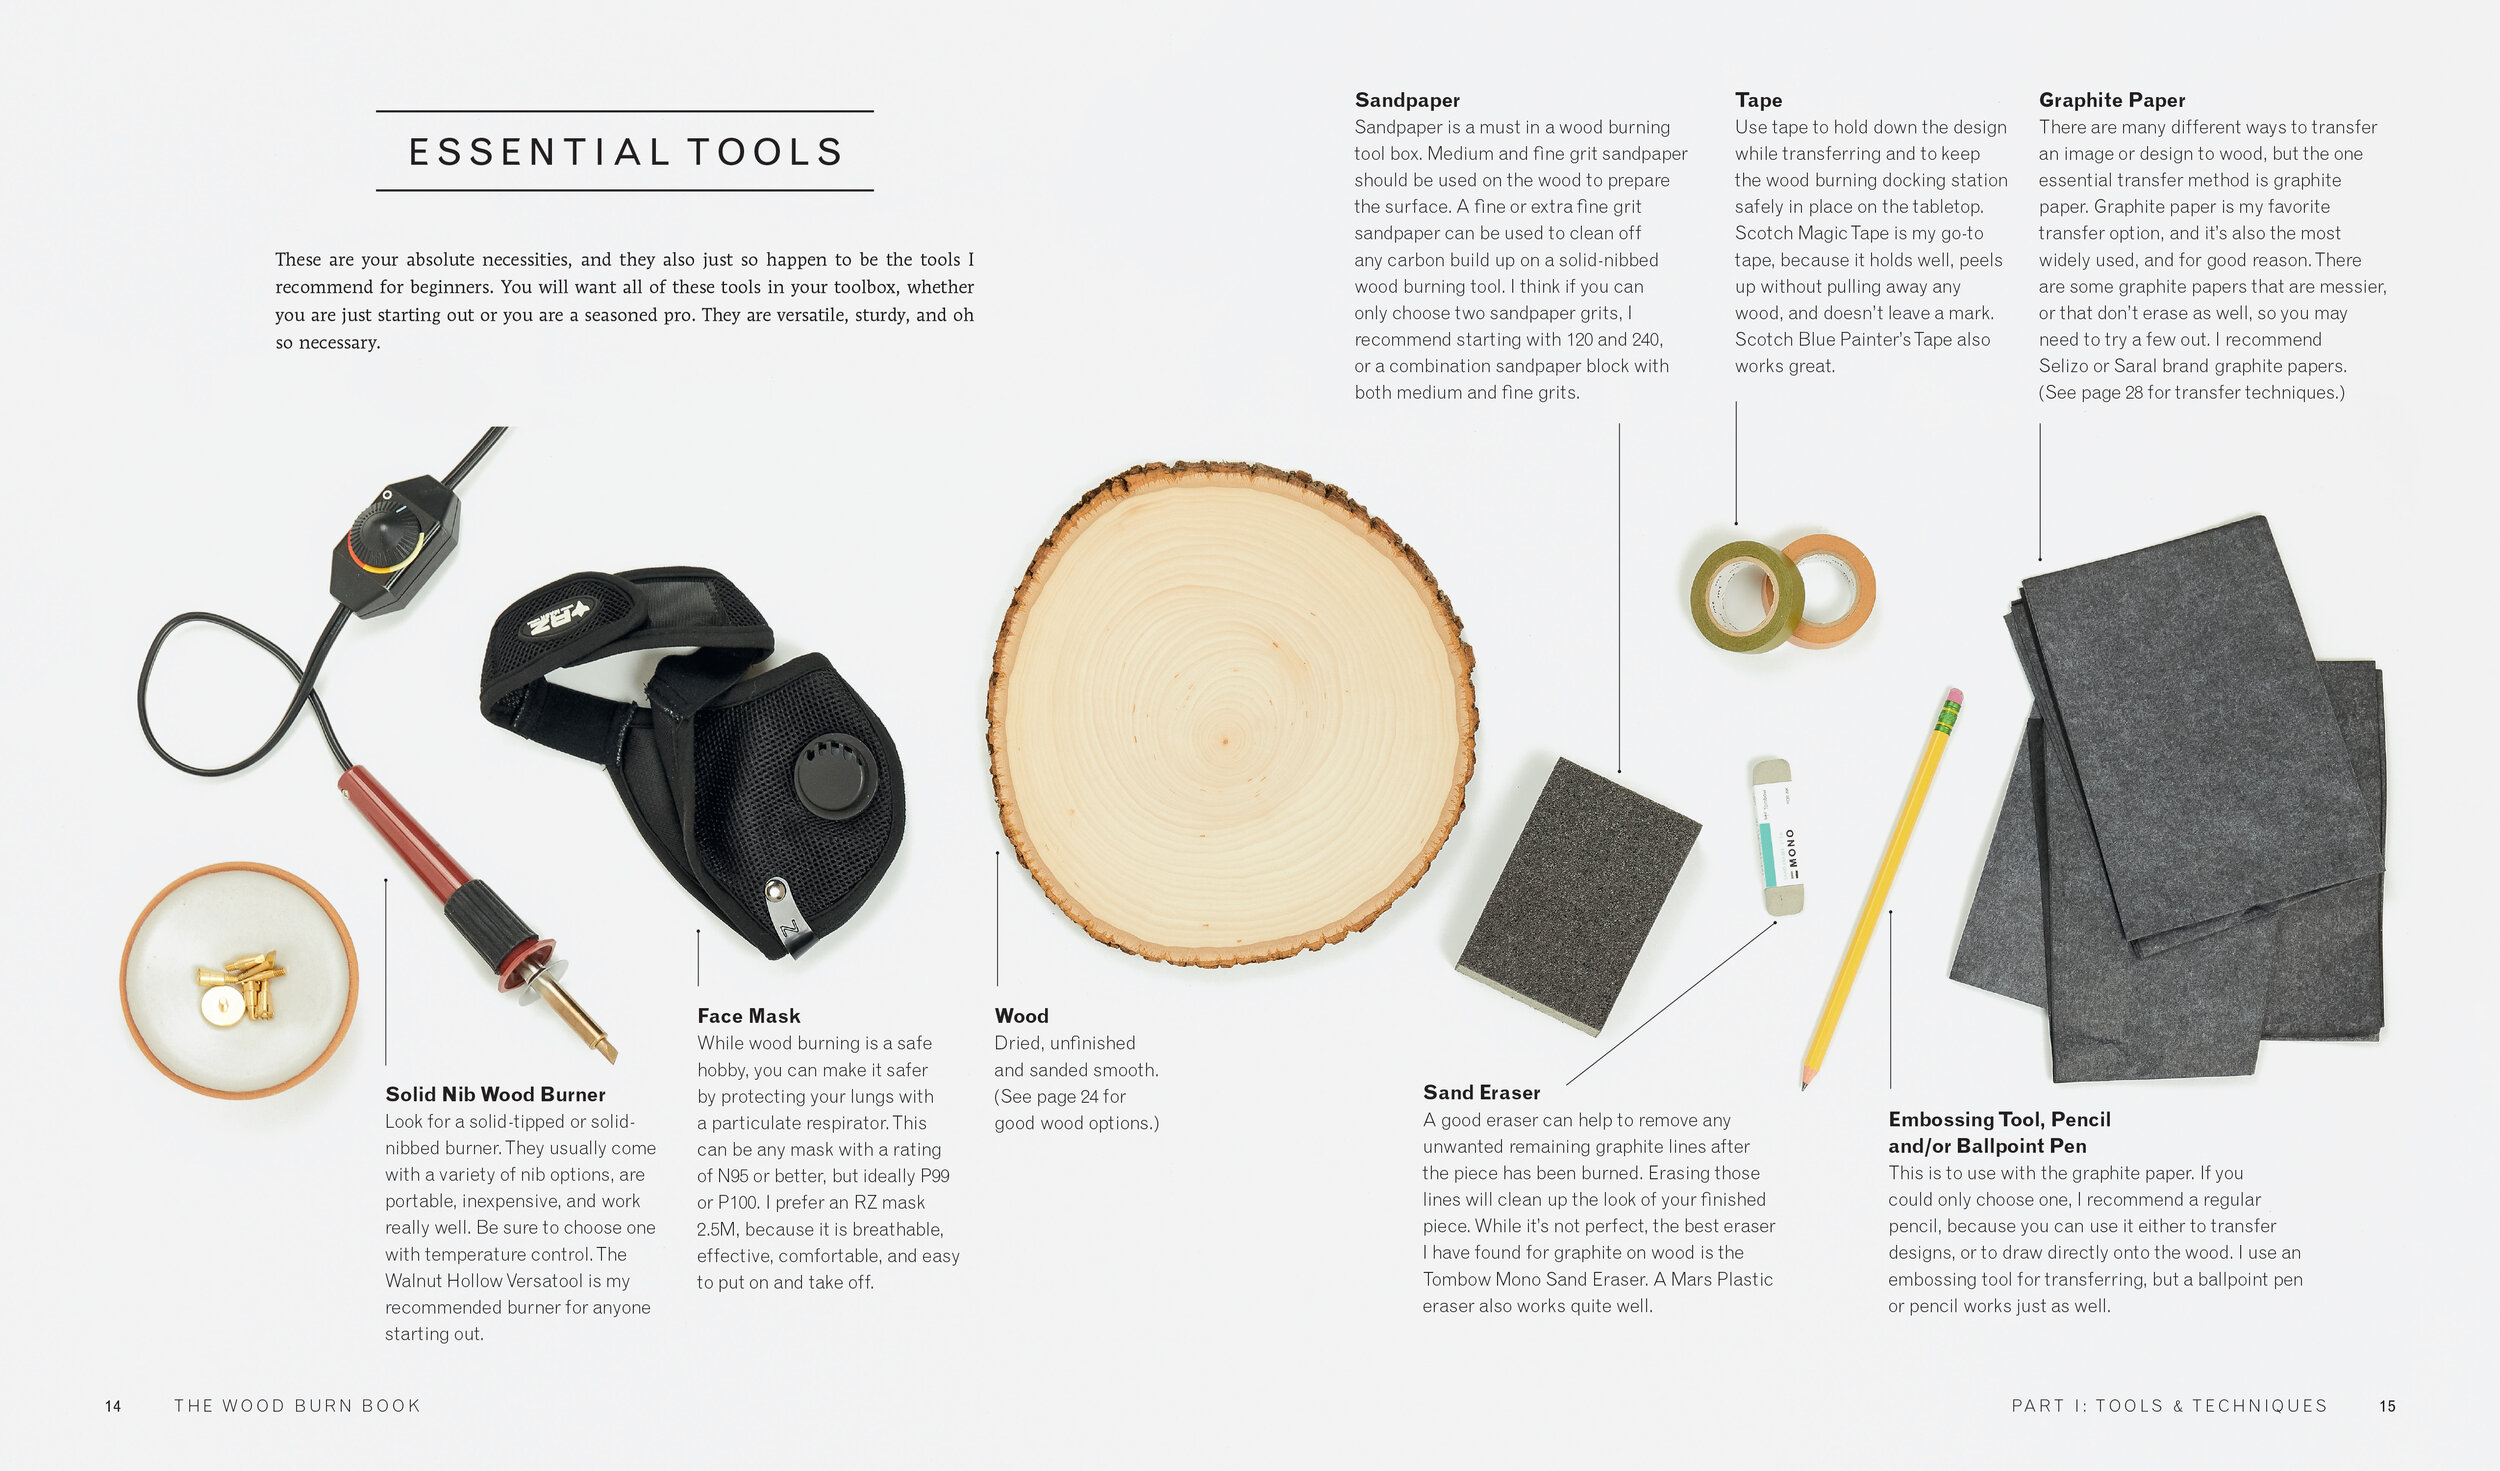
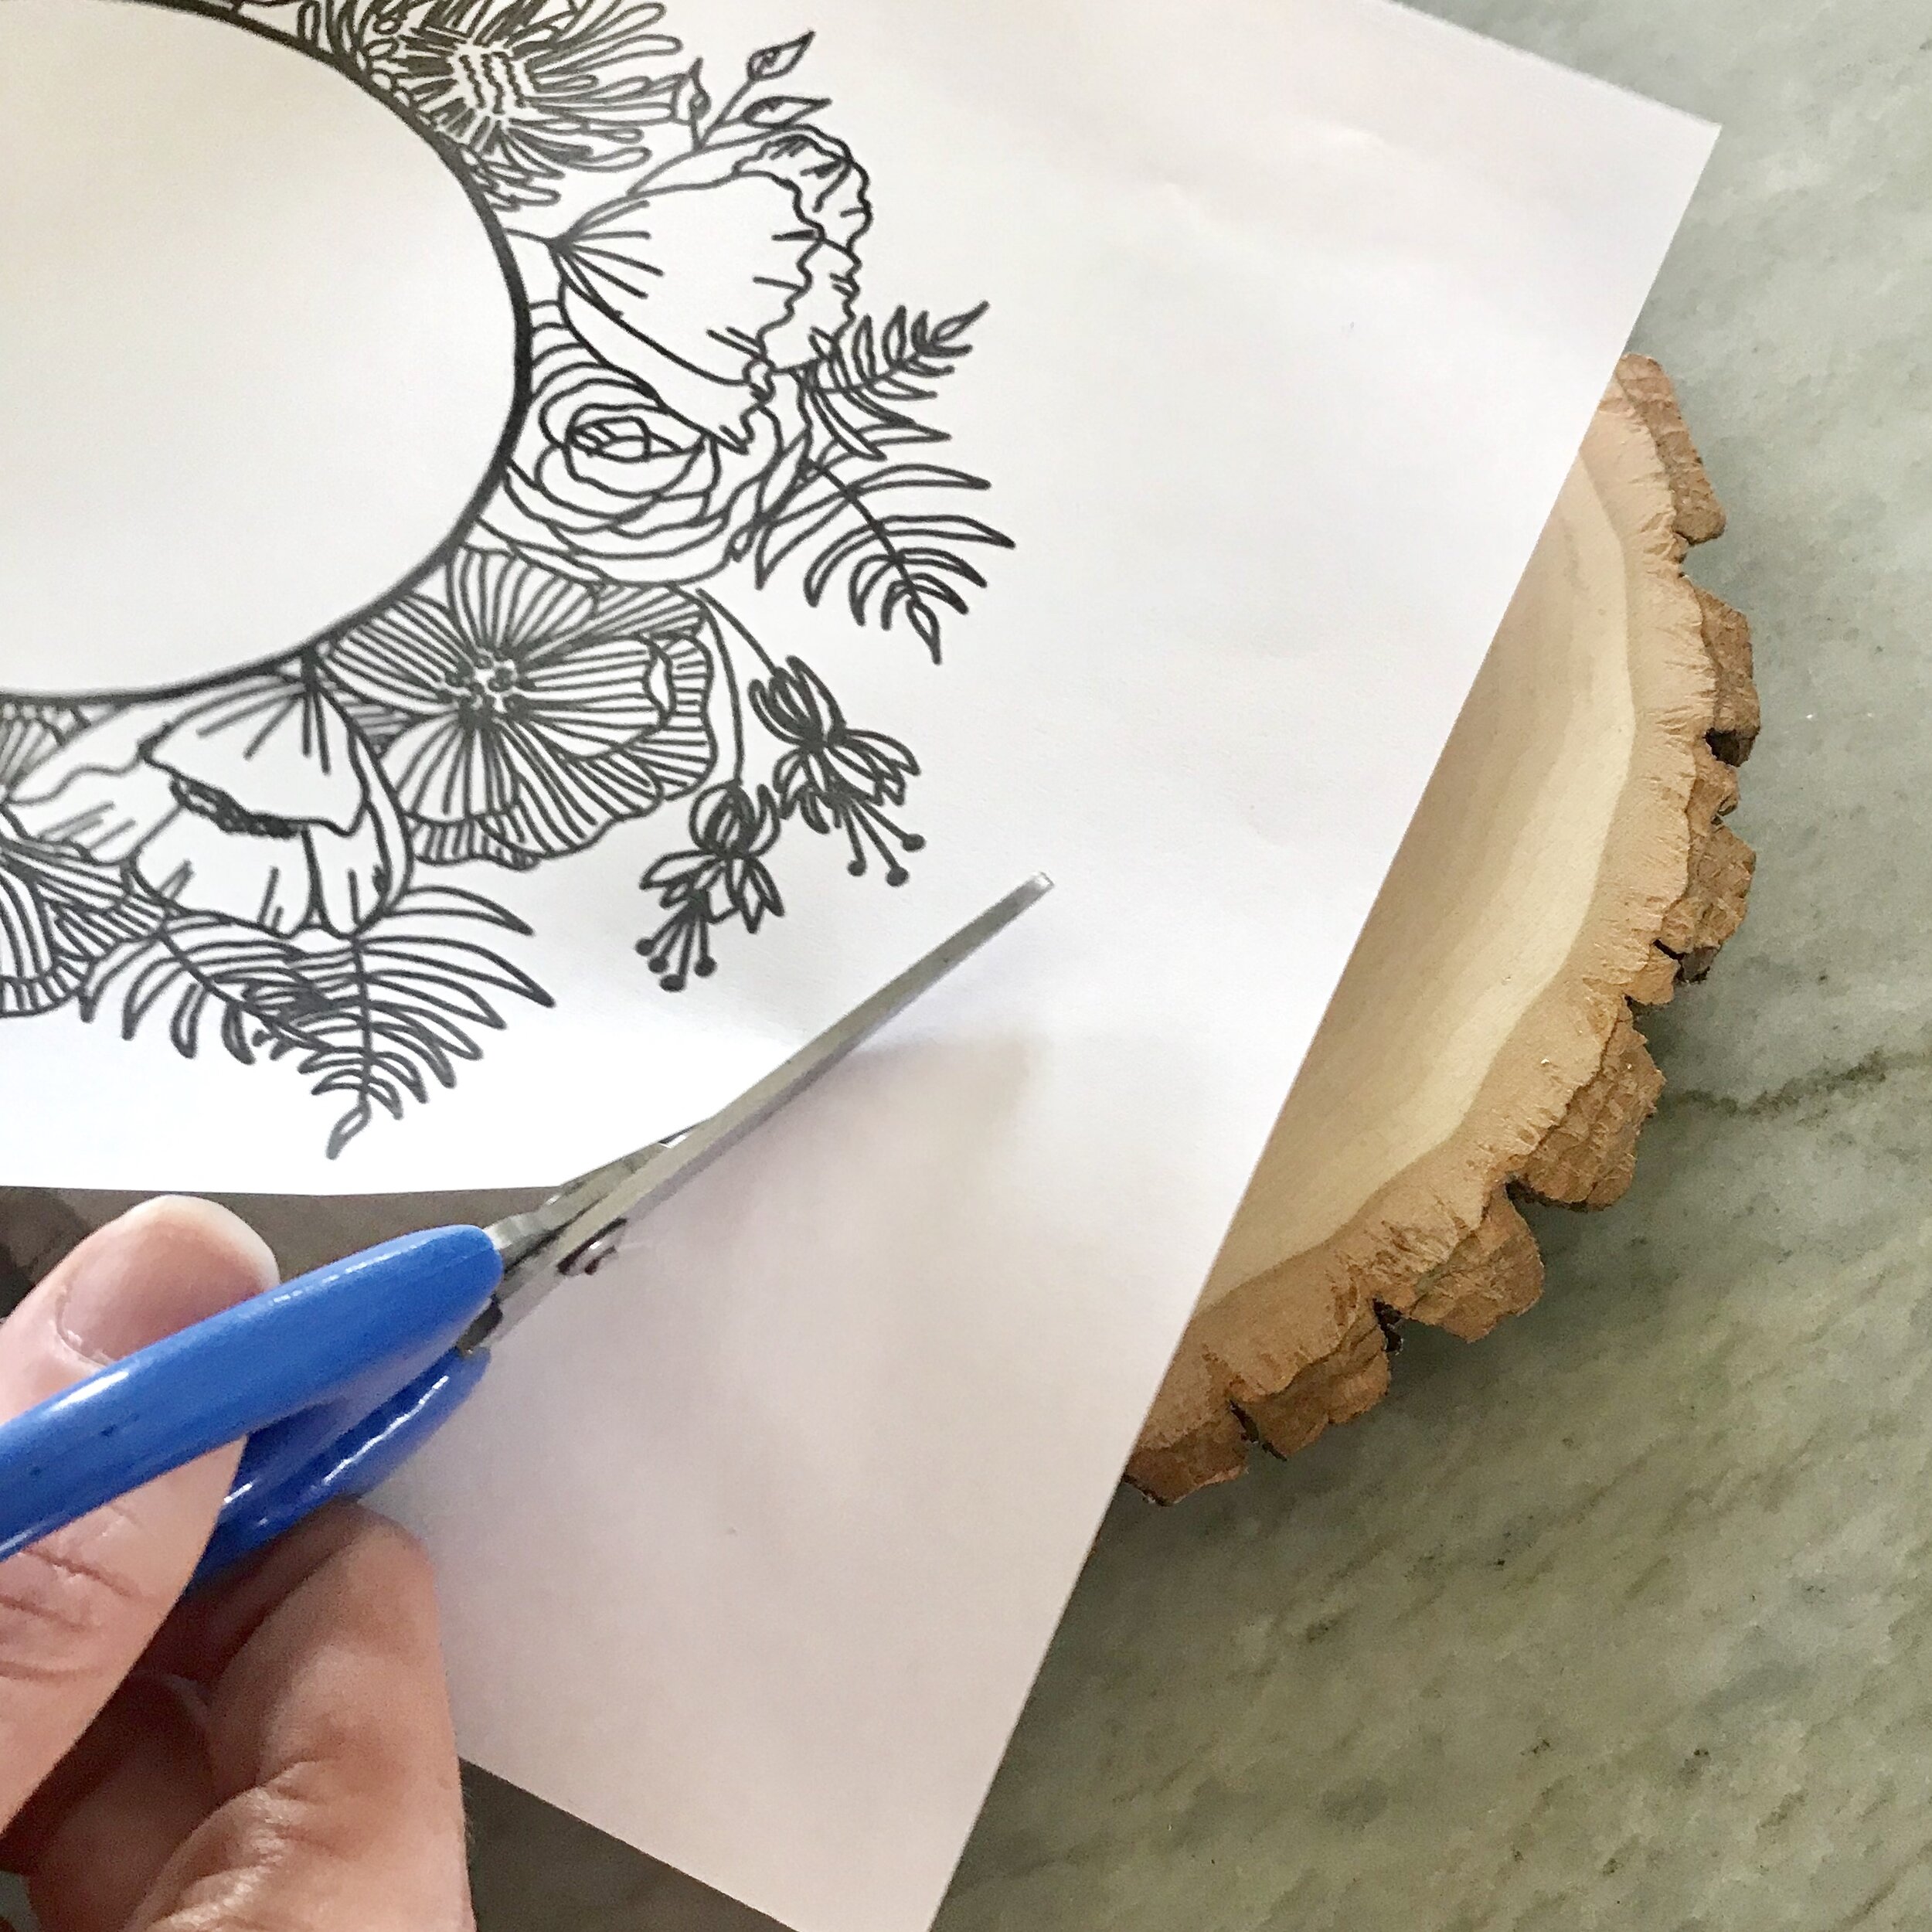
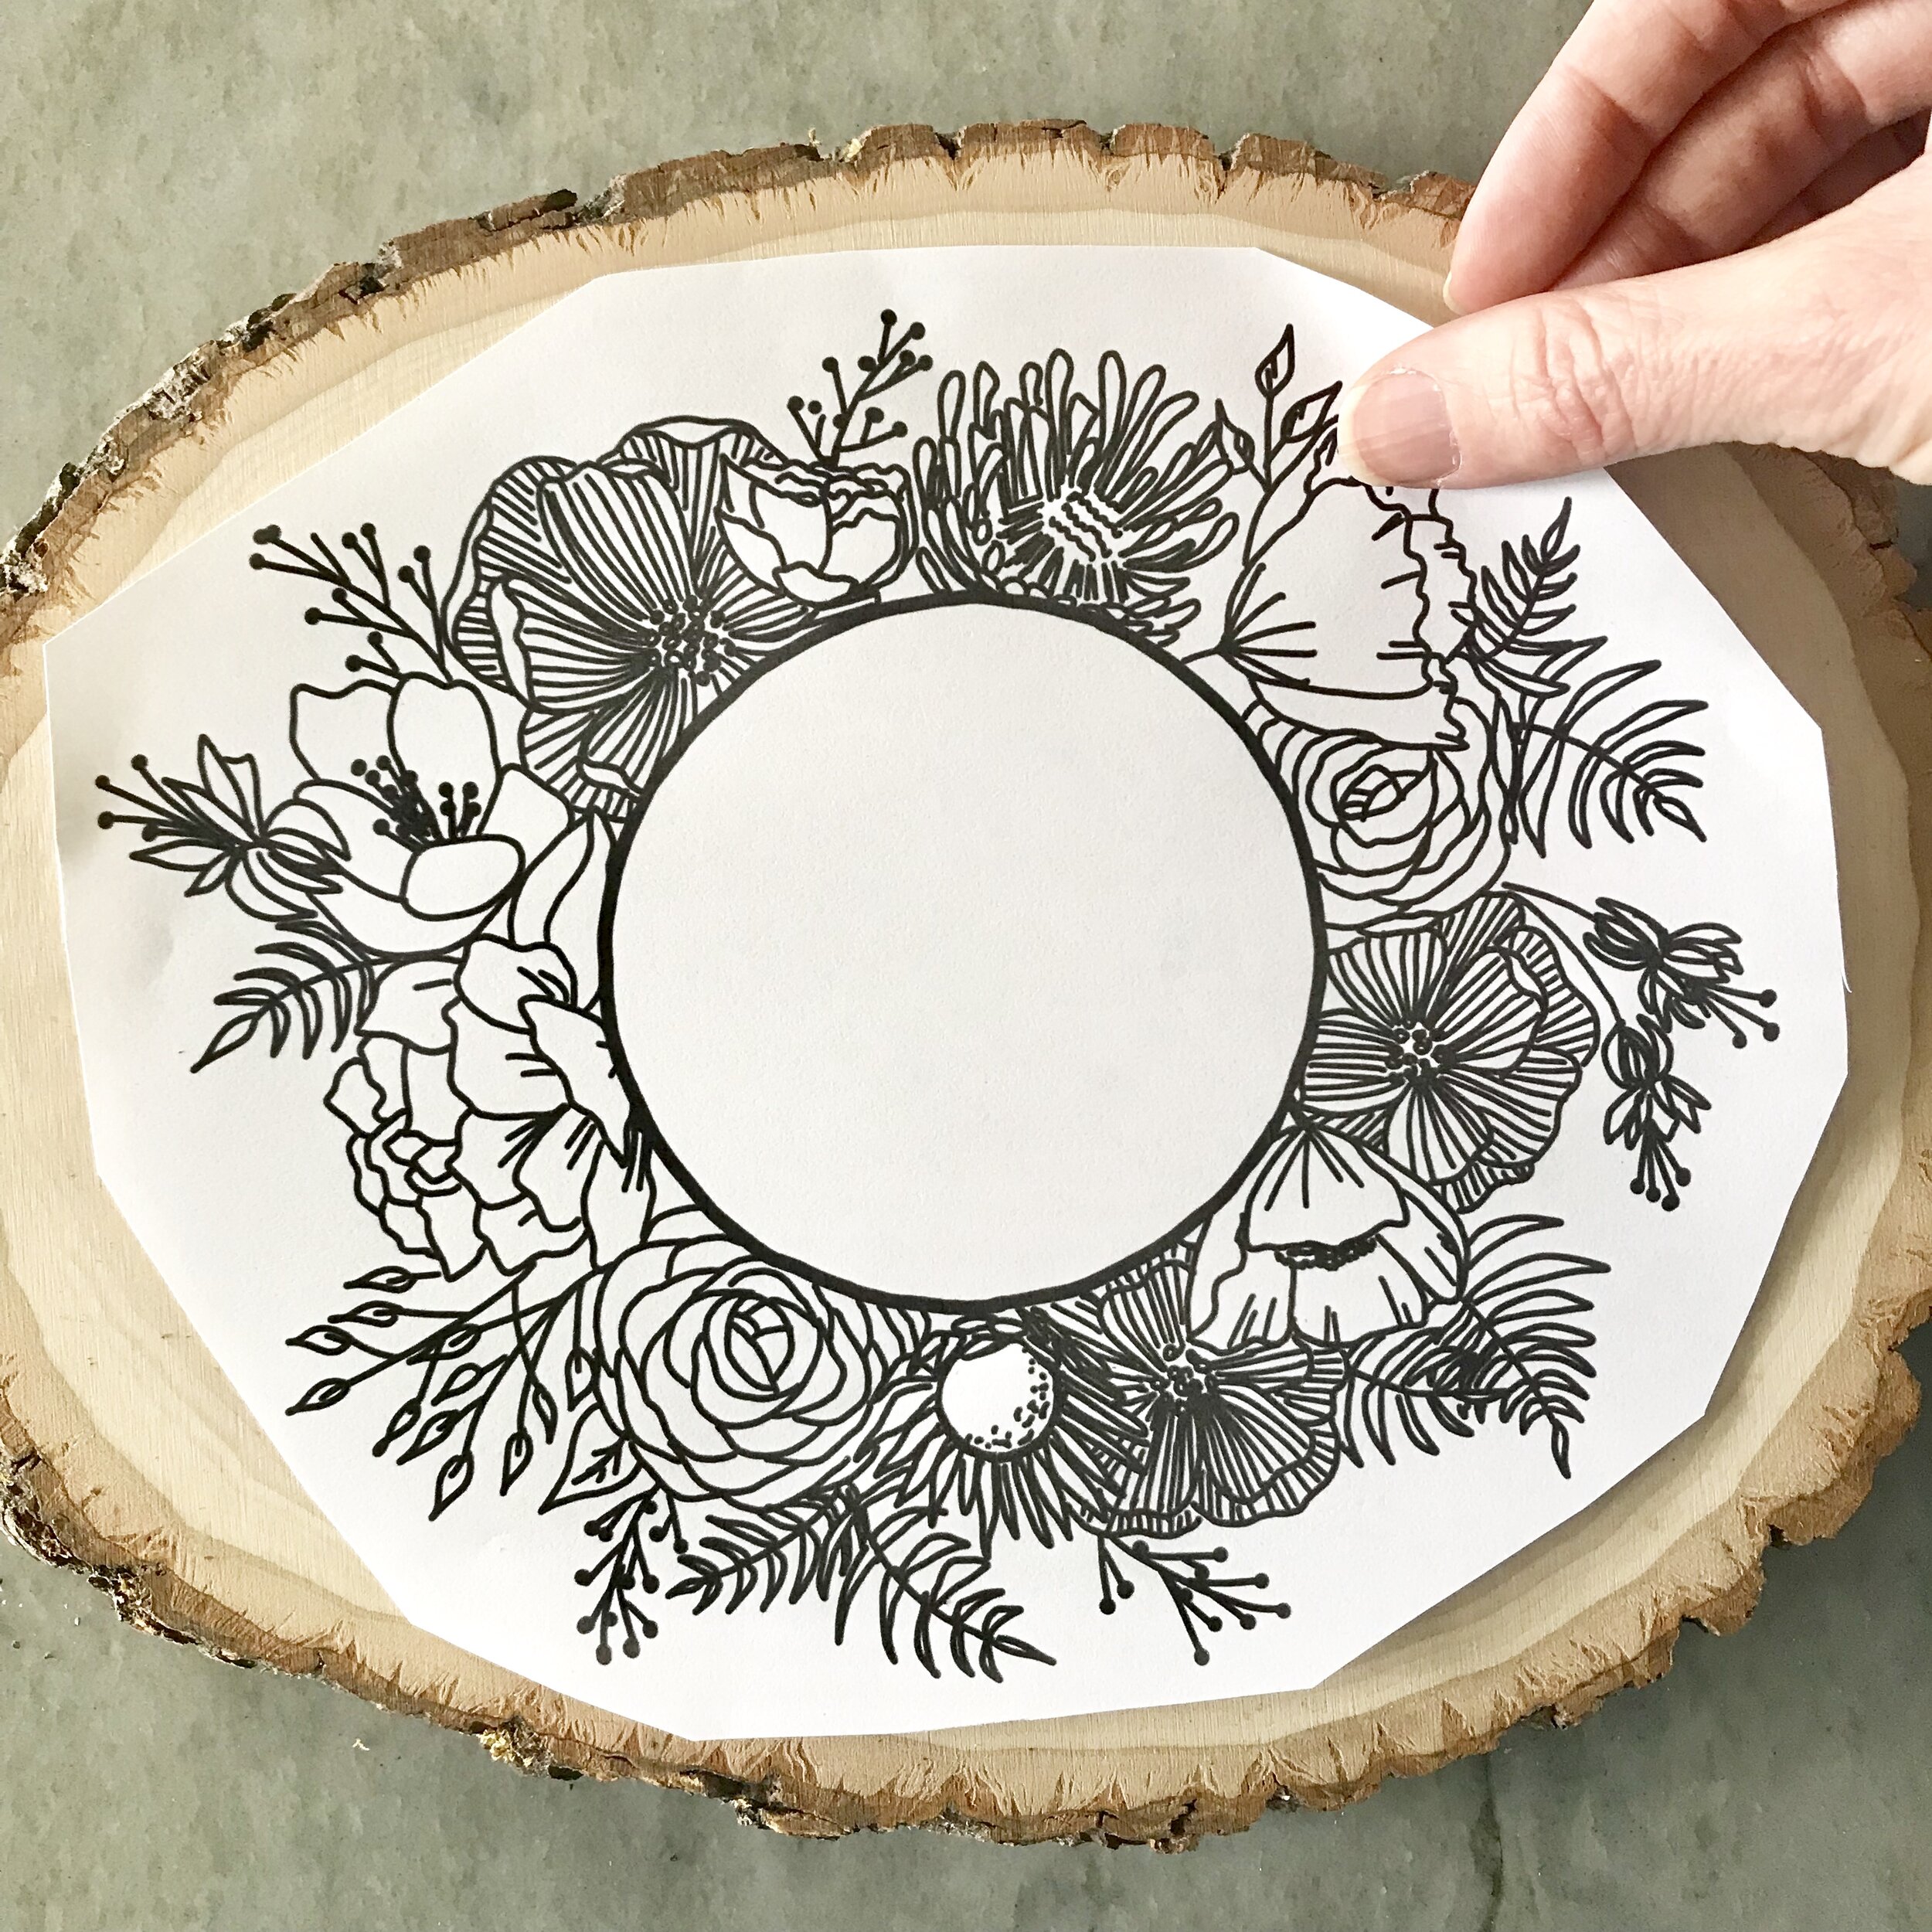
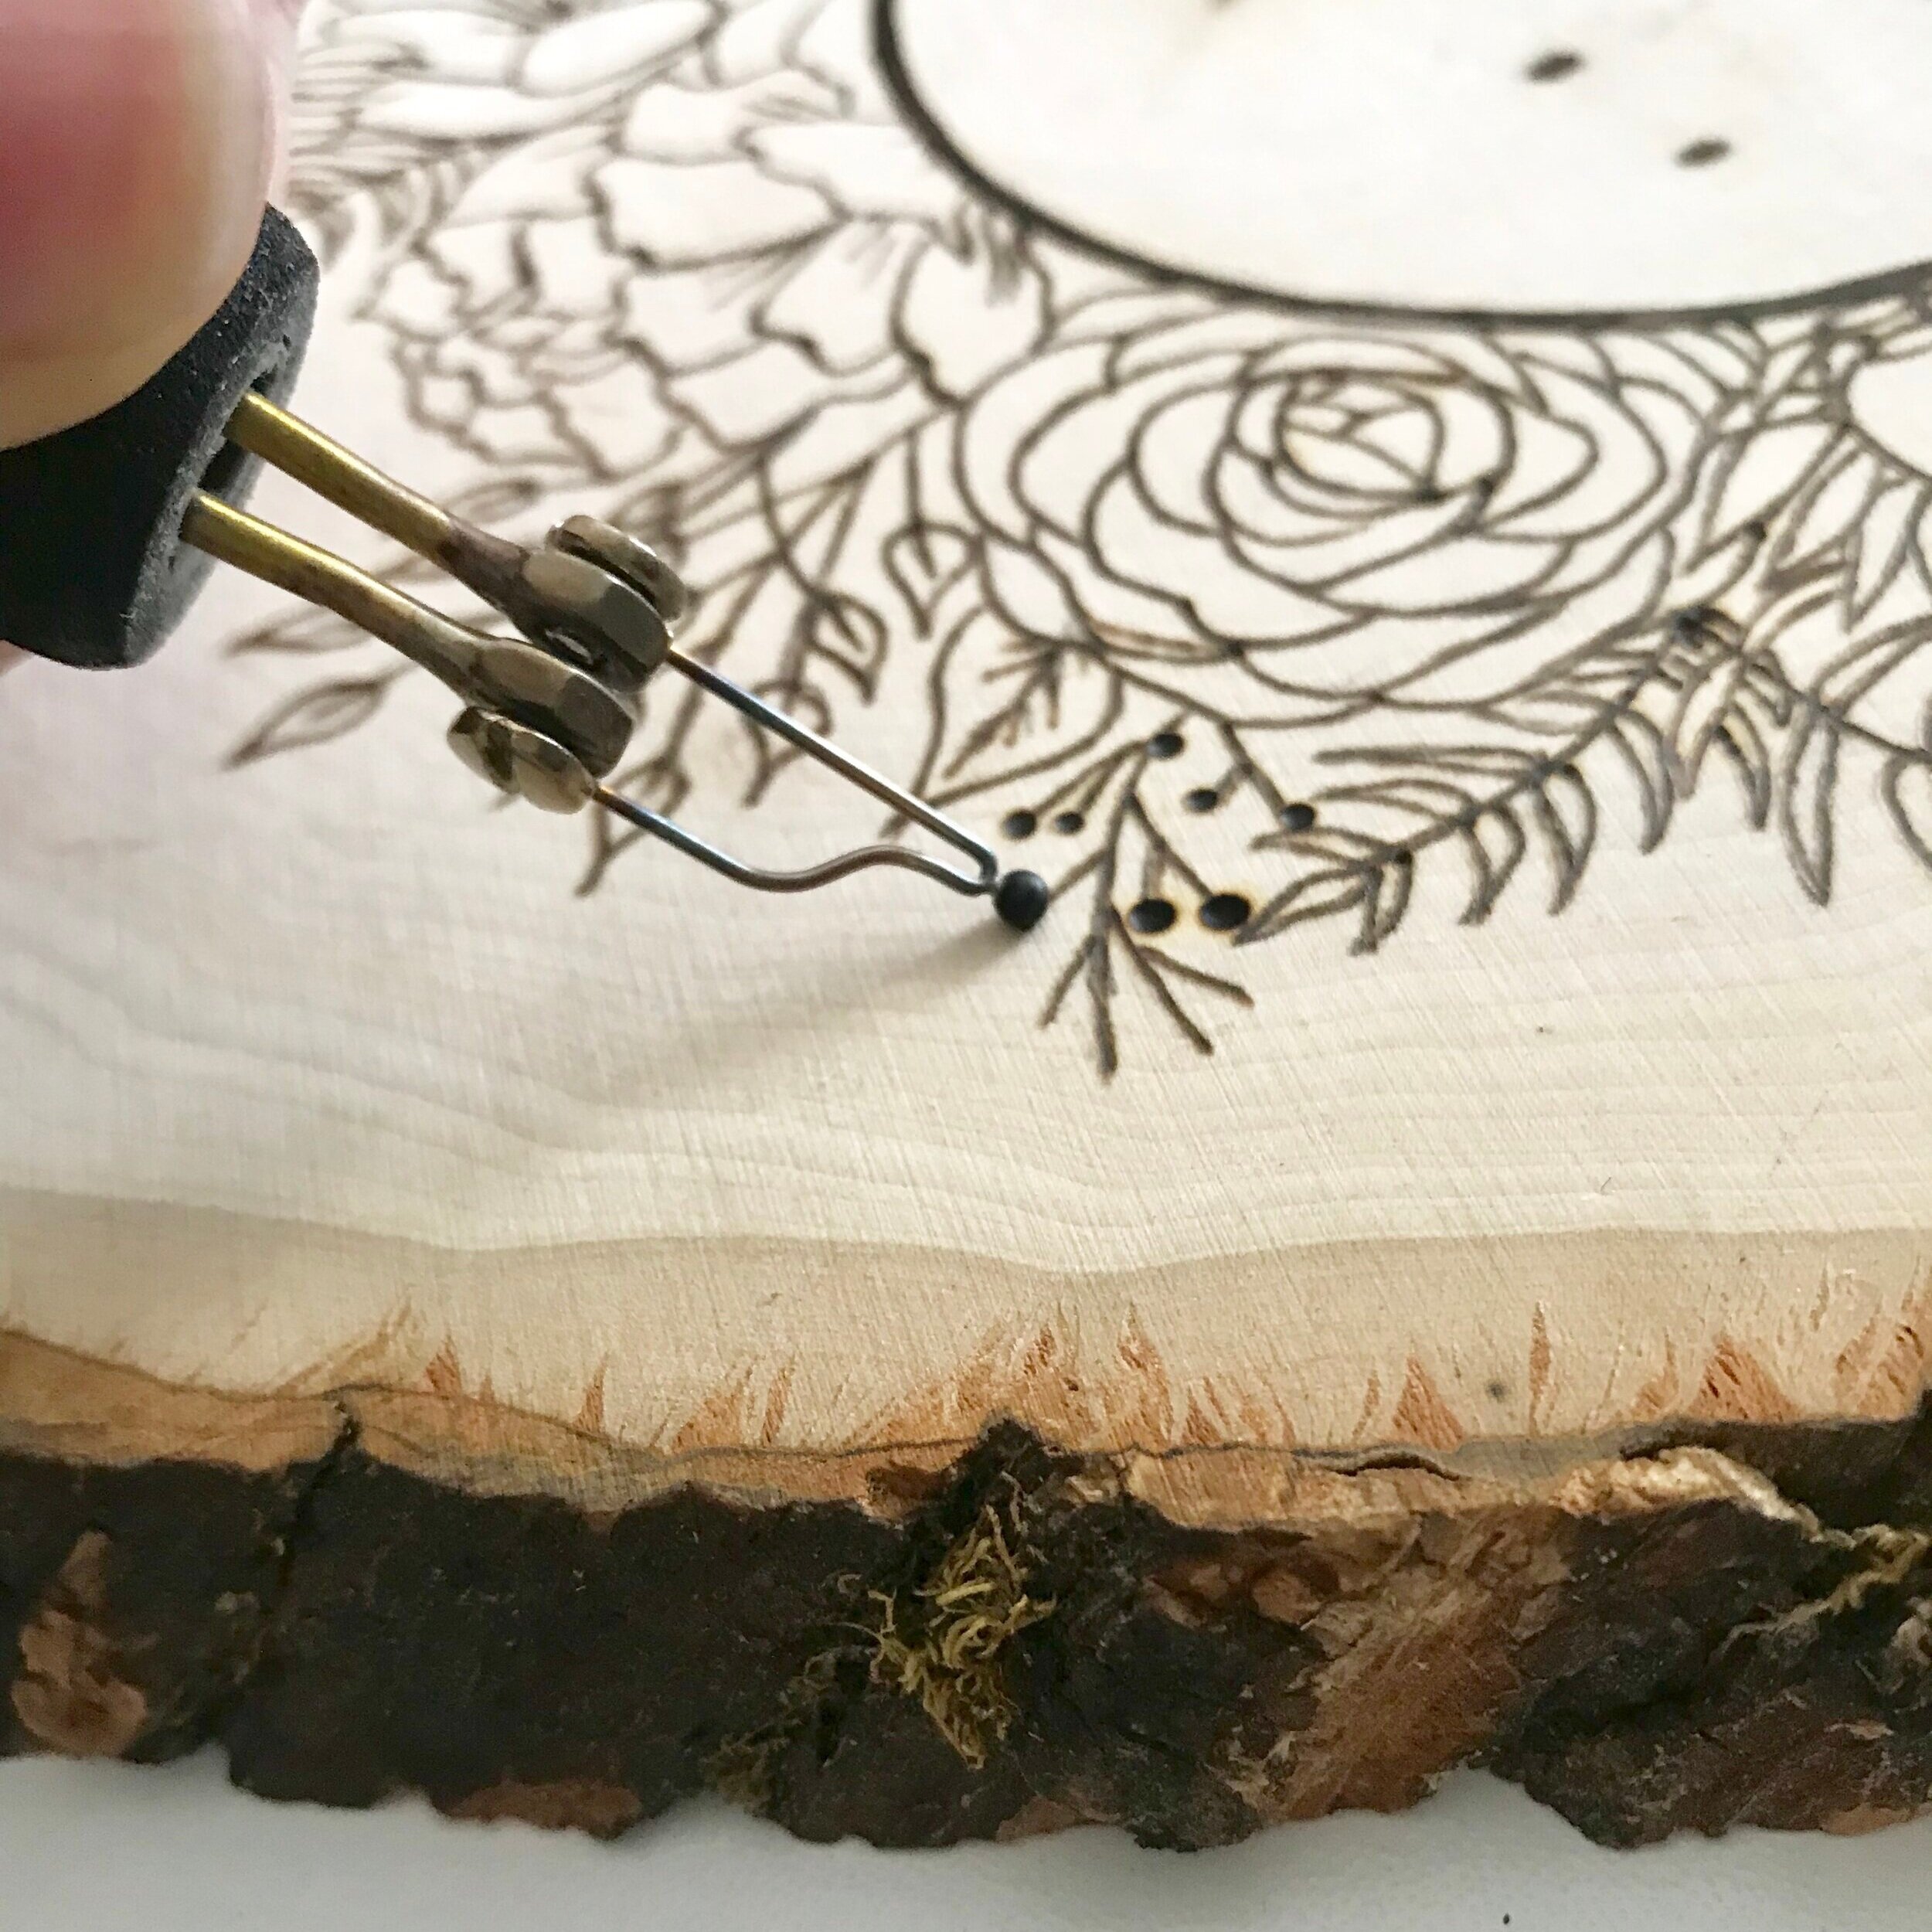
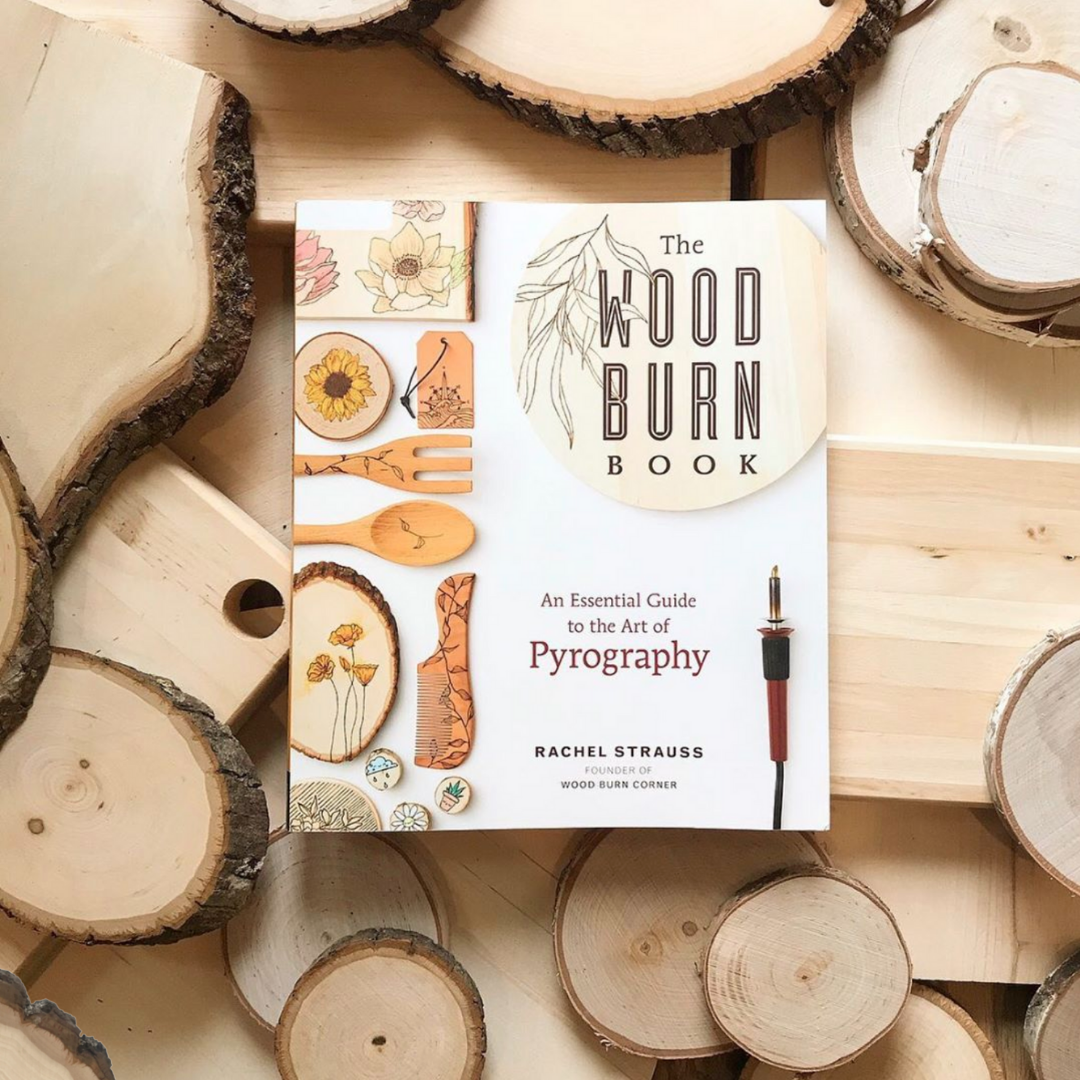
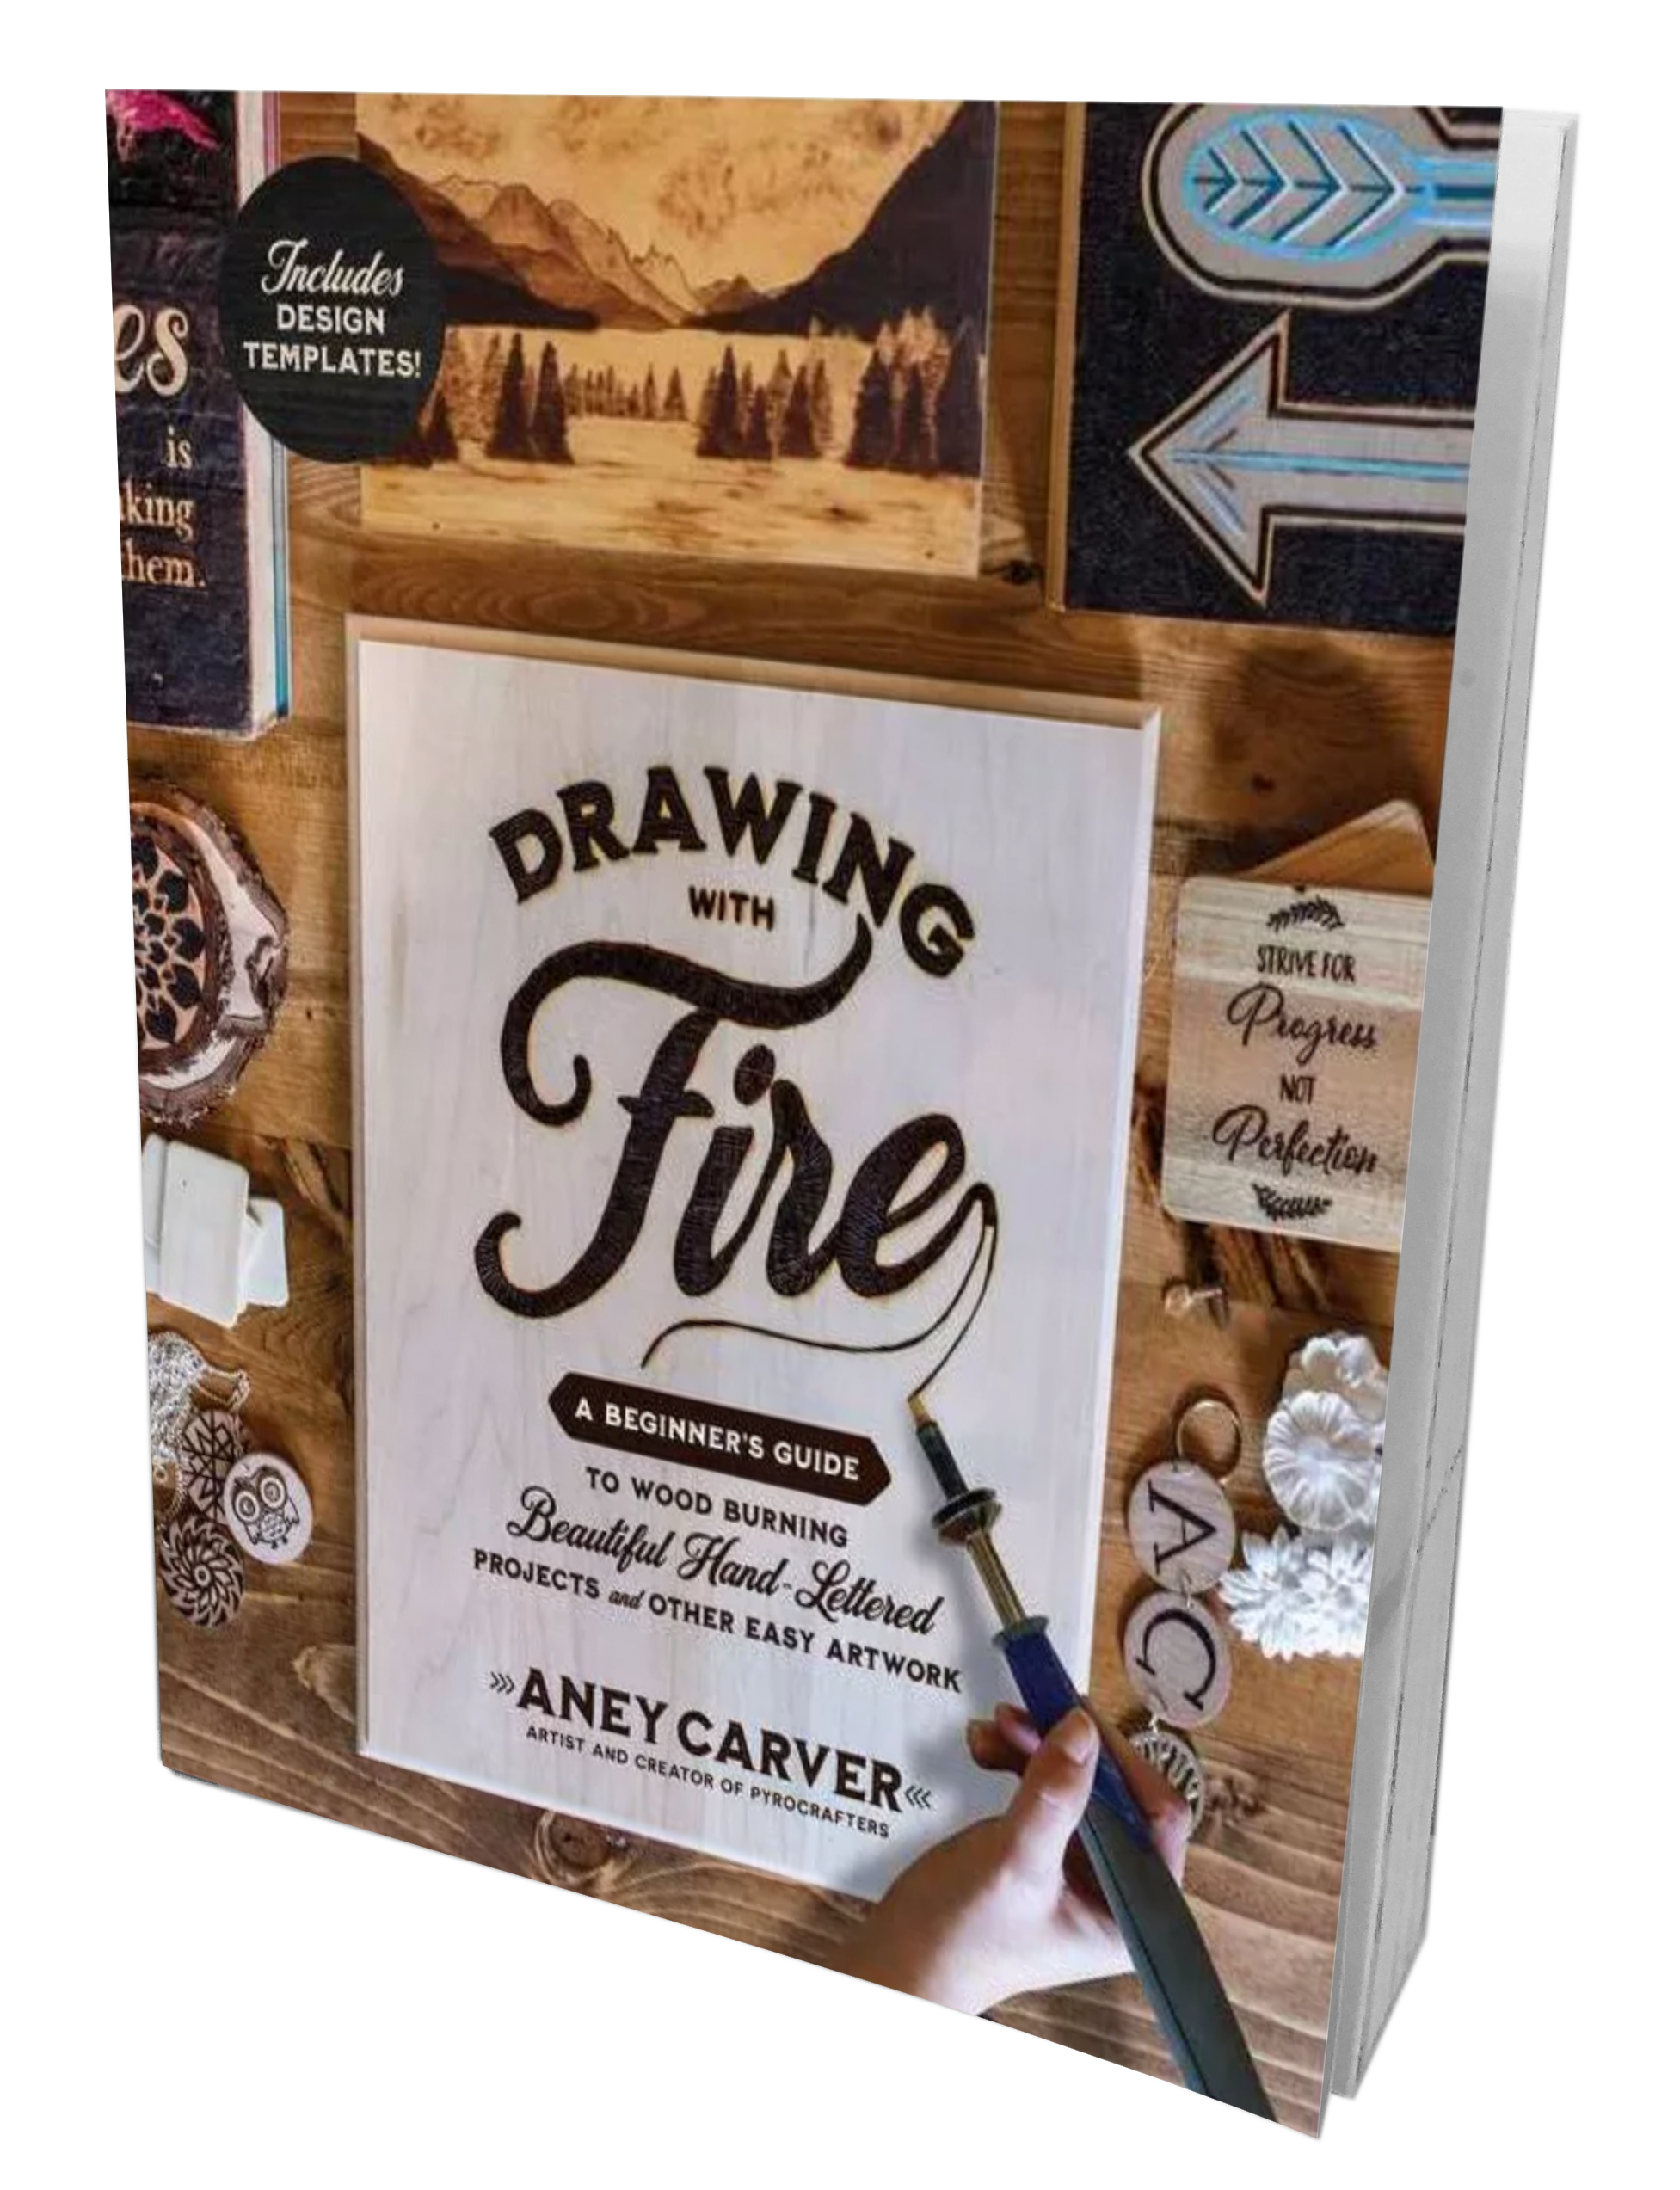
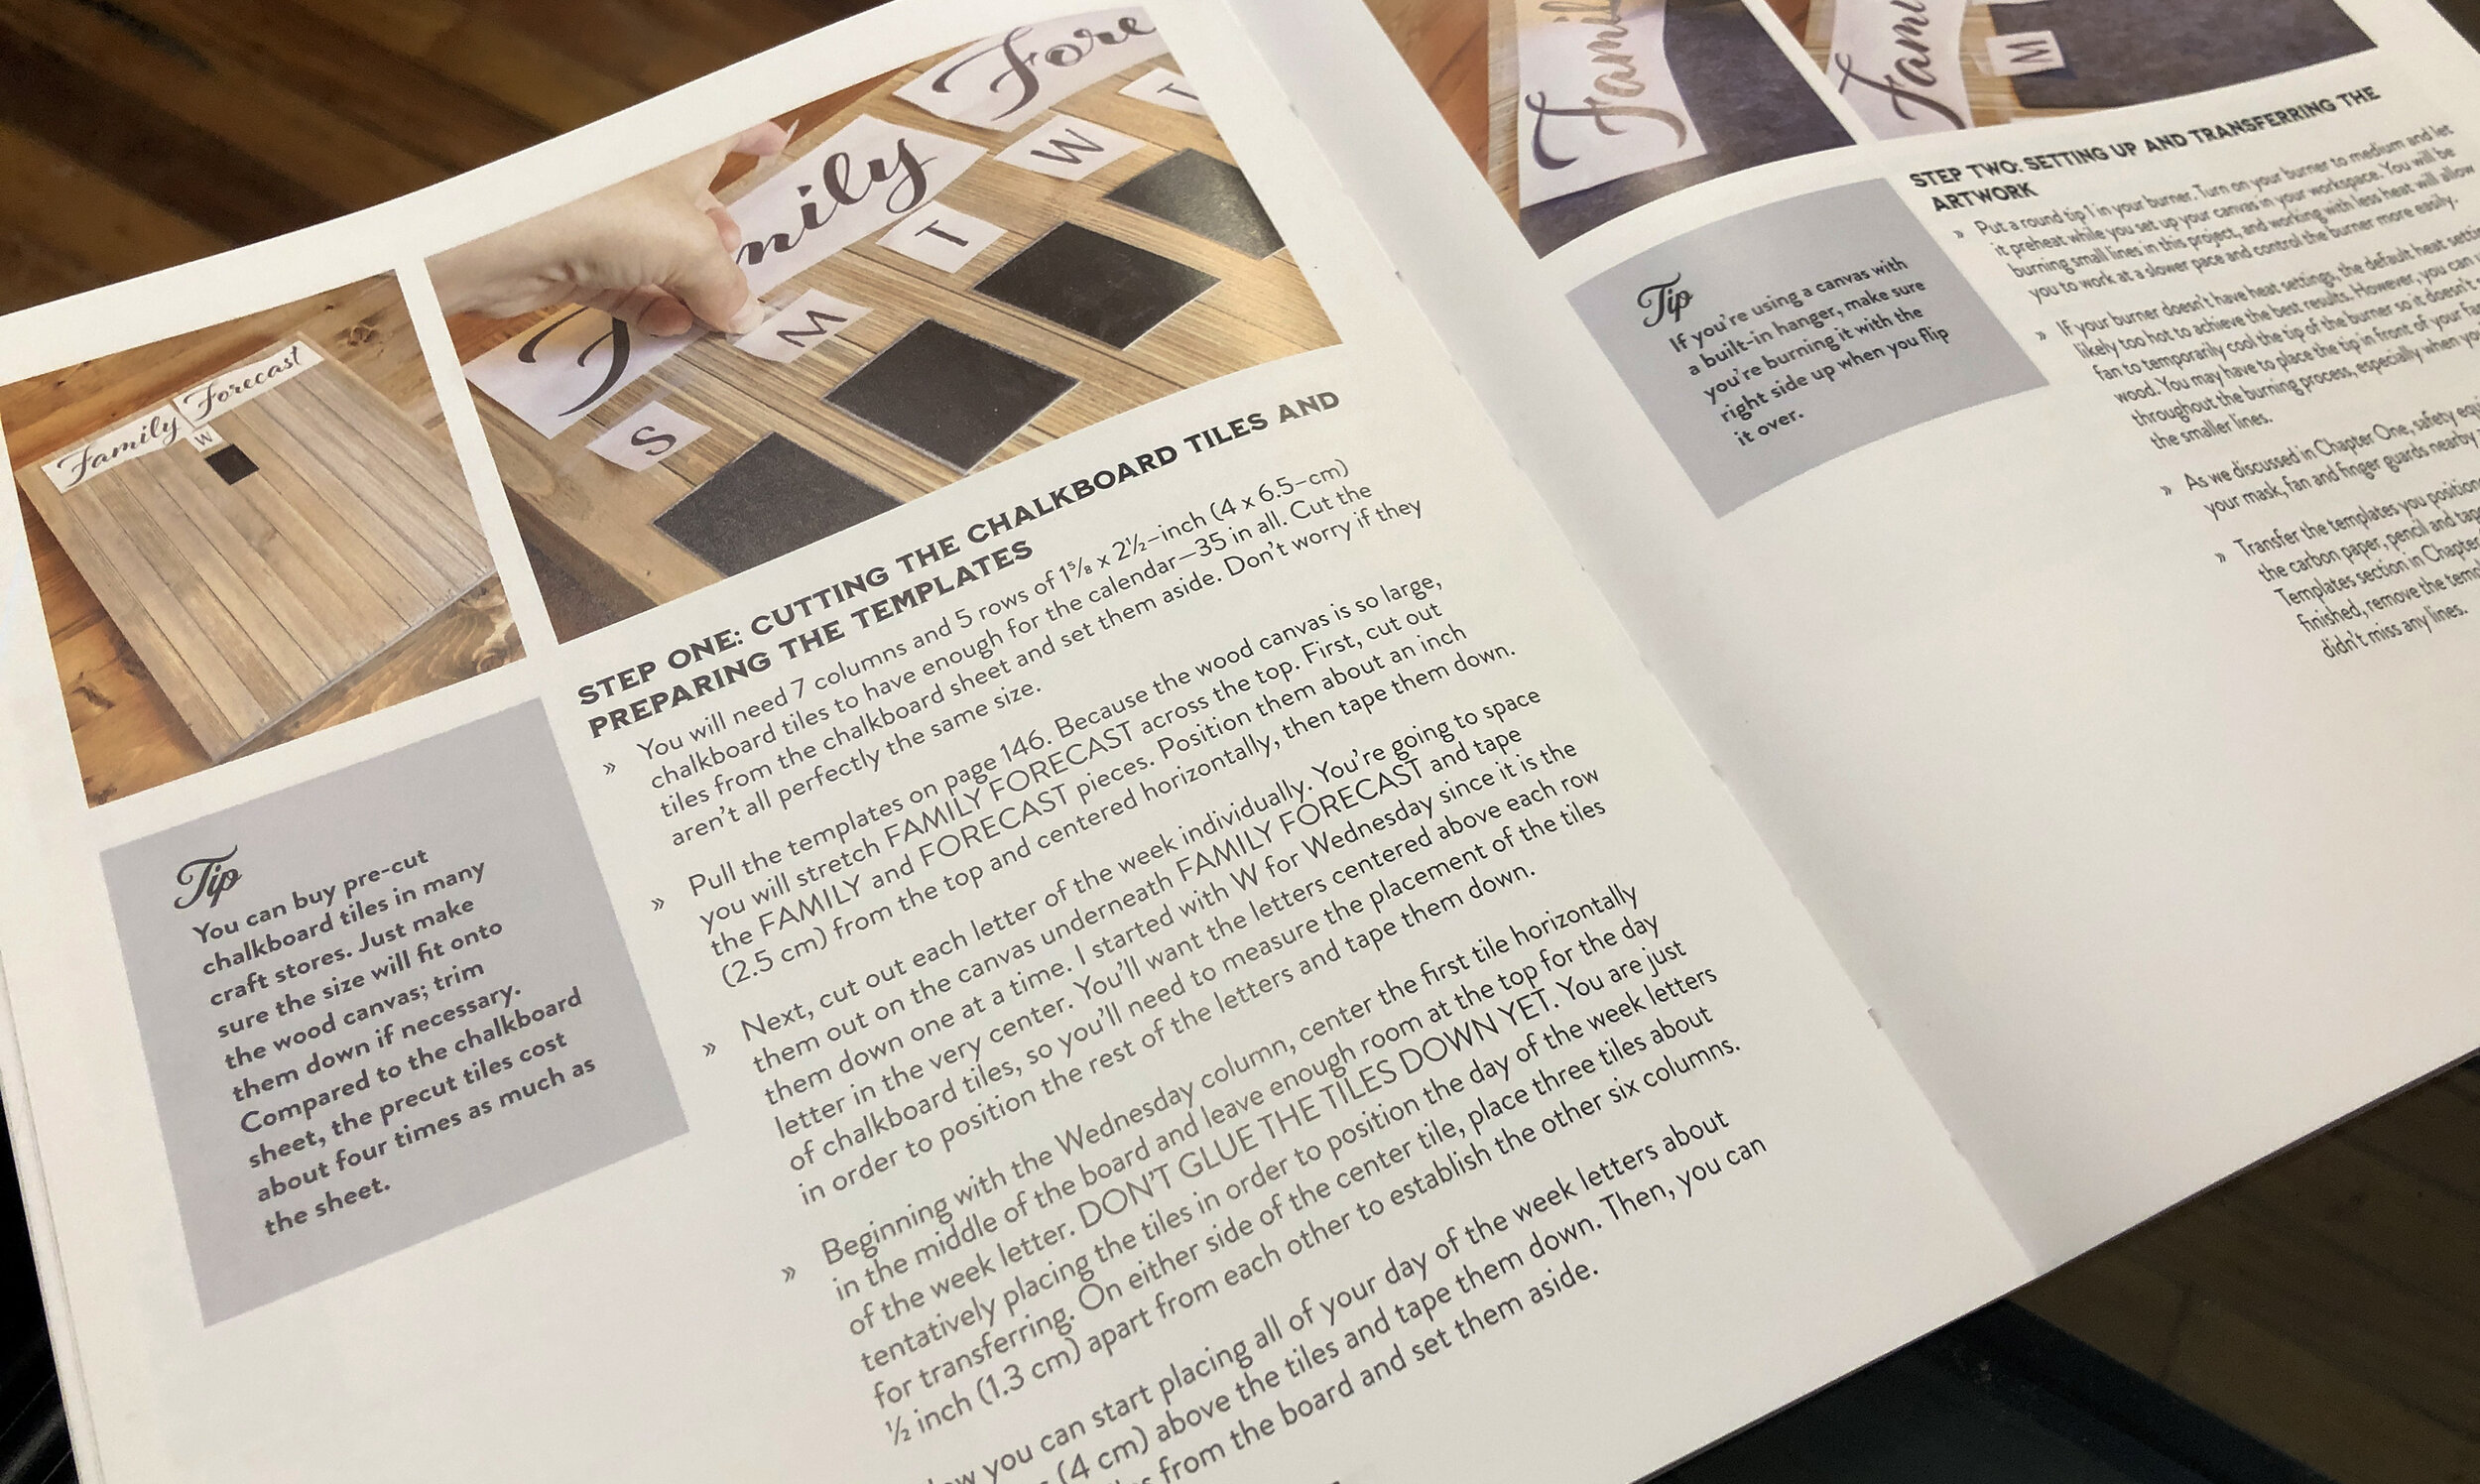
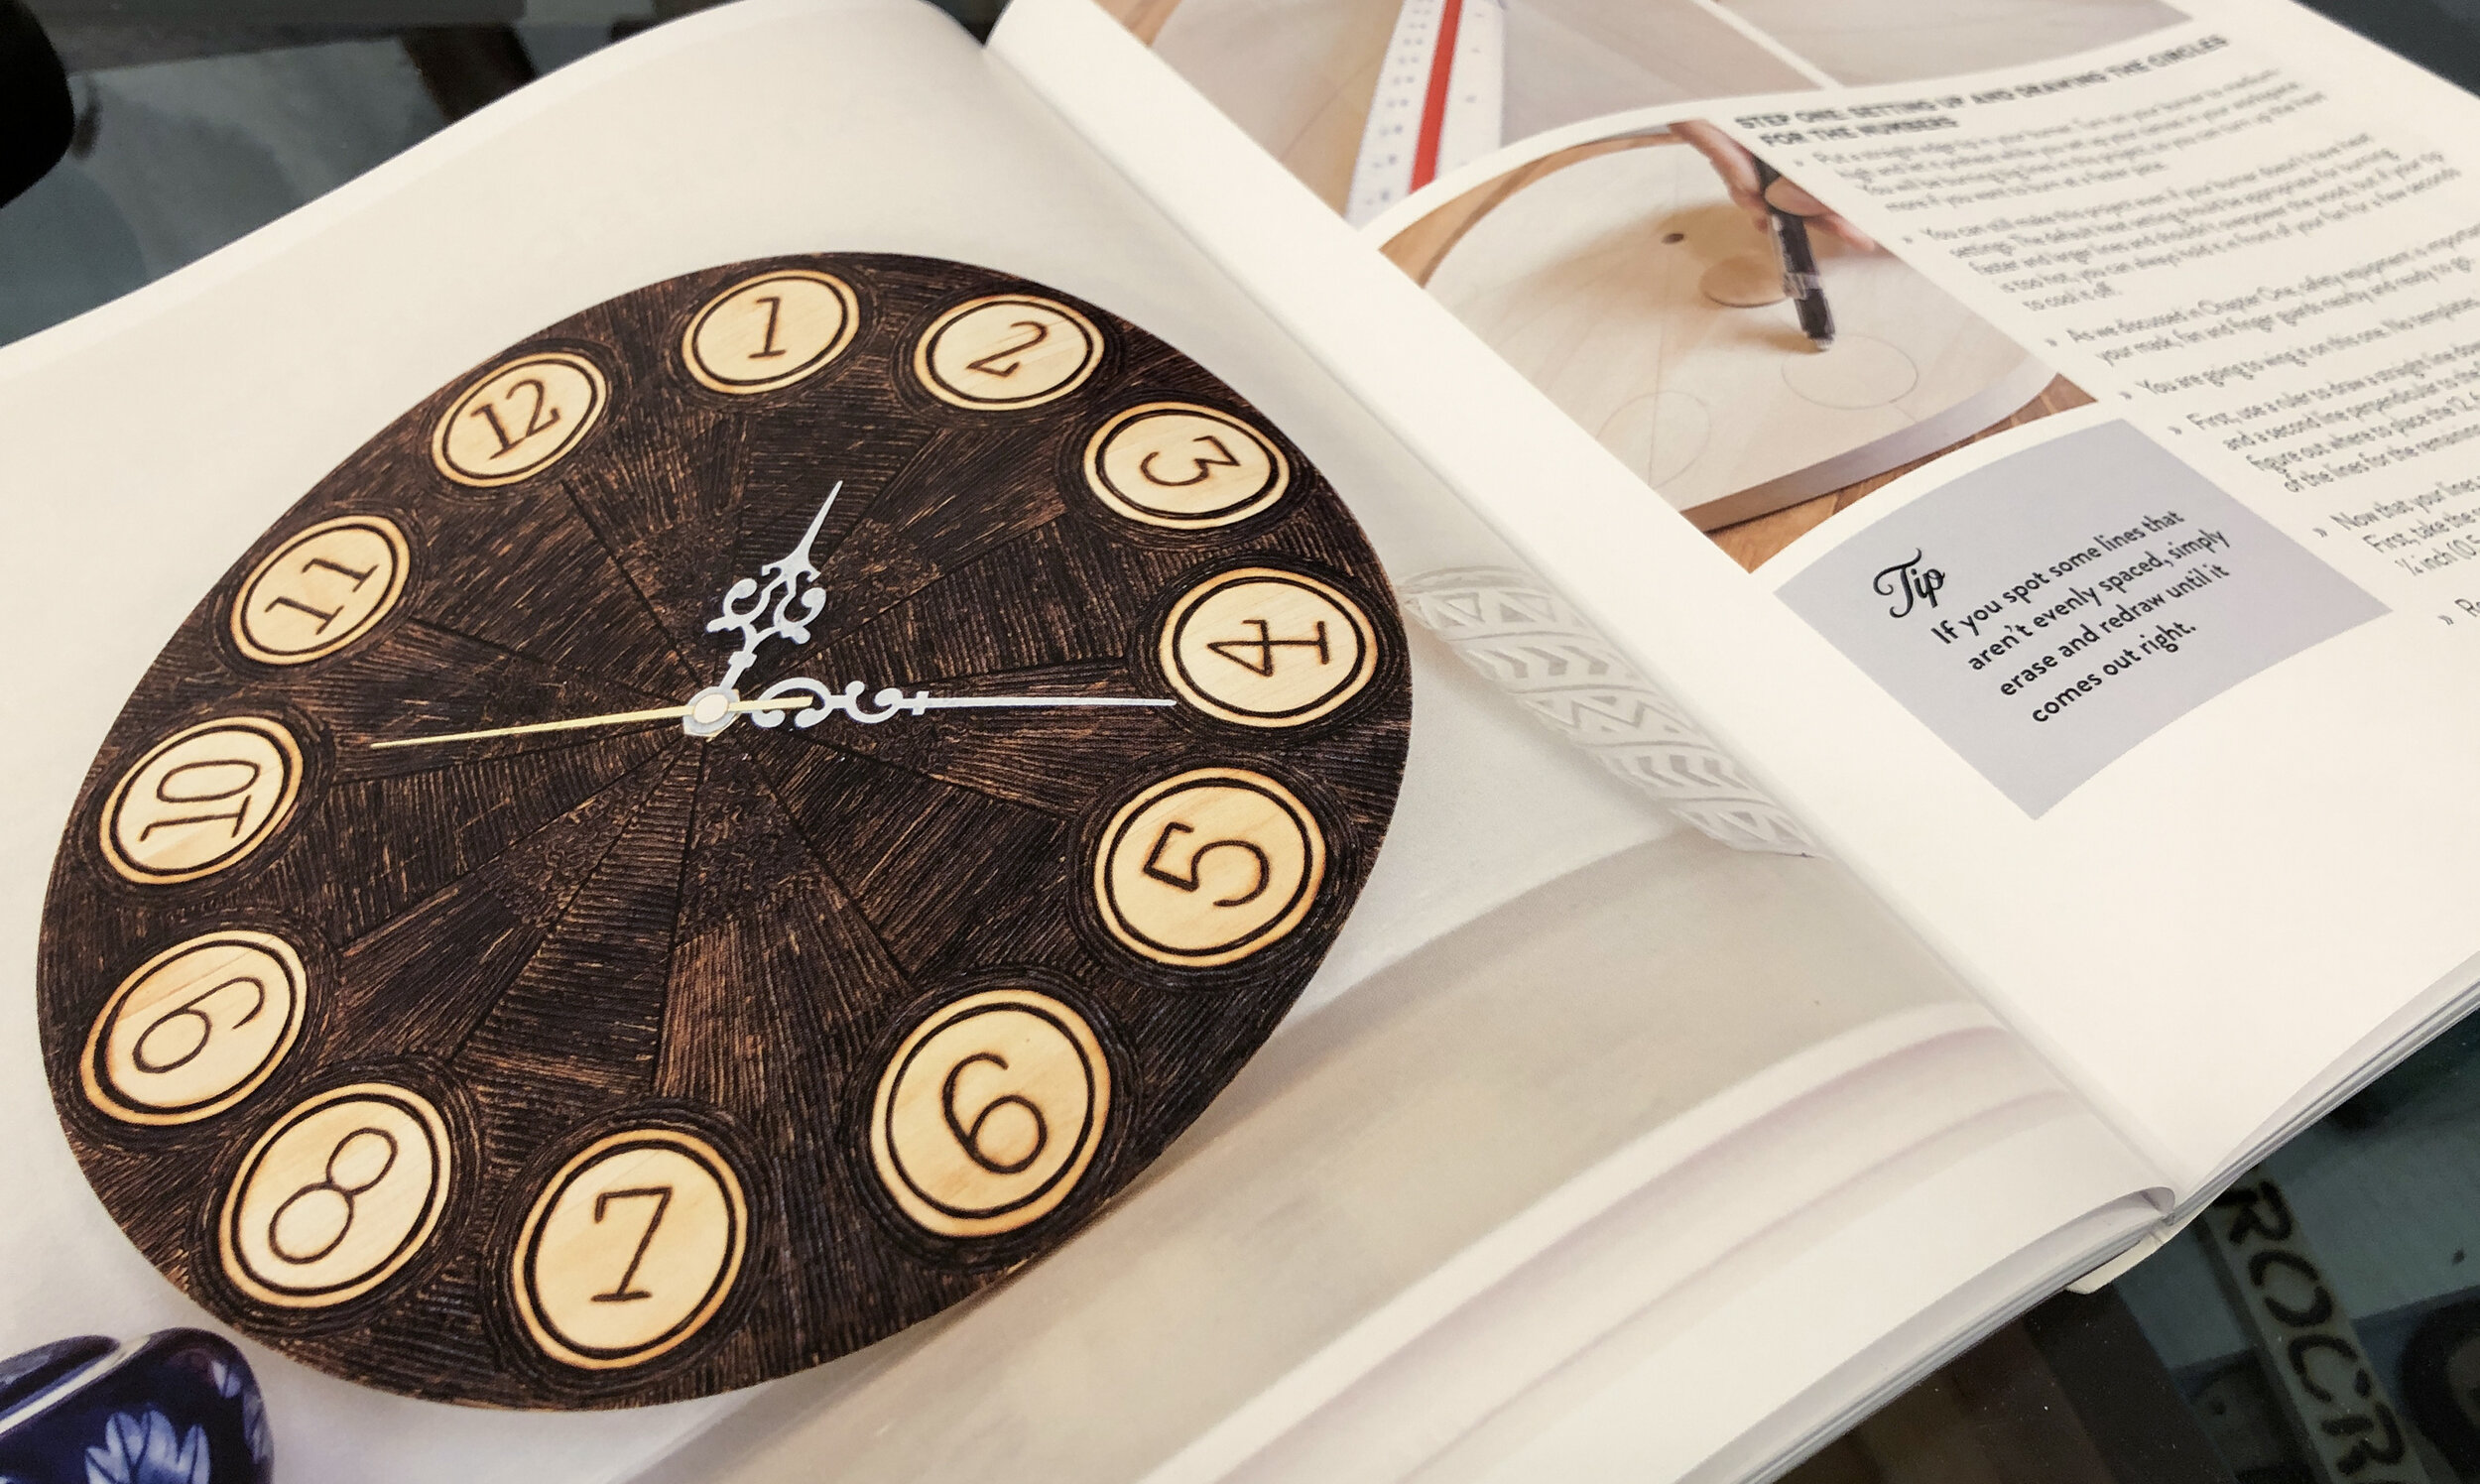
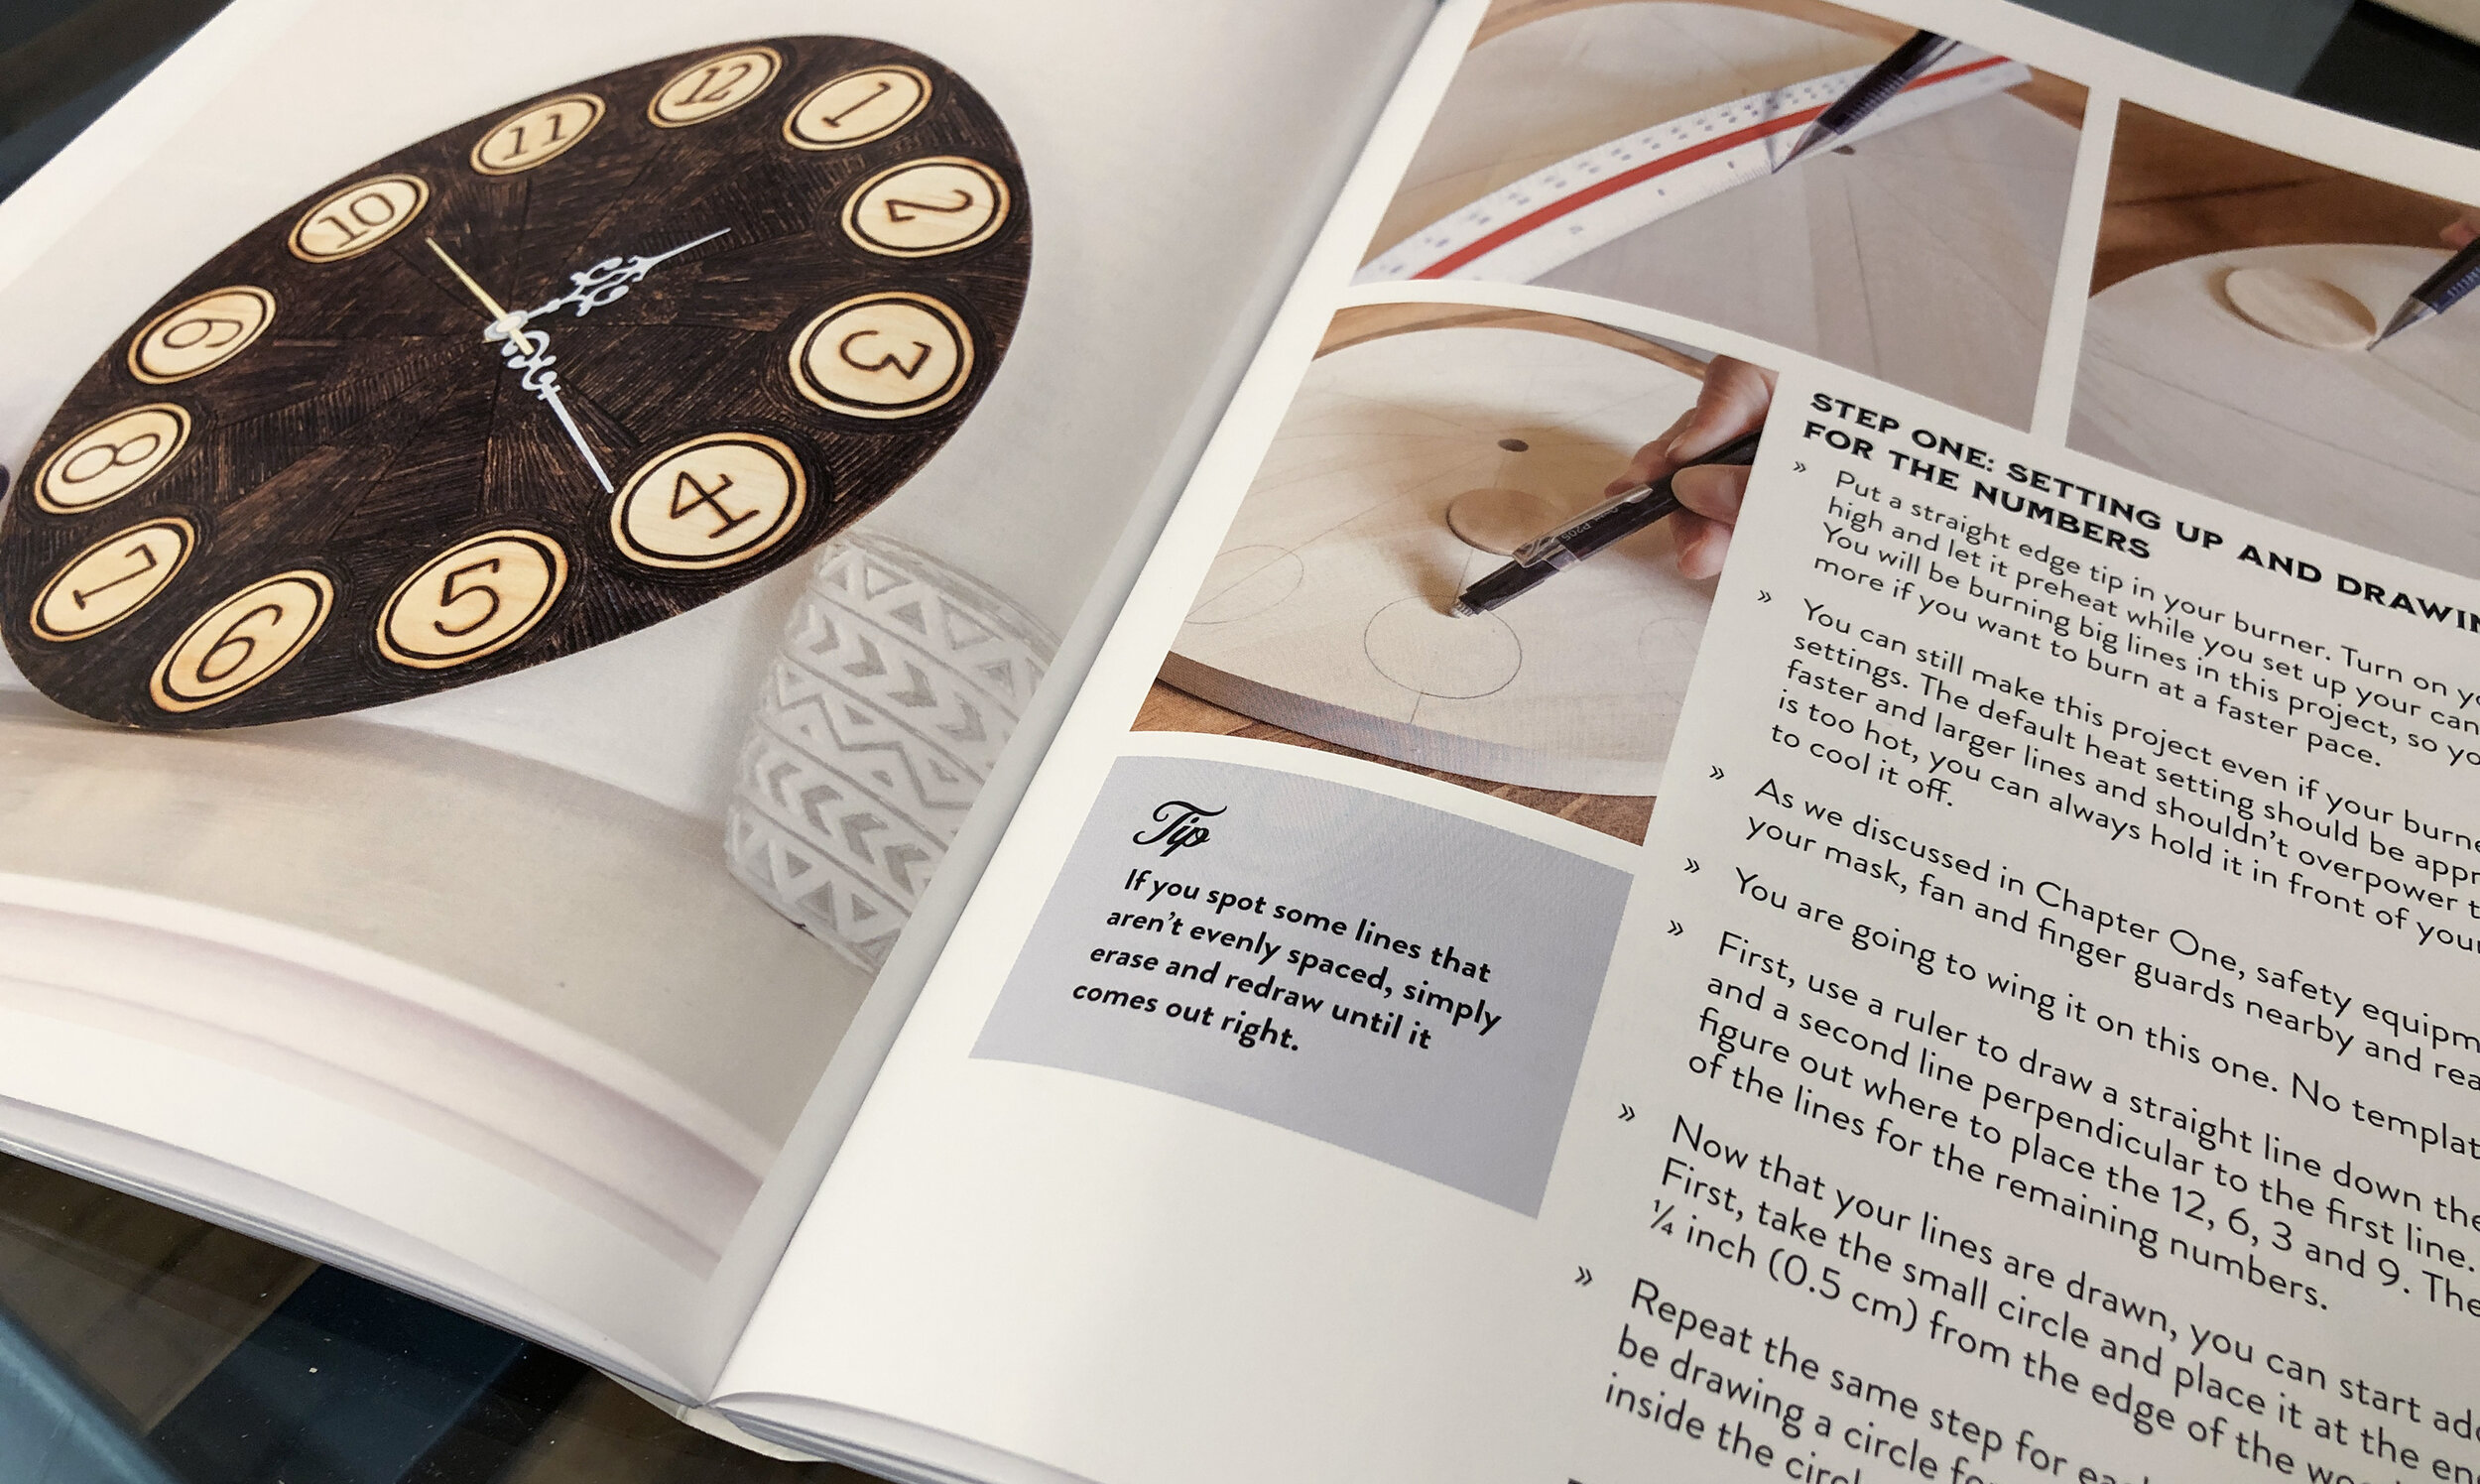
I cover 9 ways to add color to wood in my book, The Wood Burn Book.

You can also check out this blog post for a list of alternative mediums to use with pyrography.


Interview with Chelsea from CGDesigns

Name: Chelsea Gorham

Burning since: December 2017 (but didn't start my business until May of 2018)

Location: Amarillo, TX

@cgdesigns_wear and www.wearcgdesigns.com

Screen Shot 2020-05-26 at 1.04.36 PM.jpg

Can you tell us a little about your art and yourself?

I'm Chelsea Gorham, owner and artist of CGDesigns where I make and sell woodburned jewelry and art.  I am a stay-at-home Mom and homeschooler of my 4 children by day, and a woodburning artist/jeweler by night.

How did you find wood burning?

Quite on a whim. Back in the summer if 2017, I was working as a vendor at our local market as a henna artist. As I finished up a design on my customer who also happened to be a musician, he asked if I could put a "henna" design on his guitar.  Knowing I couldn't possibly put henna paste on his guitar, I still accepted his challenge and looked into woodburning as an alternative. The first person I thought to ask was my Mother who has always been an artist, and low and behold, she had a vintage burner (Detail Master IV) that she offered to mail to me. As soon as I got it, I fell in love with the process and began practicing for my first big commission!

Screen Shot 2020-05-26 at 1.05.11 PM.png

Which came first, jewelry making or wood burning, and when did you meld the two together?

They coincided, quite honestly. Because I didn't want to ruin a large, beautiful wood slab, I began by practicing my burn designs on small, affordable pieces. After I had a little collection of them, a good friend of mine commented that they would make cool pieces of jewelry...hence, wearable woodburned art was born!

 
Screen Shot 2020-05-26 at 1.04.00 PM.png
 

Have you always done art?

Yes, having been surrounded by art/artists all my life, it feels very much a part of my life.  I would say my first memory of making art was when I was 3 years old. I have so many collections of art - from technical design to watercolor, I've enjoyed them all over the years. But...It wasn't until woodburning, that I finally accepted the title of Artist.

Screen Shot 2020-05-26 at 1.05.29 PM.png

What goals do you have for CGDesigns?

More collaborations and expanding my portfolio in the short-term. My own workshop/jewelry shop/makers space in the long-term.

What inspires you?

Surrounding beauty - in nature, art, seasons, life. I love pattern designs, geometry and symmetry - all which I try to blend with my 'technical' design style. I love linear design and just want to make pretty things that hopefully bring joy.

Let’s talk about the earring of the month club! What is it, how does it work? Where do people go to sign up?

The Earring of the Month Club is a subscription service where my customers can sign-up for a surprise themed earring that shows up on their doorstep every month. I created it as a way to streamline a part of my business that allowed me to focus on a set # of earrings and have some fun while doing it. I have 4 subscription options that are all very affordable; VIP, 12 month, 6 month and 4 month options. VIP being the best value. To sign up, go to www.wearcgdesigns.com and click on the Earring of the Month tab at the top. 

You have now started a junior line, can you tell us a little about that?

The junior/youth line was inspired by my 10 year old daughter, Allison, who just got her ears pierced this past winter. She has always wanted to try my earrings as she sees me create them, but I told her that we could work on some together, that way she gets them just the way she likes! She sat down, sketched out her ideas and we collaborated on an adorable collection of earrings that all sold at their release. We plan on making it a regular thing now that she got a small taste of entrepreneurship and seeing the benefits of hard work mixed with fun. 

There is a design portion of your services.  Henna and Booth/Brand Styling. Can you tell us a little about these services?

Henna tattooing is a service that is always available to my customers. (It is after all how I got started!) I am available for private sessions, parties and events.

Booth/Brand Styling is a service I offer any creative who wants to up their market presence at in-person selling events. I take a look at their online presence, ie. shops, instagram feed, logo/brand as it is and base a style off of what 'feel' I get. I basically act as a consultant to get your booth that eye-catching look that makes you stand apart when selling in person. There is a unique art to marketing and design and I love bringing that 'a-ha' moment to my clients with this design service.

I have been loving your new portraits. (please include a portrait photo)

Thank you! I have long wanted to try them and quarantine has pushed me to do these things that I've been putting off.

 
Screen Shot 2020-05-26 at 1.21.21 PM.png
 

What goals do you have for your art? Any other new techniques you are hoping to try?

Always want to improve and learn new things. I would love to be able to comfortably finish a large wood piece with only using a variety of burn techniques. Shading/gradient work being at the top.

How much time is spent wood burning versus the rest of the business? What percentage would you give each?

I'd say about 30-40% burning, and 60-70% all the other stuff!

Tell us about these super successful LIVE Video Sales you have been doing? Where did the idea come from? How did you set it up? What suggestions do you have for someone wanting to try one?

Instagram LIVE Market is an idea my creative entrepreneur coach, Kristyn Burney, perfected. I would suggest following her and joining her Facebook Group 'Creative as a Mother' for the best info on a successful LIVE Market. She has so many helpful tips on how to creative revenue and run a successful online business @kristynburney

Deserted Island, with power question. You can choose ONE

Burner: 'Old Faithful' Detail Master IV

Nib: Knife tip - I love clean, crisp linework

Type of wood: Birch

Non-essential tool (but basically essential to you): Dental Pick Thingy


What other tools are essential for you?

Watercolor travel set and Tombow Sand Eraser

What apps/programs do you find useful for your business?

Canva - I use it for so many things in my business.

What are the main types of wood that you use for earrings? Do you have a favorite? And where do you source your wood?

Birch Plywood is my go-to for earrings.

I have 2 wood suppliers/laser cutters I work with for custom/premium shapes.

What parts of the business do you absolutely love and what parts feel like a chore?

I love collaborations, networking with other makers and 'a-ha' moments of my own.

My least favorite part would have to be planning content on social media. It is necessary, but can feel like a long, long chore.

Any advice for newbie woodburning artists?

Play to your strengths. Start with what you know, perfect it, embrace it, make it your own. Don't feel like you have to do what anyone else out there is doing to get noticed. We are all individuals who have our own unique voice and something beautiful to offer.

Watch the recorded live video:


Prepping Wood Surfaces for Wood Burning

A smooth wood surface will help you create a smoother, better burn. It is worth the time it takes to make it smooth, trust us.

I was prepping a wood surface, and thought I would show you what I do. Hope you enjoy this quick, little video.

I used:

Please note these are Amazon Affiliate links. We only share items that we have used and love!

fullsizeoutput_5872.jpeg

Always wear protection, safety first.

** note: You should also protect your eyes. Wear goggles or glasses to protect your eyes from dust. I normally do if I am doing more than one piece (promise) but you should be better than me. What is the saying.... “do as I say, not as I do.” Lol.

Check out this blog post for more tips and tricks when it comes to sanding your wood in preparation for pyrography!


How To Transfer Designs To Wood: Heat Method

This technique is one of our favorites for it’s speed and accuracy. It works great for lettered pieces, detailed pieces, anytime you need a really precise transfer, or for almost any design.

NOTE: This technique requires a laser printed design. If you are printing words or letters, you design must be printed in reverse.

What Tools Do I need?

The best tool would be a solid tip burner, like this Walnut Hollow Versa Tool above. This tool is great for covering big areas because of its durability, consistent heat distribution, and simplicity in handling. A wire tip burner will work just as well, but it will take a little longer.

how-to-transfer-an-image-onto-wood

The perfect nib for the job is the Transfer Nib or Transfer Point. This nib covers a large surface area making the transfer faster. Any shading point will do. Anything hot and flat - even an an iron will work.

Don’t have this tool and want to transfer your design in a pinch?? Check out 3 ways to transfer a design without using heat.

How to transfer your pattern:

  1. Prepare your design

You will need your design printed in reverse as the transfer is going to be mirrored onto the surface. You must use a laser printer or photocopier. The toner will be transferred directly to the wood using heat. This is especially important with any text or lettering!

To get started with a design, grab one of our free templates, check out our template books or visit the templates store!

2. Prepare your SURFACE

Start with a sanded smooth, dry, clean, and unfinished wood surface. Click here to see how to prepare your surface for burning.

I like to cut quite close to the edges of the design itself so that the placement is easier to see. Leave some room for tape - you don’t want to be touching it with your hot tool.

Place your design on your wood facing down (make sure it is right where you want it) and tape down on one side (two or more if it's a large design.)

3. Transferring the design

You want your tool to be hot, but not hot enough to burn the paper. Make a little test on the corner because if you burn the paper too much, your transfer may not work. Apply a light pressure and keep moving your tool over the back of the design.

Make sure you transferred everything before you remove your design. I like to peak underneath to check I transferred the entire design, just be careful not to move the paper placement or the design may not line back up.

If it is not transferring, try pressing a little harder, and/or slowly increasing your heat.

Word of warning when using a regular iron:

I had a large project so I tried using an iron thinking it would save me time.

Well, my iron has a steam setting that automatically kicks in at a certain temperature. In order to make the transfer work, the heat has to be quite high and, of course, there should not be any steam or moisture coming out of the iron…

I tried to use the medium heat (right before the steam started coming out) and the design did transfer BUT I needed a lot more pressure than normal which wasn’t a sustainable option. I had to press quite hard for anything to happen. I switched back to the Versa Tool because it was easier on the wrists and had the heat I needed.

What if I make a mistake?

Sometimes when peaking under the paper to see if the design has transferred, the paper will shift. If you continue with the transferring process, the shift can cause the design to be out of place.

Sometimes you think you placed the design down correctly, but after the transfer, it’s not exactly where you want it to be…

You can simply sand off the transfer lines with regular sandpaper. Click here to learn more about that process.

How many times can I use the design??

You can use this method to transfer a design onto wood a couple times. Each time you transfer, the design will get lighter and lighter so it is best to get it right the first time!

Watch these free videos below for tips, tricks, and all the details you need to successfully transfer designs using this technique.


The Wood Burn Book

I am beyond excited to share the cover of my book, The Wood Burn Book. Seriously, somebody pinch me.

Order Here
Book for website on wood.png


Best Information Possible

The Wood Burn Book is the culmination of years of collecting information through trial and error, asking questions, reading books, and the community mind. In #thewoodburnbook I walk you through necessary tools, tool care, types of burners, types of nibs and their uses, safety, wood types, and wood alternatives. We go over the best transfer techniques, adding color with many different mediums, best finishes and their uses and everything is based on my personal research and what the community uses. I then walk the reader through many projects (with printable templates) that utilize the different ways to add color, textures, finishes, and on many different types of surfaces.

You can find it on Amazon Here or Internationally Here.

IMG_2102.JPG

Collaboration

There are some INCREDIBLE guest artists that I was lucky enough to collaborate with to create unique wood burning projects for the readers to try. Beautiful pieces by @thepigeonletters @lettersbyshells @bobodesignstudio @jeshypark @electriceunice @allikdesign @brownpaperbunny @leslie.writes.it.all can be found in this book.

IMG_2110.JPG

Community

Would this be a Wood Burn Corner book if it didn’t involve the community? I think not.

Throughout the book you will get direct, quoted, advice from many members of our #BurnClub community. I’m so excited for you Burn Clubbers to find your quotes in it! There are a lot of fantastic words of wisdom from them sprinkled throughout. You can really feel the sense of community that our Burn Club embraces in these quotes and their desire for everyone to be successful. It is the best.

The reason I wrote this book was to pass on as much good, to the point, information as I possibly could in a beautiful and fresh format. I wanted to give the reader fun, modern, and actually achievable ideas for wood burning projects. I wanted to create a beautiful forever book that could be utilized as a beginning wood burning artist, and referenced even as a pro.

IMG_2105.JPG

You will see that I wrote about what I know know about. I touch on the topic of shading, but this is not the book to teach you how to create photo realistic art. This is the book that will help you reap all the benefits of wood burning by eliminating the frustrations that can come with not knowing what type of wood, burner, nib, color, or finish to use or how to use them. It is the book to help you troubleshoot, and improve. I strived to make an aesthetically pleasing, easy-to-follow, super informational book, and I really hope you like it.

IMG_2106.JPG

If you can trace, you can burn.

I believe every household should own a wood burning tool because of its therapeutic qualities and my hope is that with the method I teach in this book that it will encourage people to pick up a burner and give it a try. With The Wood Burn Book and just the ability to follow a line, I believe anyone can wood burn successfully. I have seen it in person with the classes I teach, and I am so excited to see how many people pick it up and fall in love with wood burning like we all have.

I hope you love The Wood Burn Book, and help me spread the word.

Happy Burning,

Rachel


Order Here

Praise For The Wood Burn Book: An Essential Guide to the Art of Pyrography

“The ultimate resource for wood burning from a fun artist! So many project ideas to expand anyone's craft skills. Rachel is an expert guide to this addictive, yet soothing medium.”

- Megan Colwell, The Travelling Woodburner (@happicamperkc)


“Rachel is a thought leader in the art of wood burning. Her modern aesthetic translates to beautiful, custom art and her unique ability to teach that art has led to a growing, thriving community within the space.”

- Morgan Spenla, The Crafter's Box


“Rachel has created a beautiful guide overflowing with information for those who want to learn the art of wood burning. I love the rich imagery and detailed instructions within each project. It makes me instantly want to pick up a burner and start creating. 
 
She has an incredible talent for creating projects that can entice anyone wanting to try this unique art form. Every project is gorgeously designed and crafted. There’s something for everyone from the beginner to the expert. I especially like the Kids art Keepsake project. It’s such an inventive way to turn your child’s memories into a keepsake. 
 
Rachel has written a must-get guide book for anyone considering pyrography…Read this book and learn from one of the best”

- Aney Carver, Owner of Pyrocrafters and author of "Drawing with FIre"


Read more about what people are saying!

Amazon Reviews


Burnt February 2019

These Burnt Month Challenges all started with #BurntNovember back in 2017! They are every-other-day challenges for the wood burning community on Instagram. The community uses the given prompts to inspire pieces of art. It always astounds me how many amazing and unique pieces of art can come out of one word.

wood burning inspiration

Burnt February reached 5,000 posts to the challenge! How insane is that?! The first time I did this challenge we had a grand total of 400 posts, so to say my mind is blown is a gross understatement. You guys are the absolute best! This COMMUNITY, quite simply, rocks! Make sure to follow #BurntFebruary on insta to keep up with the new amazing art being posted!

The Burnt February kick-off giveaway goes to @lineandember! They won a STACK of wood from @walnuthollow for sharing the prompts and engaging with the community.

The winner of a STACK of wood at the end of the challenge (from our sponsor @walnuthollow) is for participating in the prompts: drumroll please.... the winner is.... @oh.wanderer! Congrats!!

Below are the featured artists for each prompt. Click on the image to get a closeup of all the gorgeous wood slice art!

Thank you to all of you for joining in the fun. Can’t wait for the next one!

Click here to view past challenges!

Want to join future Burnt Month challenges?

SIGN UP FOR OUR Burn Club NEWSLETTER TO SEE WHEN THE NEXT CHALLENGE IS HAPPENING.

JOIN BURN CLUB+ TO GET YOUR PROMPTS EARLY!

OR FOLLOW US ON INSTAGRAM AND STAY TUNED FOR THE ANNOUNCEMENT!

These challenges are a great way to hone your skills, grow your following, try new things, and meet your fellow wood burning artists. #communityovercompetition

Interview with Basia from fine line pyro

Name: Basia Chmielowiec

Burning since: 2009

Location: Barrie, Ontario 🇨🇦

Formerly: @finelinepyro and www.finelinepyro.ca and currently @woodburncorner and www.woodburncorner.com

20190429_Pyro_251.jpg

Can you tell us a little about your art, your life, and you!

My name is Basia, the wood burning artist behind fine line pyro. One of the craft mediums I enjoy is pyrography and creating sustainable high end art that is inspired by nature!

Radial symmetry art is my jam but I also love trying new things and collaborating with other artists.

IMG_8087.jpg
95FEEA90-EB56-4390-878F-92F99803E349.JPG


How did you find wood burning, and when?

In 2009, I got my first wood burning machine as a payment for creating some artwork on a bus!

I lived in Calgary for about 6 years and during that time I met this wonderful group of people who started a business called bass bus. their idea was to create a moving platform for artists and musicians that would travel to different music festivals/events and perform. this amazing community grew and grew and I am very happy I was able to see it blossom.

Since the bus was always moving, they needed artwork inside the bus that was permanent. They had transformed the entire interior with wood and discovered the art of pyrography to be the answer to artwork that could be touched and not broken. They trusted me enough to burn their bus and I am so honoured they did. I haven’t stopped burning since and am still using the same machine they gave me!

IMG_0902.JPG
Screen Shot 2020-05-12 at 2.03.13 PM.png

I will always have a special place in my heart for these amazing people, the mountains and the wonderful 6 years spent out west.

Screen Shot 2020-05-12 at 1.48.09 PM.png


How did you find this fine art, fine line style? 

Practice, practice, practice. 

Doing the same thing you love and varying it and tweaking it over time allows your style and your art to have a character that is organic and your own. It took me a while to realize this. I was often putting myself down for not being as good as others, or not being able to create something amazing the first time I try. being an artist and having your own style is a journey that has to be taken. One of my favourite podcasts by Rich Roll (featuring Chase Jarvis): Creativity Is Our Birthright, sums it up nicely!

Have you always created art? 

Art has always been part of my life in one way or another. In high school I took all the art classes that were available. I never had any formal training afterwards but a solid family foundation which supported and encouraged all varieties of creativity. I often draw with pencil and ink, mostly mandalas, as well as play with digital mandalas, i dabbled in scrapbooking, I really got into pastel, and also dove deep into making feather earrings and accessories and so many other random things… I really like to make stuff.

52BBEC9F-8546-4886-AFF1-753D4D05058F.JPG

What is it about mandalas that you love so much?

The meaning of the word mandala in Sanskrit is circle. Mandala is a spiritual and ritual symbol in Hinduism and Buddhism, representing the universe. The circular designs symbolizes the idea that life is never ending and everything is connected. Mandalas can be simple or intricate, big or small and no two I make are ever exactly the same. Creating them is my meditation, no matter the medium. Drawing and burning mandala’s make me zone out and escape the clutter in my mind.

 
61E79662-468A-47E2-BA32-364E8246FA05.jpg


Any new techniques you are hoping to try?

I can’t wait to add some gold leafing onto my work but I want to work with adding colours, aiming for sustainable paints and natural elements to keep my work earth friendly.


How much time is spent wood burning versus the rest of the business? 

The ratio is about 80-20. i spend about 80% of my time wood burning and 20% on my business. I would like to invest more time onto the business end of things but have to juggle a full time job and a family. Perhaps one day…


If people want to teach classes, what do you suggest they look for? Any pieces of advice? 

Teaching classes brings me so much joy. I really enjoy when I can show people something new that can provide some peace and calmness in their lives. The best way to start, especially if you are short on time, is with a company.

I started teaching at Lee Valley Tools. They did all the work gathering students, providing materials and tools, and receiving payments. All I had to do was show up. This was huge since I didn’t have time or money for advertising and looking for students. Now that I have more followers and know more people interested in learning, I invested in a few extra machines and am able to host small classes from my home!


Deserted Island, with power question. You can choose ONE:

Burner: any Razertip brand burner. I have the SS-D10 (I am also an affiliate for this company. I have been usnig the same machine as the one I got from burning the bus!!!🔥 Use the discount code BASIA at checkout to save some money 🔥)

Nib: the chisel tip (a.k.a. the sexy tip!)

 
IMG_8410.jpg
 

Type of wood: cedar for it’s butter softness and sourwood for its stunning bark 🤤

Non-essential tool (but basically essential to you): sandpaper - I very gently sand most of my pieces when I am finished burning them to get the very fine lines I love.

What other tools are essential for you? 

I can do without (if i really had too) but I do take my compass everywhere I go. This helps me get the perfect circles and general shapes for my mandalas.


What apps, and programs do you find yourself using? 

Planoly is great for organizing instagram photos and the order I post them. I am able to see my feed and insert new photos and move them around. This really helps plan ahead of time. I also use the mobile version of adobe lightroom for editing before they go into planoly. Canva is a game changer for all things digital! and of course, Pinterest is always my favourite to get inspired as well as market myself for free.

How do you stay organized? 

I really love using google keep. It’s basically like a digital sticky note hub that I can colour coordinate, tag (level of importance), label (business or personal), add photos too, make into checklists and share (ie. grocery store list) and edit with others. I always have it in my phone and it’s connected to gmail so setting alarms or scheduling e-mails is really easy! This is great because even those looooong term ideas can be stored away but also can be easily found anytime i want.


What wood do you use, and what suppliers do you prefer in Canada?

I often go dumpster diving in nearby wood shops. Many companies who make kitchens or generally work with wood cannot use little pieces so their scrap wood and cut off’s go into the landfill. I divert as many pieces as I can and make them into art! I recently scored on a whole lot of cherry, which I love using and it has a gorgeous warm colour with beautiful grains throughout. If I need to purchase a specific kind or shape, I go to Exotic Woods in Burlington or look online.


What parts of the business do you absolutely love and what parts are hard? 

Of course I love the actual art process, trying new things with wood burning and evolving my style. The part that is difficult for me is the whole selling process. I have a hard time pricing my art… I just started selling and am hoping to improve on this as I grow.


Any advice for newbie wood burning artists?

Keep on creating. As I mentioned earlier, make it till you make it. The more you do the more you know what and how to do it. Also, understanding that we all have a journey to go through is important. Don’t compare yourself to others and their work. Compare yourself to who you were yesterday and just keep moving forward.

Where do you find inspiration? 

Nature! I love nature and everything it has to offer. I go portaging as often as I can and during those times, and also when I am taking care of my own plants in my home and backyard, I get a wealth of new ideas and inspiration. Being in the forest grounds me.

What goals do you have for Fine Line Pyro?

I have something very exciting in the pipelines. I want to take nature and being in the forest and mix it in with mandalas so I am creating a sketchbook fit for traveling, guiding people of all artistic levels to make their own mandalas. Stay tuned in my fine line pyro instagram feed for an announcement coming soon!  


Watch the recorded live video:


Interview with Megan from HappiCamperKC

Name:  Megan Colwell

Burning since:  2012

Location: Kansas City (based)

@happicamperkc on Instagram and Facebook or Shop Etsy

LOGO - Happi Camper 2.jpg

 
0704191247d-01.jpeg
 

You have a unique living/working situation, can you tell us about that? 

Sure! I live in a 2018 Travel Trailer (camper). We are going on 2 years living in it full time. When we can, we travel the country. So far we have been out West and loved it!


Tell us a little about your business and what you make.

I am a self-taught wood burning artists. I love to make bold and colorful works of art of all types, however, my specialty is line art and texture. 

Screen Shot 2020-05-09 at 12.03.06 PM.png

You have another business, Happidesk. Can you tell us a little about that?  

Of course! @Happidesk is where I conduct my business as a virtual assistant. Although my main focus is Real Estate, I also help many small business with things like: Social Media Management, Branding, Design, and Engagement. I help accounts authentically connect and grow with their target audience. 

What percentage of your time do you spend wood burning versus business? How much of your time is devoted to Happicamper vs Happidesk? 

Great question! Typically Monday thru Friday I spend on Happi Desk, using my evenings to engage on Happi Camper when I can. I do my best to dedicate Friday night thru Sunday night to making art and content for Happi Camper. 

What other hobbies/crafts do you enjoy? 

I also enjoy watercolor and illustration. I can't forget travel! I love exploring new areas, especially anything flora/fauna related. 

Where do you draw inspiration? 

Definitely from our surroundings. I love nature and find lots of new plants/places to research then apply to my art. I also draw a lot of inspiration from vintage styles. 

What piece of advice can you offer to anyone who is new to wood burning or new to the community? 

Do not "compare and despair". At the end of the day, social media can go away. Only compare yourself to your growth path, and not others. You are so unqiue; no one in the world is like YOU. So the more you lean into your own authenticity and forget about all the like/followers noise, the better you'll be in the end. 

Any quick tips for growing your Instagram following? What has worked for you? 

Sure! I follow the 10-10-10 on a daily basis. Ten minutes liking and commenting on my current followings' posts. Ten minutes connecting with my current followings' stories through genuine DMs. And ten minutes connecting with my target audience through recent posts in niche hashtags.

What other platforms do you use and enjoy besides Instagram? Any that you have found success with when it comes to reach and exposure?

I have used Pinterest with some success. I also use Etsy as a connection platform, especially for networking. Liking and favoriting others shops is a great gateway to collaborations. 

If you could give advice to yourself when you first started out, what would that be? 

Get more back-up pens! Since I burn so hot and heavy, I go thru pens very quickly!

Are there any apps that you can’t live without when it comes to your business? 

A scheduler. I love Apphi, and have also used the Later app. This helps me keep my posts up at peak times, plan ahead, and maintain a brand presence. 

Deserted Island, with power question. You can choose ONE

Burner: Colwood Super Pro II

Nib: Spade Tip

Type of wood: Poplar

Non-essential tool (but basically essential to you): Tombow sand eraser

 
0327201319a-01.jpeg
 

Choosing what tools you keep on hand has to be a thoughtful process because of space limitations, so I am curious what are some of your other favorite tools you have in your toolbox? 

Acrylic paint pens have been a lifesaver for me. They take up SUCH little space and are so easy to use!

How do you finish your pieces? 

I use an aerosol polycrylic gloss finish. It really make the texture pop!

What are your favorite ways to add color? 

Lately, it is def the paint pens. But I also favorite other types of mediums like milk paint and watercolors.

What goals do you have for Happi Camper? What art goals do you have? 

One day, I would love to have some land, build a cabin, and renovate a handful of vintage campers. It would be an Air B-n-B where I could also host wood burning workshops. Short term goals def include teaching wood burning workshops in the Kansas City area!

What are your favorite podcasts and inspirational books? 

I listen to the Joe Rogan podcast, as well as Russell Brand. But honestly, I'm not much of a podcast listener. My favorite inspirational book is, "You Can Heal Your Life" by Louise Hays. 

I think we are all very curious as to how you can fit all of your wood burning supplies into the camper. Can you show us some of your storage solutions?

I have to thank my hubby here. He is the organization GURU. We keep my art supplies in baskets separated by type. We even label everything so it's easy to grab. I also bundle supplies in re-purposed Ipsy bags. One bag has everything I need to start sketching a new piece, and houses some of my main nibs. 

What are you working on now? 

I am currently working on a few geometric shelves as I shift to making more functional art. I also have a new wood sign commissions in the pipeline. 

Watch the recorded live video:


160 Ideas of Things To Wood Burn Next

Creativity ruts are a very real thing. When the options are endless for things you can wood burn, choosing one can be difficult. I have found that if I give myself some sort of constraint, whether it be an object, a subject matter, or a word, that it tends to spark an idea much easier. This is a place I hope you visit when you need inspiration of what to burn next.

My suggestion for utilizing this list would be to close your eyes, twirl your finger around, point, and see where you land. You can choose to point again, or let your mind wander with how you could create that object with your unique wood burned touches. I think you will find inspiration quite quickly.

woodburned-spatula-and-spoon-mandalas

I also recommend looking at old #burntmonthchallenge prompts (#burntmarch, #burntfebruary), and #burntday prompts for inspiration. Check out this blog post to learn more about these challenges!

If you need patterns and designs to burn, visit the templates store full of individual patterns for sale, like the one on these wooden spoons or grab yourself one of the community template books.


160 Ideas of What to Wood Burn Next:

wood-burned-comb

spoons + serving ware + cutting boards + plaques + baseball bats + hammer + key chain + leather jacket + notebooks + ring dish + growth blocks + baby blocks + growth wall charts + toys + wall art + food display + candle display + pet portraits + coasters + ornaments + trophies + tables + cake knife + violin + guitar + desk + chairs + salad bowl + candy dish + wooden cups + cell phone covers + earrings + necklaces + bracelets + hair clips + chopsticks + baby bowls + baby plates + candle holders + serving tray + dice tray + toy box + shelving unit + bed headboard + wooden watch + clock + rolling pin + wooden apple + trivets + wooden tongs + pen holder + business card holder + jewelry holder +  shirts + jackets + canvas bag + leather key chains + salt bowl + coffee scoop + doll house + cabinet + piggy bank + wooden airplane + hand held fan + countertop + wine rack + cheese plate + cheese knives + toilet seat + memory box + plates + vase + comb + brush  + wall sign + open/closed sign + drawer fronts + lazy susans + puzzles + matching games + bathroom signs + kids’ room signs + chess pieces + checkers + trinket tray + cane + walking stick + map + key hook + magnets + boomerang + coat hangers + watercolor paper + driftwood + tool handles + skateboard deck + napkin holders + stools + magic wands + brooms + cork + dried gourd + pumpkin + nesting dolls + shoehorn + wooden bookmark + fishing pole + jenga + belts + purse + shoes + toy train + tablet cover + light switch cover + outlet cover + coffee table + animal ID tag + door knobs + bird house + dog bowl holder + wooden eggs + essential oil diffuser + dog name sign + welcome sign + step stool + bone + antler + tooth + horn + tree bark + cotton + pencil + stylus + recipe box + hats + leather backpack + canvas tote + rings + napkin rings + table number displays + logo sign + displays for business + cups + cribbage board + wooden pipe + tie clip + cuff links + figurines + wooden peg doll + bed frame + sandwich boards + chalkboard + picture frame  + pool cue + alphabet blocks + leather bookmarks + catchall + paper cards


The options are endless, and oh-so fun to imagine.


Check out some of these fun projects:

garden-marker-plant-tag
 
wood-burned-magnets-project


Need more pyrography inspiration or project ideas?

Check out the Pinterest board: Ideas and Items to Burn On for everyday and unique items made from wood or burnable surfaces.


Interview with Aney from Pyrocrafters

Me6.JPG

Name: Aney Carver

Burning Since: 2016

Location: Prattville, AL

www.pyrocrafters.com and @pyrocrafters


How did you start your pyrography journey?

In 2016. I started burning just for fun, then we started making things for friends and family and the next thing you know we’re taking orders. Then I started posting on social media and it just kind of took off in unexpected ways, which continues to this day. 

Do you do any other art forms/crafts/hobbies?

I love to make everything. Just making in general lights my fire. But specifically, I love to make things with cardboard. I’m not necessarily good at it especially when you see what other people are able to make. But I just love the idea of reusing a material in a completely different way in which it was intended and turning it into something functional.

cardboard-table2.jpg


Best piece of advice when it comes to owning your own wood burning business?

I really thought about this question a lot and it’s hard to choose just one piece of advice. This could apply to wood burners or any business at all. Learn. Learn as much as you can about what your business is, how to improve it, how to improve yourself, how can you help others, how can you can you be consistent, courageous, creative, inspirational, what you want to accomplish, why you’re in business. It all comes back to learning and taking in as much info you can on how to be better for yourself and for others. You can listen to podcasts, follow people that will teach you, read or listen to books, or just plain ole google searches. A lot of what you want to learn can be found for free if you do the work to find it.


Tell us about your book, Drawing with Fire, it such a beautiful book! Where can we find in it?

My book process took place from early 2019 to mid late summer. It’s a wood burning project book that focuses more on the projects themselves. The publishers and I brainstormed about what the book should be about from complex detailed portraits to lettering only to beginner projects. We ended up creating a lot of lettering projects for beginners, a few crafty projects and then a few more detailed intermediate projects with shading techniques.  


The goal was to get right to the projects and have the book focus on giving the reader a book full of projects they could make. In the early stages, we had a lot of setup stuff about tools, but we decided to narrow that down and make it more about projects. I wanted to create projects based on supplies that were easy to find. So I tailored the projects around what materials I could easily get my hands on, so that the reader (a beginning wood burner) would be able to easily find what they needed. I wanted them to be able to focus on the projects, learning wood burning and creativity instead of trying to figure all the tools. That was the fun part.

The process was fast and a bit stressful. From the time the publisher approached me until it was written was about five months. So if I had to change something about the process it would have been having more time to put into the creation of it. Overall, it was an amazing experience. 

Check out the book Drawing With Fire!


You are going on a deserted island with power. You can only bring one of the following:

Burner: Colwood.

Wood type: Poplar

Nib: Straight Edge/Skew tip

Favorite non-essential tool, but one you love to have: My shop. When we first moved into this house, I didn’t have a work space, i was constantly moving around and working where I could. I wrote my book and worked through all the projects on our dinging room table because I didn’t have a space to do it. We had to do a lot of work on this shop and I am so incredibly grateful for this space, I don’t have words to express it. I come in here every workday morning and meditate to the gratefulness of having this space. 


What do you love about doing Youtube videos? What have you found difficult?

I love being able to show people how to do this art. I love connecting with people and reading the comments about how they are learning this new craft and that the videos I’m putting out are helping them. That’s the best feeling. 

The hardest part is being in front of the camera. I just get nervous and forget how to talk. But I think I’m doing better. Again it comes back to learning and doing things that make you uncomfortable at first, but pushing through until you get better. Einstein said, “Anyone who has never made a mistake has never tried anything new”.  

What percentage of your time and energy goes into YouTube, Instagram, facebook, woodburning, and computer office stuff? How much does each piece of the pie get?

Oh gosh, I don’t really have a percentage, but I would say the large majority and then I weave in my wood burning into it. So when I have a new wood burning piece idea, I film it along the way so that I’m creating content for all those spaces while I’m creating my art. It’s all woven together into one collective effort. 

If you could give one piece of advice to someone who is brand new and starting out, what would that be?

Don’t be afraid to mess up. You’re brand new, so spoiler alert, you’re going to mess up. You just need to know that up front and be okay with it. I’ve been doing this for a while and I make mistakes all the time. A lot of mistakes can be corrected and if they can’t, just sand it down and start over. Just try stuff and see what happens.


What are you working on now?

Right now, I’m working on new art pieces, and switching those over to my website instead of the Etsy site. I have a lengthy course planned that I have been planning forever and it’s been delayed a bit because I was going to have a videographer come and film it, but we’ve pushed that back because of all this virus stuff. 

I have a new Pyrocrafters Membership service coming out soon! There will be LIVE courses, pre-recorded courses, and more content exclusively for members.

And I’m also working with Chandler tools to build a course around using their tools, so that’s super exciting too. That’s also been pushed back because of the virus. It’s coming eventually, just delayed a bit.


Favorite thing to watch or listen to while you burn?

Sooo many things. Schitt’s Creek, The good Place, How Did this get made podcast, Don’t keep your day job podcast by Cathy Heller, Rachel Hollis’s everything, Brendan Burchard’s anything and everything. I’m listening to his book High Performance Habits right now. 


What are your favorite tools?

So, I’ve been working with an array of tools lately and there are so many great burner tools out there. Here are a few of my favorites.

Chandler Tool


Screen Shot 2020-04-29 at 7.17.24 PM.png
 
 
Screen Shot 2020-04-29 at 7.18.02 PM.png
 
 
Screen Shot 2020-04-29 at 7.18.34 PM.png
 
 
Screen Shot 2020-04-29 at 7.19.24 PM.png
 

*Some are Amazon Affiliate links for easy shopping. Hope they help.


Pricing Your Art

I want to discuss how to price your art. Specifically, pricing your wood burned art. However, you can apply this formula to pretty much any medium you are selling!

Pricing, oh pricing. The bane of any artist’s existence. Why is it so hard to price your art? Could it be because you feel like you are putting a price tag on a little bit of your soul? Probably. Could it be because you are having to do the humbling task of assigning value to your time, thoughts and passion? How are you even supposed to be neutral and non-biased in that situation? You know all the hard work, years of training and mistake making, time, emotion and thought that went into it. It seems like an impossible task to put a price on it, but in order to make money as an artist, pricing is a must. There are things you can do, and systems you can put in place to make it easier on yourself.

Will pricing still not be very fun? Yes, but I am hoping this helps to at least make it a bit easier and more systematic to calculate.

Formula for Pricing:

Overhead

+

Hourly Rate

+/-

Content

=

Price


Overhead Costs:

These are costs that need to be recovered.

  • Materials: Let’s start with the easy stuff, materials. This is where you calculate the price of your materials. These are items where they were used entirely for this piece. The variation in size, type of wood, and price of the materials used goes here.

  • Supplies: You have many items that you purchase for your business that you will utilize to make the particular piece you are pricing. You may not use the whole item or you may just put a little more wear and tear on it. Think paint, colored pencils, shipping supplies, finishes, glue, tape, printer paper, graphite paper, your wood burning tool, your computer, etc. Take note of ALL the supplies you use. It may surprise you how many items it actually involves. You are putting wear on those supplies to create this piece, and you need to keep that in mind when you are coming up with your pricing.

    You are obviously not going to be tacking on the price of a ream of paper, the whole wood burning tool, or the price of a whole tube of paint (unless you used a whole tube, then it goes in the materials category), you just want to think about what the cost to your business creating that particular piece actually had. A lot of people forget this part.

    I think it is easier to just tack on a set amount (example: $2-$5) to any piece to cover some of those overhead supplies used and costs for materials used.


Time:

  • Hourly Rate: I personally think the easiest way to take yourself out of the pricing process is to make it a calculation. If you just have a set hourly rate, based on your experience, skill, and what you want to pay yourself, then it takes the guesswork out of it. Do include your time communicating, designing, burning, and packaging. If it is for that piece, and it is taking up your time, it should be added.

    Keep in mind your speed in which you burn and operate(if you are slow, then lower your rate and work on speeding up your process), your skill level and years of training, and what value you put on your time when coming up with your hourly rate. I can not suggest a number here. This is highly individual.

    Once you have your hourly rate number, then it becomes easy to just plug it into your formula.

    Start by keeping track of how long you actually spend on a piece. Set a stopwatch. Write it down on a piece of paper, and attach it to the piece of wood. Add to that number as you add to the piece. People tend to underestimate how much time they actually spend working on a piece, so this is a good piece of information to have. It will also help make it easier to price custom work, because you will have a much better idea as to how long it actually takes for you to complete a piece.

Content:

  • Content: Content matter matters. A simple lettered piece will not be priced at the same spot as a detailed artistic piece, even if it took the same amount of time to make it. This is where adjustments need to be made. Once you have put in your formula, then you can look at the price and either add or take away from your total. Content also includes how how good the finished product is and it’s subject matter. All things to keep in mind when adjusting pricing.

Make Adjustments:

Doing this exercise will be incredibly valuable to making adjustments to how your business functions. If you are spending too much time on your pieces, and are having to adjust your price down every time at the content stage, then it is time to look at streamlining your process to find ways to cut time. If you are finding that you are constantly undervaluing yourself (maybe people have even said you need to raise your prices), then you probably need to give yourself a raise and up your hourly rate. Now, if you have figured out how to get faster, and still produce the same level of content or maybe even higher quality, I am not saying you should adjust your prices lower. Content really does help determine value.

Knowledge is power. That’s why knowing how much time you are spending, how much money you are spending, and where will help you and your business to run smoothly, pricing will be less of a headache, and you will be able to make positive informed adjustments to your business.


6 Things to consider when coming up with your pricing formula:

  1. Where are you selling? What is the cost of living where you are selling? Selling in person in San Francisco is not the same as selling in a small town

  2. Who is your target audience? If you are selling high end, you better have those high end prices

  3. What is the subject matter?

  4. How big/detailed is the piece?

  5. What is it worth to you? Some pieces mean more to ourselves than they do to other people, and it just will never feel right to sell it at the price people would buy it, and that is ok. Just hold onto that piece

  6. How much would you pay for it? always a good idea to step into the shoes of your buyer.


Other Pricing Tips:

Still don’t want to price your pieces, consider having a trusted friend suggest prices for your work. Make sure they fully understand what goes into it, the market, your target audience, and material costs.

Watch the market. Go and look at what other artists of your skill level are charging. This will give you many points of reference. Keep in mind that most wood burning artists out there are not charging enough for their work. As a community we need to work together to get paid what we deserve for our work.

Keep documentation of what pieces sold and for what amounts. Take note of what is working, and what isn’t. What sells quickly, and what doesn’t. Then make adjustments.

Lowering the price, does not necessarily mean that something will sell better. Sometimes, raising the price, to match the value of it will actually help it sell better. People don’t want to buy something that isn’t quality. If you lower your prices too much, then people will assume that they are getting a lower quality item, will pass and spend their money elsewhere.

Don’t compromise on pieces with sentimental value. Make sure you aren’t selling it for less than what you are actually willing to part with it for.

Be sure to leave a little wiggle room for sales, and unexpected costs.

Add shipping into your price for ease of shopping whenever possible.

Going one dollar less than a rounded up number works. People look at $49 as significantly less than $50. Use that.


Pricing your art is just one piece of the puzzle

Choosing the right platform, location to sell, the right description, taking the right photo, and making it easy to find are also really important. If you don’t get your piece in front of the right audience, it won’t matter what value you place on it.

cami-williams-QMmQgS2XYDA-unsplash.jpg

WANT TO LEARN MORE ABOUT WOOD BURNING AND BOOST YOUR CREATIVE BUSINESS??

Grow with the community: Join Burn Club+, a place where you can ask questions, and get the full answers, a place of fun and learning.


To-Do List and Ta-Da List

These two lists are part of the secret to become more impactful, to stay on task, and accomplish more as well as feeling more accomplished.

I am a big believer in lists. I think getting your thoughts and ideas out of your head and on paper is incredibly powerful. It makes space to think about other things.

to do list

To Do Lists:

I am constantly making “To-Do” lists. I make them for household chores, tasks for my business, daily activities, events, and so much more. Any time there are a lot of moving parts, writing them down makes such a big difference. And anyone running a business knows there are plenty of moving parts.


8 Reasons Why To-Do Lists are Necessary!

  1. They are time savers because you can more easily stay on task.

  2. They keep you organized.

  3. They keep you motivated and moving forward.

  4. You can easily see what is left.

  5. It gives you a place to put your ideas. Get’s them out of your head and on paper.

  6. They make it easier to prioritize tasks.

  7. You don’t forget something when it is written down and is waiting to be crossed out.

  8. Crossing things off lists is so gratifying.


But, let’s talk about Ta-Da Lists, because I think they might be even more necessary and beneficial for our success and for our mental health.


Ta Da Lists:

There is an interesting phenomenom called the Zeigarnik effect. It is described as “a psychological phenomenom where a tendency to remember interrupted or incomplete tasks more easily than tasks that have been completed.” This means that our To-Do list, our incomplete, unfinished tasks are what we remember. How sad is that?! This is where Ta-Da lists come in.

A Ta-Da list is your antidote. A Ta-Da list is your way to overcome the Zeigarnik phenomenom. When you write down your accomplishments, and have them up for your viewing, you are more likely to feel satisfied, happy, and accomplished. And don’t we all want that.

equally important.

Write down your to do list, but don’t just cross them off. Cross them off then add them to your Ta-Da list, and you will surely feel better about your accomplishments.


Need some help clarifying what you should be putting on that to do list and how to efficiently and effectively grow your business?? Complete the Focus 5 Exersize to help you find clarity and guidance on your next steps.

Want to track your goals?? Check out these trackers! They are jsut as satisfying as a ta-da list!


Habit Tracker Shop


What Woodburning Tool is Right for Me?

Choosing a burner can be quite difficult. There are so many brands, so many options, so many nibs and it can all be a bit confusing…

But before we dive into the price ranges and styles of tools, I want to start with an important reminder:

the quality of your art isn’t defined by the cost of your tools.

The tools we use are undeniably important, but at the end of the day, it’s all about the user and what works best for them. Many artists can create incredible work with the simplest, most affordable tools, showing that skill and creativity matter more than price. On the flip side, even the fanciest tools can feel frustrating, like struggling to get solid lines.

Now, lets talk about the function of tools. When you are looking into a wood burning tool, I like to think that you need to consider a couple things when choosing:

  1. Price

  2. Use

  3. Style

Price - What will my money get me?

Price is first because, well, your budget is your budget and wood burning tools can range in price from $15-$300+, so lets starthere.

I like to think that there is 4 different levels in price.

⭐️ LEVEL 1: $15 USD

These are value tools that usually just have an on/off switch, recommended only if you are doing one project. They may come with several nib options but take some time to heat up and are a bit bulky to hold. This one from Walnut Hollow has been tried, tested and true.

If you can invest a little more money, especially if you want to continue pyrography, we recommend going up, at least one more level.

 
Screen Shot 2020-04-28 at 1.11.06 PM.png
 

⭐️ ⭐️ LEVEL 2: $30 USD

These are usually your solid-nibbed wood burning tools with temperature control. They usually come with several interchangeable nibs, are portable, but take a little while to heat and cool. Still slightly bulky, but for learning, exploring and understanding the art of pyrography, this price range is what you should be looking for.

Be weary of anything around this price or cheaper, especially off of amazon…

We love the Walnut Hollow Versa tool. This was our first burner, and after trying many many others, this is still one we recommend for beginners and large projects the most! Click here to get yours.

 
Screen Shot 2020-04-28 at 1.16.49 PM.png
 

⭐️ ⭐️ ⭐️ LEVEL 3: $80 USD to $120 USD

These are considered professional level machines, or entry level wire nib burners. Most come with interchangeable nibs. They may be lower quality wire nibs, when they are interchangeable, that may need some gentle tweaking before use or with a limited number of nibs, but this option is good if you want to learn what nib you like best. The grip will be more pen-like, it will have decent temperature control, and it will heat and cool faster than the previous tools. They are lighter weight machines and are not meant for heavy use.

 
Screen Shot 2020-04-29 at 9.13.19 AM.png
 

⭐️ ⭐️ ⭐️ ⭐️ ⭐️ LEVEL 4: $200 USD and Up:

These are your professional machines. These are sturdy, heavy duty, professional equipment. A lot of the time you will need to buy the machine separate from the pens/nibs. Many of the nibs are hand formed. There are options for pen choices(fixed pen and interchangeable options) and tons of individual options for nib choices (flow, spade, writing, shading transfer hot stamps). Some companies will customize nibs, and some offer such a wide range you wont need customization (looking at you Razertip). The grip of these machines will be pen-like, it will have excellent temperature control(in some cases precise to the last degree), it will heat and cool in seconds, and in general these machines will reach much higher temperatures. Some great companies, our top three, include Razertip, Tekchic, PJL Enterprises.

You can watch a video where we review a bunch of pro burners and listen in as we dive into Razertip and what we like and don’t like about each of their machines, by joining Burn Club+ (then head to the Open Studio Recordings Channel!)

 
Screen Shot 2020-10-05 at 4.44.58 PM.png
 

Use - How will I use my wood burning tool?

ONE TIME USE - If you are planning on using a wood burning tool for just one project, then go ahead and get yourself a single temperature, solid-nibbed value wood burning tool. A tool like the Walnut Hollow Value Tool is around $15. It comes with several nib options and you will be able to complete your project.

HOBBIEST and PROFESSIONALS - If you plan on doing more than one project, or very large projects, then we highly recommend that you get yourself a solid-nibbed, temperature-controlled woodburning tool. The Walnut Hollow Versatool is our favorite. This tool is so versatile, inexpensive (around $30 ), comes with a bunch of useful nibs, and works like a dream. This could easily be the only tool you buy. The level of detail that you can achieve with this one tool is astounding. Just go look at the #versatool to see what I mean. There are many professional wood burning artists who only use this tool.

PROFESSIONALS - If you are burning more than a couple times a week, then you should invest or start saving up to invest in a proper professional machine. These machines will decrease your time wasted waiting for you tools to heat/cool, will allow you to have a more ergonomic grip while working, they will allow for quicker nib changes, and will just speed up your whole process. They are worth the investment. Some great companies include Razertip, Tekchic, PJL Enterprises.

STATIONARY OR MOBILE - Will you have a dedicated wood burning station, or will you be on the move? This is something to consider when choosing the right burner for you. Some do not pack or travel well, while others are made to be portable.

Style - Solid vs Wire Nibs

For a detailed explanation between these two styles, check out the blog post: Wire Tip Vs. Solid Tip Burner. In a nutshell:

SOLID: A Solid-nibbed or solid-tipped burner has a long heated shaft, with nibs that screw directly into the shaft. Your hand placement is further away from the surface being burned, and is generally a thick grip that will take some getting used to. They can come in temperature-controlled and single temperature varieties. These range from $15-$30.

 
Screen Shot 2020-04-28 at 1.16.49 PM.png
 

Now, a solid-nibbed burner, does have its drawbacks. It takes a little while to heat up and cool down, the grip is thick and requires your hand to be far away from the surface you are burning (can take some getting used to), and the docking station is not very solid. But… this compact machine can burn! It’s great for covering large areas too as a solid nib burner will retain its heat better than a wire burner. We recommend this tool, or something similar be in every wood burning artists tool bag.

There is also an amazing nib called the Transfer Nib. It is amazing for transferring images to wood precisely and quickly. Check out this blog post on Using Heat To Transfer Images Onto Wood.

WIRE: A wire nib burner, or often called a professional burner, generally has a more pen-like appearance with a wire at the end that heats up. Your hand placement is much closer to the surface burning. The machine heats and cools quickly. These usually have a solid docking station, great temperature control, and a wide range of nib options.

The different nibs can be changed in a variety of ways for these wire nib burners.


1. FIXED NIB - Some people prefer to have the entire pen switch out. It does decrease the chances of having connection issues, because changing nibs is so easy. These pens with a fixed nib usually just plug in quite quickly and easily. This is a more expensive option than the interchangeable nib, but more convenient and they tend to last longer than the interchangeable nib pens.

 
Screen Shot 2020-10-05 at 4.15.51 PM.png


2. INTERCHANGEABLE NIB - This can be done in a couple ways. Sometimes the wire nib is in its own housing, and the housing switches out. Other times, you will fine that you are unscrewing the actual wire, and replacing it with a different wire. The ones in their own housing can be changed quicker and easier with less issue. I have found that when you are changing out just the wire, you need to be careful to make sure that all the connections are solid or your burner wont heat properly. Always test your temperature after switching out nibs.

 
Screen Shot 2020-10-05 at 4.16.20 PM.png


Choose your Burner

Now that you know the different options, and what you should consider, it’s time to choose a burner. Here are some burners that we have personally held in our hands:

Here are some websites and Amazon Affiliate Links to the companies I trust: (Wood Burn Corner receives a small portion if you purchase through these links, or look below to visit the individual website’s of each manufacturer.)


Lower End Burners:

The Walnut Hollow Versatool for quick projects
and The Creative Wood Burner for a more comfy grip.


Higher end burners:


Razertip:

Take a look at the Razertip’s options and their wide selection. They have new digital burners with a bit of a higher heat, but even their older models are one of my favourites. They also have options to join multiple burners together but I like to keep it simple. Since it’s really easy to change out the pen while I burn, I don’t need anything more than the basic version. Personally I don’t like the digital machine either.

If you want to watch a video where we review this company and what we like and don’t like about each of their machines, join Burn Club+ and head to the Open Studio Recordings Channel!

🔥 Use the code BASIA at checkout to grab yourself a discount! 🔥

Yes, I am an affiliate! I have been using my SSD-10 for almost 15 years now and it still works like magic. Razertip has great customer service and an excellent warranty as well!

 
Screen Shot 2020-10-05 at 4.44.58 PM.png
 

Tekchic:

Check out Tekchic - this machine is powerful, compact and has a decent grip on the pen. Not the best grip - the pen is still a little thick, but otherwise it heats up quickly.

 
Screen Shot 2020-04-29 at 9.29.19 AM.png
 

TruArt:


This machine is also really reliable and gets nice and hot. A bit thicker on the hand grip but works well.

 
truart-wood-burning-machine
 

PJL Enterprises - Optima 1:

Visit PJL Enterprises to see their collection of tools. These pens are more pen-like, machine gets hot and the switches are very satisfying.

 
Screen Shot 2020-04-28 at 1.38.04 PM.png


Want to learn more about Wood Burning and improve pyrography Skills?

Join our FREE community of pyrographers in Burn Club where we share tips, tricks, pyro resources, and free templates and coupon codes for pyro materials and accessories.


Interview with Brad from Razertip


Company Name: Razertip Industries Inc.

Name and Role: Brad Merkle - Operations Manager

Location: Saskatchewan, Canada

www.razertip.com or @razertip

Guess what…. I am an affiliate! I’ve been using this company as my main tool for burning for over 15 years now. I highly recommend them!

🔥 Use the discount code BASIA at checkout to save some money 🔥


Can you tell us a brief history of Razertip? How/when did it start? 

razer.jpg

Razertip started in 1984 when Cam Merkle was burning feather detail onto a decorative decoy woodcarving. The tool he was using wasn’t cutting it so he made his own. Through requests from friends and students it grew from there. Since then Razertip has been innovating and improving how pyrography tools and tips are made.


How many people are on the Razertip team? How many Are family members?

We have about 20 people on our team along with some additional contractors that we have established great relationships with. There are 5 family members on the team.

Can you share with us about the different machines you offer? How do they differ?

SK, SSD-10 and the P80 (and P80x expansion modules) The SK and SSD-10 are very similar units operating at 10 amps and provide great heat recovery and results. The P80 is the newest machine, it features a universal power supply, touch screen interface for unprecedented control and tip heat consistency.

Screen Shot 2020-04-27 at 2.42.22 PM.png
Screen Shot 2020-04-27 at 2.42.31 PM.png

What is the temperature range of your tools? 

Our tips can operate at room temperature and many can exceed 800 degrees celsius. Depends on the shape and size of the tip. Tip temperature is only a part of the equation...Tip heat recovery is equally important to maintain a consistent and even burn.


What countries are your burners available in, and where can they purchase them?

We ship orders worldwide. Our burners are available from dealers widely throughout the US and Canada and also in many European countries as well as Australia and New Zealand.


Where are the machines and nibs made?

Our tips and machines are made in our facility here in Canada. We try to make as much as we can here and to deal as much as possible with local suppliers.


You offer both fixed tip and interchangeable tip options, which is more popular?

The interchangeable tips are very popular for beginners and those who want a variety of tips or to try them out with less cost. Where the fixed tip pens are popular for those who want the ease of switching pens or those who only want a select few options and know what tips they like.

Screen Shot 2020-04-27 at 2.47.15 PM.png


What are the three most popular nib options you have available? And how many nib options do you offer?

We have a 5 piece pyrography tip set that is very popular as it offers much of what people are looking for to start out.


You shared an exclusive with us, TWO NEW PRODUCTS that are in the works. What are they and when can we expect to be able to purchase them?

We previewed our new Standard Pen and the P88 - an advanced version of the P80, which features 8 customizable memory heat settings as well as some other new features.


How do you recommend that pyrographers clean your wood burning tools? Does it depend on the type of nib?

Sharp, straight or flat tips can be cleaned with ease (hot or cold) using the Razertip Tip Cleaner. Rounded, curved or ball tips are better cleaned with a dense brass brush. We suggest avoiding anything abrasive, which can cause wear on the tip.


What goals do you have for Razertip? 

To never sit still… We continue to look for ways to inspire our customers and meet their needs with our tools, offerings and customer service. 

Watch the recorded live interview:


10 Steps for Wood Burning By Hand

Wood burning is such a versatile craft. Once you know the basics of pyrography, you can add pyrography embellishments to so many things. The options are endless.

You can make wall art, a personalized sign, a baby gift, a wedding present, a housewarming gift, and functional art… For some inspiration on what to burn next, check out this blog post: 160 Ideas of Things To Wood Burn Next

This is your quick-start 10 step guide to get you wood burning!

You will only need safety gear, a piece of wood, and a wood burning tool.

To get started with these, check out:

Oh and you will also need an idea of WHAT you want to burn! If you are not free-hand burning, start off with drawing your design on the wood slice with a pencil and burn over your lines with the hot tool.

If you want to transfer a design you will need a couple more things: the design, tape, graphite paper, a pen or embossing tool, and an eraser (preferably a sand eraser).

With these basic tools you can wood burn almost anything.

Designs and Templates:

If you want a design to practice with, check out our freebies page, grab a one of our Community Template Books or visit the templates store full of individual patterns for sale.


Want to watch some classes on pyrography instead? There are some you can purchase, some where you can learn from experts in the community burn live, some tutorials for free and private classes too!

Learn more about FREE online classes and tutorials
 

10 Steps for Wood Burning By Hand

For a more detailed list of tools you will need, check out our DIY Wood Burning Kit or learn more about What Wood Burning Tool is Right for Me.


1. Choose your wood and the design you would like to burn on it. Ensure the wood is dried, unfinished, and sanded smooth before you begin. Know your woods. Basswood, poplar, or birch are a great place to start. Click here to see the BEST WOOD FOR PYROGAPHY.

 
IMG_6358.jpg
 

2. Work in a well-ventilated, clean, and flat workspace. Be sure to follow all safety precautions (check out our free safety guide) for quick and easy access when you burn). Always wear a mask and turn off and unplug your burner when not in use.


3. Size, cut, carefully position, and tape your design of choice to the wood.

IMG_6362.jpg
IMG_6365.jpg

4. Slide graphite paper under the design with the darker/shinier side touching the wood.


5. Carefully trace the lines on the artwork, using your embossing tool or ballpoint pen with light-medium pressure. Don’t press too hard, otherwise the graphite lines will be hard to remove if you dont end up burning exactly on top of them.

IMG_6370.jpg

6. Peek under the graphite and design to ensure all the artwork has been transferred before you remove them. Try not to move your design around until you are sure everything has been transferred over.

 
IMG_6421.jpg
 

7. Choose your burner nib, screw it on, and heat up your wood burning tool. Once warm you are ready to burn! Check out how to choose a tool to learn which one will work for you.

8. Test your temperature on scrap wood, or the backside of your piece before you start. Go slow!

9. Pull don’t push. Let the burner do the work for you. Apply light, even pressure. Start with a lower temperature, because you can always add heat and always add more burn. Just glide. Really, go slow!

 
IMG_6885 2.JPG
 

10. Once wood burning is complete, use a sand eraser to remove any graphite lines still showing. Check out: How to get rid of mistakes and graphite/pencil lines.

Add color or a finish, if you so please, then post a photo and tag @woodburncorner in it! We want to see what you create!

 
IMG_6880.jpg


Check out the Pyrography Troublshooting Guide to find solutions to common pyrography problems


Safety in Wood Burning


Pyrography is a safe hobby if you follow the safety guidelines and protect yourself. Please read thoroughly!


Take your health & safety seriously.

 
Grab the safety Printable
 

Your Set Up:

·      Do not leave a hot tool unattended; always turn off AND unplug the wood-burning tool before leaving the room.

Be mindful of turning it off, even if you only need to put it down for a moment to grab something. Trust me, it happens really fast and because the tool it so pen-like, you can forget really quickly how incredibly hot it gets!

·      Work on a clean, hard surface: The cords can move things, turning your wood can knock things over… Make sure your area is cleared off, clean, and solid. You really don’t want to me catching something that is falling, mid burn with a hot tool in your hand!

·      Work in a well-ventilated area: fans and/or fume extractors are always a good idea! (Position the fan right next to your work, facing away from you to pull smoke away from your face.) I also turn on this air purifier near my workspace. It’s got a washable carbon filter and easily replaceable hepa filter. It really takes away any doors almost immediately!

· Pull your hair up: if you have long hair. Any loose clothing or fabrics around you should be tucked away as well. Sparks can fly!

·      Use a set of pliers and a ceramic dish for hot tips: This will allow you to safely switch, remove, and temporarily discard hot tips without burning your table (some nibs can easily roll around).

Screen Shot 2020-05-04 at 11.47.29 AM.png

·      Make sure you have a solid docking station to put the burner down on, ensuring it doesn’t move around; tape it to the desk if necessary.

·      Teach children about safety. Kids are curious so make sure they know they can seriously hurt themselves when touching any metal parts. When your wood burning tool is in use; never leave children unattended around your work station. Kids love to press buttons (animals can also step on buttons and switches)!! Unplug your machine from the outlet if you’re not burning.

Your Wood Choice:

·      Make sure the wood you choose is dried, sanded smooth, and not chemically treated (no stains or other finishes). This includes your own finishes like watercolours, paints, gold leafing etc. Always do your burning first and then add in your colors and finishes. Check out the blog post about which woods to avoid burning on.

·      Check wood toxicity of the wood you will be using prior to burning a new piece. I like wood-database.com. Also, never ever burn on something that has a finish on it (any coatings, paint or even stain…). Always add your mixed media after you burn and if you missed it above, make sure to check out the blog post about which woods to avoid burning on.

·      So which woods can you use? Check out the blog post about the Best Wood for Pyrography.

The Smoke:

image0.jpg

·      Always wear a mask with a rating of P-95 or preferably higher. There are many different options; do some research and make sure the rating is high enough for smoke. Look for masks with carbon filters and don’t cheap out on this one!!

Which one do we love? RZMask is a great company for many reasons. Their masks are soft and super comfortable. They are reusable (change out the filter and wash the shell - this will save money and the environment)! Plus, they’ve got lots of styles and colours to choose from.

I personally like the M3 (like in this photo) with the thick strap because I always wear my hair in a high bun. The M3 has the option to switch around the straps to a double strap on each ear and a double strap along the back of your head. RZMask has a variety of strap options and sizes for different sized heads, hairstyles and shapes…

·      As mentioned in the set up section above, ventilation is crucial for pyrography. Even though you have a mask on, the smoke is still lingering in the room you are burning… I use a small fan which pulls away the smoke from my face, however, to protect the lungs of those around you, you have a couple options. You can choose a room air purifier (again, make sure it has a carbon filter); I love the Winix brand - it is quiet, looks good and removes all the smelly stuff from the air really quickly!

If you are travelling and want something smaller, we suggest the Razertip Razaire Mini - Smoke Extractor. You kind of have to be close to the machine (I usually set this up on my wood slice), but it is light and portable so its perfect when I am on the go!

🔥 Use the discount code BASIA at checkout to save some money on your purchase 🔥


·      Avoid smoke inhalation and eye irritation by working with your face tilted to the side of the wood being burned (wear eye protection if you burn hot and tend to sit close and lean in to your work).

If you feel any dizziness or headaches coming on while burning, stop and assess your situation.

Take breaks often!

Always follow all safety precautions set by the wood burning tool manufacturer.


To learn more about pyrography, get inspired and grow with a community of woodburning artist, join us in the FREE Burn Club!

join the burn club


Burnt October 2018

These Burnt Month Challenges all started with #BurntNovember back in 2017!

Burnt October 2018 was amazing! Held on Instagram, #burntoctober is an every-other-day art challenge for wood burning artists of all stages. It was created for artists to push their craft, expand their portfolios with new art, gain followers, try new things, meet fellow pyrographers, sell art, and have a lot of fun. Scroll down to see the featured artists!

This is a sponsored challenge and post from our friends at Walnut Hollow, the amazing makers of excellent wood surfaces and wood burning products like the wood and burner in this photo of the amazing prompts we have for you next month.


Thank you to all of you for joining in the fun. Can’t wait for the next one!

Click here to view past challenges!

These challenges are a great way to hone your skills, grow your following, try new things, and meet your fellow wood burning artists. #communityovercompetition

Interview with Kayla from Rustic Wood Supply


Screen Shot 2020-05-07 at 10.15.56 AM.png

Company Name: Rustic Wood Supply
Name and Role: Kayla & Seth Stallard- Owners
Location: Murphy, North Carolina
www.rusticwoodsupply.net and @rusticwoodsupply


When and how did you start Rustic Wood Supply?

We started Rustic Wood Supply in 2012. We were planning our wedding and I was trying to get ideas for decorations that we both liked. Being from the mountains, we both like the "rustic, country" look. I found some wood slices on Pinterest and began to show them to my husband. He said, "I am not buying those when I can make them."  After researching some on Etsy, we realized that there was not many people selling them so he decided to give it a go. His idea was to just make $50 or so here and there just for a little gas money to get back and forth from college. Soon after, I was quitting my job at a hospital to help him. Little did we know just how much God would bless us!


How many people are on the team at Rustic Wood Supply?

It is just me and my husband. He gets all the trees and cuts all of the wood. I do all of the computer work, packing, shipping, and grinding/sanding all the wood.


How and where is the wood sourced?

All of our wood is locally sourced. We work directly with a couple of loggers and sawmills. Sourwood is a small tree that has no benefit for the logging industry. So we go ahead of their crew and get what trees they are just going to run over. We try to do this so we can make use of something that will simply be left to just rot. We live in an area with vast amounts of mature standing timber. In order to directly help wildlife and keep the mountains healthy, certain portions are strategically logged to promote new growth and vegetation to help suply an abundance of wildlife and mountain species. Logging is often looked down upon, but it is actually very beneficial to give back to earth. We also do storm work. We do not get many strong storms because of the mountains around us, but when we do, we use downed trees from these events.

What kinds of wood varieties do you offer?

Our main two wood species are sourwood and poplar. We do work with pine and can access other woods if preferred. However, most of our customers prefer the sourwood as it so easy and good to work with.

Can you show us some of your products?

CE754AFD-47D8-48F9-BF5C-16E68413DDC8.jpeg
7B3AB7D8-BD95-4CF2-8E97-5068A32EF31F.jpg

How do you prep the wood? Is it dried? Is it sanded?

Everything that we cut is cut green and then air dried. We do not have a kiln. This is a process used by large companies to mass dry more wood at a faster rate. Everything we do is cut to order and air dried. It might be a little slower than a kiln, but still very accurate.  Acceptable percentage in kiln dry wood is 8-10% and air dry percentage is 1-6%. We do not have a very large inventory as we like to stay personal with our customers and take on a large amount of custom orders.  All of our wood is sanded smooth. The small slices we offer are cut smooth, and the larger live edge pieces are sanded down before sending out.

 
E7D813BF-39CA-4D10-BA9C-6E5F7FC80711.jpeg
4F352C49-5483-4A61-850A-9FEFE672B85F.jpeg
 

What are your recommendations for wood storage?

We recommend just keeping the wood stacked and out of the direct sunlight. Also, extremely hot areas can cause some of the wood to crack so stored in a cool, dry area is preferred.

When did you discover that wood burning artists loved your wood?

Not long ago, we started trying to expand our social media. We quickly realized that there was a large wood burning community on instagram. It was about 7 months ago when most of our activity on instagram showed us that wood burners really loved our products. We have had a lot of great feedback from the wood burning artists on our sourwood slices. A lot of people had never heard of sourwood, but customers are saying that it burns beautifully.


What percentage of wood would you say goes to wood burning artists?

I would say about 30%.


What other things do you see your wood slices being used for?

A lot of our slices are used for weddings. They use the round live edge pieces for centerpieces, cake stands, or food decor. In the fall, we sell thousands of our small coaster size slices for companies to turn into ornaments. We have had several customers create a large wood slice wall. They have all turned out beautiful! A lot of our slices are used by engraving companies. The slabs have been used for home decor signs, serving trays, and even interior design.

B93355C3-D583-4EFD-8C4F-F5415D758FD4.jpeg
4A5C105B-56AE-43E4-9C2C-EB01D3E5B1C5.jpeg
 

Are you shipping now and where do you ship?

We are shipping now. We are just limiting how many days that we do ship. We have cut down to only shipping about 1 day a week. We do offer shipping everywhere in the world. International shipping can be expensive, but if the customer is willing to pay for it, we are happy to do so! The only country we have had problems shipping to is Australia. They do not seem to let the wood through customs and it ends up getting sent back to us.


Any new products in the works?

We are working on offer some free standing slices. We already make them for customers, but they are just not on our website yet. We are also going to launch new sourwood mini slabs. They will be live edge on both sides ranging between 3 and 5" wide and around 1 ft long. 


What goals do you have for Rustic Wood Supply?

To us, being personal with our customers is huge and means a lot to us. As just a husband and wife team, we like to know our customers and engage in the community. We like to personally see what happens with the wood we cut and really enjoy seeing what people turn it in to. We pride ourselves in having the best quality small wood slices as well as the most affordable prices and we always want that for our customers. We also would just like to get our products out there and make people aware of the quality of our wood even though it is not as common as others.  Our goals are to just stay personal with our customers and put our best work in for them to ensure the best quality in our products.  We are at a point where we have grown some and people do know about our company, but at the same time, we enjoy being the small business that we have become and just hope that we can simply support our little family of three!


A Case for Unfinished Woodburned Art

Do I need a finish for my wood art?

Some say it is a big no-no to not finish a wood piece, while others love it. I am here to build the case for the unfinished, un-lacquered, un-stained, un-oiled, as-is, natural, raw woodburned art.

IMG_2008.jpg

What happens to the wood over time?

The first piece I ever created, my wedding name sign, back in 2011 still looks as good as the day I burned it. I didn’t finish it with anything. No oil, no stain, no varnish — nothing! It has been hanging on my wall for almost 10 years. While my craft has improved, this is still one of my most treasured burned pieces and I love that it has held up to time. But, I also love that even if it didn’t hold up or if it eventually fades, I can easily add to it whenever I please.

I am not saying that there isn’t a time and place for finishes, I actually think they help in many many cases, but that is for a different blog post: Finishing Your Wood Burned Art: How and Why to Finish Your Wood Burned Art.

For my wood burned art pieces that will be hanging on a wall, I prefer to leave it raw.

IMG_2014.jpg

7 reasons why I leave my woodburned wall art raw:

  1. I love the contrast that the light colored wood has against the darkened burn lines. When almost any finish is added, that contrast diminishes.

  2. By not finishing the piece, you are able to go back and add or edit the piece later on, you can touch-up areas if they fade over time without any prep work or damage to the original piece.

  3. It’s cost effective! It doesn’t cost any money to leave the wood as-is.

  4. You aren’t going to ruin it by choosing the wrong finish or by applying your finish improperly. Nothing is worse than ruining a finished piece in its final step.

  5. It won’t yellow, crack, or chip off over time. It also will collect less dust and dirt than your oil based finishes.

  6. It’s not going to ruin any color you add to your piece. It won’t smear, discolor, or fade any mixed media you add.

  7. It’s a time saver! You don’t have to prep the surface, add the finish, sand between coats, and wait for it to cure.

This is not to say it doesn’t come with its disadvantages, but for wall decor, that is out of sunlight, and not being touched, I think it is a fantastic option.

There will be plenty of people that disagree, and that’s ok. You go right ahead and finish your piece, but for those wanting to leave it raw, here is your permission.

IMG_2013.jpg

What are the disadvantages of leaving your woodburned art unfinished?

There are obviously some cons to leaving the wood raw. It doesn’t protect against - oil, fingerprints, dirt, dust, dents, UV, or water - but a lot of finishes don’t either.

For any kitchenware, I would never suggest leaving it raw. ALWAYS oil your kitchen wood items with food-safe finishes. The oil will protect them and keep them looking beautiful.

Anything functional art that is going to be handled, touched, and used I recommend applying a finish. This will help protect it from fingerprints, dents, water and damage. Check out: Woodcare 101: Preserving Your Pyrography Art

Considering unfinished?

I hope my case for the raw, unfinished, natural, as-is wood art has convinced some of you to give it a go. To leave your art unfinished, save a little time, money and frustration. For those beautiful woodburned art pieces that are going to decorate someone’s walls, to be admired, but not touched, consider leaving it raw.

IMG_6885.JPG
 

Check out these other helpful blog posts

Adding Watercolor to Wood

Getting kids involved with your pyrography

Transferring Images Using Heat and Without Using Heat