wood1

Building Your Website with Squarespace

In today's world, having a website has become an essential part for any business or individual looking to establish a presence online. A website can serve as a digital storefront, a way to showcase your work or skills, or a platform to share your ideas and opinions with the world. With so many website building platforms available, it can be overwhelming to choose one that meets your specific needs.

Why Squarespace?

Basia here. I would like to take a moment and rave about Squarespace. I have built websites on several different platforms including Wix, Shopify and Wordpress. These platforms are probably my top choices compared to other platforms I’ve used in the past, however they do not hold a candle to Squarespace.

With Squarespace, you can easily create a website that looks and feels professional, and you won’t have to worry about hosting, security, or any of the other hassles that come with running a website. It’s easy to use (with a shorter learning curve than other platforms) and their support is unlike any other!

I love it so much that I am an affiliate: Go to squarespace and Use the code BASIA at check-out to receive 20% off your annual subscription (for your first year).

Read on to see 8 reasons why I love Squarespace…

8 Reasons Why I Love Squarespace

  1. Easy to use

    One of the most significant benefits of using Squarespace is its ease of use. Yes, there is a learning curve, like with any new platform or app. BUT! compared to any other site I’ve used, this has left me the least amount of frustration (by far). They have a drag-and-drop interface which makes it simple to design and customize your website without any coding knowledge. It also offers a variety of templates to choose from, allowing you to create a professional-looking website quickly and makes learning the platform super easy.


  2. Professional templates

    Pretty much all websites come with a bunch of templates these days. Squarespace makes it easy to choose one according to what you want to do (i.e. art portfolio, e-commerce store, blogger or influencer etc…). Once you choose one, it’s drag and drop from there. These templates are designed to be responsive, meaning they will adjust to the screen size of the device being used to view your website, ensuring that it looks great on any device - bonus!


  3. E-commerce capabilities

    Squarespace makes it easy to set up an online store, allowing you to sell physical or digital products, subscriptions, and services. Squarespace's e-commerce capabilities include inventory management, order tracking, and shipping integration with leading carriers such as USPS, UPS, and FedEx. Squarespace also supports multiple payment options, including credit card payments and PayPal. What is really cool too is that you can integrate any products throughout your site. Meaning you can insert a product beautifully into a blog post or your home page if you want. No need to keep the shop front the only place to promote your stuff.


  4. Search engine optimization (SEO)

    This is a BIG one! If you don’t know what SEO is or why it’s so important, read my blog post on justpinit.ca —> What is SEO and why is it so important? Squarespace is designed with SEO in mind! Your website will be optimized for search engines right out of the box. Squarespace's templates use clean code and are optimized for mobile devices, both of which can improve your website's search engine rankings. Squarespace also offers features such as customizable page titles, meta descriptions, and URLs, which can further improve your SEO. These features are super simple and clear to use so you do not have to learn a whole new language or a separate platform.


  5. Built-in analytics

    Squarespace offers built-in analytics that allow you to track your website's performance, including metrics such as page views, unique visitors, and bounce rate. These insights can help you understand how your website is performing and make data-driven decisions to improve it.


  6. Squarespace is cloud-based

    All of the website building tools and resources are hosted on Squarespace's servers, rather than on your local computer. What does that mean?

    • There are no software installations required. All you need is an internet connection.

    • Automatic updates. You don't need to worry about manually updating your website builder or plugins to ensure they are up to date.

    • Scalability. If your website grows in popularity and starts to receive more traffic, Squarespace can handle the increased demand without any additional work on your end.

    • Security. The company employs advanced security measures to protect its servers and user data, including SSL encryption and regular backups.


  7. Updating your website on the go

    The app for the platforms itself is amazing - I am able to change (using the squarespace app on my phone) the price of a product while I was out and about. I was able to edit a link and spelling mistake in one of my blog posts directly from my phone! I can check the analytics from my phone and orders coming. I can even refund a customer immediately from the app on my phone without opening up my computer!! This accessibility has saved me so much stress when I was not around my computer and needed to make immediate changes.


  8. Support

    Squarespace offers 24/7 live support to its users, making it even easier to get help when you need it. You can contact them via live chat or email, and they will respond promptly to help you resolve any issues you may be experiencing. This level of support can be particularly helpful for individuals or businesses that are new to website building and may need some guidance along the way.

    Before I use their live support when I get stuck, I simply google my question. Often I am lead to the Squarespace forum but there is also a lot of information sharing on YouTube (if you prefer to watch versus read - especially when working in a place you don’t understand, watching people solve problems is very useful). There are loads of people using squarespace which makes solving your problems easier by having a large pool of people willing to help!

I seriously love Squarespace.

Their older version (7.0) was a little more simple and easier to use than the 7.1 version that is currently available, but even this newest version is easier to navigate and problem solve, compared to any other platform I’ve used before.


Here’s how I can help you save money:

Use the code BASIA at check-out and you will receive 20% off your annual subscription (for your first year).

Lettering Tips and Tricks for Wood Burning

In the short video below these written instructions, I cover some quick tips and tricks to make for cleaner lines with lettering when it comes to wood burning on wood.

Please ensure you always follow the safety precautions outlined by the wood burning tool company and read our blog post for more tips and tricks on staying safe while burning (including a free downloadable version that can serve as a great reminder): Safety in Wood Burning

IMG_4705.PNG
  1. Start with a clean desk, and unfinished, dry, and sanded smooth wood. A smooth surface will make for a cleaner burn.

  2. Make a clean transfer. I like to use the heat transfer technique for lettering, so that I have a perfect transfer. Be sure to flip your text or print in reverse first. If you are drawing directly on the surface, use a very light hand. Also check out how to transfer your image without using heat.

  3. Make sure your nib is nice and clean, and scrape it off throughout the burning process. Test your temp before you start. Check out the blog post on tool care and maintenance to see how I keep my tools clean and ready to burn.

  4. Start in the middle of the word. That way if you are burning a little hot, it won’t show as much as the beginning of the word.

  5. Then start with your outlines. Get a clean outline of your words first, which then allows you to go back in and fill in without fear of going outside the lines or mistake.

  6. Slow and steady, as usual. Pull don’t push. Let the burner glide on the surface. For more tips and tricks on burning, check out this blog post and scroll to the bottom to get some super helpful pieces of advice to help you burn smoother.


Looking for designs and templates to practice burning with?

woodturning-patterns

Check out our Community Template Books

or The Templates Shop where you can find individual designs and royalty free template patterns too!


Are you new to wood burning and looking for a tool?

I recommend the Walnut Hollow Versa Tool as a starting point. Get it and all your supplies for this project in The Wood Burn Box or check this blog post to learn which tool is best for you!)

What lettering tips do you have? What have you found helpful? Please share in the comments.

Pyrography on Odd Objects

Alternative Surfaces to Burn on.png

Will it burn? Pyrography is such a versatile art! You can burn on almost everything.

I have been working on a little passion project over on TikTok of experimenting with pyrography on all kinds of odd things. It has been so much fun.

IMG_2911.jpg

I usually involve my kids in the process of filming, design, editing, etc… They have been having as much fun as I have been having at using my wood burning tool in new and weird ways.

So far, we have been burning on a lot of different food items, and it has been so interesting to see what burns well, and what does not. I have plans to try burning on so many different objects, so stay tuned for all the weird and the fun.


List of what I’ve burned on:

  • a hundred dollar bill

  • paper

  • antler

  • lime

  • pasta

  • mango

  • tortilla

  • radish

  • canvas

  • onion

  • lasagna

  • leather

  • cantaloupe

  • watermelon

  • orange

  • carrot

  • toast

  • potato

  • egg

  • apple

  • pasta

For me, making a lasagna with Garfield’s image burned into it has been my favorite. I have also burned Shrek’s face into a tortilla, and burned on mango! Check it out.

I know I am not alone in my experiments. I have seen pyrographers burn on all sorts of odd objects. Who said the wood burning tool was just for wood, anyway?

What have you tried to burn on? What has been your favorite?

As always, safety is important. Protect yourself and those around you when experimenting, and use your best judgement when choosing things to burn. I do my experiments outdoors, with a mask and fan.

Check out this blog post on Common Wood Types to Avoid Burning on!

and Feel free to download our free guide to safety, here.

For more ideas on fun random things to burn on, follow my Pinterest board: Alternative Surfaces To Burn On.

WANT TO LEARN MORE ABOUT WOOD BURNING AND IMPROVE PYROGRAPHY SKILLS?

Learn everything you need to know at your own pace from your home with The Complete Wood Burning Toolkit.

Grow with the community: Join Burn Club+, a place where you can ask questions, and get the full answers, a place of fun and learning.

Check out my one-on-one creative business coaching to boost your business in the right direction.


How to Collaborate Effectively

collaborating.jpg

Let’s talk about collaboration. Collaborating can be an excellent way to grow your audience and get your work in front of fresh eyes. It is an excellent marketing tool and an excellent way to make some great friends too.

Collaboration can look like a unique one-of-a-kind piece that you create with a fellow pyrographer, or a mixed media piece with artists from other fields, or a collaborative effort with companies. I have found success with all three. Click here to check out my collaboration pieces I have completed with other artists as well as companies I have partnered with.

When you get other people and other accounts talking about your work, it will grow your feed much faster than if you are the only one talking about it, and this is why I believe that collaboration is so fantastic, and why I attribute my past collaborations to a lot of my successes.

Collaborations can be scary and difficult to navigate, but I have some suggestions for you.

  1. It needs to be a win-win-win situation. Be sure to set it up that way so that it is worth it for the person you are collaborating with for them and for their audience. It needs to make sense for all parties involved. If you are approaching someone with an idea, make sure you are clear on what it is you are asking of them and what it is you will be doing/providing.

  2. Lay out all the details and agree to them before you continue forward. How are you dividing up expenses and profits? Where are you posting it? For how long? This should all be discussed before anything is made.

  3. Communication is key. Have a backup form of communication if possible. If you are: running behind, have questions or concerns, don’t like something, or have an idea, I encourage you to speak up. Communicate your concerns and ideas with your collaboration partner. It will allow everything to run smoother.

  4. Keep their aesthetic in mind when you are deciding if they are a right fit, and when you are coming up with your design/idea.

  5. Workout your marketing strategy ahead of time. How many times will you post? How will you talk about it? Will you do a joint LIVE?

  6. Follow through. Nothing is more frustrating than working on a group project with someone who is not pulling their weight.

But HOW?

Series/Collection Sale: Sell a collaborative collection on one person’s site, while the both of you promote it. Collaborative collections are fantastic, because you put in all the work for a collaboration and only have to ship one time, but create several pieces.

  • Use whoever’s platform is larger to hold the sale whenever possible.

Giveaways: These are fantastic. This is a great way to motivate followers to follow the other members of the collaboration. Make sure the item(s), the rules, the photo, and the text are all very clear.

  • Have people entering interact beyond tagging friends. Ask them a question, connect with them. It will feel more genuine for everyone, because it will be. Ask them to share about it too, to spread the word.

Auctions/bidding: Doing a blind/silent auction is also a great way to have a successful collaboration. You can also raise money for charity/cause. This raises awareness of the charity, but also of you, your art, and your values as a small business.

  • A piece of mine that sold for the highest amount was from a blind auction sale. Don’t discount them, but do know that you need to promote them a lot; well before, and during the auction.

Promoting Products: Collaborating with companies can be a great way to make some extra money, get some great products, and extra exposure.

  • Know what is expected of you. Read any contracts, and be carful of exclusivity. Only choose brands that make sense for your brand. Do your research.

I hope you consider bringing collaborations into your business as a regular practice. I think you will find the many benefits that that can come from them.


Let’s work together!

Are you a business or an artist that would like to collaborate with Wood Burn Corner or with the wood burning community? We would love to hear from you!


Looking for more creative business tips & tricks?

For more pyrography tips and tricks and to learn wood burning at your own pace from your home consider The Wood Burning + Business Toolkit

Grow with the community: Learn more about Burn Club+, a place where you can ask questions, and get the full answers, a place of fun and learning.


Burnt Challenges

Screen Shot 2020-12-08 at 11.10.11 AM.png

It all started with #BurntNovember back in 2017 (view past challenges here).

It’s a call to all artists to create a piece of artwork based on a specific word/prompt. The challenges are living in the wood burning community on Instagram.

There have been three types of Burnt Challenges: Burnt Month, Burnt Day, and Burnt Week. These challenges are a great way to hone your skill, get creative, grow your following, try new things, and meet your fellow wood burning artists: #communityovercompetition


Burnt Months

Screen Shot 2020-07-07 at 12.36.00 PM.png

Burnt Month challenges are an every-other-day challenge that run for the entire month. Every prompt you participate in counts as an entry to be featured (on our blog, on Instagram and Pinterest) and enters you to win pyrography goodies and prizes!

All you have to do is follow the prompt for the corresponding day of the month, and post your piece on your Instagram account.

It’s always really cool to see peoples interpretations of each prompt as well as each persons unique style, technique and art coming through!

Check out past Burnt Month challenges:


Burnt weeks

Screen Shot 2020-07-16 at 7.35.38 PM.png

Burnt Week was held back in May 2019 and was a weeklong challenge. Each day there was a new prompt, sponsored by an amazing business. The Burn Club Retreat, Walnut Hollow, Truart, The Pigeon Letters, Howard, Arteza, and Tekchic sponsored last years challenge. Hoping to do another weeklong event in 2021 complete with prizes, just like last year.

Check out past Burnt Month challenges:


Burnt Days

Announced on Mondays on Instagram, we provide you with a prompt. You have the entire week to complete the challenge. These challenges will also be announced earlier in Burn Club and Burn Club+ so join in on the fun by joining us there!

Check out past Burnt Days by following #BurntDay

Screen Shot 2020-11-10 at 9.33.32 AM.png

Sign up for our newsletter to see when the next challenge is and join Burn Club+ to get your prompts early!

or follow us on instagram and stay tuned for the announcement!


Want to join out Burnt Challenge Pinterest Board?

Click Here to go to the board and send us a request. You can post your burnt challenge artwork there and see other art that was part of these challenges!

wood burning inspiration
 

Creative Woodburner - 4 original nibs and how to use them

Screen+Shot+2019-01-24+at+8.40.02+PM.jpg

This video goes over the 4 different nibs a.k.a. tips or points (Drawing Point, Rounded Shader, Universal, Shading Point, Ball Point) that come with the Creative Woodburner from Walnut Hollow, and how each can be used. I give examples of how the machine works and is set up, and how the different nibs can be used.

Make sure to check out how to use the 4 NEW nibs/points from Walnut Hollow

Get yours Here (use WBC15 at checkout for 15%off!)

The Creative Woodburner features the art of WBC’s Rachel Strauss on its packaging and in the instruction manual/inspiration guide. It can be found in store at Joann, or online at Home Depot, Walnut Hollow, Amazon, and Joann. This burner is comfortable to hold, burns really well, and heats and cools quickly.

 
Screen Shot 2020-04-29 at 7.17.24 PM.png
 

To learn about different wood burning machines and figure out which one is right for you, visit: What Wood Burning Tool is Right for Me?


Start Here if you are NEW to Wood Burning

IMG_2105.JPG

So you are new to pyrography. WELCOME!

We are so glad you are here. Wood burning is such a versatile, relaxing, useful and wonderful hobby, and we’re so excited for you to discover it all.

The first step to learning about challenges, events, community news and anything happening in the pyro world is to sign up for out Free Burn Club Newsletter.

Keep reading to learn about the basics to get you started. We wanted to put together a place where you can go to get all sorts of great information in one spot.


Safety:

PLEASE start with the Safety Guide. It’s a guide on how to practice safe habits when wood burning. Really, don’t skip this. It is important for yourself and those around you and there is a free printable you can refer too and it also acts as a good reminder!


Tools and Accessories:

The Wood Burn Box - A box with tools and accessories we recommend beginners to start with, all in one place! We’ve put the essential (and some odd but helpful) tools together with some wood slices and complete with instructions and everything else you need to easily start this relaxing hobby, right when you open the box!

If you want to customize the box, check out the DIY Wood Burning Kit. It is basically a list (with direct links) of everything in The Wood Burn Box but with options (i.e. variety of recommended tools, variety of wood companies and odd tools you can choose or skip if you already have them at home).

Research your own tools. Click here for a guide on What Woodburning Tool is Right for Me?


Our Classes:

Check the Online Classes page for video tutorials, recordings to masterclasses and some pretty cool. unique pyrography events, as well as mini freebie blog posts with project ideas and instructions on how to wood burn.

Prefer to learn at your own pace? Check out the online Wood Burning Toolkit. The Toolkit is self-guided and taught by us and other fantastic pyrographers in our community. It is a massive collection of pyro information in one spot. You can work at your own pace, on your own time, at your own speed, and in your own order. There are audio lessons (transcripts included), written lessons, video and picture tutorials, as well as PDF printables to go with the entire Toolkit. The intention is having everything all in ONE place where you can go to find tools, resources, and sound advice for all things wood burning.

For a quick start guide, check out 10 Steps for Wood Burning By Hand


Our Books:


The Wood Burn Book includes detailed instructions on how to wood burn, tools, tool care, wood types, wood prep, adding color, finishes, and is filled with fun projects.

pyrography-templates-book

The Wood Burn Community Book of Templates is an intro to pyrography book with traceable templates created by our community for the community.


Templates Store

Unique patterns to practice with as well as Royalty Free designs!


Pieces of advice to help while burning:

how-to-woodburn-tips-and-tricks
  • When in doubt, turn down your burner and go slower.

  • Never leave a hot burner unattended. Always turn off and unplug.

  • Pulling, not pushing, is generally easier. Either way, don’t press hard: let the heat do the work.

  • Let the burner glide across the wood.

  • Turn your wood as you burn to keep a good vantage point.

  • Always use dried, sanded, unfinished wood. Check out Common wood types you should NEVER burn on.

  • Any color or finishing gets added after you are completed burning.

  • Check out these transfer techniques: Transfer an image onto wood using heat or without heat.

  • Join the wood burning community and not only will you learn all about wood burning, you will also make some really amazing friends.

  • Read the Burn Club emails and the blog!

  • Ask for help. Don’t be afraid to ask for help.


We can’t wait to see what you make. Comment if you have any questions, need advice, want to give advice, or want to show off a finished piece! We are here for it all.

Happy Burning, friends.


The Wood Burn Book - Behind the Scenes

The making of The Wood Burn Book was not always so pretty. Let me tell you about one part of the book making process; the making of the cover.

The cover that I created for my book proposal, and my original title.

The cover that I created for my book proposal, and my original title.

We had 3 photos shoots, and many brainstorming sessions, lots of mocked-up designs, and meetings specifically for the cover of the book. I didn’t realize how many eyes, how many opinions, all the different things that people think about when coming up with a book cover design. I had my vision, my aesthetic, and my desired look. I went to several book stores to look at different book covers, to see what stood out to me. I worked with a photographer and a product stylist who also had their aesthetic and preferences. My publishing house had many voices within it with differing opinions about what works, what sells, what gives the best glimpse into what the reader gets. There were multiple meetings specifically about the cover of my book. Then, there were surprising inserted opinions from buyers (think large retail stores) that had requests based on how they stock their shelves, and what their customers prefer to buy. I don’t know if you have heard the expression, “too many cooks in the kitchen,” but that was exactly what happened. The cover photo ended up being the very last thing to get done for the book, even though it was one of the first things we ever shot.

IMG_3268.jpg

After much discussion, many rejected layouts by myself and them, and learning what my publisher wanted, plus what I wanted, plus what the buyers wanted, I sat down on the floor of my office, and laid out options for a cover. I took a photo, and then rearranged. Took another photo. Made adjustments. Took another photo. And another. And another. By the end, I had carpet burns on my knees, but I ended up with the layout for the cover of my book! Something we all could agree on. FINALLY!

At this point, Coronavirus had hit the United States, and my photography team could no longer safely shoot the cover, so I shipped off all of the pieces to my publisher’s in-house photographer to get the final shot.

I am pretty pleased with the final look, and was glad that I stood up for myself throughout the process. It was nice to be able to come up with a compromise that worked for everyone, even if the process was a bit painful.

Interview with Brandy from Mark it with a B Gallery LLC

Name: Brandy Roels

Burning since: 2016

Location: Michigan, US

@markitwithab_gallery, etsy and www.markitwithabgallery.com

Screen+Shot+2020-06-07+at+11.50.18+AM.jpg

What does your shop specialize in/offer?

This is Brandy Roels, owner and artist of Mark it with a B Gallery LLC. I run my small business out of my in-home studio in Michigan, US. I focus on woodburning custom pet and people portraits, as well as niche fan art, fantasy art, and wildlife art. All my woodburning is done completely by hand, and I print prints of my work straight from my studio.

Screen Shot 2020-06-07 at 12.08.31 PM.png

Have you always been an artist?

I started drawing at age three (always animals) and admired pet portrait artists. Art became my passion, and I continued taking every art class offered up through high school and private art lessons outside of school. In 2015, I graduated Summa Cum Laude from the Savannah College of Art and Design (SCAD) with a BFA in Illustration. My main focus was painting realistic portraits. 

I officially started my business in 2016 by offering portraiture painting, candle-making, sculpting, card-making and woodburning. It was way too much! I narrowed it down to just woodburning a year later, making fun signs, cooking utensils and cutting boards. However, I missed my background in portraiture and found a way to combine portraits and woodburning. 

How did you find your distinct artistic voice?

I stopped making the types of pieces I thought people would buy and started making pieces that truly expressed me. I love creating subject matter of animals, fairies/fantasy and fan art from films/tv. I also wanted to start sharing more of myself in my pieces. Not just making pretty pieces but making emotional pieces - expressing my emotions and evoking emotions for the viewer. 

Style:

My art style just kind of happened one day. This one is hard to explain. I remember creating a realistic bunny illustration, and I did not like the way the fur sort of got lost into the color of the wood. So, I added an outline around the exterior form of the bunny, like how tattoo artists draw outlines. Thus, my classic outline began!

Screen+Shot+2020-06-07+at+11.55.59+AM.jpg
Screen Shot 2020-06-07 at 11.56.26 AM.png
Screen+Shot+2020-06-07+at+11.56.45+AM.jpg

Is it scary to be vulnerable with your art? To put real life into it? Is it therapeutic to create? Does it feel different when you are creating those pieces versus a dog portrait?

I know I’m not the first person to say this, but being vulnerable is hard. It almost feels easier to just keep things inside to yourself. I just got tired of doing that! The only person I had been completely vulnerable with was my husband, but I still felt alone and like I was bothering him by re-bringing things up I had not moved passed. Of course, he was not bothered and is a very understanding, kind man. 

I started sketching what I was feeling and called it “nonjudgmental sketching” (just sketch, don't think and don’t judge myself on what I draw). One day, I created a full, finished woodburning and painting piece ("Mother" - my first pregnancy piece based on one of my miscarriages). From there, I decided I would share it on social media and tell my story. After doing that, I found I was NOT alone, people were NOT judging me based on what happened, and people actually thought my piece was beautiful and powerful. A huge part of me healed that day. 

Now I make personal pieces to express my deep emotions or unsolved past trauma. I found it does help heal me and certainly is therapeutic. My creative process is more mellow and slow, versus my fast hatch-marking fur technique I do for pet portraits. I still have the same focus for pet portraits, but because my attachment is different my process is faster for pet portraits. 

What helps you get into a creative headspace? Certain music? A food or drink? A candle? Is there a routine to it?

Honestly, nothing specific! I usually just automatically start feeling the need to be creating/working or doing SOMETHING with my hands. I set my own schedule but like to start working at around 9 AM every morning and go until my husband gets home at 5 PM. Even after he comes home (and we are trying to relax), that need to keep doing something with my hands continues. I have tried "making" myself work on a hobby in the evening instead of continuing regular work - to keep me sane.

What percentage of time do you spend on actual wood burning versus business running? 

I spend most of my time woodburning/creating for sure. When it comes to business upkeep (like making an email newsletter or updating my website or financial spreadsheet), I dedicate a specific day (or couple of days) in order to give it my full attention and just get it done. It’s definitely not the most fun part, but it is needed and should receive my full attention. 

What things have you implemented that makes your whole business run smoother? What tips or pieces of advice can you give someone who would like to make their business run a little more smoothly?

It was one of those periods of time where I realized I’m trying way too hard. I decided there needs to just be one way for doing each aspect of my business. For example, I kept changing my creative process leading up to creating a custom piece (too much back and forth with the customer) or changing up my shipping/packaging. Now everything I do just has one way of getting it done. For advice, ask yourself if you’re happy with the way you do everything. What are you not enjoying? What can be made simpler/combined AND keep you happy?

One main thing that helped me in “being more official” was keeping track of ALL the money I made and spent. My husband created a spreadsheet for me (he’s a techy engineer), where I can input everything into categories. These include: Online Income, Commission Income, Fees (like processing fees taken from my online shop), Donations (I make), Office/Studio Purchases, Advertising Purchases, Shipping Purchases, etc. It’s exactly like balancing a checkbook! Mine is set to monthly, and I upload each purchase or sale immediately. When tax time comes, I have everything sorted and my sales tax I owe already calculated to pay my state. 

What goals do you have for Mark It with a B Gallery? Any art goals? 

My main goal is to open a gallery and store space where I could set up my studio to create all my work, sell my work/other woodburning artists' work/responsibly sourced pet and baby goods, and have a classroom to teach art classes/private art lessons. I already have the business plan and cost sheet in place!

 
Screen Shot 2020-06-07 at 12.22.10 PM.png


Any lessons learned the hard way that you want to spare someone the time? 

1. Stop saying yes to everyone! Make sure you can actually create the piece OR that you really want to make the piece. I actually stopped accepting truly custom pieces, meaning things I don’t normally create. I understand needing the money, but I honestly value my happiness more. I usually ended up undervaluing the cost of those custom pieces too!

2. Woodburning art fades NO MATTER the sealant as soon as it’s touched by the sun. This is why I started making prints!

3. Clean the tips!! I’ve damaged quite a few tips from never cleaning the carbon debris or using a sanding block to try to wipe it off. It just sands away your tip shape. I use a leather strop with polishing compounds.

Deserted Island, with power question. You can choose ONE

Burner: Colwood Detailer

Nib: BALL POINT

Type of wood: Basswood

Non-essential tool: Quinn (husband)

Why the ball-point? Do you think you will ever use another nib?

I started out with Walnut Hollow’s basic green woodburning unit, and I would only use the Cone Point and Flow Point. It really was not until I upgraded to Walnut Hollow’s Creative Wood Burner with wire tips that tried the ball point tip. Then I was hooked! I’m able to do everything with it! I actually (truly) don’t know how to use ANY of the other tips for woodburning. Seriously! I might break out someday and actually try other tips for fun. As for now, I only own the ball point tip for my Colwood Detailer machine.

How do you add color to your pieces and do you have a favorite?

I love to use various types of paint! Since I was a portrait painter, I just enjoy the feeling of spreading paint around - especially on smooth wood. I find I end up blending my paint strokes in with my woodburning marks, such as adding short brushstrokes of color in with an animal's fur. I like everything I use to be water soluble, so even the oil paint I get is safe to use with water. My favorite paints I use are:

1. Winsor and Newton Watercolor Paint Tubes

2. Golden Paint Acrylic Paint

3. Holbein Acryla Gouache

4. Holbein Duo Aqua Oil WATER SOLUBLE Oil Paint

5. Winsor and Newton Artisan WATER MIXABLE Oil Paint

image.png

What are some of your favorite tools in your toolbox?

For woodburning, I honestly do not use much else other than my woodburner. I like to draw my designs directly on the wood using a graphite pencil and kneaded eraser. While I am woodburning, I will occasionally use a box cutter blade to erase any unwanted woodburning lines or areas that I burned too dark. It can also add some texture! Pretty boring, but that's it!

How do you make prints?

I print them myself at home. I have a Canon Pixma Pro 100. My process is I photograph my pieces, edit the picture and format the piece to fit on 5x7 and 8x10 sizes, and then just print. I like to use matte finish paper so there are no glares on my work. I tried using ink that was compatible with my printer, but I gave in and now use the expensive Canon brand ink. It's just better in the long run, trust me! I also use Canon brand paper (Photo Paper Pro Premium Matte).

Screen Shot 2020-06-07 at 12.18.29 PM.png

If interested, you can order prints from printing companies online instead of buying your own printer. Kinkos definitely has great paper options and is not so bad price-wise. I have also heard great things from this site: finerworks.com

What do you use to finish your pieces? 

Like I said earlier, I love using products that are water-based. The sealant I use is Rust-Oleum Varathane WATER-BASED Spar Urethane Exterior with UV Protection (woodburning will still fade if placed directly in sunlight). It's available in a paint-on can or spray can (I prefer the spray!).

Dream collaboration? Business or person? 

I know that I would love to collaborate with local and national pet rescues or adoptions, using my pet portraits as a way to help raise money for their business/for all those cute pets out there needing a home. If I do open my own gallery/store someday, I plan to have a pet adoption day event in my store often where people can adopt and get one of my pet portraits (where the proceeds would go to the rescue business).

What are you working on now?

Growing a baby! I am currently pregnant with a baby girl, and this time I am seriously taking it easy after my previous miscarriages. I still have custom pet portrait orders I am creating, but I am keeping my environment as mellow as possible. My online store is currently closed, and I plan to open it again around the holiday time with limited edition items. Stay tuned!


Watch the recorded live video:


Burnt June 2019

These Burnt Month Challenges all started with #BurntNovember back in 2017! They are every-other-day challenges for the wood burning community on Instagram. The community uses the given prompts to inspire pieces of art. It always astounds me how many amazing and unique pieces of art can come out of one word.

pyrography challenges

THANK YOU to our sponsor @walnuthollow and every single one of you that participated. Our community gave back in so many amazing and creative ways for the last day of #burntjune. We had pyrographers who were giving back by volunteering, giving back to themselves through self-care, bringing awareness to issues, giving back to their followers, donating to a cause and making art for a cause. It was truly inspiring.

The winner for the STACK OF WOOD from our amazing sponsor @walnuthollow is @paintandpyro!

Check out the features below or see #burntjune for all the wonderful art this community has created!!

Thank you to all of you for joining in the fun. Can’t wait for the next one!

Click here to view past challenges!

Want to join future Burnt Month challenges?

SIGN UP FOR OUR Burn Club NEWSLETTER TO SEE WHEN THE NEXT CHALLENGE IS HAPPENING.

JOIN BURN CLUB+ TO GET YOUR PROMPTS EARLY!

OR FOLLOW US ON INSTAGRAM AND STAY TUNED FOR THE ANNOUNCEMENT!

These challenges are a great way to hone your skills, grow your following, try new things, and meet your fellow wood burning artists. #communityovercompetition


5 Revenue Streams for your Wood Burning Business

how to make money selling your art

Having different avenues of revenue will strengthen your business. If Instagram were to disappear tomorrow, or Etsy or Facebook, would your business survive? Or, more realistically, you can no longer do in person craft shows or teach in person, are you set up online to sustain your business?

This is why it is so important to have several different revenue streams in place.

Couple additions to the video:

  1. Craft Shows - See if any of the in-person craft shows you would normally participate in are pivoting to online, and if so, join them! Search for other online art/craft fairs that you can participate in. It will increases exposure and sales.

  2. Selling Online - Artsy, Saatchi, Artpal, Society 6, Etsy, Singulart, VISUAL (art prints). People can’t buy things if they don’t know they are for sale.

  3. Instagram - Also consider a LIVE sale. Set it up as you would an in-person booth, and walk the shoppers through it all, be sure to give everything prices and labels. You may sell some live, but you can leave it up for 24 hours and sell more. Don’t be afraid to sell customs that way, too!

  4. Teach - I also want to suggest teaching online. You could do a pre-recorded class, or a burn together/live zoom style class.

  5. Facebook - Share specific art pieces with the right audience. If you have an anteater piece, search for an anteater lovers facebook group to share there. Selling art is all about getting it in front of the right people’s eyes.

Check out the Passive Income Ideas for Artists blog post to learn how to make money while you sleep!


Learn EVEN more ways to make money doing what you love with The Complete Wood Burning and Business Toolkit.

This toolkit has EVERYTHING you need to grow your business together in one place to guide you, so you can feel confident to go after your goals, with the right tools to achieve them:

Goal Setting

Finding Focus

Community + Collaboration

Productivity, Assigning Tasks + Accomplishing Goals

Artist Health 

Photography + Videography

Copyright Basics + Art Reference

Avenues of Revenue

Selling

Selling In-Person

Email Lists

Website + eCommerce

Social Media

Digital Prints + Licensing

Subscriptions

Book Recommendations

and of course in-depth knowledge about Pyrography:
Techniques
Surfaces
Burners
Transfer Techniques
Adding Color
Finishes
Pyrography Books


Looking to boost your Pyro business to the next level??

Grow with the community: Join Burn Club+, a place where you can ask questions, and get the full answers, a place of fun and learning.

Get some personal support: One-on-one coaching provides tailored support guaranteed to boost your business.


Adding Watercolor to Wood

IMG_2443.JPG

There are so many different ways to add color to wood, but watercolor is probably my favorite.

There are a couple things you are going to want to know before you start adding watercolour on wood.

It doesn’t act the same way that watercolor paper does. Where you place it, it will soak in and stick. You can’t blend as easily as you can on paper. Especially if you are adding wood to a dried piece of wood, that wood will soak it right up because it is very thirsty.

Be careful not to use too much water or you can split the wood. (Trust me, I have done this!) You will think you can create more blending by adding more water, which you can, but it can be at the coast of the entire piece.

I prefer to use water brush pens for my paintbrushes. These are paintbrushes that hold the water or water color in their handle, and you squeeze them to get water onto your brush. I love these, because I have more control over the amount of water I am using, and it saves me time from having to dip back into the water glass.

There are some preferred watercolor manufacturers that I love like Arteza and Windsor & Newton, but a cheap pallet of colors from your local craft store will do just fine. If you are looking for metallic pigments, I can not recommend Fine-Tec Paints enough.

In this quick 5 minute video I cover how to add watercolor to wood, and what to avoid. I talk about the tools and materials that I use, and some tips and tricks I have learned.

No matter how you choose to add color, please remember, color goes AFTER burning. Never woodburn over color! Never ever! You do not want to be breathing those fumes. Always wood burn first then add your mixed media.

Affiliate Links for the materials I used:

I cover 9 ways to add color to wood in my book, The Wood Burn Book.

You can also check out this blog post for a list of alternative mediums to use with pyrography.


Interview with Chelsea from CGDesigns

Name: Chelsea Gorham

Burning since: December 2017 (but didn't start my business until May of 2018)

Location: Amarillo, TX

@cgdesigns_wear and www.wearcgdesigns.com

Screen Shot 2020-05-26 at 1.04.36 PM.jpg

Can you tell us a little about your art and yourself?

I'm Chelsea Gorham, owner and artist of CGDesigns where I make and sell woodburned jewelry and art.  I am a stay-at-home Mom and homeschooler of my 4 children by day, and a woodburning artist/jeweler by night.

How did you find wood burning?

Quite on a whim. Back in the summer if 2017, I was working as a vendor at our local market as a henna artist. As I finished up a design on my customer who also happened to be a musician, he asked if I could put a "henna" design on his guitar.  Knowing I couldn't possibly put henna paste on his guitar, I still accepted his challenge and looked into woodburning as an alternative. The first person I thought to ask was my Mother who has always been an artist, and low and behold, she had a vintage burner (Detail Master IV) that she offered to mail to me. As soon as I got it, I fell in love with the process and began practicing for my first big commission!

Screen Shot 2020-05-26 at 1.05.11 PM.png

Which came first, jewelry making or wood burning, and when did you meld the two together?

They coincided, quite honestly. Because I didn't want to ruin a large, beautiful wood slab, I began by practicing my burn designs on small, affordable pieces. After I had a little collection of them, a good friend of mine commented that they would make cool pieces of jewelry...hence, wearable woodburned art was born!

 
Screen Shot 2020-05-26 at 1.04.00 PM.png
 

Have you always done art?

Yes, having been surrounded by art/artists all my life, it feels very much a part of my life.  I would say my first memory of making art was when I was 3 years old. I have so many collections of art - from technical design to watercolor, I've enjoyed them all over the years. But...It wasn't until woodburning, that I finally accepted the title of Artist.

Screen Shot 2020-05-26 at 1.05.29 PM.png

What goals do you have for CGDesigns?

More collaborations and expanding my portfolio in the short-term. My own workshop/jewelry shop/makers space in the long-term.

What inspires you?

Surrounding beauty - in nature, art, seasons, life. I love pattern designs, geometry and symmetry - all which I try to blend with my 'technical' design style. I love linear design and just want to make pretty things that hopefully bring joy.

Let’s talk about the earring of the month club! What is it, how does it work? Where do people go to sign up?

The Earring of the Month Club is a subscription service where my customers can sign-up for a surprise themed earring that shows up on their doorstep every month. I created it as a way to streamline a part of my business that allowed me to focus on a set # of earrings and have some fun while doing it. I have 4 subscription options that are all very affordable; VIP, 12 month, 6 month and 4 month options. VIP being the best value. To sign up, go to www.wearcgdesigns.com and click on the Earring of the Month tab at the top. 

You have now started a junior line, can you tell us a little about that?

The junior/youth line was inspired by my 10 year old daughter, Allison, who just got her ears pierced this past winter. She has always wanted to try my earrings as she sees me create them, but I told her that we could work on some together, that way she gets them just the way she likes! She sat down, sketched out her ideas and we collaborated on an adorable collection of earrings that all sold at their release. We plan on making it a regular thing now that she got a small taste of entrepreneurship and seeing the benefits of hard work mixed with fun. 

There is a design portion of your services.  Henna and Booth/Brand Styling. Can you tell us a little about these services?

Henna tattooing is a service that is always available to my customers. (It is after all how I got started!) I am available for private sessions, parties and events.

Booth/Brand Styling is a service I offer any creative who wants to up their market presence at in-person selling events. I take a look at their online presence, ie. shops, instagram feed, logo/brand as it is and base a style off of what 'feel' I get. I basically act as a consultant to get your booth that eye-catching look that makes you stand apart when selling in person. There is a unique art to marketing and design and I love bringing that 'a-ha' moment to my clients with this design service.

I have been loving your new portraits. (please include a portrait photo)

Thank you! I have long wanted to try them and quarantine has pushed me to do these things that I've been putting off.

 
Screen Shot 2020-05-26 at 1.21.21 PM.png
 

What goals do you have for your art? Any other new techniques you are hoping to try?

Always want to improve and learn new things. I would love to be able to comfortably finish a large wood piece with only using a variety of burn techniques. Shading/gradient work being at the top.

How much time is spent wood burning versus the rest of the business? What percentage would you give each?

I'd say about 30-40% burning, and 60-70% all the other stuff!

Tell us about these super successful LIVE Video Sales you have been doing? Where did the idea come from? How did you set it up? What suggestions do you have for someone wanting to try one?

Instagram LIVE Market is an idea my creative entrepreneur coach, Kristyn Burney, perfected. I would suggest following her and joining her Facebook Group 'Creative as a Mother' for the best info on a successful LIVE Market. She has so many helpful tips on how to creative revenue and run a successful online business @kristynburney

Deserted Island, with power question. You can choose ONE

Burner: 'Old Faithful' Detail Master IV

Nib: Knife tip - I love clean, crisp linework

Type of wood: Birch

Non-essential tool (but basically essential to you): Dental Pick Thingy


What other tools are essential for you?

Watercolor travel set and Tombow Sand Eraser

What apps/programs do you find useful for your business?

Canva - I use it for so many things in my business.

What are the main types of wood that you use for earrings? Do you have a favorite? And where do you source your wood?

Birch Plywood is my go-to for earrings.

I have 2 wood suppliers/laser cutters I work with for custom/premium shapes.

What parts of the business do you absolutely love and what parts feel like a chore?

I love collaborations, networking with other makers and 'a-ha' moments of my own.

My least favorite part would have to be planning content on social media. It is necessary, but can feel like a long, long chore.

Any advice for newbie woodburning artists?

Play to your strengths. Start with what you know, perfect it, embrace it, make it your own. Don't feel like you have to do what anyone else out there is doing to get noticed. We are all individuals who have our own unique voice and something beautiful to offer.

Watch the recorded live video:


How To Transfer Designs To Wood: Heat Method

This technique is one of our favorites for it’s speed and accuracy. It works great for lettered pieces, detailed pieces, anytime you need a really precise transfer, or for almost any design.

NOTE: This technique requires a laser printed design. If you are printing words or letters, you design must be printed in reverse.

What Tools Do I need?

The best tool would be a solid tip burner, like this Walnut Hollow Versa Tool above. This tool is great for covering big areas because of its durability, consistent heat distribution, and simplicity in handling. A wire tip burner will work just as well, but it will take a little longer.

how-to-transfer-an-image-onto-wood

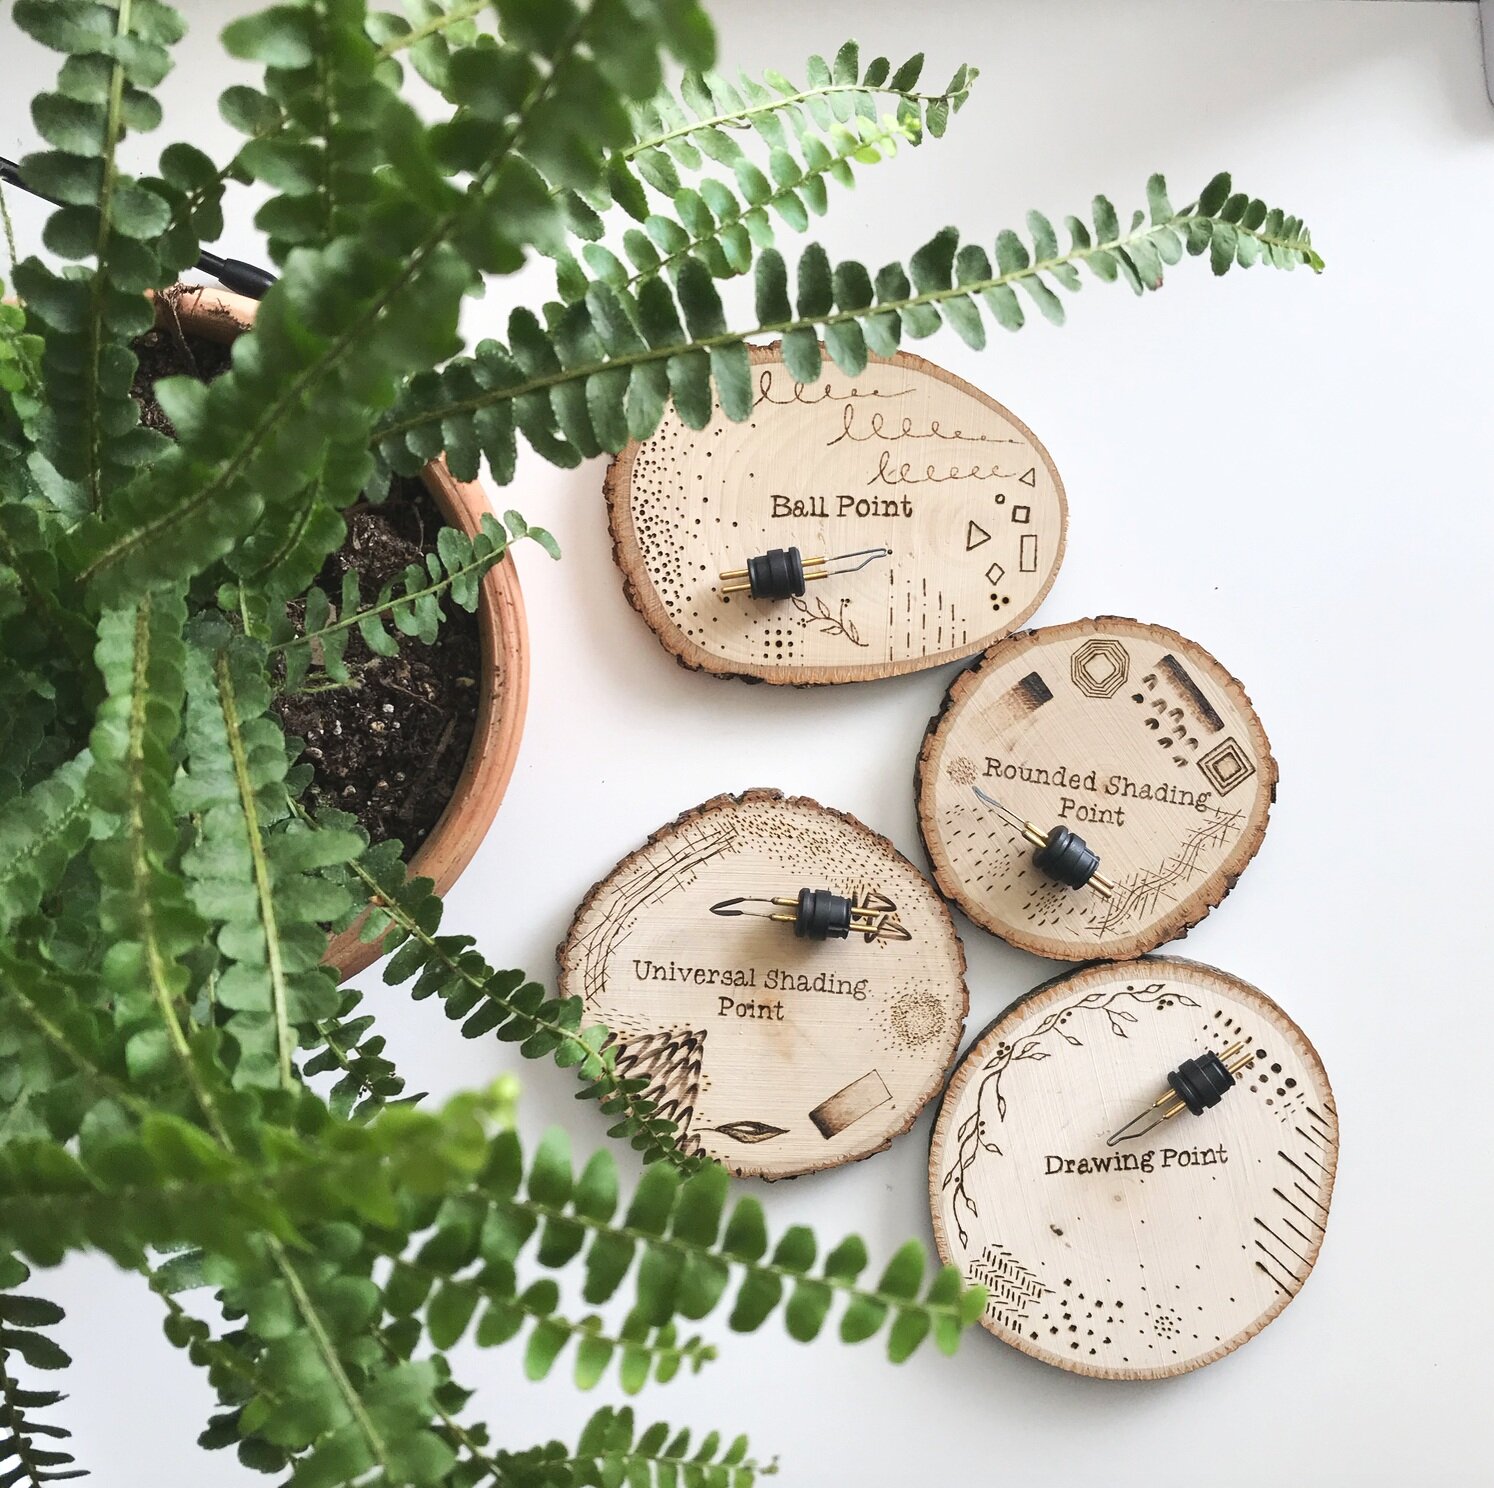
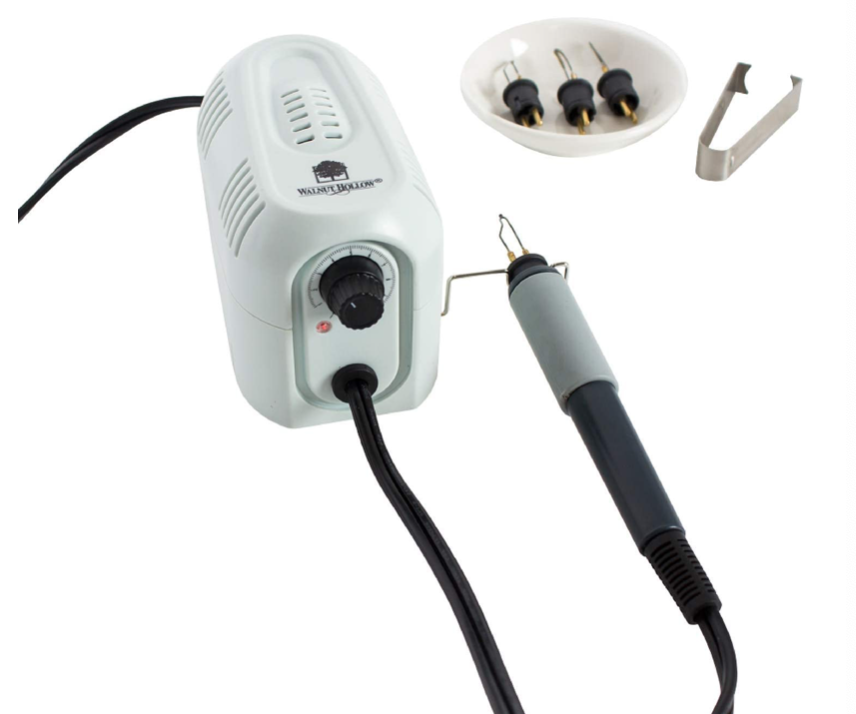
The perfect nib for the job is the Transfer Nib or Transfer Point. This nib covers a large surface area making the transfer faster. Any shading point will do. Anything hot and flat - even an an iron will work.

Don’t have this tool and want to transfer your design in a pinch?? Check out 3 ways to transfer a design without using heat.

How to transfer your pattern:

  1. Prepare your design

You will need your design printed in reverse as the transfer is going to be mirrored onto the surface. You must use a laser printer or photocopier. The toner will be transferred directly to the wood using heat. This is especially important with any text or lettering!

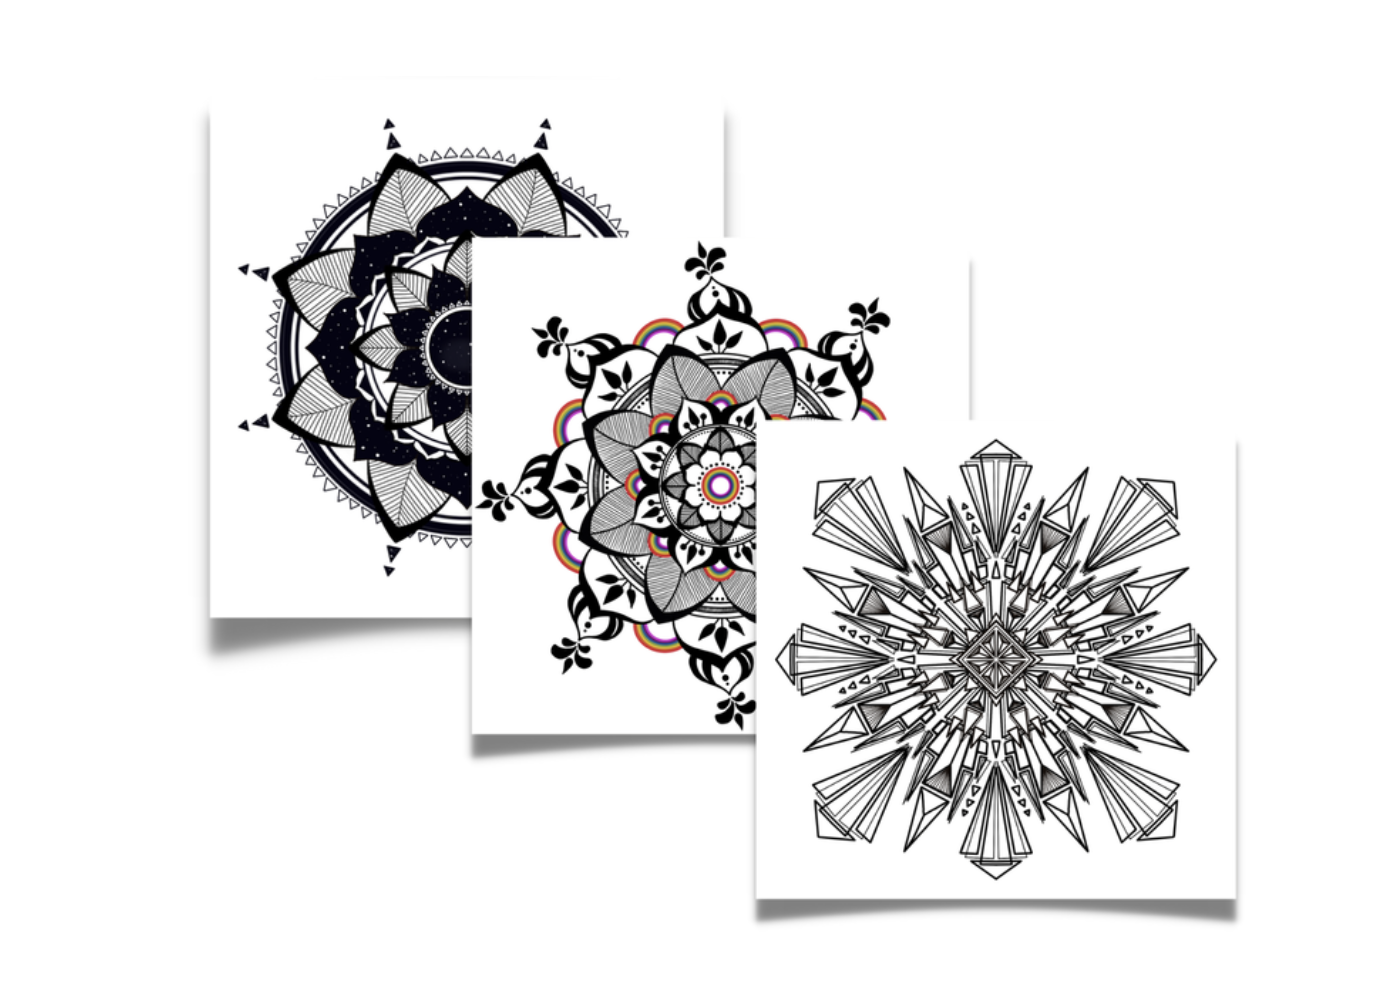
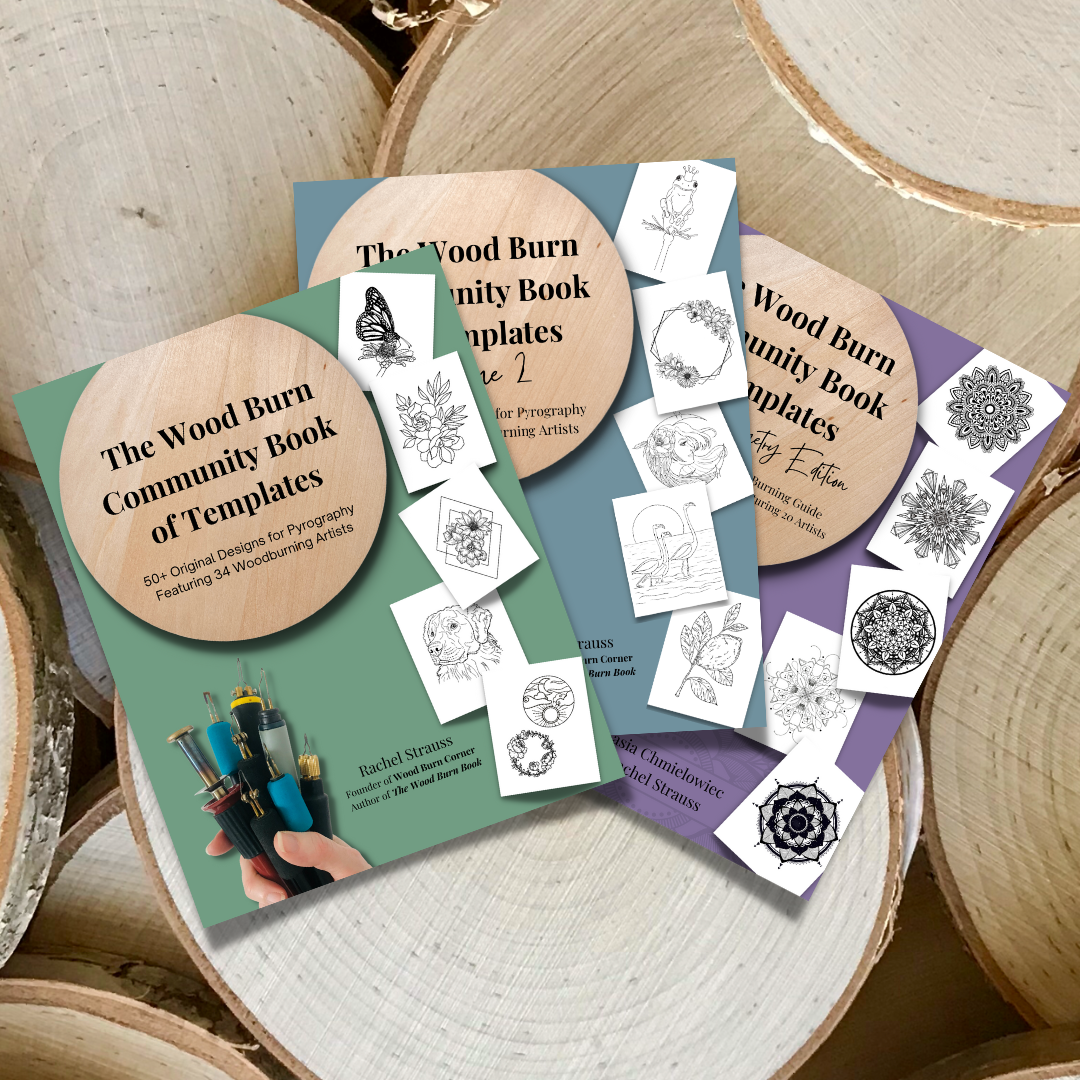
To get started with a design, grab one of our free templates, check out our template books or visit the templates store!

2. Prepare your SURFACE

Start with a sanded smooth, dry, clean, and unfinished wood surface. Click here to see how to prepare your surface for burning.

I like to cut quite close to the edges of the design itself so that the placement is easier to see. Leave some room for tape - you don’t want to be touching it with your hot tool.

Place your design on your wood facing down (make sure it is right where you want it) and tape down on one side (two or more if it's a large design.)

3. Transferring the design

You want your tool to be hot, but not hot enough to burn the paper. Make a little test on the corner because if you burn the paper too much, your transfer may not work. Apply a light pressure and keep moving your tool over the back of the design.

Make sure you transferred everything before you remove your design. I like to peak underneath to check I transferred the entire design, just be careful not to move the paper placement or the design may not line back up.

If it is not transferring, try pressing a little harder, and/or slowly increasing your heat.

Word of warning when using a regular iron:

I had a large project so I tried using an iron thinking it would save me time.

Well, my iron has a steam setting that automatically kicks in at a certain temperature. In order to make the transfer work, the heat has to be quite high and, of course, there should not be any steam or moisture coming out of the iron…

I tried to use the medium heat (right before the steam started coming out) and the design did transfer BUT I needed a lot more pressure than normal which wasn’t a sustainable option. I had to press quite hard for anything to happen. I switched back to the Versa Tool because it was easier on the wrists and had the heat I needed.

What if I make a mistake?

Sometimes when peaking under the paper to see if the design has transferred, the paper will shift. If you continue with the transferring process, the shift can cause the design to be out of place.

Sometimes you think you placed the design down correctly, but after the transfer, it’s not exactly where you want it to be…

You can simply sand off the transfer lines with regular sandpaper. Click here to learn more about that process.

How many times can I use the design??

You can use this method to transfer a design onto wood a couple times. Each time you transfer, the design will get lighter and lighter so it is best to get it right the first time!

Watch these free videos below for tips, tricks, and all the details you need to successfully transfer designs using this technique.


For more pyrography tips and tricks and to learn wood burning at your own pace from your home consider The Complete Wood Burning Toolkit.


The Wood Burn Book

I am beyond excited to share the cover of my book, The Wood Burn Book. Seriously, somebody pinch me.

Book for website on wood.png


Best Information Possible

The Wood Burn Book is the culmination of years of collecting information through trial and error, asking questions, reading books, and the community mind. In #thewoodburnbook I walk you through necessary tools, tool care, types of burners, types of nibs and their uses, safety, wood types, and wood alternatives. We go over the best transfer techniques, adding color with many different mediums, best finishes and their uses and everything is based on my personal research and what the community uses. I then walk the reader through many projects (with printable templates) that utilize the different ways to add color, textures, finishes, and on many different types of surfaces.

You can find it on Amazon Here or Internationally Here.

IMG_2102.JPG

Collaboration

There are some INCREDIBLE guest artists that I was lucky enough to collaborate with to create unique wood burning projects for the readers to try. Beautiful pieces by @thepigeonletters @lettersbyshells @bobodesignstudio @jeshypark @electriceunice @allikdesign @brownpaperbunny @leslie.writes.it.all can be found in this book.

IMG_2110.JPG

Community

Would this be a Wood Burn Corner book if it didn’t involve the community? I think not.

Throughout the book you will get direct, quoted, advice from many members of our #BurnClub community. I’m so excited for you Burn Clubbers to find your quotes in it! There are a lot of fantastic words of wisdom from them sprinkled throughout. You can really feel the sense of community that our Burn Club embraces in these quotes and their desire for everyone to be successful. It is the best.

The reason I wrote this book was to pass on as much good, to the point, information as I possibly could in a beautiful and fresh format. I wanted to give the reader fun, modern, and actually achievable ideas for wood burning projects. I wanted to create a beautiful forever book that could be utilized as a beginning wood burning artist, and referenced even as a pro.

IMG_2105.JPG

You will see that I wrote about what I know know about. I touch on the topic of shading, but this is not the book to teach you how to create photo realistic art. This is the book that will help you reap all the benefits of wood burning by eliminating the frustrations that can come with not knowing what type of wood, burner, nib, color, or finish to use or how to use them. It is the book to help you troubleshoot, and improve. I strived to make an aesthetically pleasing, easy-to-follow, super informational book, and I really hope you like it.

IMG_2106.JPG

If you can trace, you can burn.

I believe every household should own a wood burning tool because of its therapeutic qualities and my hope is that with the method I teach in this book that it will encourage people to pick up a burner and give it a try. With The Wood Burn Book and just the ability to follow a line, I believe anyone can wood burn successfully. I have seen it in person with the classes I teach, and I am so excited to see how many people pick it up and fall in love with wood burning like we all have.

I hope you love The Wood Burn Book, and help me spread the word.

Happy Burning,

Rachel


Praise For The Wood Burn Book: An Essential Guide to the Art of Pyrography

“The ultimate resource for wood burning from a fun artist! So many project ideas to expand anyone's craft skills. Rachel is an expert guide to this addictive, yet soothing medium.”

- Megan Colwell, The Travelling Woodburner (@happicamperkc)


“Rachel is a thought leader in the art of wood burning. Her modern aesthetic translates to beautiful, custom art and her unique ability to teach that art has led to a growing, thriving community within the space.”

- Morgan Spenla, The Crafter's Box


“Rachel has created a beautiful guide overflowing with information for those who want to learn the art of wood burning. I love the rich imagery and detailed instructions within each project. It makes me instantly want to pick up a burner and start creating. 
 
She has an incredible talent for creating projects that can entice anyone wanting to try this unique art form. Every project is gorgeously designed and crafted. There’s something for everyone from the beginner to the expert. I especially like the Kids art Keepsake project. It’s such an inventive way to turn your child’s memories into a keepsake. 
 
Rachel has written a must-get guide book for anyone considering pyrography…Read this book and learn from one of the best”

- Aney Carver, Owner of Pyrocrafters and author of "Drawing with FIre"


Read more about what people are saying!


Burnt February 2019

These Burnt Month Challenges all started with #BurntNovember back in 2017! They are every-other-day challenges for the wood burning community on Instagram. The community uses the given prompts to inspire pieces of art. It always astounds me how many amazing and unique pieces of art can come out of one word.

wood burning inspiration

Burnt February reached 5,000 posts to the challenge! How insane is that?! The first time I did this challenge we had a grand total of 400 posts, so to say my mind is blown is a gross understatement. You guys are the absolute best! This COMMUNITY, quite simply, rocks! Make sure to follow #BurntFebruary on insta to keep up with the new amazing art being posted!

The Burnt February kick-off giveaway goes to @lineandember! They won a STACK of wood from @walnuthollow for sharing the prompts and engaging with the community.

The winner of a STACK of wood at the end of the challenge (from our sponsor @walnuthollow) is for participating in the prompts: drumroll please.... the winner is.... @oh.wanderer! Congrats!!

Below are the featured artists for each prompt. Click on the image to get a closeup of all the gorgeous wood slice art!

Thank you to all of you for joining in the fun. Can’t wait for the next one!

Click here to view past challenges!

Want to join future Burnt Month challenges?

SIGN UP FOR OUR Burn Club NEWSLETTER TO SEE WHEN THE NEXT CHALLENGE IS HAPPENING.

JOIN BURN CLUB+ TO GET YOUR PROMPTS EARLY!

OR FOLLOW US ON INSTAGRAM AND STAY TUNED FOR THE ANNOUNCEMENT!

These challenges are a great way to hone your skills, grow your following, try new things, and meet your fellow wood burning artists. #communityovercompetition

Interview with Basia from fine line pyro

Name: Basia Chmielowiec

Burning since: 2009

Location: Innisfil, Ontario 🇨🇦

@finelinepyro and www.finelinepyro.ca

20190429_Pyro_251.jpg

Can you tell us a little about your art, your life, and you!

my name is Basia, the wood burning artist behind fine line pyro. One of the craft mediums I enjoy is pyrography and creating sustainable high end art that is inspired by nature!

mandalas are my jam but i also love trying new things and collaborating with other artists.

IMG_8087.jpg
95FEEA90-EB56-4390-878F-92F99803E349.JPG


How did you find wood burning, and when?

in 2009, I got my first wood burning machine as a payment for creating some artwork on a bus!

i lived in Calgary for about 6 years and during that time I met this wonderful group of people who, at that time, started a business called bass bus. their idea was to create a moving platform for artists and musicians that would travel to different music festivals/events and perform. this amazing community grew and grew and I am very happy I was able to see it blossom.

since the bus was always moving, they needed artwork inside the bus that was permanent. they had transformed the entire interior with wood and discovered the art of pyrography. they trusted me enough to burn their bus and i am so honoured they did. i haven’t stopped burning since and am still using the same machine they gave me!

IMG_0902.JPG
Screen Shot 2020-05-12 at 2.03.13 PM.png

I will always have a special place in my heart for these amazing people, the mountains and the wonderful 6 years spent out west.

Screen Shot 2020-05-12 at 1.48.09 PM.png


How did you find this fine art, fine line style? 

practice, practice, practice. 

doing the same thing you love and varying it and tweaking it over time allows your style and your art to have a character that is organic and your own. it took me a while to realize this. i was often putting myself down for not being as good as others, or not being able to create something amazing the first time i try. being an artist and having your own style is a journey that has to be taken. one of my favorite podcasts by Rich Roll (featuring Chase Jarvis): Creativity Is Our Birthright, sums it up nicely!

Have you always created art? 

art has always been part of my life in one way or another. in high school i took all the art classes that were available. i never had any formal training afterwards but a solid family foundation which supported and encouraged all varieties of creativity. I often draw with pencil and ink, mostly mandalas, as well as play with digital mandalas, i dabbled in scrapbooking, i really got into pastel, and also dove deep into making feather earrings and accessories and so many other random things… I really like to make stuff.

52BBEC9F-8546-4886-AFF1-753D4D05058F.JPG

What is it about mandalas that you love so much?

the meaning of the word mandala in Sanskrit is circle. mandala is a spiritual and ritual symbol in Hinduism and Buddhism, representing the universe. the circular designs symbolizes the idea that life is never ending and everything is connected. mandalas can be simple or intricate, big or small and no two i make are ever exactly the same. creating them is my meditation, no matter the medium. drawing and burning mandala’s make me zone out and escape the clutter in my mind.

 
61E79662-468A-47E2-BA32-364E8246FA05.jpg


Any new techniques you are hoping to try?

I can’t wait to add some gold leafing onto my work but I want to work with adding colours, aiming for sustainable paints and natural elements to keep my work earth friendly.


How much time is spent wood burning versus the rest of the business? 

the ratio is about 80-20. i spend about 80% of my time wood burning and 20% on my business. I would like to invest more time onto the business end of things but have to juggle a full time job and a family. perhaps one day…


If people want to teach classes, what do you suggest they look for? Any pieces of advice? 

teaching classes brings me so much joy. i really enjoy when i can show people something new that can provide some peace and calmness in their lives. the best way to start, especially if you are short on time, is with a company.

i started teaching at Lee Valley Tools. they did all the work gathering students, providing materials and tools, and receiving payments. all i had to do was show up. this was huge since i didn’t have time or money for advertising and looking for students. now that i have more followers and know more people interested in learning, i invested in a few extra machines and am able to host small classes from my home!


Deserted Island, with power question. You can choose ONE:

Burner: any razertip brand burner. I have the SS-D10

Nib: the chisel tip (a.k.a. the sexy tip!)

 
IMG_8410.jpg
 

Type of wood: cedar 🤤

Non-essential tool (but basically essential to you): sandpaper - i very gently sand most of my pieces when i am finished burning them to get the very fine lines i love 

What other tools are essential for you? 

I can do without (if i really had too) but i do take my compass everywhere i go. this helps me get the perfect circles and general shapes for my mandalas.


What apps, and programs do you find yourself using? 

planoly is great for organizing instagram photos and the order i post them. i am able to see my feed and insert new photos and move them around. this really helps plan ahead of time. i also use the mobile version of adobe lightroom for editing before they go into planoly. Canva is a game changer for all things digital! and of course, Pinterest is always my favourite to get inspired as well as market myself for free.

How do you stay organized? 

i really love using google keep. its basically like a digital sticky note hub that i can colour coordinate, tag (level of importance), label (business or personal), add photos too, make into checklists and share (ie. grocery store list) and edit with others. I always have it in my phone and its connected to gmail so setting alarms or scheduling e-mails is really easy! This is great because even those looooong term ideas can be stored away but also can be easily found anytime i want.


What wood do you use, and what suppliers do you prefer in Canada?

i often go dumpster diving in nearby wood shops. many companies who make kitchens or generally work with wood cannot use little pieces so their scrap wood and cut off’s go into the landfill. i divert as many pieces as i can and make them into art! I recently scored on a whole lot of cherry, which i love using and it has a gorgeous warm color with beautiful grains throughout. if i need to purchase a specific kind or shape, I go to Exotic Woods in burlington or look online.


What parts of the business do you absolutely love and what parts are hard? 

of course i love the actual art process, trying new things with wood burning and evolving my style. the part that is difficult for me is the whole selling process. i have a hard time pricing my art… i just started selling and am hoping to improve on this as i grow.


Any advice for newbie wood burning artists?

keep on creating. as i mentioned earlier, make it till you make it. the more you do the more you know what and how to do it. also, understanding that we all have a journey to go through is important. don’t compare yourself to others and their work. compare yourself to who you were yesterday and just keep moving forward.

Where do you find inspiration? 

nature! i love nature and everything it has to offer. i go portaging as often as i can and during those times, and also when i am taking care of my own plants in my home and backyard, i get a wealth of new ideas and inspiration. being in the forest grounds me.

What goals do you have for Fine Line Pyro?

i have something very exciting in the pipelines. i want to take nature and being in the forest and mix it in with mandalas so i am creating a sketchbook fit for traveling, guiding people of all artistic levels to make their own mandalas. stay tuned in my fine line pyro instagram feed for an announcement coming soon!  


Watch the recorded live video:


Interview with Megan from HappiCamperKC

Name:  Megan Colwell

Burning since:  2012

Location: Kansas City (based)

@happicamperkc on Instagram and Facebook or Shop Etsy

LOGO - Happi Camper 2.jpg

 
0704191247d-01.jpeg
 

You have a unique living/working situation, can you tell us about that? 

Sure! I live in a 2018 Travel Trailer (camper). We are going on 2 years living in it full time. When we can, we travel the country. So far we have been out West and loved it!


Tell us a little about your business and what you make.

I am a self-taught wood burning artists. I love to make bold and colorful works of art of all types, however, my specialty is line art and texture. 

Screen Shot 2020-05-09 at 12.03.06 PM.png

You have another business, Happidesk. Can you tell us a little about that?  

Of course! @Happidesk is where I conduct my business as a virtual assistant. Although my main focus is Real Estate, I also help many small business with things like: Social Media Management, Branding, Design, and Engagement. I help accounts authentically connect and grow with their target audience. 

What percentage of your time do you spend wood burning versus business? How much of your time is devoted to Happicamper vs Happidesk? 

Great question! Typically Monday thru Friday I spend on Happi Desk, using my evenings to engage on Happi Camper when I can. I do my best to dedicate Friday night thru Sunday night to making art and content for Happi Camper. 

What other hobbies/crafts do you enjoy? 

I also enjoy watercolor and illustration. I can't forget travel! I love exploring new areas, especially anything flora/fauna related. 

Where do you draw inspiration? 

Definitely from our surroundings. I love nature and find lots of new plants/places to research then apply to my art. I also draw a lot of inspiration from vintage styles. 

What piece of advice can you offer to anyone who is new to wood burning or new to the community? 

Do not "compare and despair". At the end of the day, social media can go away. Only compare yourself to your growth path, and not others. You are so unqiue; no one in the world is like YOU. So the more you lean into your own authenticity and forget about all the like/followers noise, the better you'll be in the end. 

Any quick tips for growing your Instagram following? What has worked for you? 

Sure! I follow the 10-10-10 on a daily basis. Ten minutes liking and commenting on my current followings' posts. Ten minutes connecting with my current followings' stories through genuine DMs. And ten minutes connecting with my target audience through recent posts in niche hashtags.

What other platforms do you use and enjoy besides Instagram? Any that you have found success with when it comes to reach and exposure?

I have used Pinterest with some success. I also use Etsy as a connection platform, especially for networking. Liking and favoriting others shops is a great gateway to collaborations. 

If you could give advice to yourself when you first started out, what would that be? 

Get more back-up pens! Since I burn so hot and heavy, I go thru pens very quickly!

Are there any apps that you can’t live without when it comes to your business? 

A scheduler. I love Apphi, and have also used the Later app. This helps me keep my posts up at peak times, plan ahead, and maintain a brand presence. 

Deserted Island, with power question. You can choose ONE

Burner: Colwood Super Pro II

Nib: Spade Tip

Type of wood: Poplar

Non-essential tool (but basically essential to you): Tombow sand eraser

 
0327201319a-01.jpeg
 

Choosing what tools you keep on hand has to be a thoughtful process because of space limitations, so I am curious what are some of your other favorite tools you have in your toolbox? 

Acrylic paint pens have been a lifesaver for me. They take up SUCH little space and are so easy to use!

How do you finish your pieces? 

I use an aerosol polycrylic gloss finish. It really make the texture pop!

What are your favorite ways to add color? 

Lately, it is def the paint pens. But I also favorite other types of mediums like milk paint and watercolors.

What goals do you have for Happi Camper? What art goals do you have? 

One day, I would love to have some land, build a cabin, and renovate a handful of vintage campers. It would be an Air B-n-B where I could also host wood burning workshops. Short term goals def include teaching wood burning workshops in the Kansas City area!

What are your favorite podcasts and inspirational books? 

I listen to the Joe Rogan podcast, as well as Russell Brand. But honestly, I'm not much of a podcast listener. My favorite inspirational book is, "You Can Heal Your Life" by Louise Hays. 

I think we are all very curious as to how you can fit all of your wood burning supplies into the camper. Can you show us some of your storage solutions?

I have to thank my hubby here. He is the organization GURU. We keep my art supplies in baskets separated by type. We even label everything so it's easy to grab. I also bundle supplies in re-purposed Ipsy bags. One bag has everything I need to start sketching a new piece, and houses some of my main nibs. 

What are you working on now? 

I am currently working on a few geometric shelves as I shift to making more functional art. I also have a new wood sign commissions in the pipeline. 

Watch the recorded live video:


160 Ideas of Things To Wood Burn Next

Creativity ruts are a very real thing. When the options are endless for things you can wood burn, choosing one can be difficult. I have found that if I give myself some sort of constraint, whether it be an object, a subject matter, or a word, that it tends to spark an idea much easier. This is a place I hope you visit when you need inspiration of what to burn next.

My suggestion for utilizing this list would be to close your eyes, twirl your finger around, point, and see where you land. You can choose to point again, or let your mind wander with how you could create that object with your unique wood burned touches. I think you will find inspiration quite quickly.

woodburned-spatula-and-spoon-mandalas

I also recommend looking at old #burntmonthchallenge prompts (#burntmarch, #burntfebruary), and #burntday prompts for inspiration. Check out this blog post to learn more about these challenges!

If you need patterns and designs to burn, visit the templates store full of individual patterns for sale, like the one on these wooden spoons or grab yourself one of the community template books.


160 Ideas of What to Wood Burn Next:

wood-burned-comb

spoons + serving ware + cutting boards + plaques + baseball bats + hammer + key chain + leather jacket + notebooks + ring dish + growth blocks + baby blocks + growth wall charts + toys + wall art + food display + candle display + pet portraits + coasters + ornaments + trophies + tables + cake knife + violin + guitar + desk + chairs + salad bowl + candy dish + wooden cups + cell phone covers + earrings + necklaces + bracelets + hair clips + chopsticks + baby bowls + baby plates + candle holders + serving tray + dice tray + toy box + shelving unit + bed headboard + wooden watch + clock + rolling pin + wooden apple + trivets + wooden tongs + pen holder + business card holder + jewelry holder +  shirts + jackets + canvas bag + leather key chains + salt bowl + coffee scoop + doll house + cabinet + piggy bank + wooden airplane + hand held fan + countertop + wine rack + cheese plate + cheese knives + toilet seat + memory box + plates + vase + comb + brush  + wall sign + open/closed sign + drawer fronts + lazy susans + puzzles + matching games + bathroom signs + kids’ room signs + chess pieces + checkers + trinket tray + cane + walking stick + map + key hook + magnets + boomerang + coat hangers + watercolor paper + driftwood + tool handles + skateboard deck + napkin holders + stools + magic wands + brooms + cork + dried gourd + pumpkin + nesting dolls + shoehorn + wooden bookmark + fishing pole + jenga + belts + purse + shoes + toy train + tablet cover + light switch cover + outlet cover + coffee table + animal ID tag + door knobs + bird house + dog bowl holder + wooden eggs + essential oil diffuser + dog name sign + welcome sign + step stool + bone + antler + tooth + horn + tree bark + cotton + pencil + stylus + recipe box + hats + leather backpack + canvas tote + rings + napkin rings + table number displays + logo sign + displays for business + cups + cribbage board + wooden pipe + tie clip + cuff links + figurines + wooden peg doll + bed frame + sandwich boards + chalkboard + picture frame  + pool cue + alphabet blocks + leather bookmarks + catchall + paper cards


The options are endless, and oh-so fun to imagine.


Check out some of these fun projects:

garden-marker-plant-tag
 
wood-burned-magnets-project


Need more pyrography inspiration or project ideas?

Check out the Pinterest board: Ideas and Items to Burn On for everyday and unique items made from wood or burnable surfaces.


Interview with Aney from Pyrocrafters

Me6.JPG

Name: Aney Carver

Burning Since: 2016

Location: Prattville, AL

www.pyrocrafters.com and @pyrocrafters


How did you start your pyrography journey?

In 2016. I started burning just for fun, then we started making things for friends and family and the next thing you know we’re taking orders. Then I started posting on social media and it just kind of took off in unexpected ways, which continues to this day. 

Do you do any other art forms/crafts/hobbies?

I love to make everything. Just making in general lights my fire. But specifically, I love to make things with cardboard. I’m not necessarily good at it especially when you see what other people are able to make. But I just love the idea of reusing a material in a completely different way in which it was intended and turning it into something functional.

cardboard-table2.jpg


Best piece of advice when it comes to owning your own wood burning business?

I really thought about this question a lot and it’s hard to choose just one piece of advice. This could apply to wood burners or any business at all. Learn. Learn as much as you can about what your business is, how to improve it, how to improve yourself, how can you help others, how can you can you be consistent, courageous, creative, inspirational, what you want to accomplish, why you’re in business. It all comes back to learning and taking in as much info you can on how to be better for yourself and for others. You can listen to podcasts, follow people that will teach you, read or listen to books, or just plain ole google searches. A lot of what you want to learn can be found for free if you do the work to find it.


Tell us about your book, Drawing with Fire, it such a beautiful book! Where can we find in it?

My book process took place from early 2019 to mid late summer. It’s a wood burning project book that focuses more on the projects themselves. The publishers and I brainstormed about what the book should be about from complex detailed portraits to lettering only to beginner projects. We ended up creating a lot of lettering projects for beginners, a few crafty projects and then a few more detailed intermediate projects with shading techniques.  


The goal was to get right to the projects and have the book focus on giving the reader a book full of projects they could make. In the early stages, we had a lot of setup stuff about tools, but we decided to narrow that down and make it more about projects. I wanted to create projects based on supplies that were easy to find. So I tailored the projects around what materials I could easily get my hands on, so that the reader (a beginning wood burner) would be able to easily find what they needed. I wanted them to be able to focus on the projects, learning wood burning and creativity instead of trying to figure all the tools. That was the fun part.

The process was fast and a bit stressful. From the time the publisher approached me until it was written was about five months. So if I had to change something about the process it would have been having more time to put into the creation of it. Overall, it was an amazing experience. 

Check out the book Drawing With Fire!


You are going on a deserted island with power. You can only bring one of the following:

Burner: Colwood.

Wood type: Poplar

Nib: Straight Edge/Skew tip

Favorite non-essential tool, but one you love to have: My shop. When we first moved into this house, I didn’t have a work space, i was constantly moving around and working where I could. I wrote my book and worked through all the projects on our dinging room table because I didn’t have a space to do it. We had to do a lot of work on this shop and I am so incredibly grateful for this space, I don’t have words to express it. I come in here every workday morning and meditate to the gratefulness of having this space. 


What do you love about doing Youtube videos? What have you found difficult?

I love being able to show people how to do this art. I love connecting with people and reading the comments about how they are learning this new craft and that the videos I’m putting out are helping them. That’s the best feeling. 

The hardest part is being in front of the camera. I just get nervous and forget how to talk. But I think I’m doing better. Again it comes back to learning and doing things that make you uncomfortable at first, but pushing through until you get better. Einstein said, “Anyone who has never made a mistake has never tried anything new”.  

What percentage of your time and energy goes into YouTube, Instagram, facebook, woodburning, and computer office stuff? How much does each piece of the pie get?

Oh gosh, I don’t really have a percentage, but I would say the large majority and then I weave in my wood burning into it. So when I have a new wood burning piece idea, I film it along the way so that I’m creating content for all those spaces while I’m creating my art. It’s all woven together into one collective effort. 

If you could give one piece of advice to someone who is brand new and starting out, what would that be?

Don’t be afraid to mess up. You’re brand new, so spoiler alert, you’re going to mess up. You just need to know that up front and be okay with it. I’ve been doing this for a while and I make mistakes all the time. A lot of mistakes can be corrected and if they can’t, just sand it down and start over. Just try stuff and see what happens.


What are you working on now?

Right now, I’m working on new art pieces, and switching those over to my website instead of the Etsy site. I have a lengthy course planned that I have been planning forever and it’s been delayed a bit because I was going to have a videographer come and film it, but we’ve pushed that back because of all this virus stuff. 

I have a new Pyrocrafters Membership service coming out soon! There will be LIVE courses, pre-recorded courses, and more content exclusively for members.

And I’m also working with Chandler tools to build a course around using their tools, so that’s super exciting too. That’s also been pushed back because of the virus. It’s coming eventually, just delayed a bit.


Favorite thing to watch or listen to while you burn?

Sooo many things. Schitt’s Creek, The good Place, How Did this get made podcast, Don’t keep your day job podcast by Cathy Heller, Rachel Hollis’s everything, Brendan Burchard’s anything and everything. I’m listening to his book High Performance Habits right now. 


What are your favorite tools?

So, I’ve been working with an array of tools lately and there are so many great burner tools out there. Here are a few of my favorites.

Chandler Tool


Screen Shot 2020-04-29 at 7.17.24 PM.png
 
 
Screen Shot 2020-04-29 at 7.18.02 PM.png
 
 
Screen Shot 2020-04-29 at 7.18.34 PM.png
 
 
Screen Shot 2020-04-29 at 7.19.24 PM.png
 

*Some are Amazon Affiliate links for easy shopping. Hope they help.