Wood burned garden or plant markers can be a fun and creative way to label your plants in your garden outdoors or indoors.
This project took me about 20-30 minutes for 4 markers and was completely free!
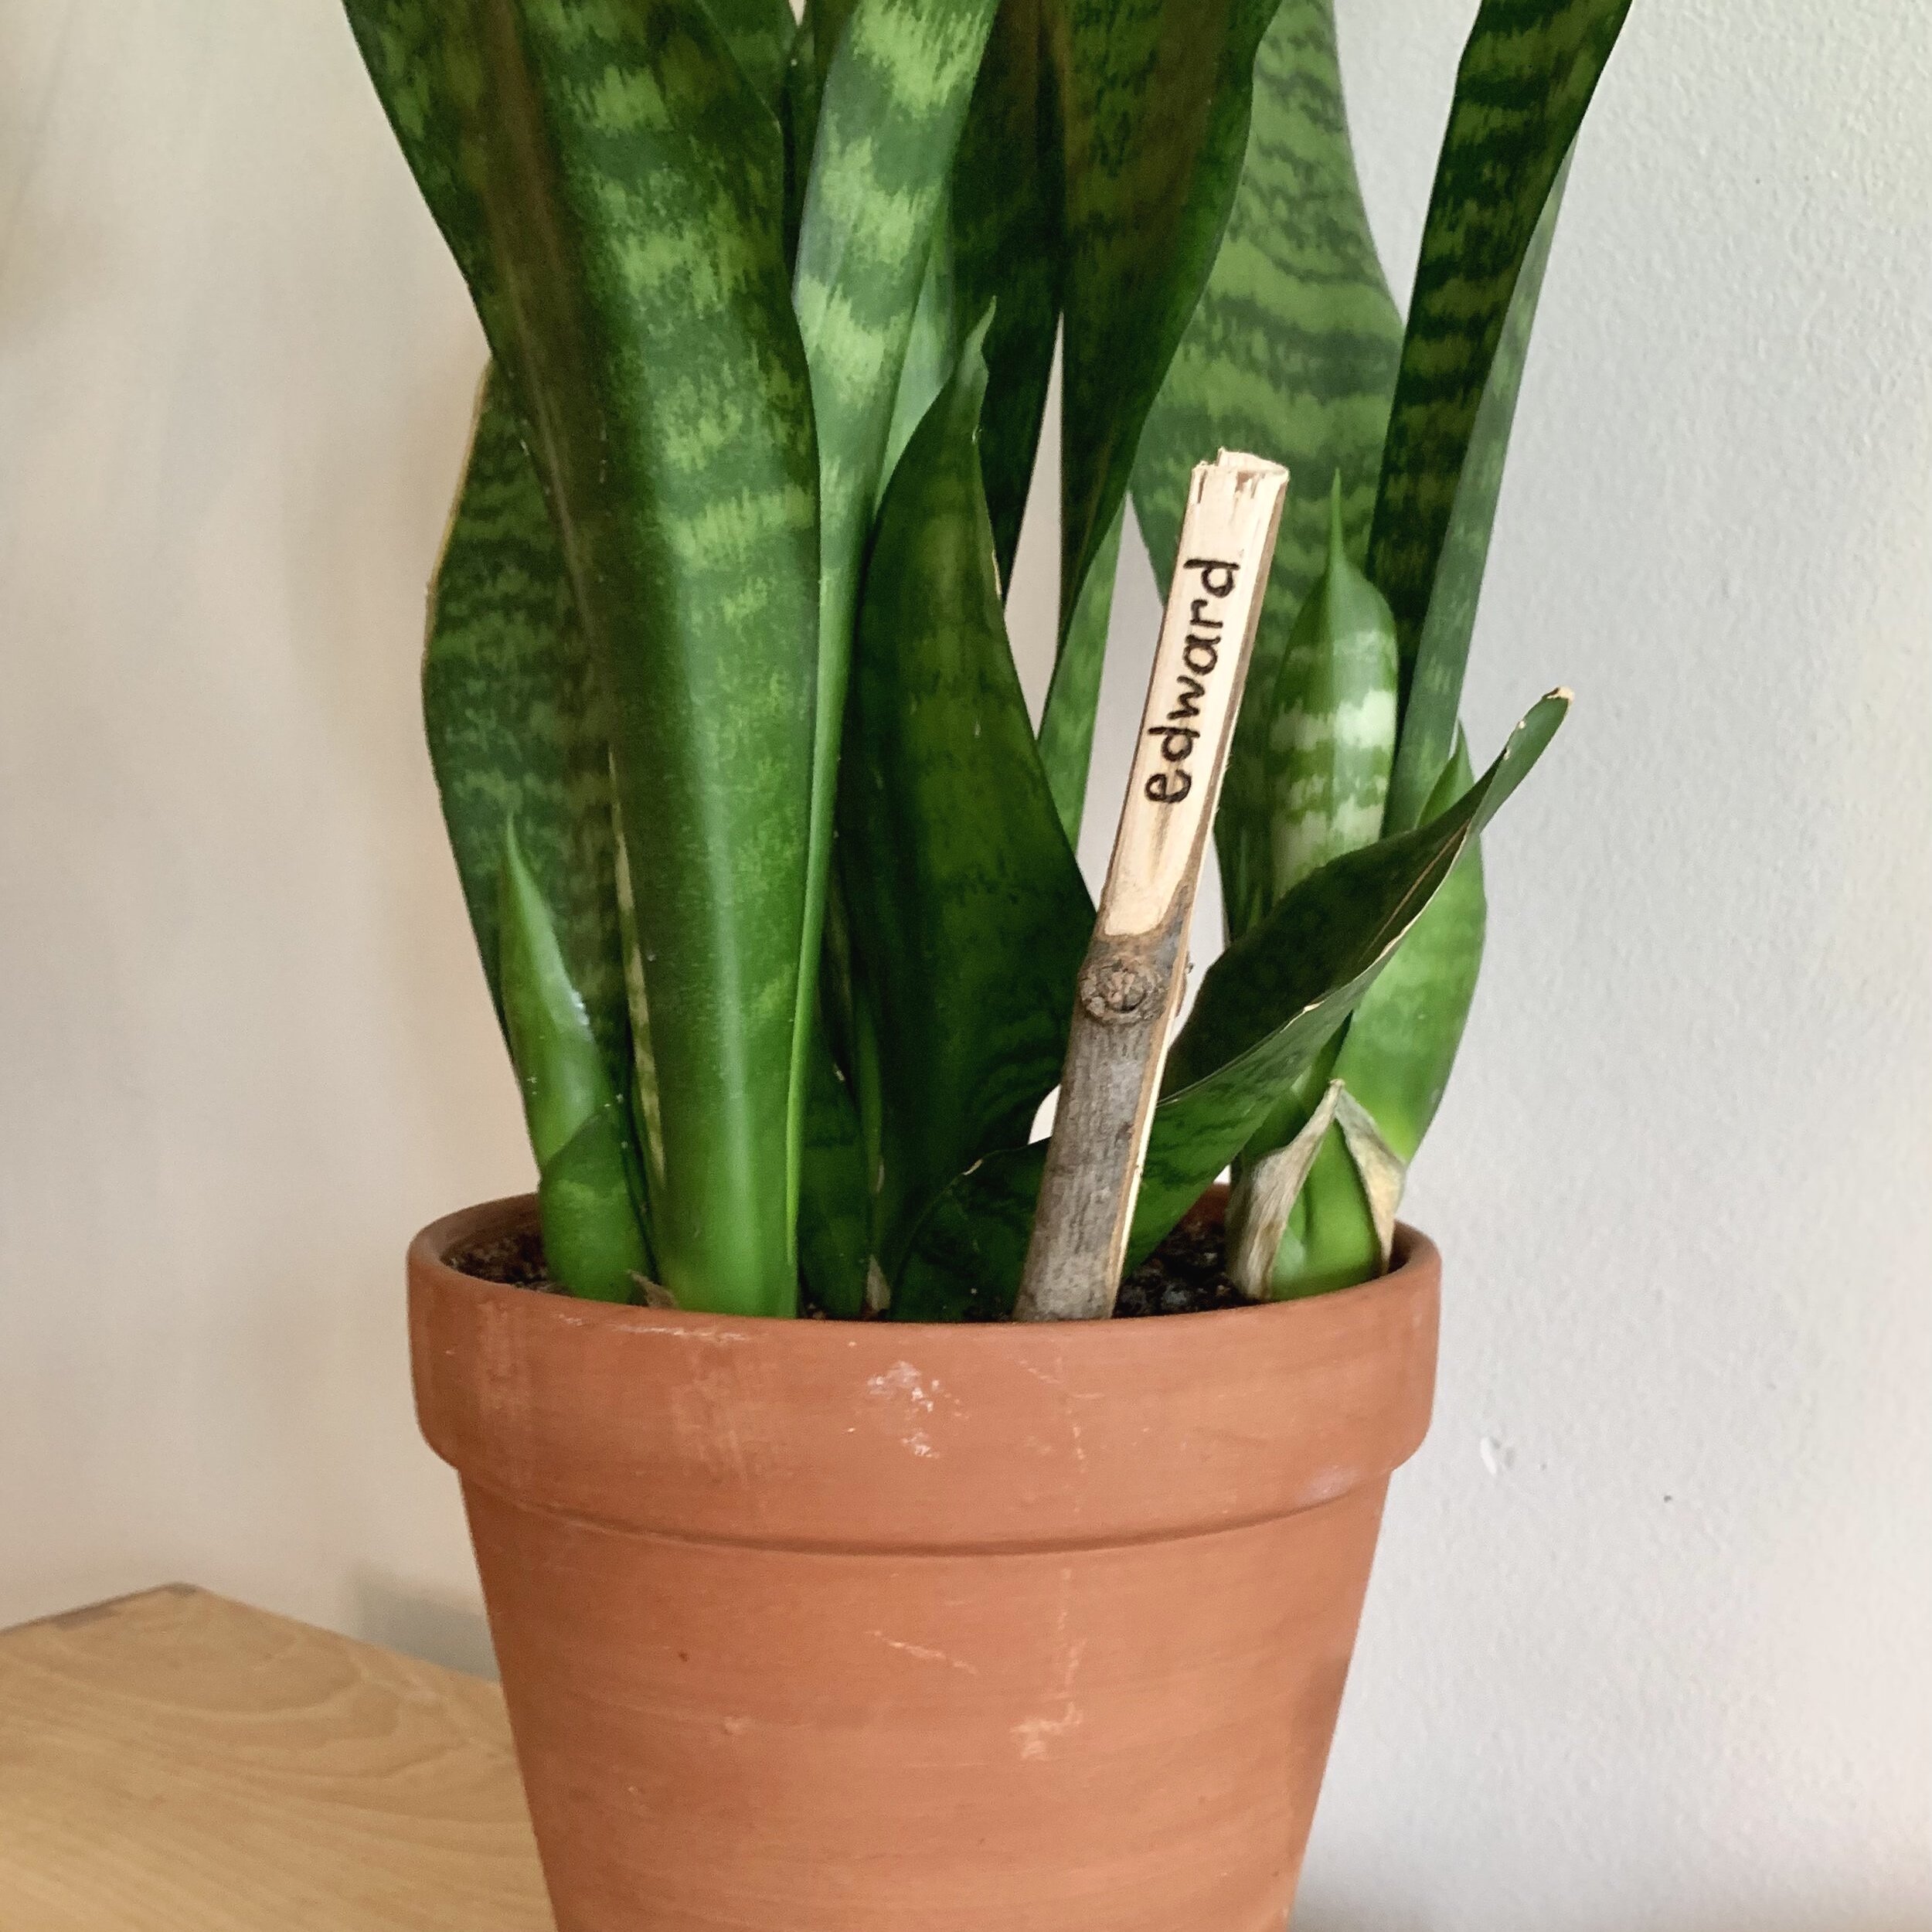
Edward, over here, is one of my favourite plants. He likes to be watered from the bottom (I put him into a bowl of water for 15-20 minutes instead of pouring water from the top). When I am away for an extended period of time, this marker helps out the person who is coming to water my plants, know that he likes to be watered in a certain way.
I wanted something quick and free because wood exposed to natural elements, like the sun, over long periods of time will make the burning fade. Also, consistent moisture will cause the wood to decay over time so choose a marker that doesn’t break the bank and keep your design simple. The markers may not last outdoors more than one season, especially if they are really thin. Indoor markers will last much longer.
Below are the steps to make your own:
Materials:
The marker (I used a stick form my backyard)
Wood burning tool
Pencil
Design or pattern (optional)
Sandpaper
Steps to making your own garden markers:
1. Select your marker of choice
I chose to work with sticks that I found in my backyard because I was going for a natural look, and I wanted this project to be free and easy. If you prefer a more finished look, you can find pre-made mini wooden stakes/markers in all shapes and sizes online. Above all, make sure that whatever surface you choose, it is untreated and unfinished.
Choosing the right stick:
Make sure to choose branches and sticks that have dried out thoroughly and have been broken off the tree/bush for a while. Do not take branches that can bend easily or directly off a tree. This is green wood and should not be burned on (see here for a list of woods to avoid burning on). Green wood refers to wood that has been freshly cut from a tree and has not been dried or seasoned yet. It contains a high amount of moisture and can create a lot of smoke, will burn much slower and will not burn consistently and crisply.
Choose a stick that is free from any major knots or defects because creating a flat surface is difficult when the stick is wonky.
Keep in mind the size and thickness of your stick. You can use a saw or pruning shears if you need to trim the stick to length. I just broke my stick with my hands because it was super dry and small enough and then I sanded the broken edges down a tiny bit to make it look a little cleaner.
2. Create a flat surface
I used a regular knife to carve a flat section on the top of the stick. It’s much easier to carve when the knife is sharp. If you do not have any sharpening stone or strop to sharpen your knife, the bottom of a ceramic mug will do in a pinch. This method can help to hone the blade's edge slightly, but it won't actually sharpen it by removing material from the blade. This method is perfect for this mini project but not ideal for larger projects.
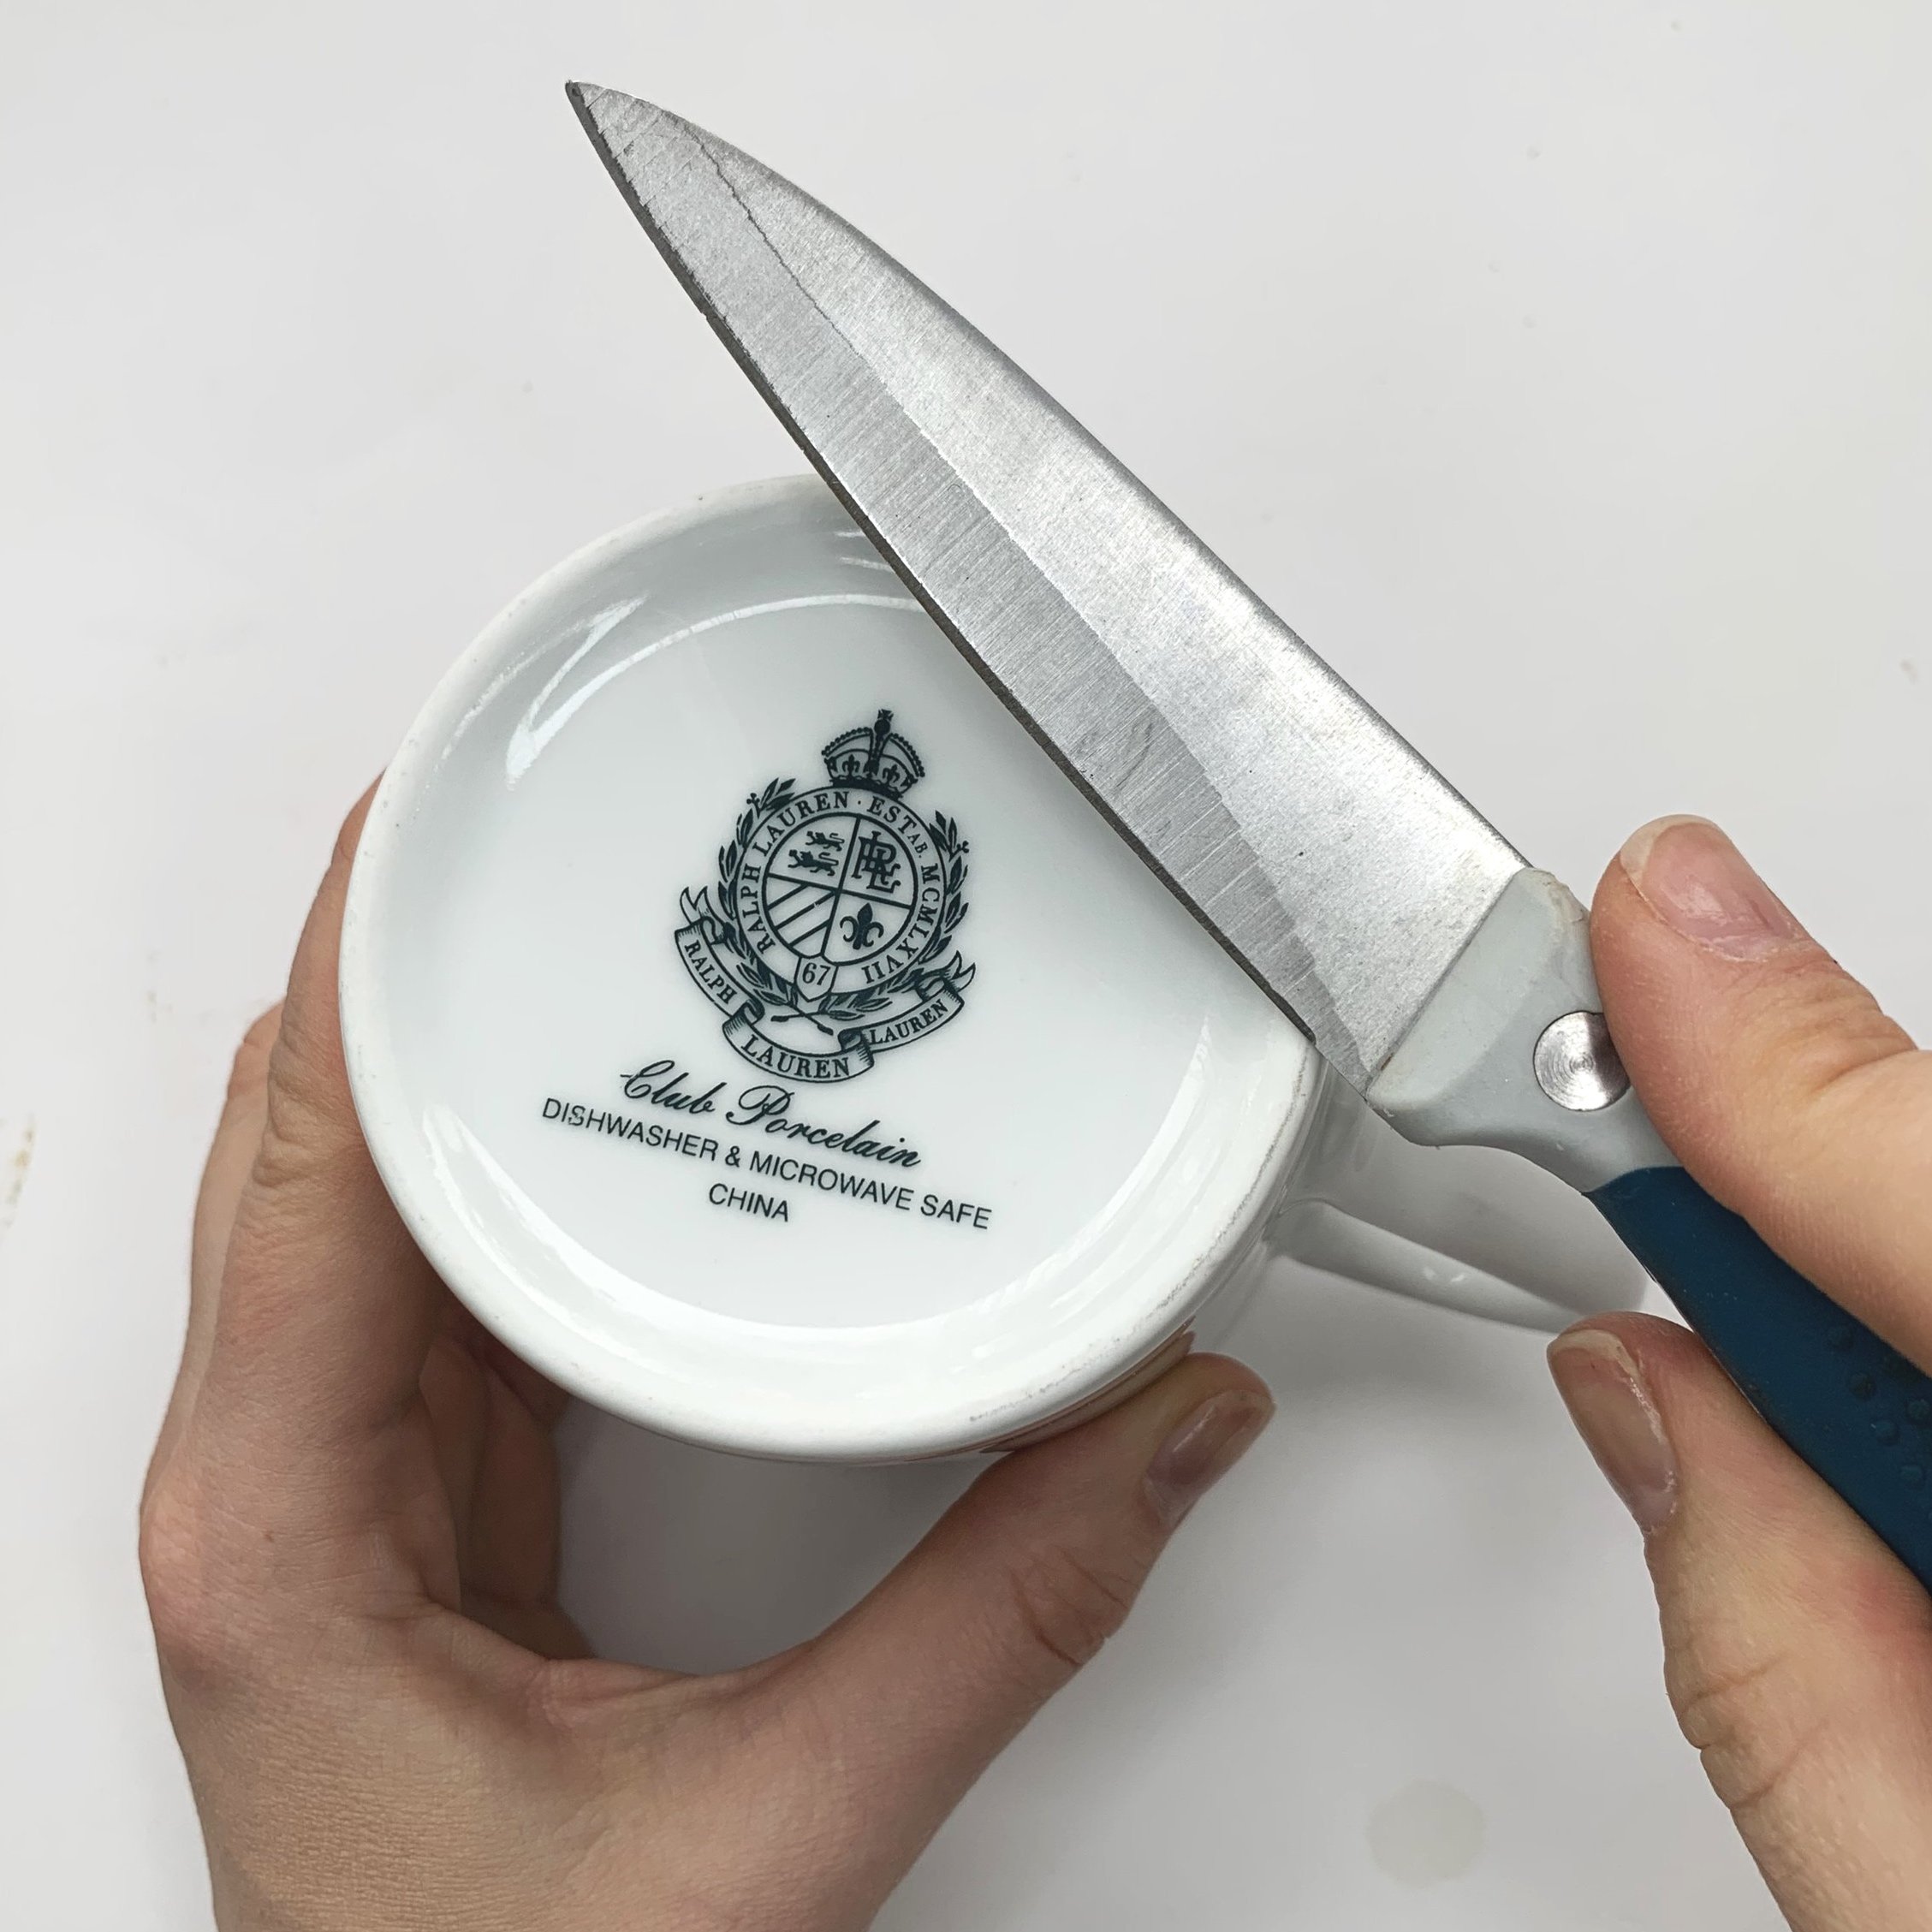
How to sharpen a knife using a ceramic mug:
To use the bottom of a mug for honing, turn the mug upside down and hold it firmly in your hand, pointing away from your body. Then, angle the knife blade at a 20-degree angle against the unglazed, rough part of the bottom of the mug. Draw the blade down the surface of the mug, applying light pressure and maintaining the same angle throughout the process. Repeat this motion several times on each side of the blade. After sharpening, test the blade by slicing through a piece of paper or card stock.
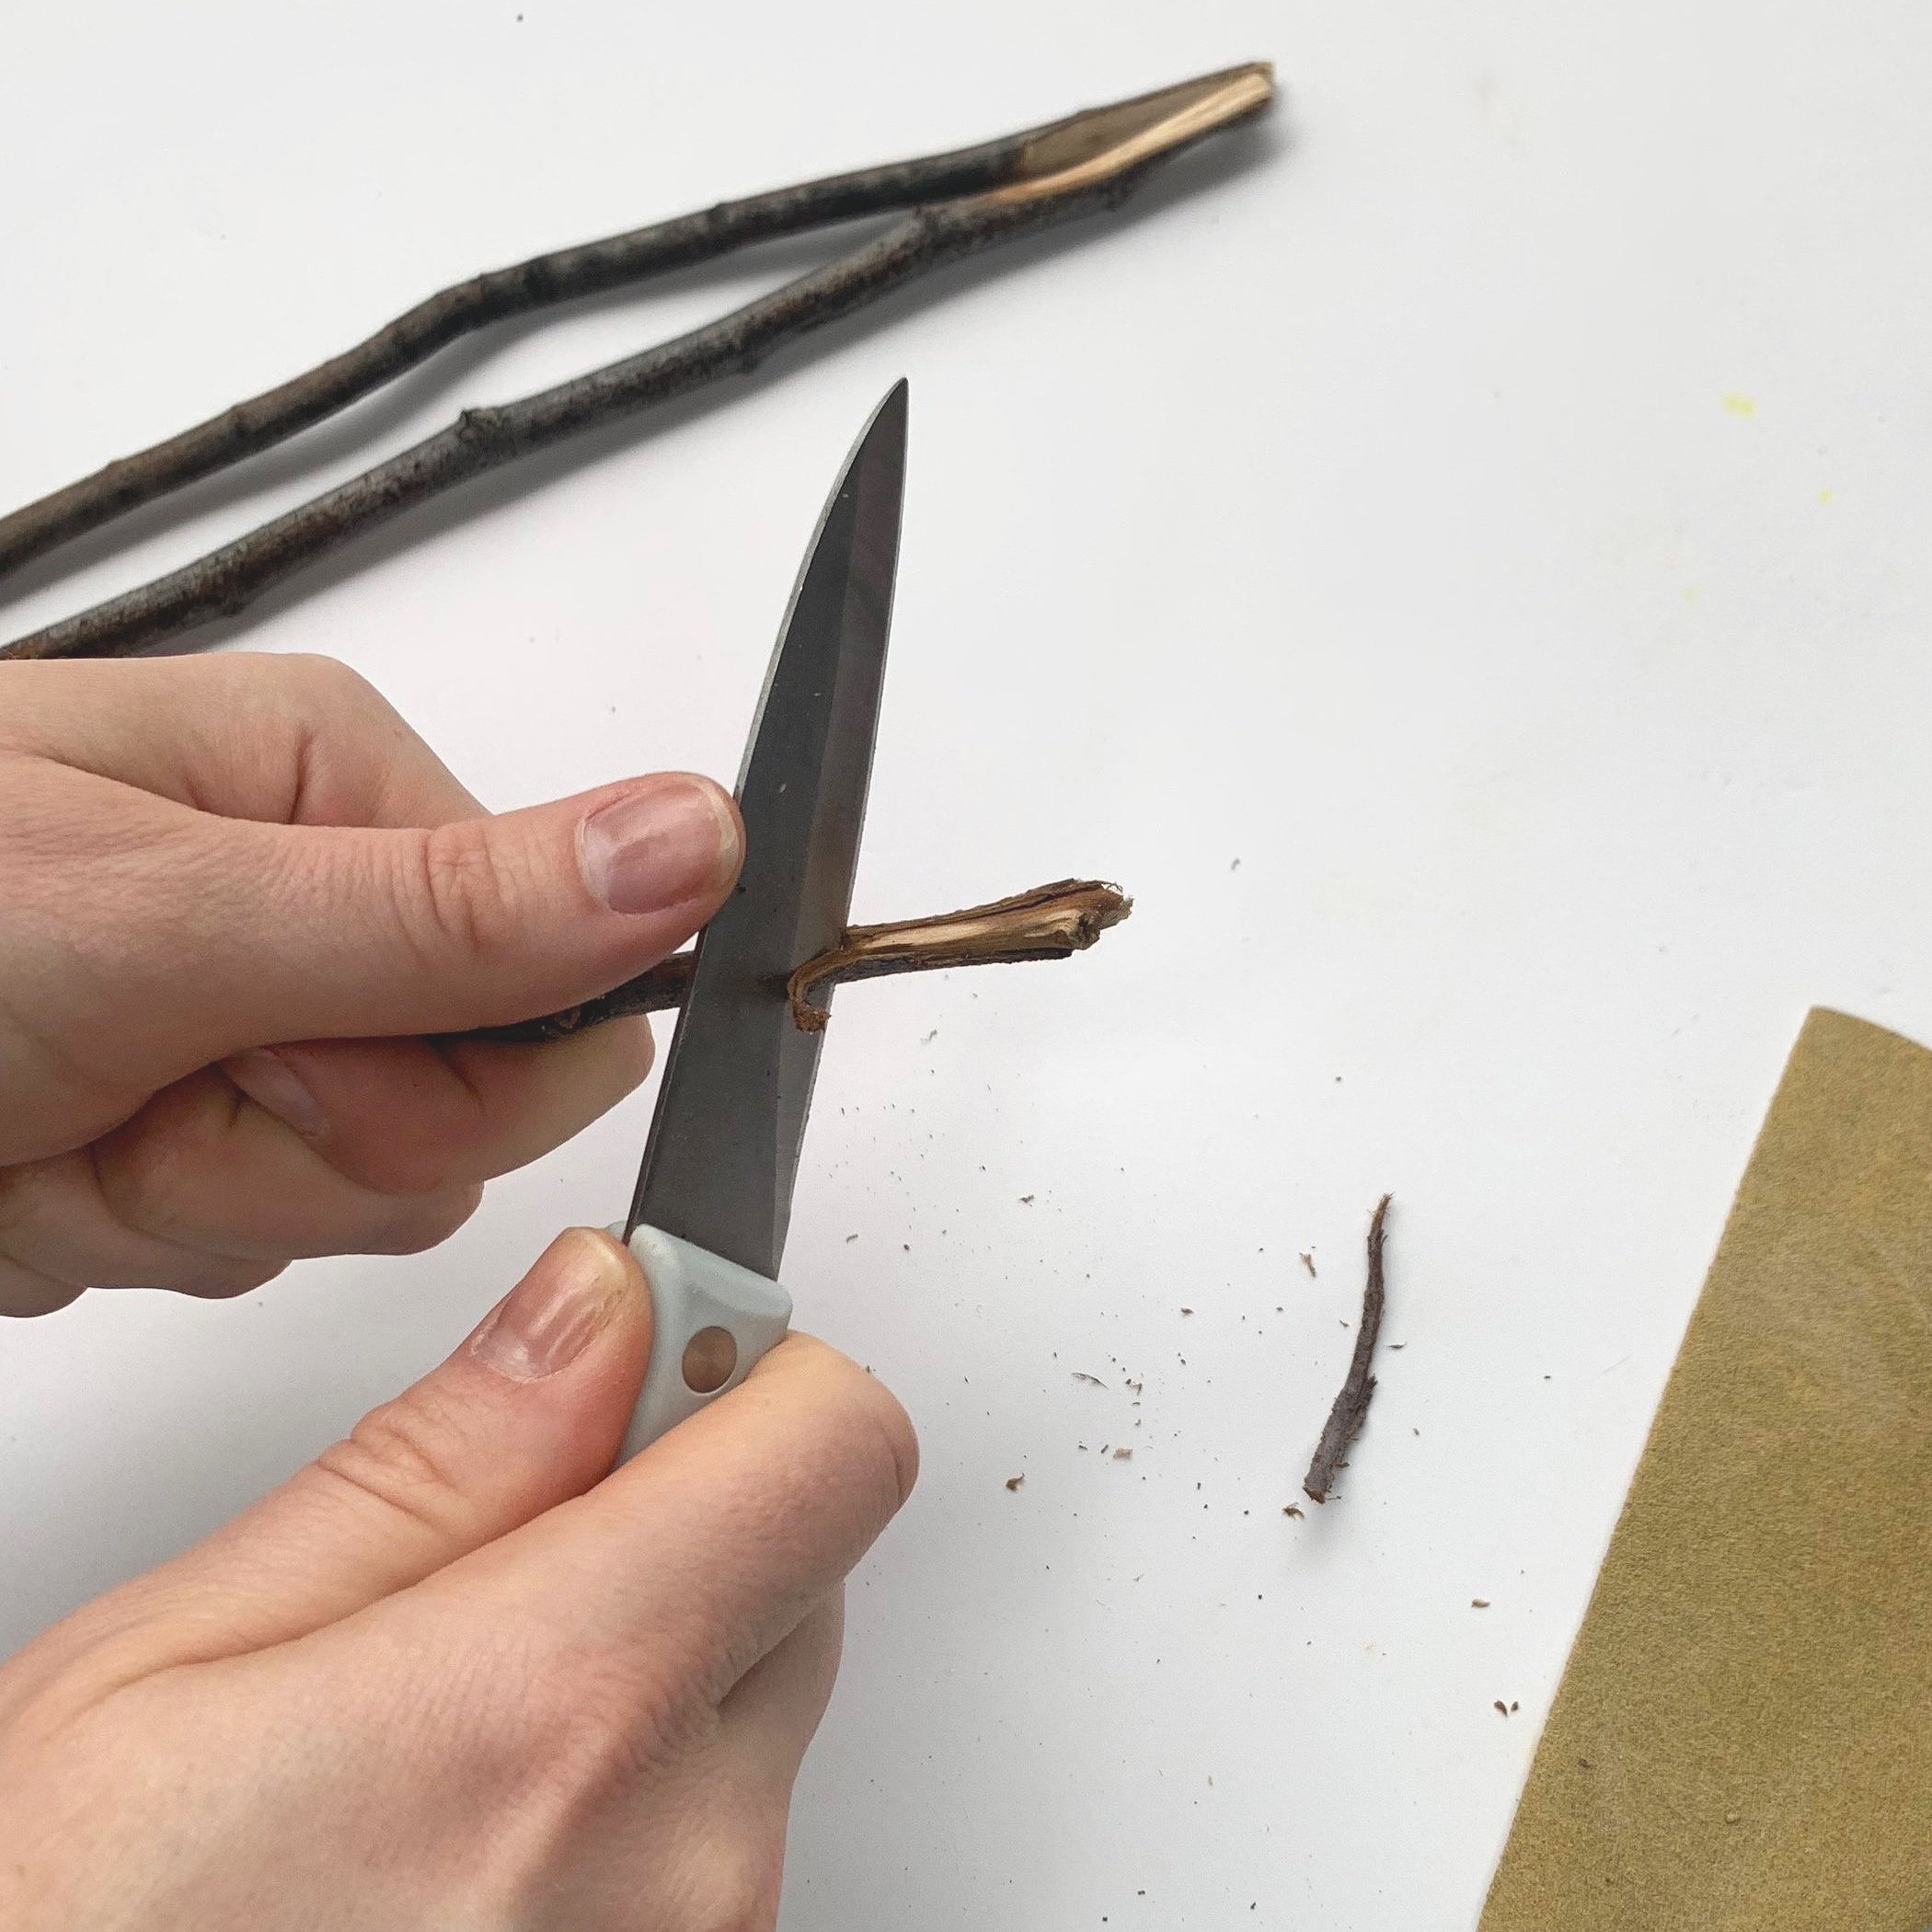
Carving your stick
Safety should always be a top priority when carving a stick. Always use a sharp knife, cut away from your body, and wear protective gloves if necessary.
Start by making small cuts and removing thin shavings from the stick.
Work slowly and carefully, and ALWAYS cut away from your body to avoid accidents.
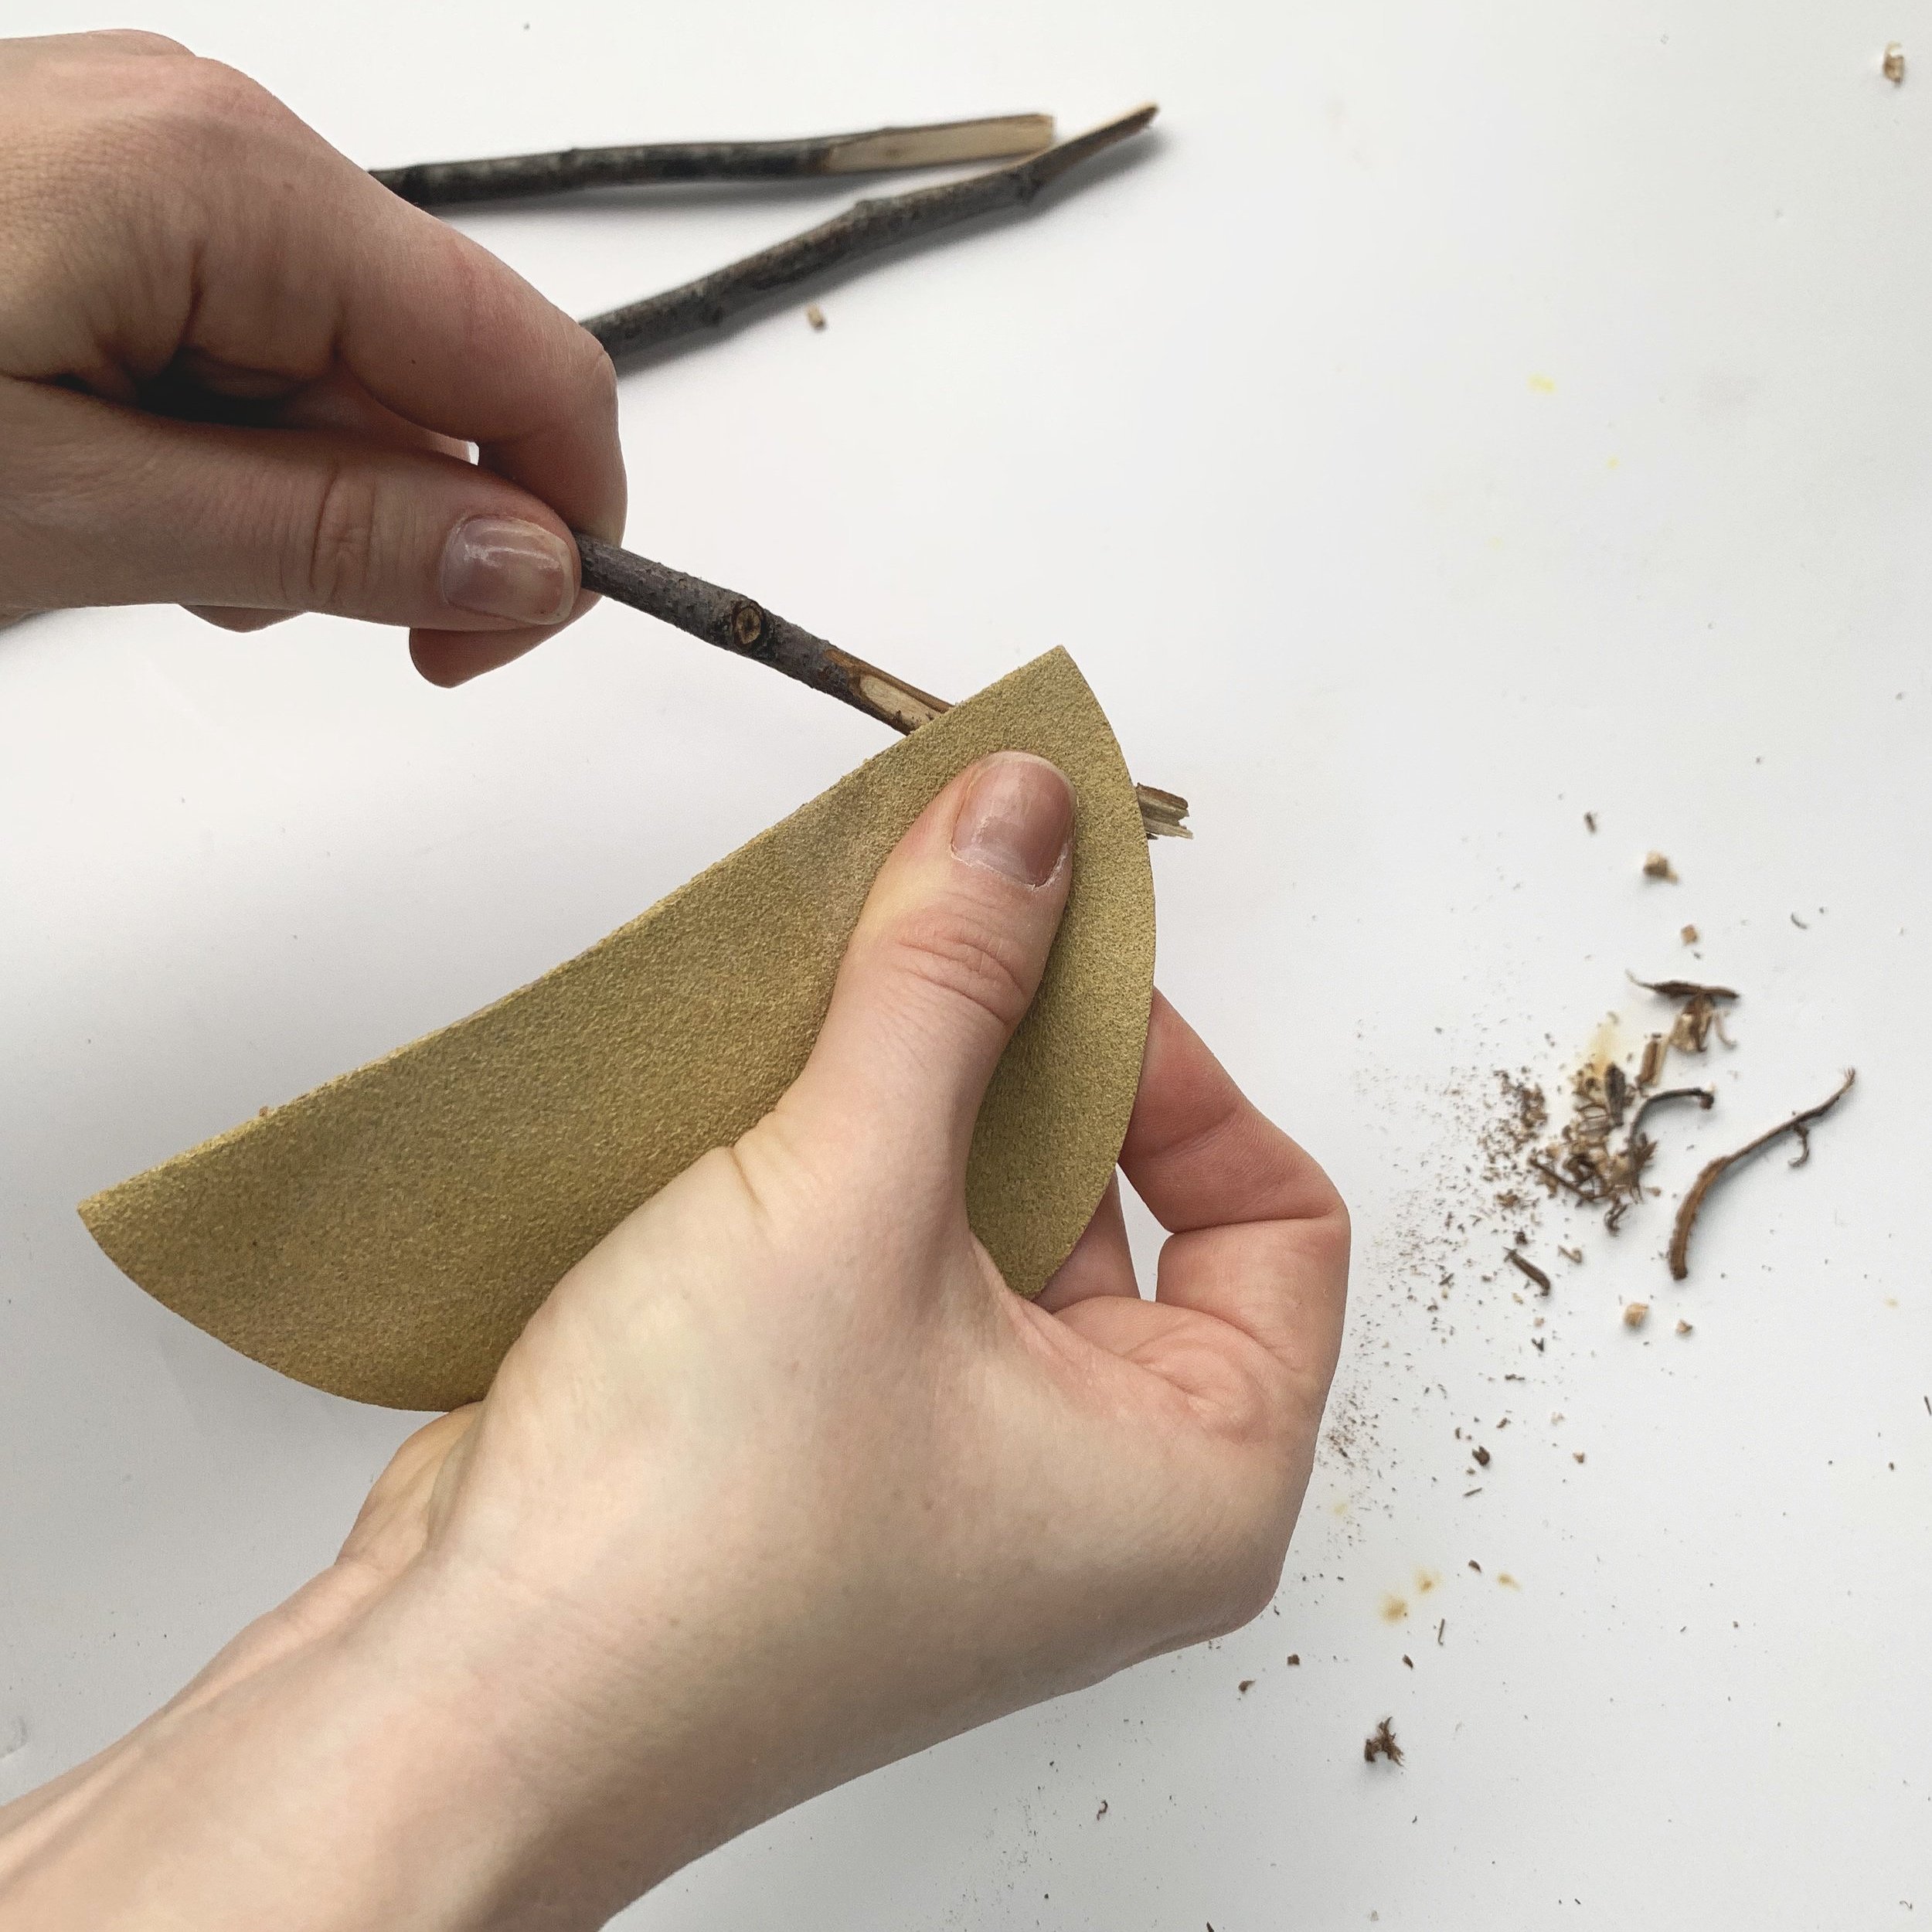
Sanding your surface
Once you have an area that is fairly smooth and the size you want, sand the area to remove any roughness or splinters. Sanding it smooth will make the burning process easier and more crisp so don’t skip this step.

3. Create your design
Using a pencil, lightly sketch the name of your plant, herb or vegetable (or whatever design you want to burn onto the wood). This will act as a guide for your wood burning tool. You do not have to follow it exactly, and can erase any lines you adjusted mid burn. Drawing it out first helps to find the centre of the area.
4. Burn it
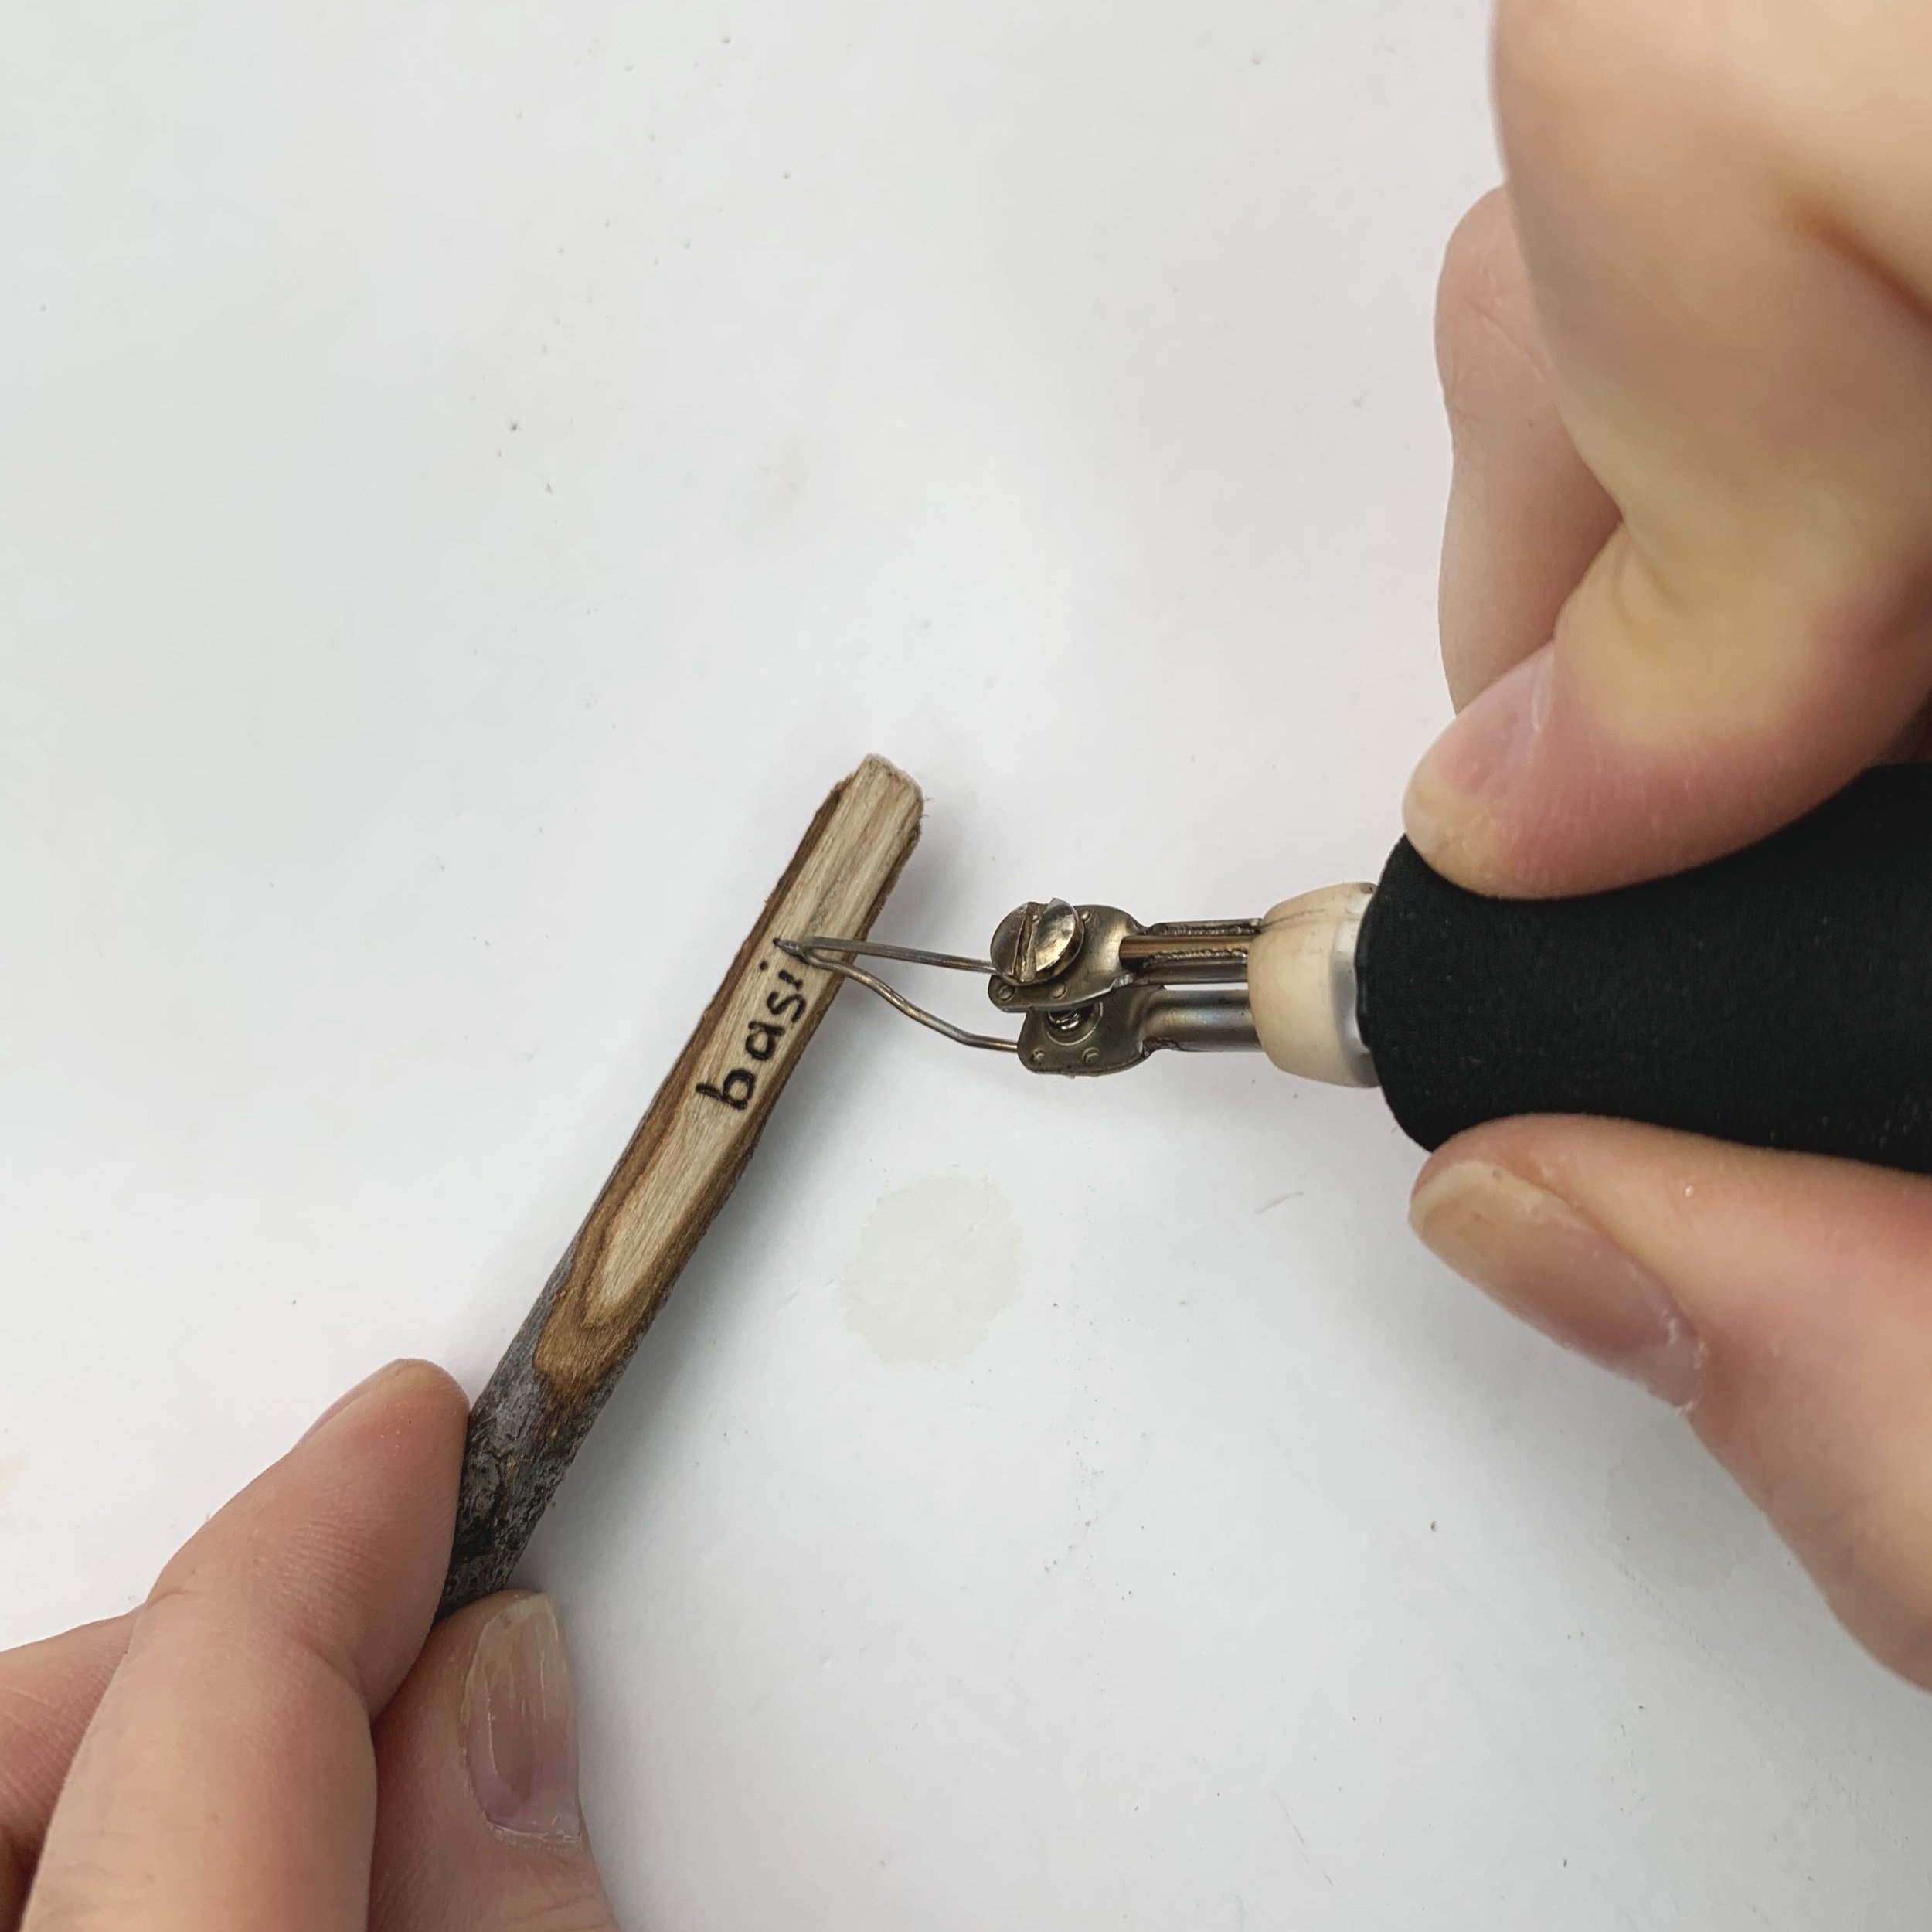
For smaller wood pieces that are tricky to hold, use tape to hold them down while you burn.
Heat up your wood burning tool and select the tip you want to use for your design.
Use your safety gear (check out our safety tips and free downloadable guide here).
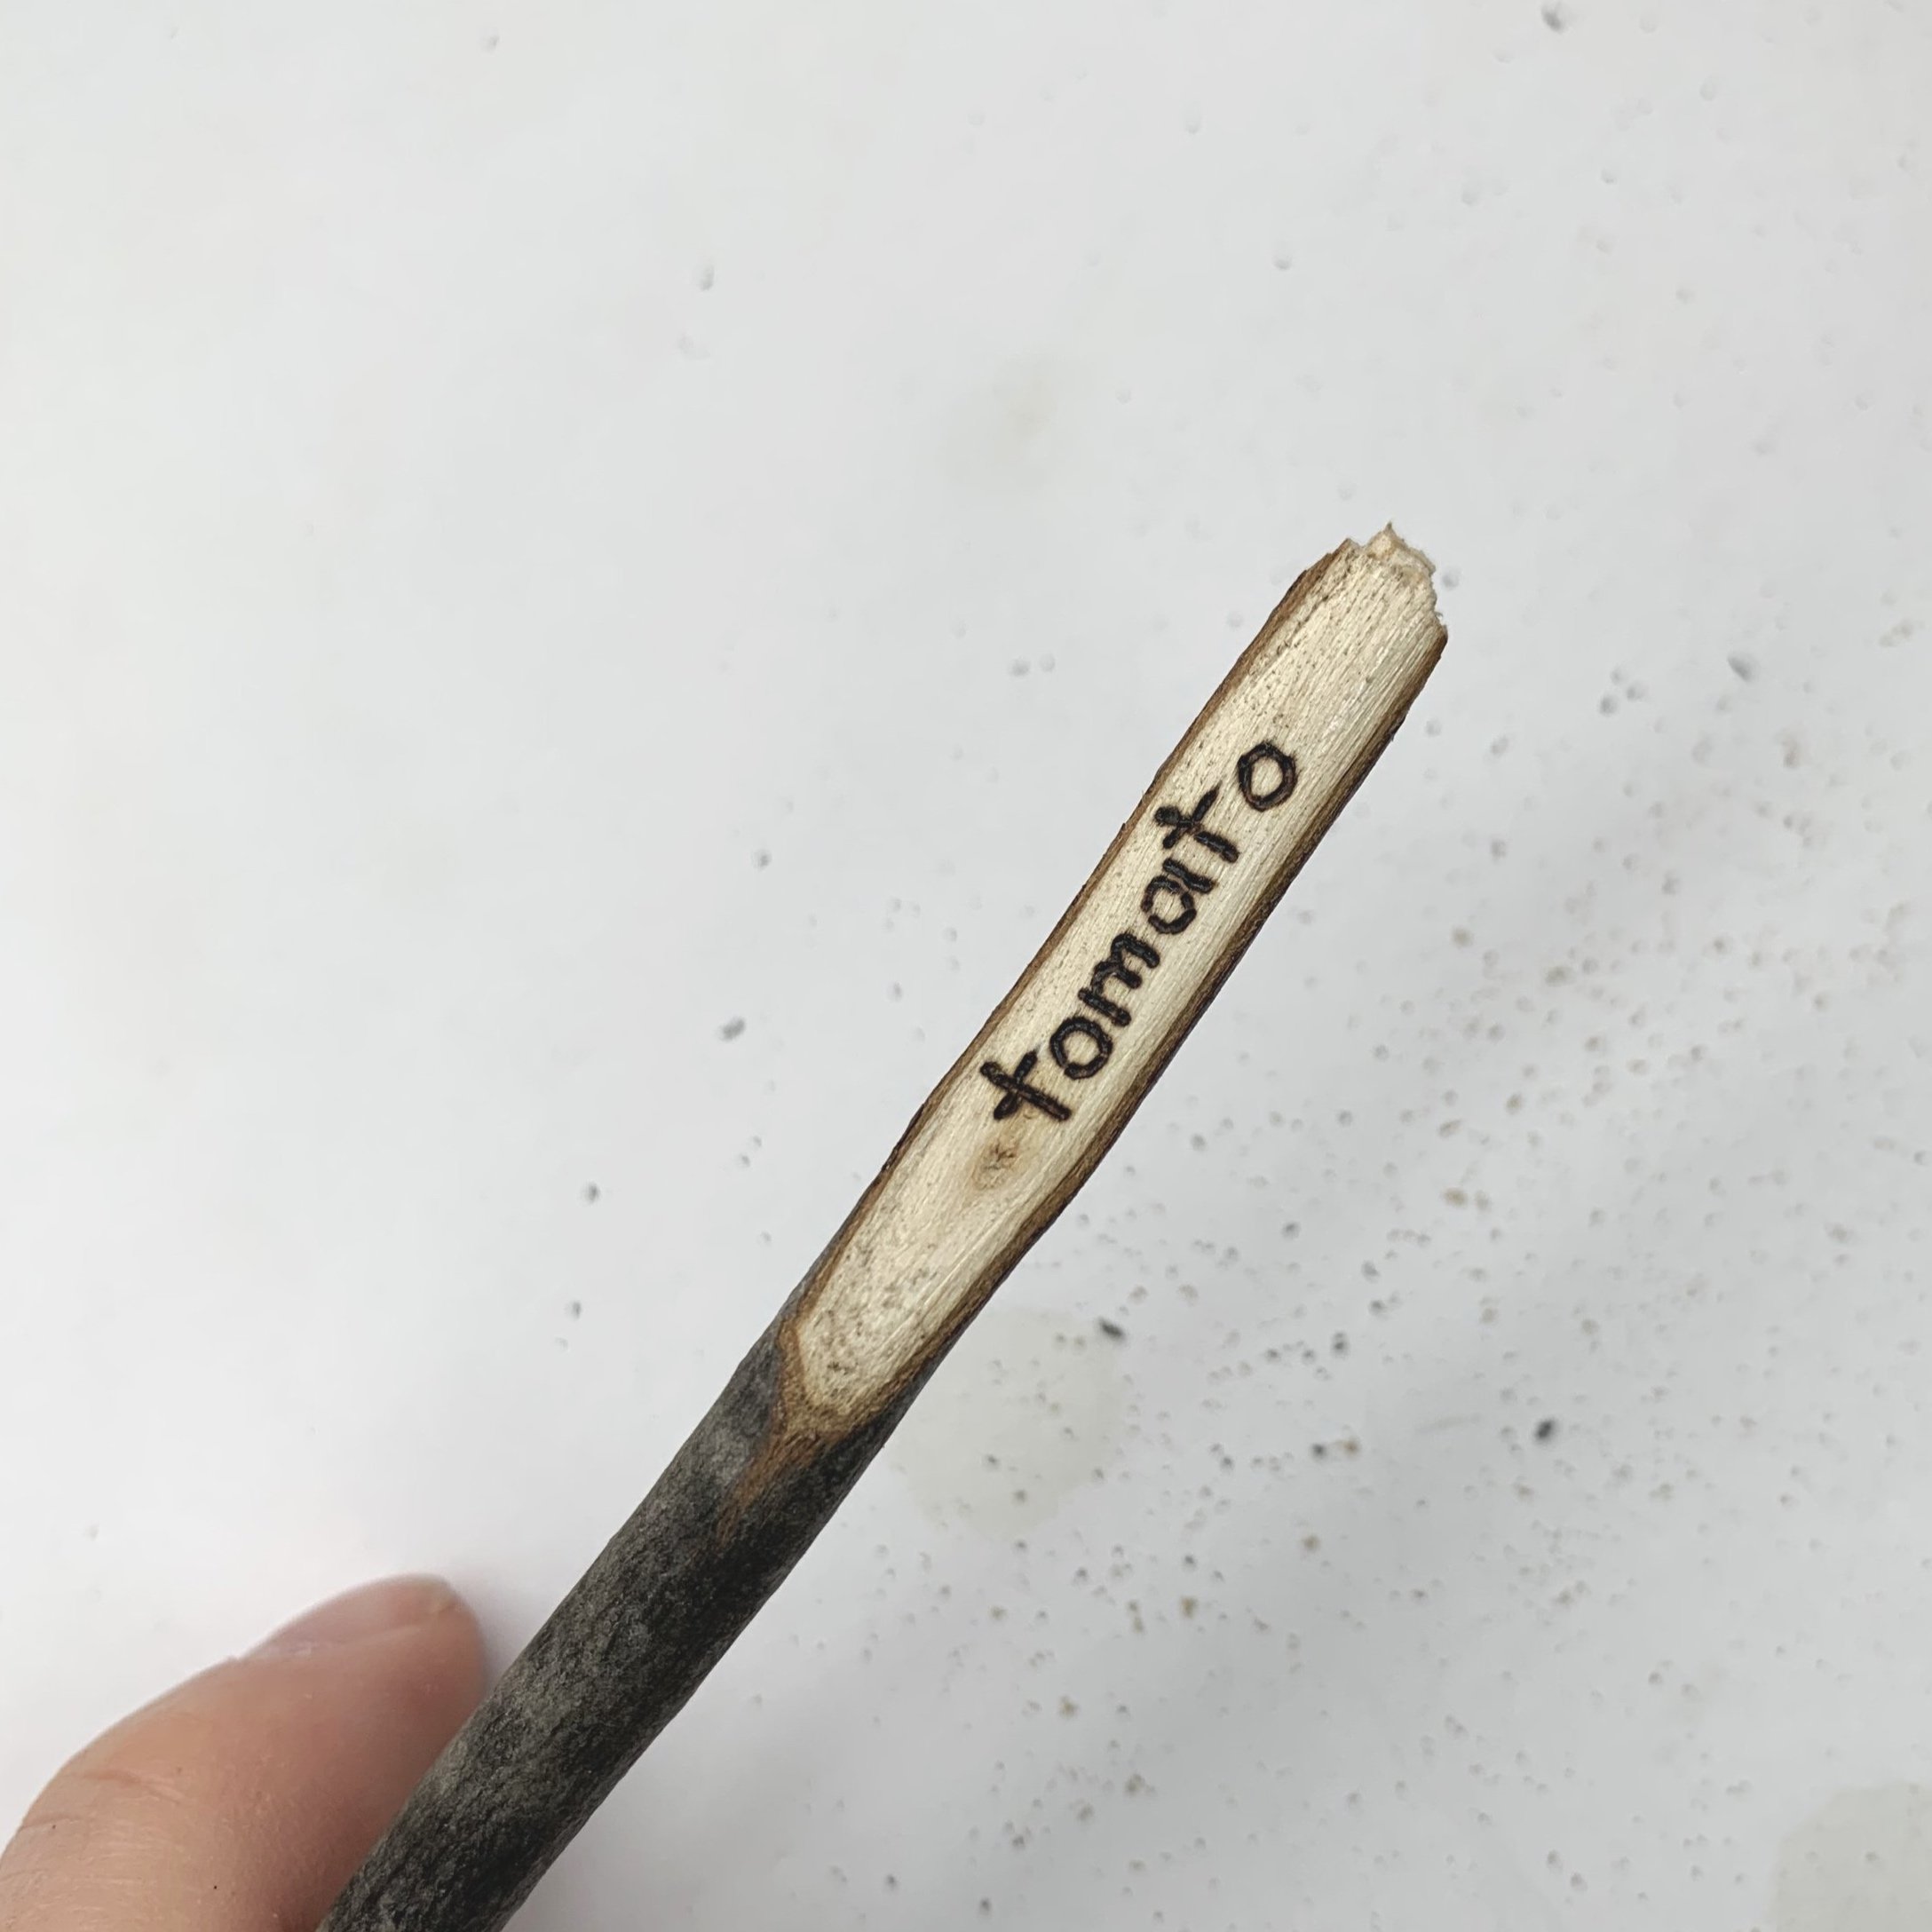
Start Burning. Carefully trace over your pencil sketch to burn the design onto the wood. Take your time and go slowler than you think you should and let the burner do the work. Turn down the heat if you feel like you are not in control.
I like to burn deep and hard so that my piece lasts longer. This causes some over-burn or glowing lines so I use sandpaper after I burn to get rid of those. The sandpaper also helps get rid of the pencil marks. Click here if you want more tips on getting rid of leftover marks or fixing mistakes.

Wipe off any residual ash or debris from the wood with a clean, dry cloth (microfibre works best) or an old clean toothbrush works too!
Sanding will remove some of the burn marks so go in and touch up any spots that got removed when sanding until you are happy with the final product.
5. finish it (optional)
Applying beeswax to you garden markers can help to protect it from moisture, weathering, and insects. Beeswax is a natural wax that has water-resistant properties.
On you cleaned surface, use a soft cloth to apply a thin layer of melted beeswax, rubbing it in with circular motions until the entire surface is covered. Allow the beeswax to dry and harden, and then buff the surface of the marker with a clean, dry cloth to bring out the shine. Beeswax can be reapplied as needed to maintain the protective coating on the garden marker.
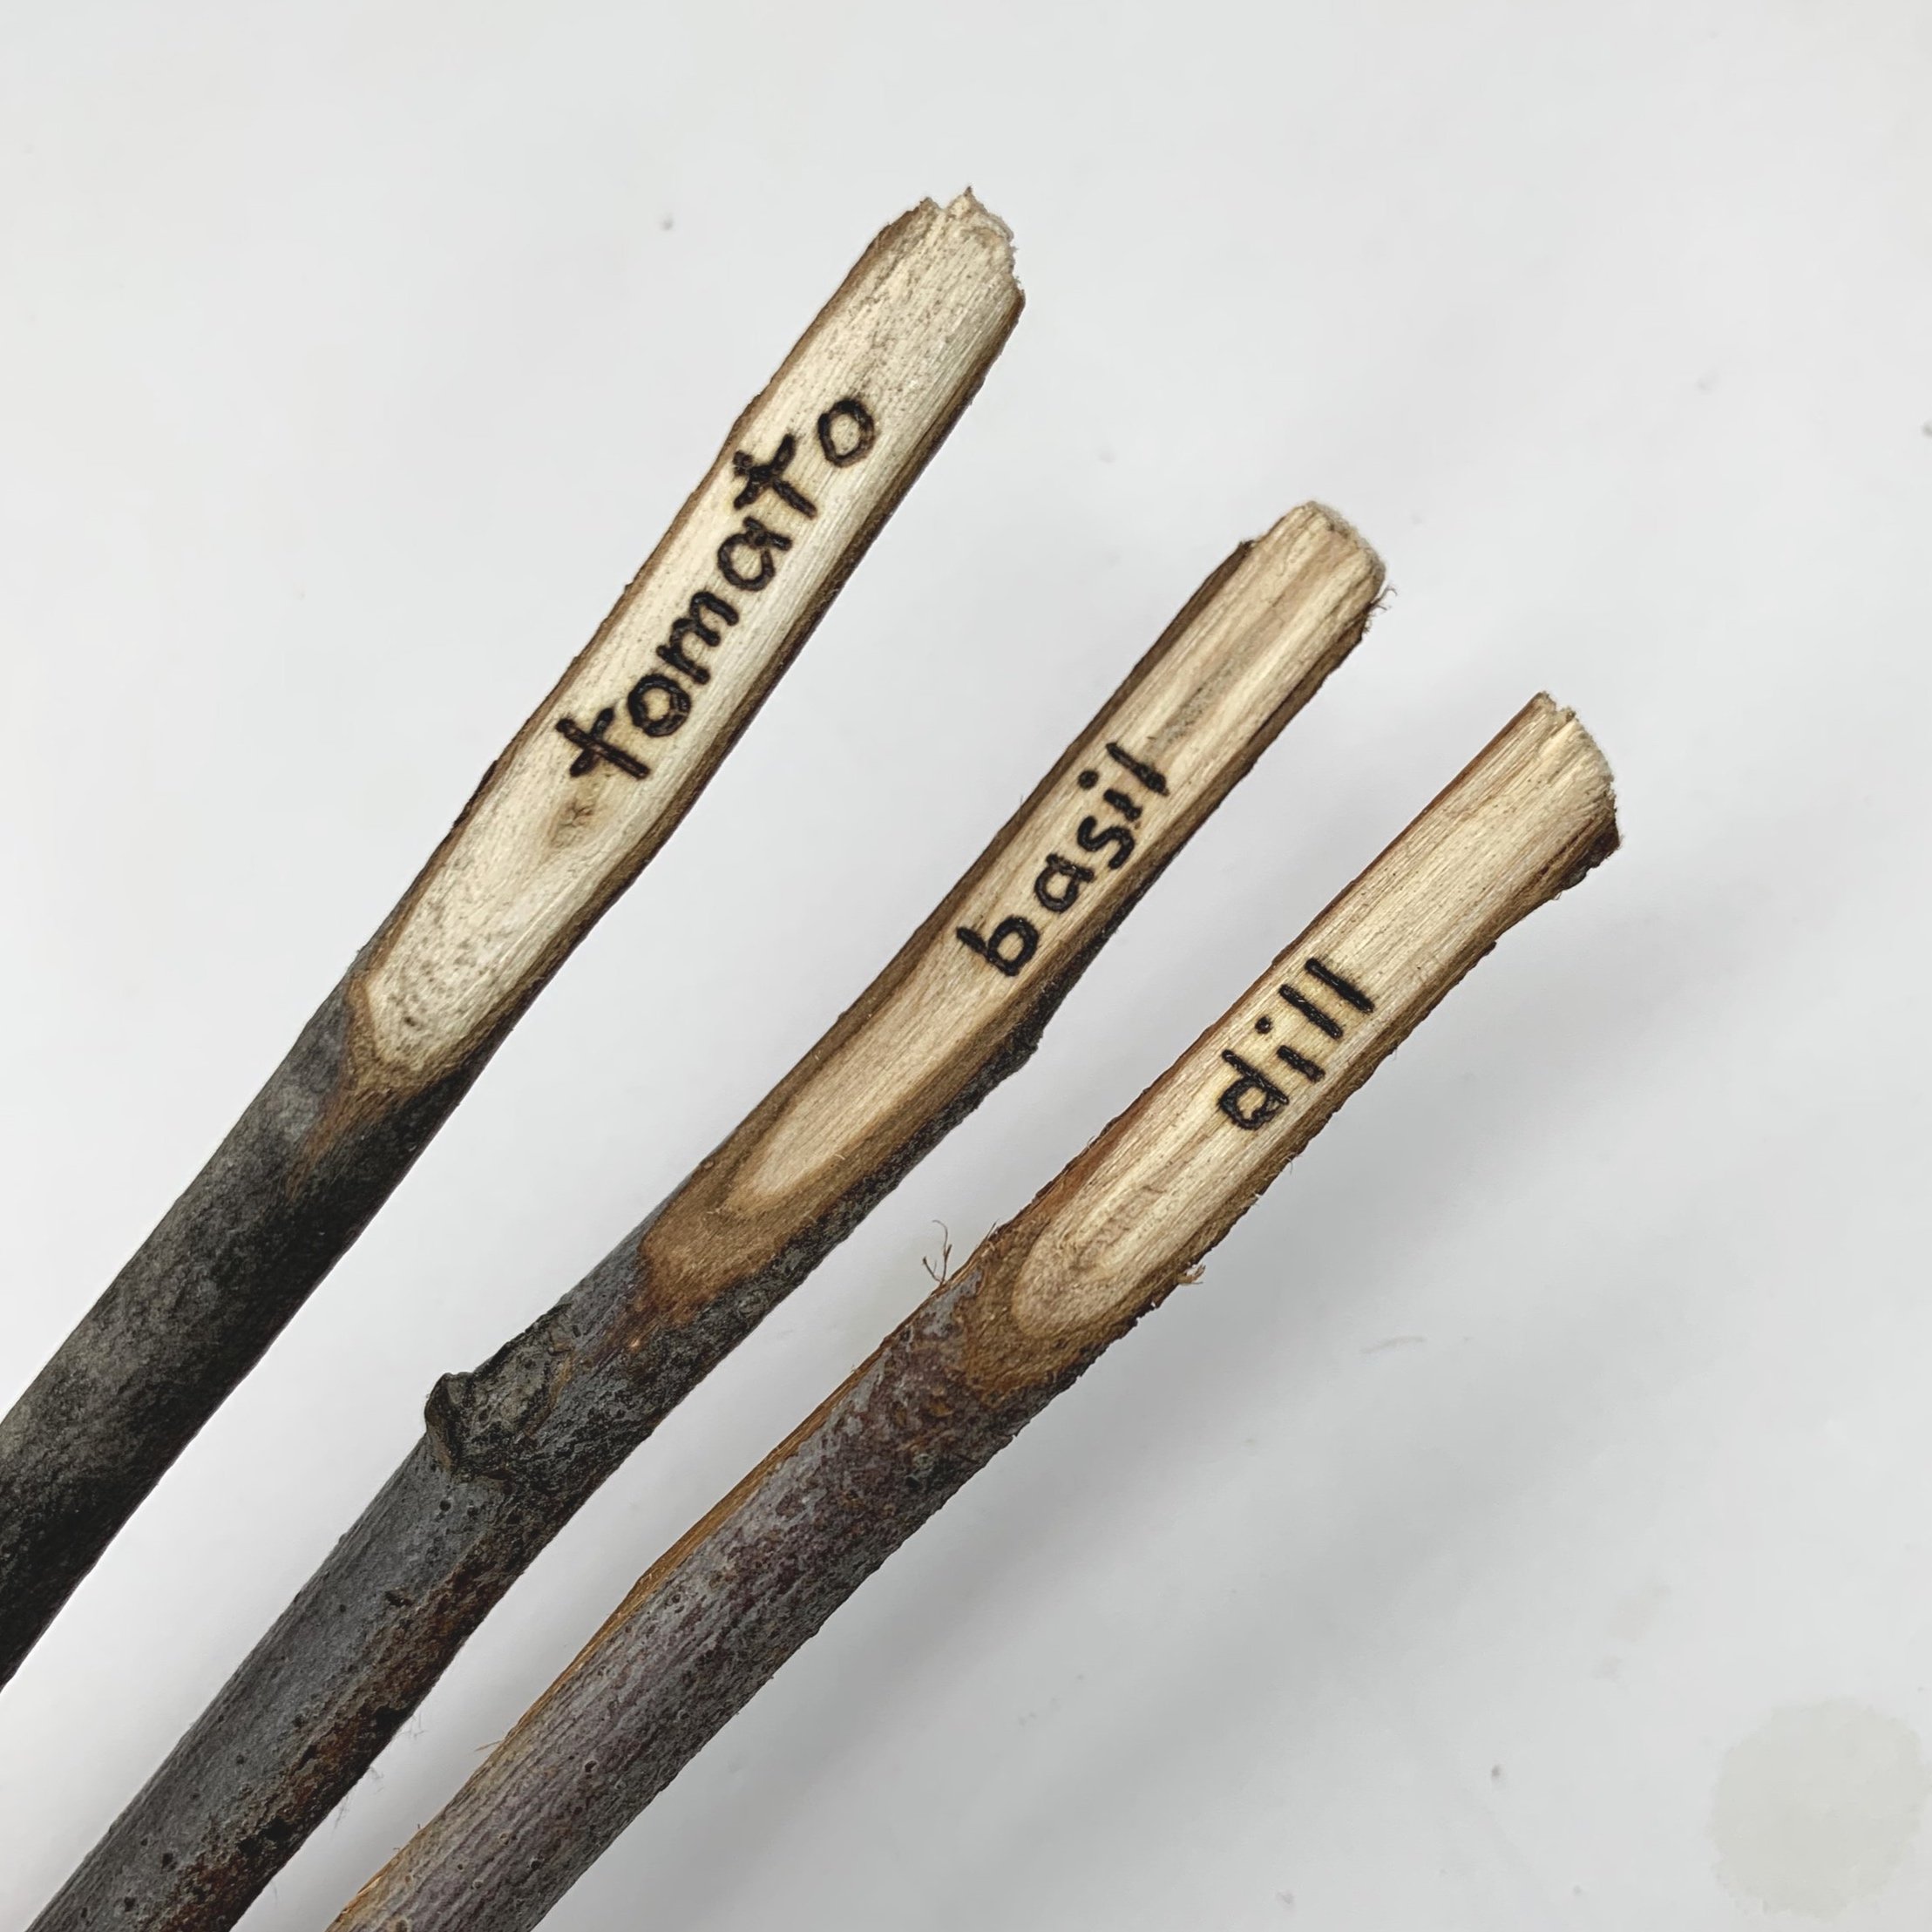
6. Enjoy it
Finally, place your wood burned garden markers in your garden next to the plants they are labeling or in your potted plants indoors.
That's it! Hope this inspires you to make some fun, functional and personalized art!

Want to learn more about pyrography??
Check out this blog post: Start Here if You Are New To Wood Burning
And grow with the community: Subscribe to our free Burn Club newsletter for freebies, pyrography tips and tricks, and so much more!