Project Ideas

DIY Wood Burned Plant Marker

Wood burned garden or plant markers can be a fun and creative way to label your plants in your garden outdoors or indoors.

This project took me about 20-30 minutes for 4 markers and was completely free!

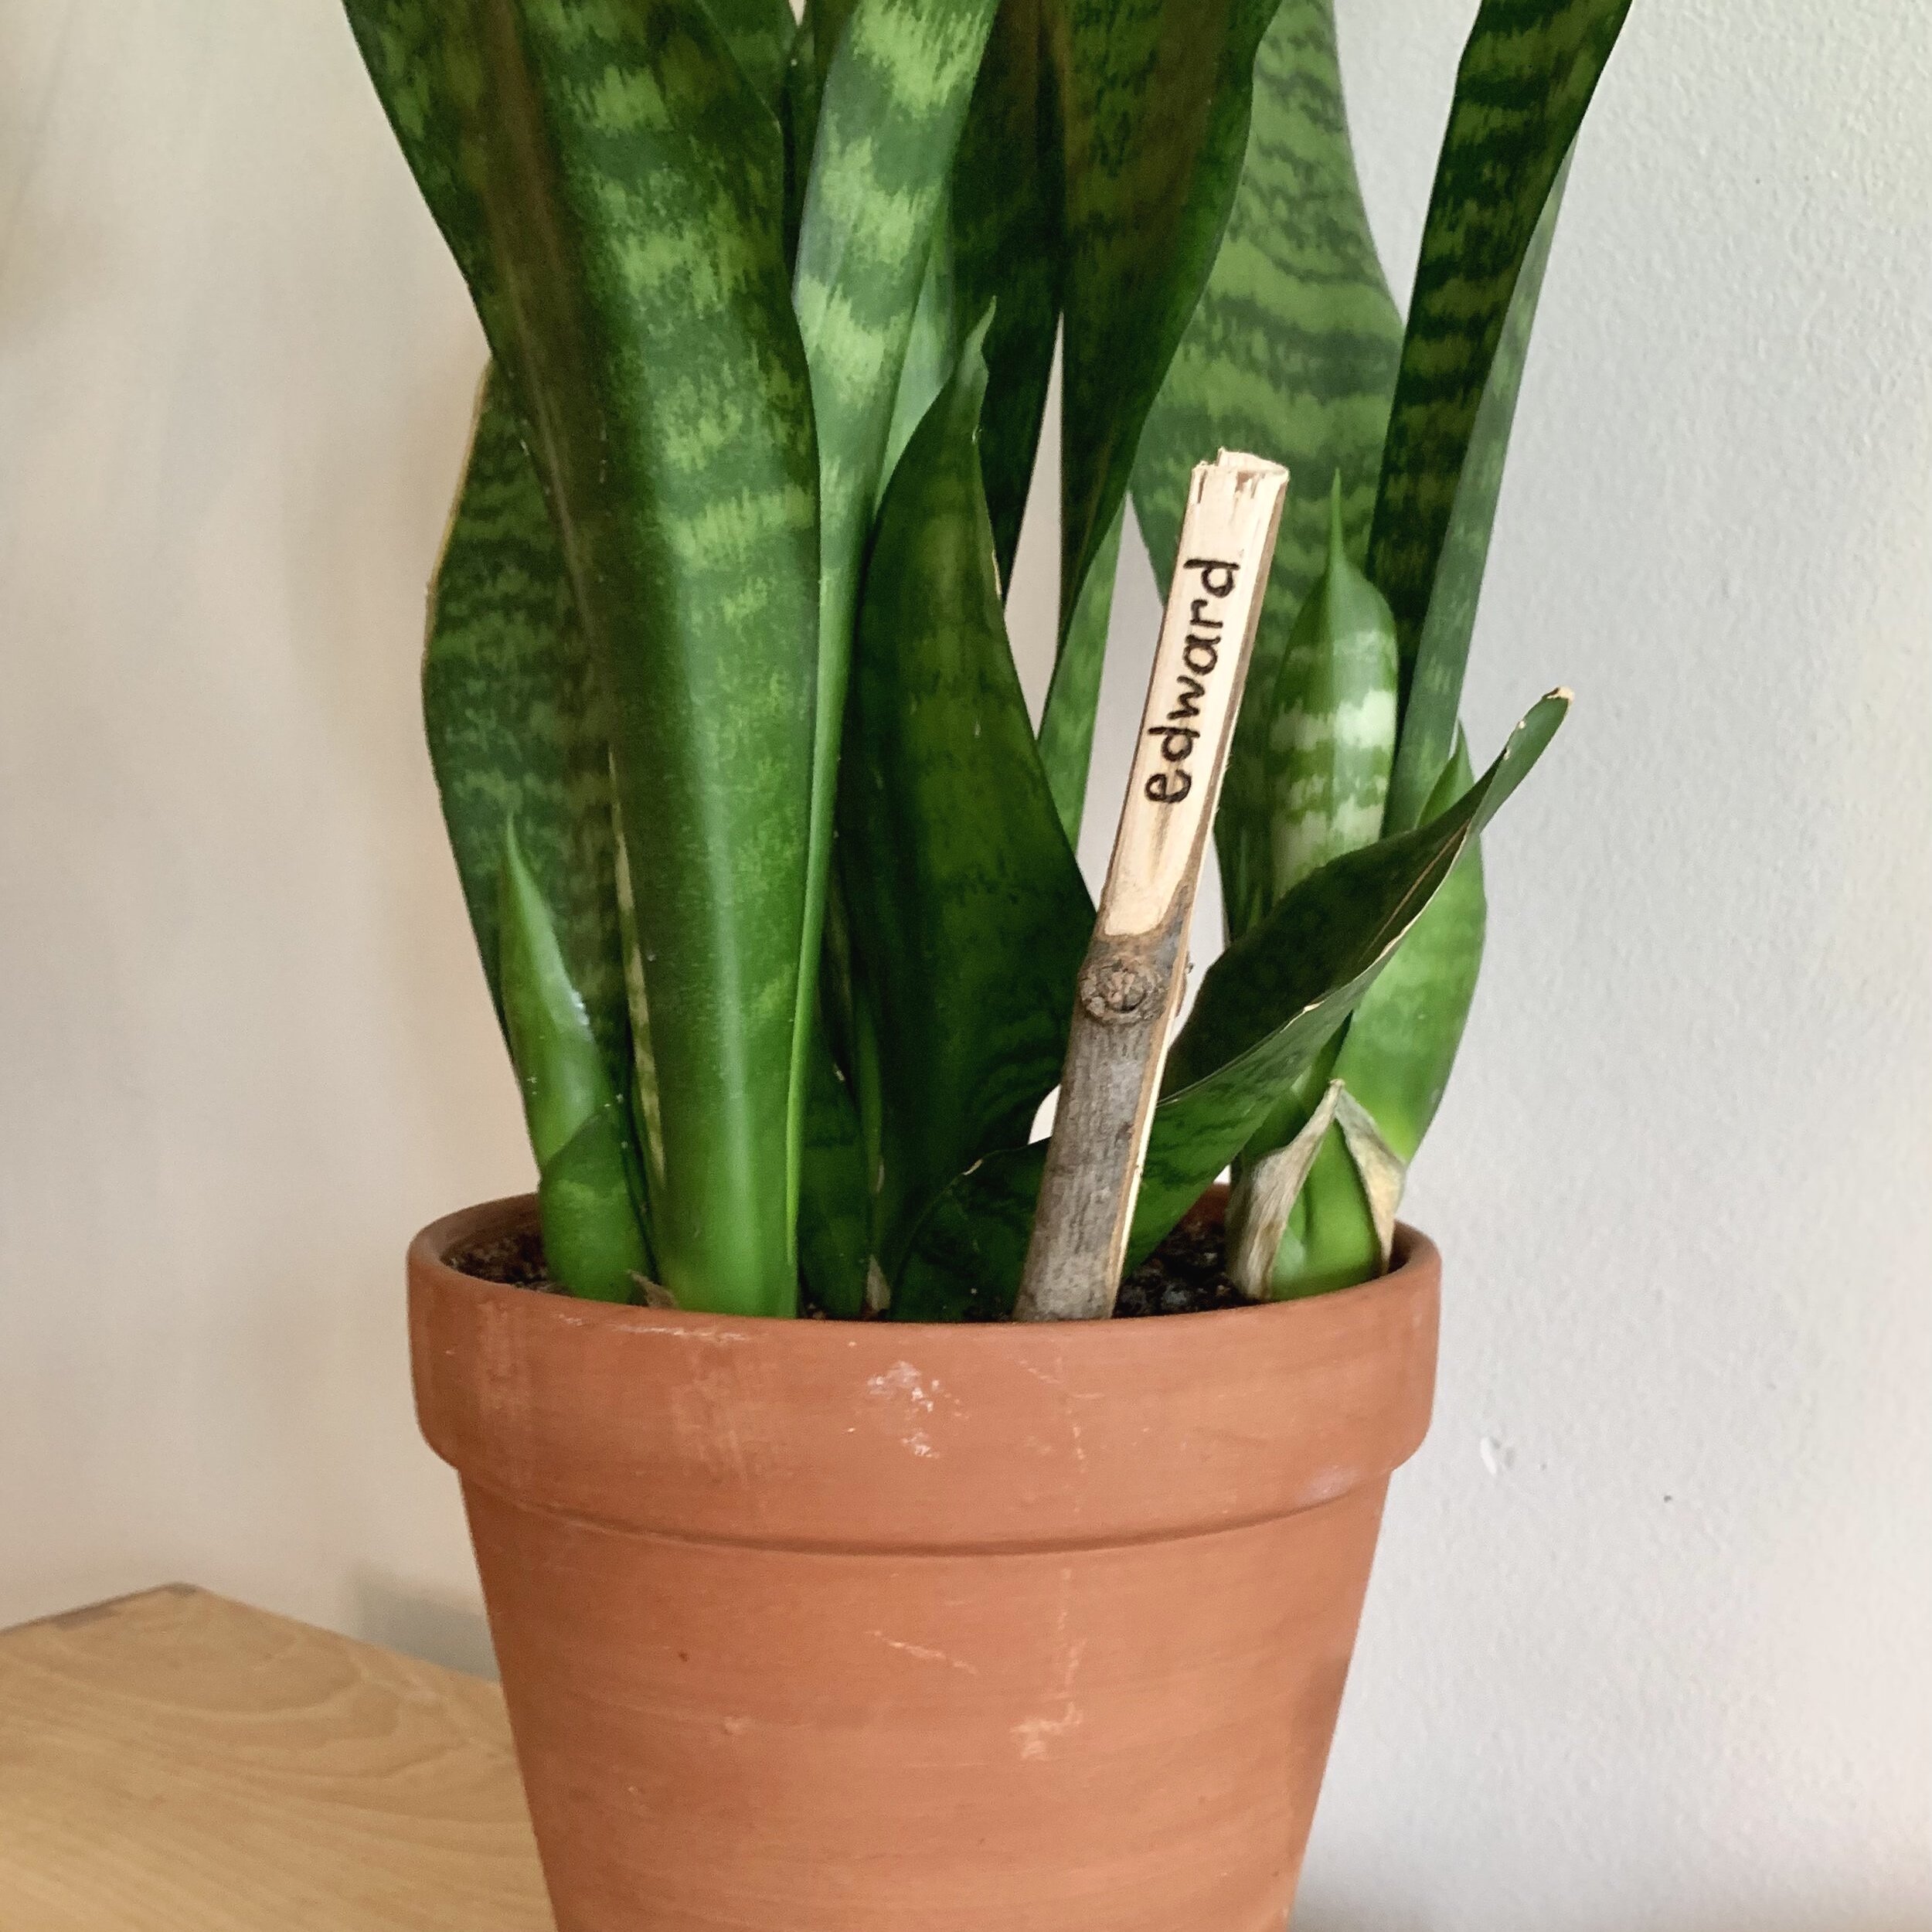
Edward, over here, is one of my favourite plants. He likes to be watered from the bottom (I put him into a bowl of water for 15-20 minutes instead of pouring water from the top). When I am away for an extended period of time, this marker helps out the person who is coming to water my plants, know that he likes to be watered in a certain way.

I wanted something quick and free because wood exposed to natural elements, like the sun, over long periods of time will make the burning fade. Also, consistent moisture will cause the wood to decay over time so choose a marker that doesn’t break the bank and keep your design simple. The markers may not last outdoors more than one season, especially if they are really thin. Indoor markers will last much longer.

Below are the steps to make your own:

Materials:

  • The marker

  • Wood burning tool

  • Pencil

  • Design or pattern (optional)

  • Sandpaper

Steps to making your own garden markers:

1. Select your marker of choice

I chose to work with sticks that I found in my backyard because I was going for a natural look, and I wanted this project to be free and easy. If you prefer a more finished look, you can find pre-made mini wooden stakes/markers in all shapes and sizes online. Above all, make sure that whatever surface you choose, it is untreated and unfinished.

Choosing the right stick:

  • Make sure to choose branches and sticks that have dried out thoroughly and have been broken off the tree/bush for a while. Do not take branches that can bend easily or directly off a tree. This is green wood and should not be burned on (see here for a list of woods to avoid burning on). Green wood refers to wood that has been freshly cut from a tree and has not been dried or seasoned yet. It contains a high amount of moisture and can create a lot of smoke, will burn much slower and will not burn consistently and crisply.

  • Choose a stick that is free from any major knots or defects because creating a flat surface is difficult when the stick is wonky.

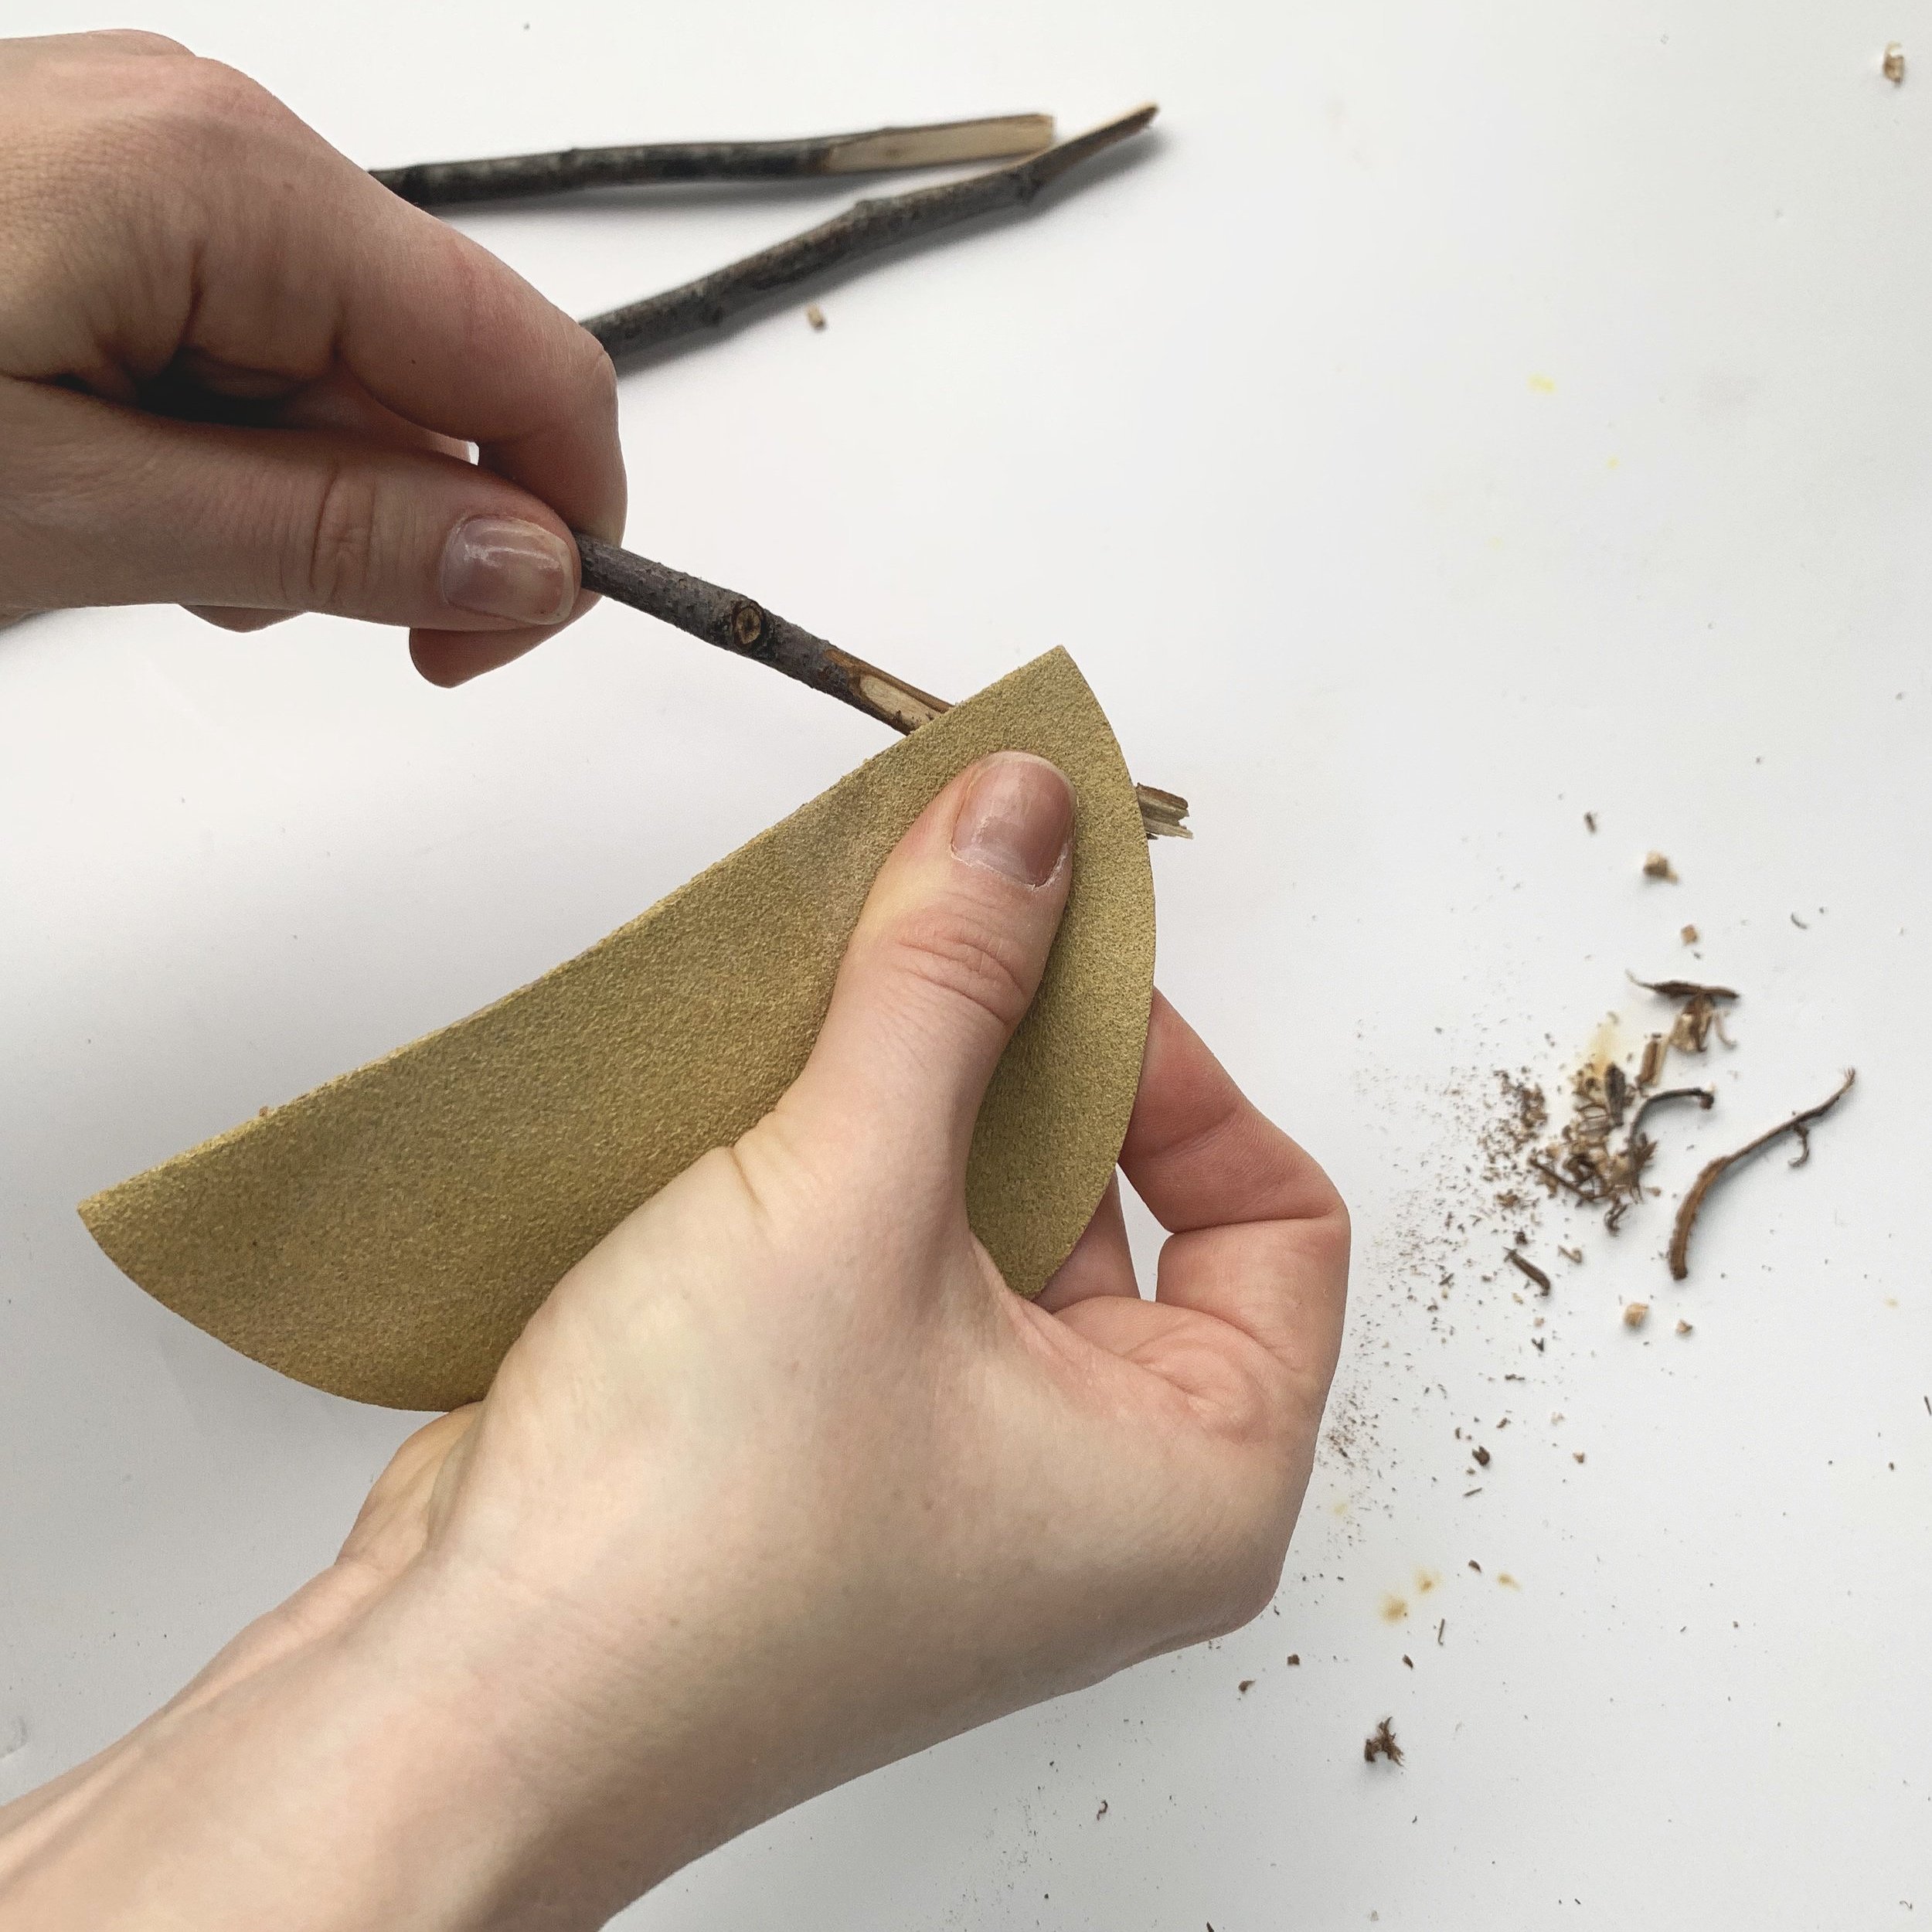
  • Keep in mind the size and thickness of your stick. You can use a saw or pruning shears if you need to trim the stick to length. I just broke my stick with my hands because it was super dry and small enough and then I sanded the broken edges down a tiny bit to make it look a little cleaner.


2. Create a flat surface

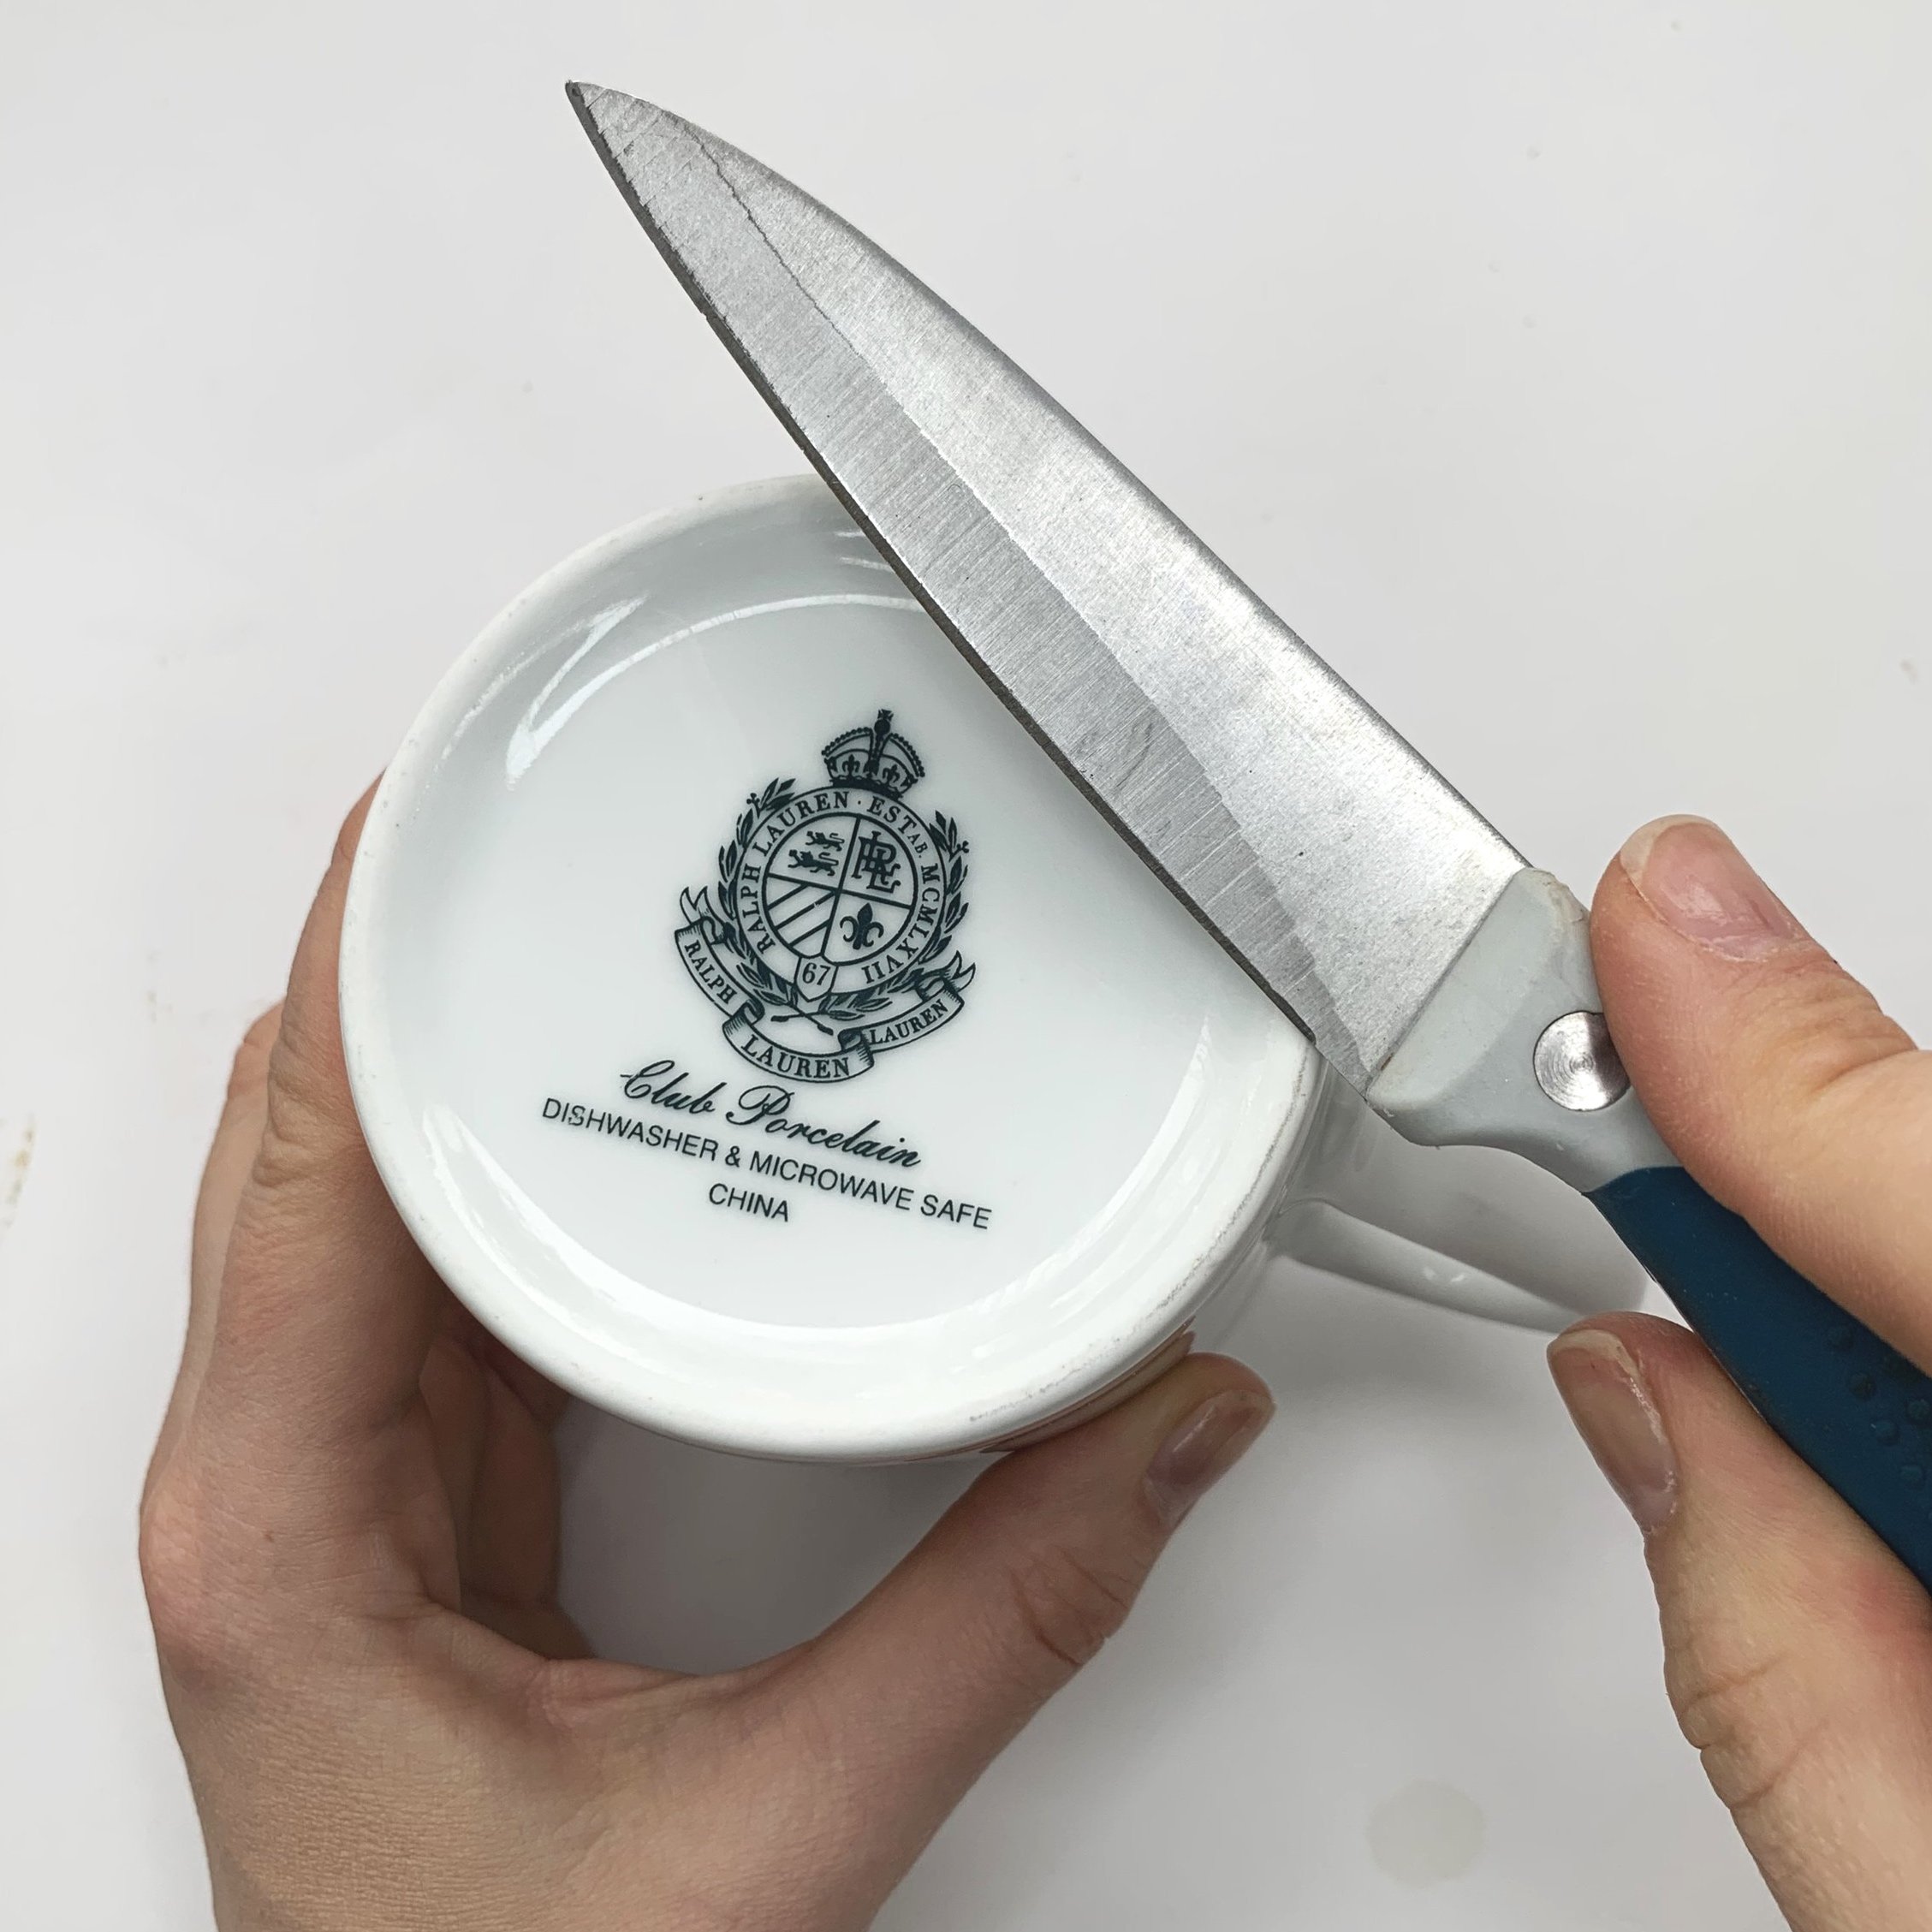
I used a regular knife to carve a flat section on the top of the stick. It’s much easier to carve when the knife is sharp. If you do not have any sharpening stone or strop to sharpen your knife, the bottom of a ceramic mug will do in a pinch. This method can help to hone the blade's edge slightly, but it won't actually sharpen it by removing material from the blade. This method is perfect for this mini project but not ideal for larger projects.

how-to-sharpen-your-knife-hack

How to sharpen a knife using a ceramic mug:

To use the bottom of a mug for honing, turn the mug upside down and hold it firmly in your hand, pointing away from your body. Then, angle the knife blade at a 20-degree angle against the unglazed, rough part of the bottom of the mug. Draw the blade down the surface of the mug, applying light pressure and maintaining the same angle throughout the process. Repeat this motion several times on each side of the blade. After sharpening, test the blade by slicing through a piece of paper or card stock.

plant-markers-wood-burned-project

Carving your stick

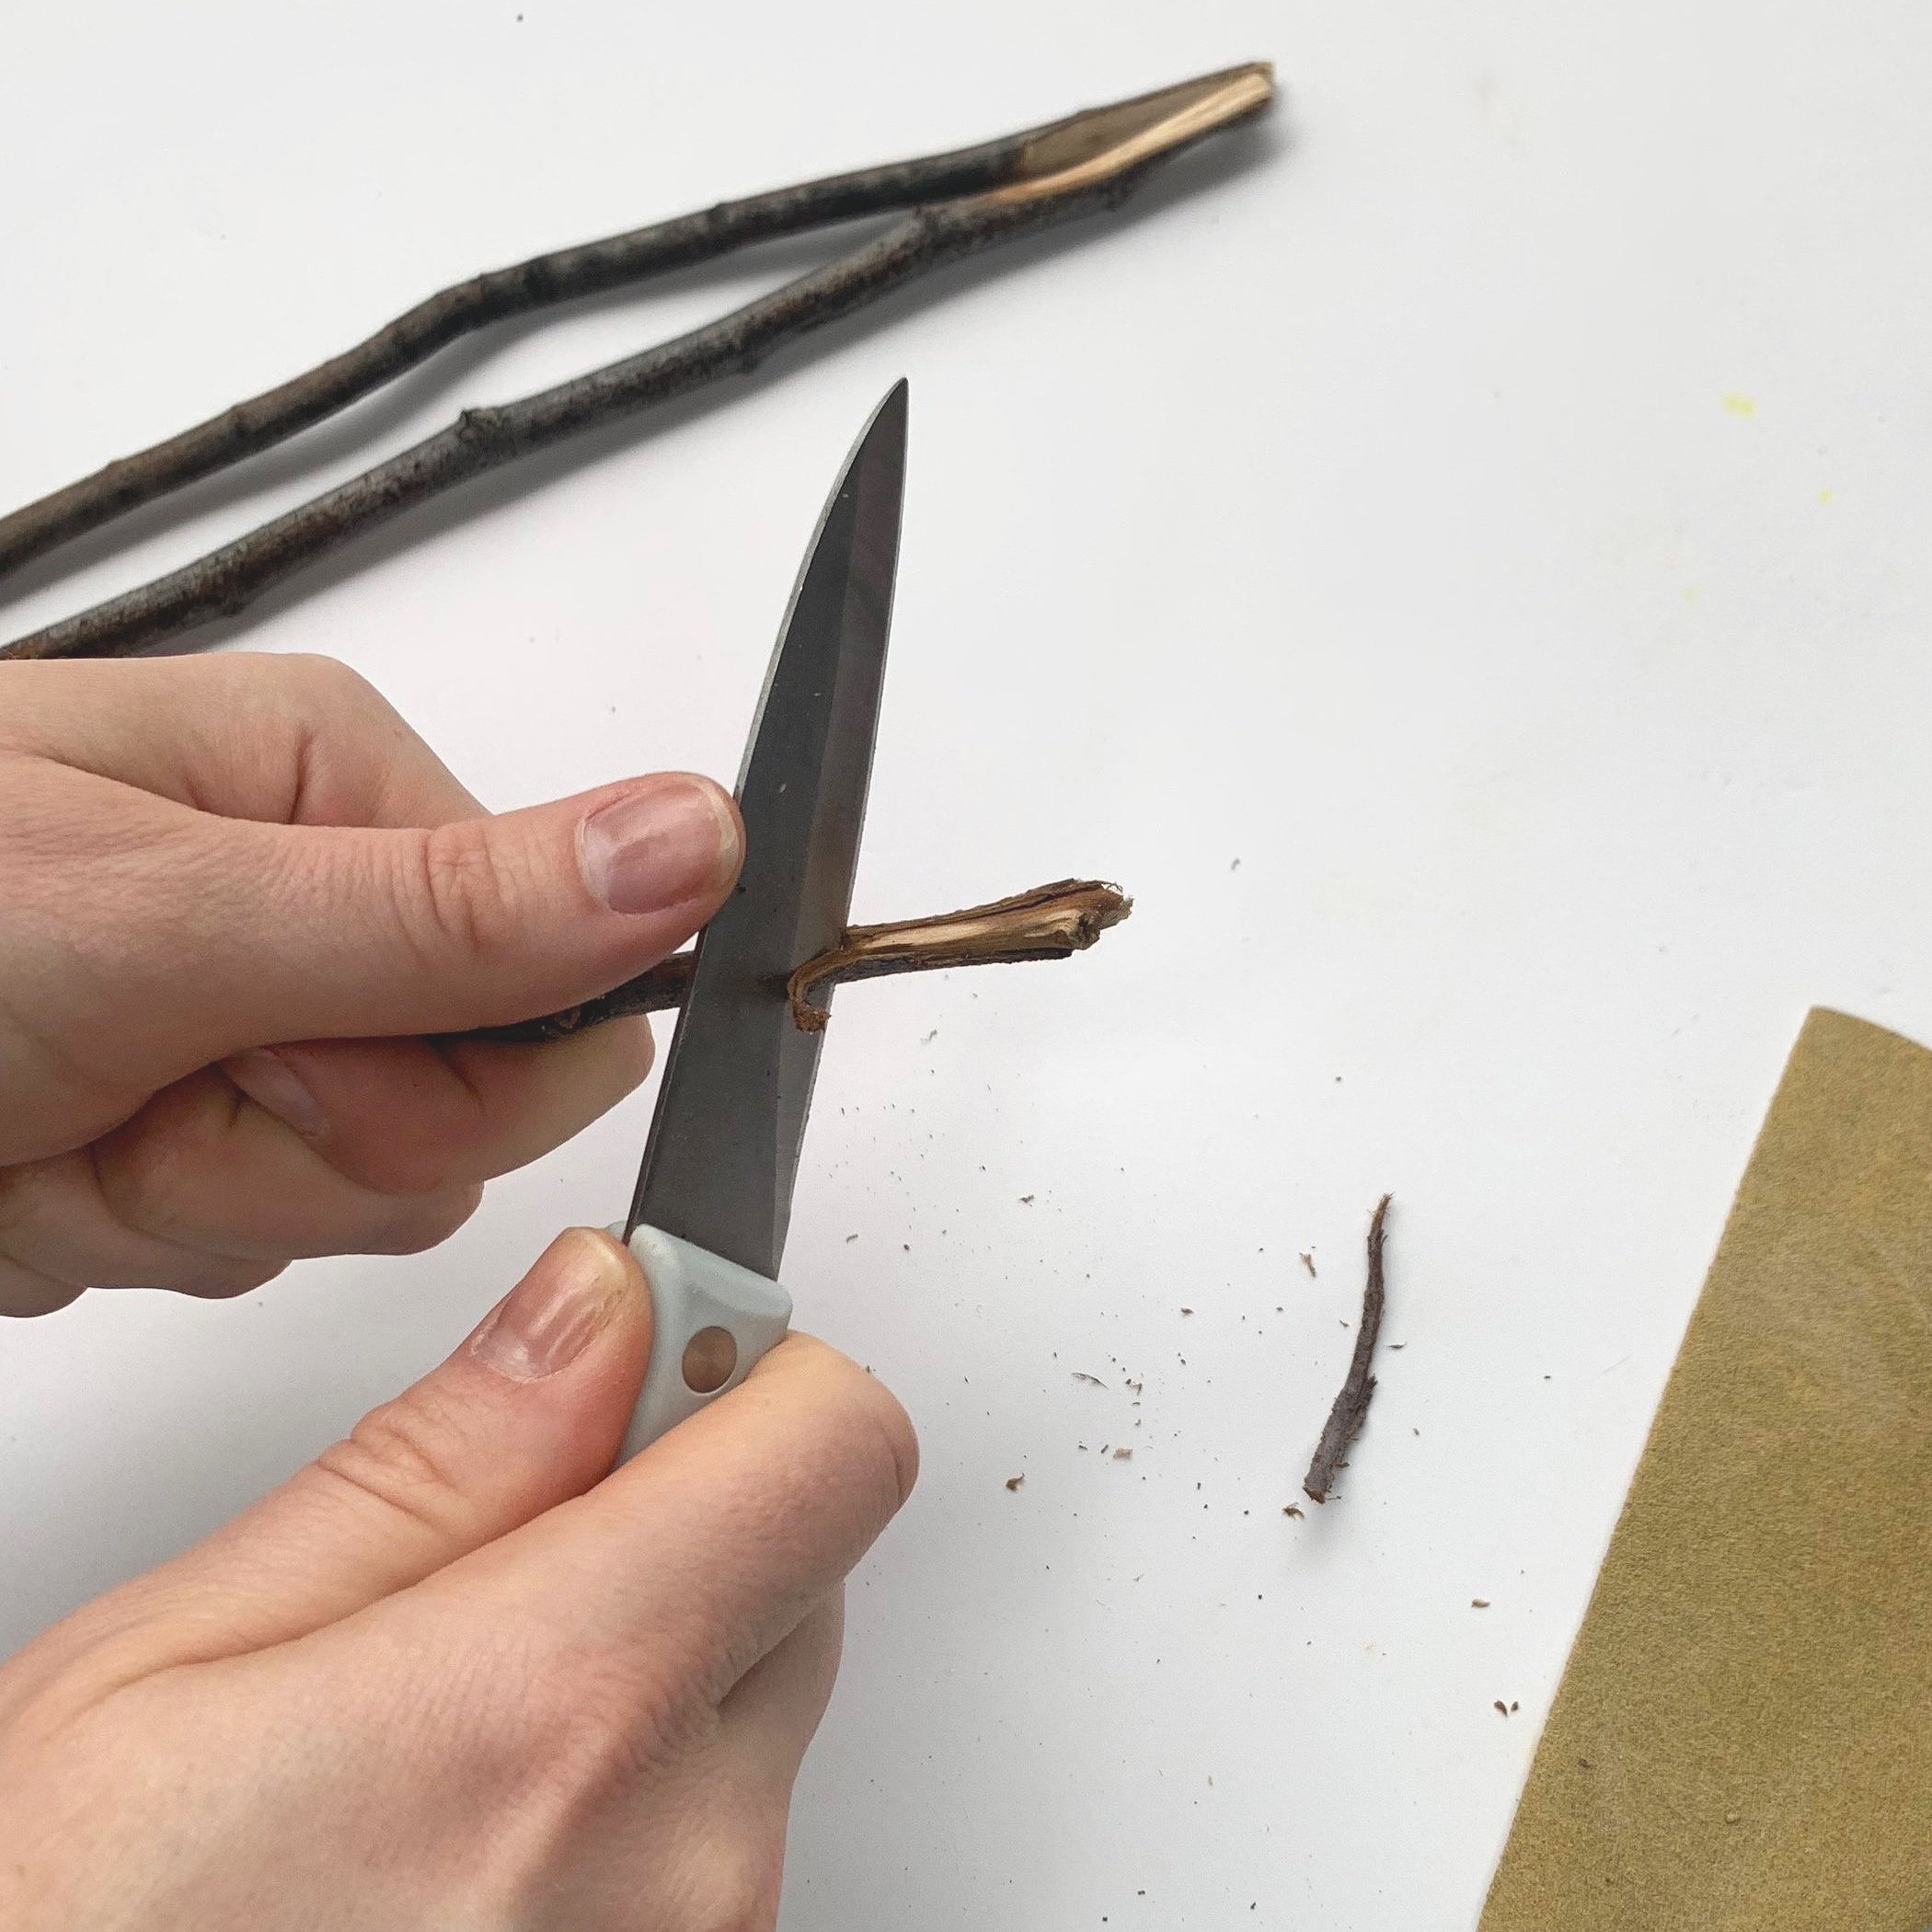
Safety should always be a top priority when carving a stick. Always use a sharp knife, cut away from your body, and wear protective gloves if necessary.

Start by making small cuts and removing thin shavings from the stick.

Work slowly and carefully, and ALWAYS cut away from your body to avoid accidents.


garden-markers-wood-burned-project

Sanding your surface

Once you have an area that is fairly smooth and the size you want, sand the area to remove any roughness or splinters. Sanding it smooth will make the burning process easier and more crisp so don’t skip this step.


draw-your-pattern-or-design-using-a-pencil

3. Create your design

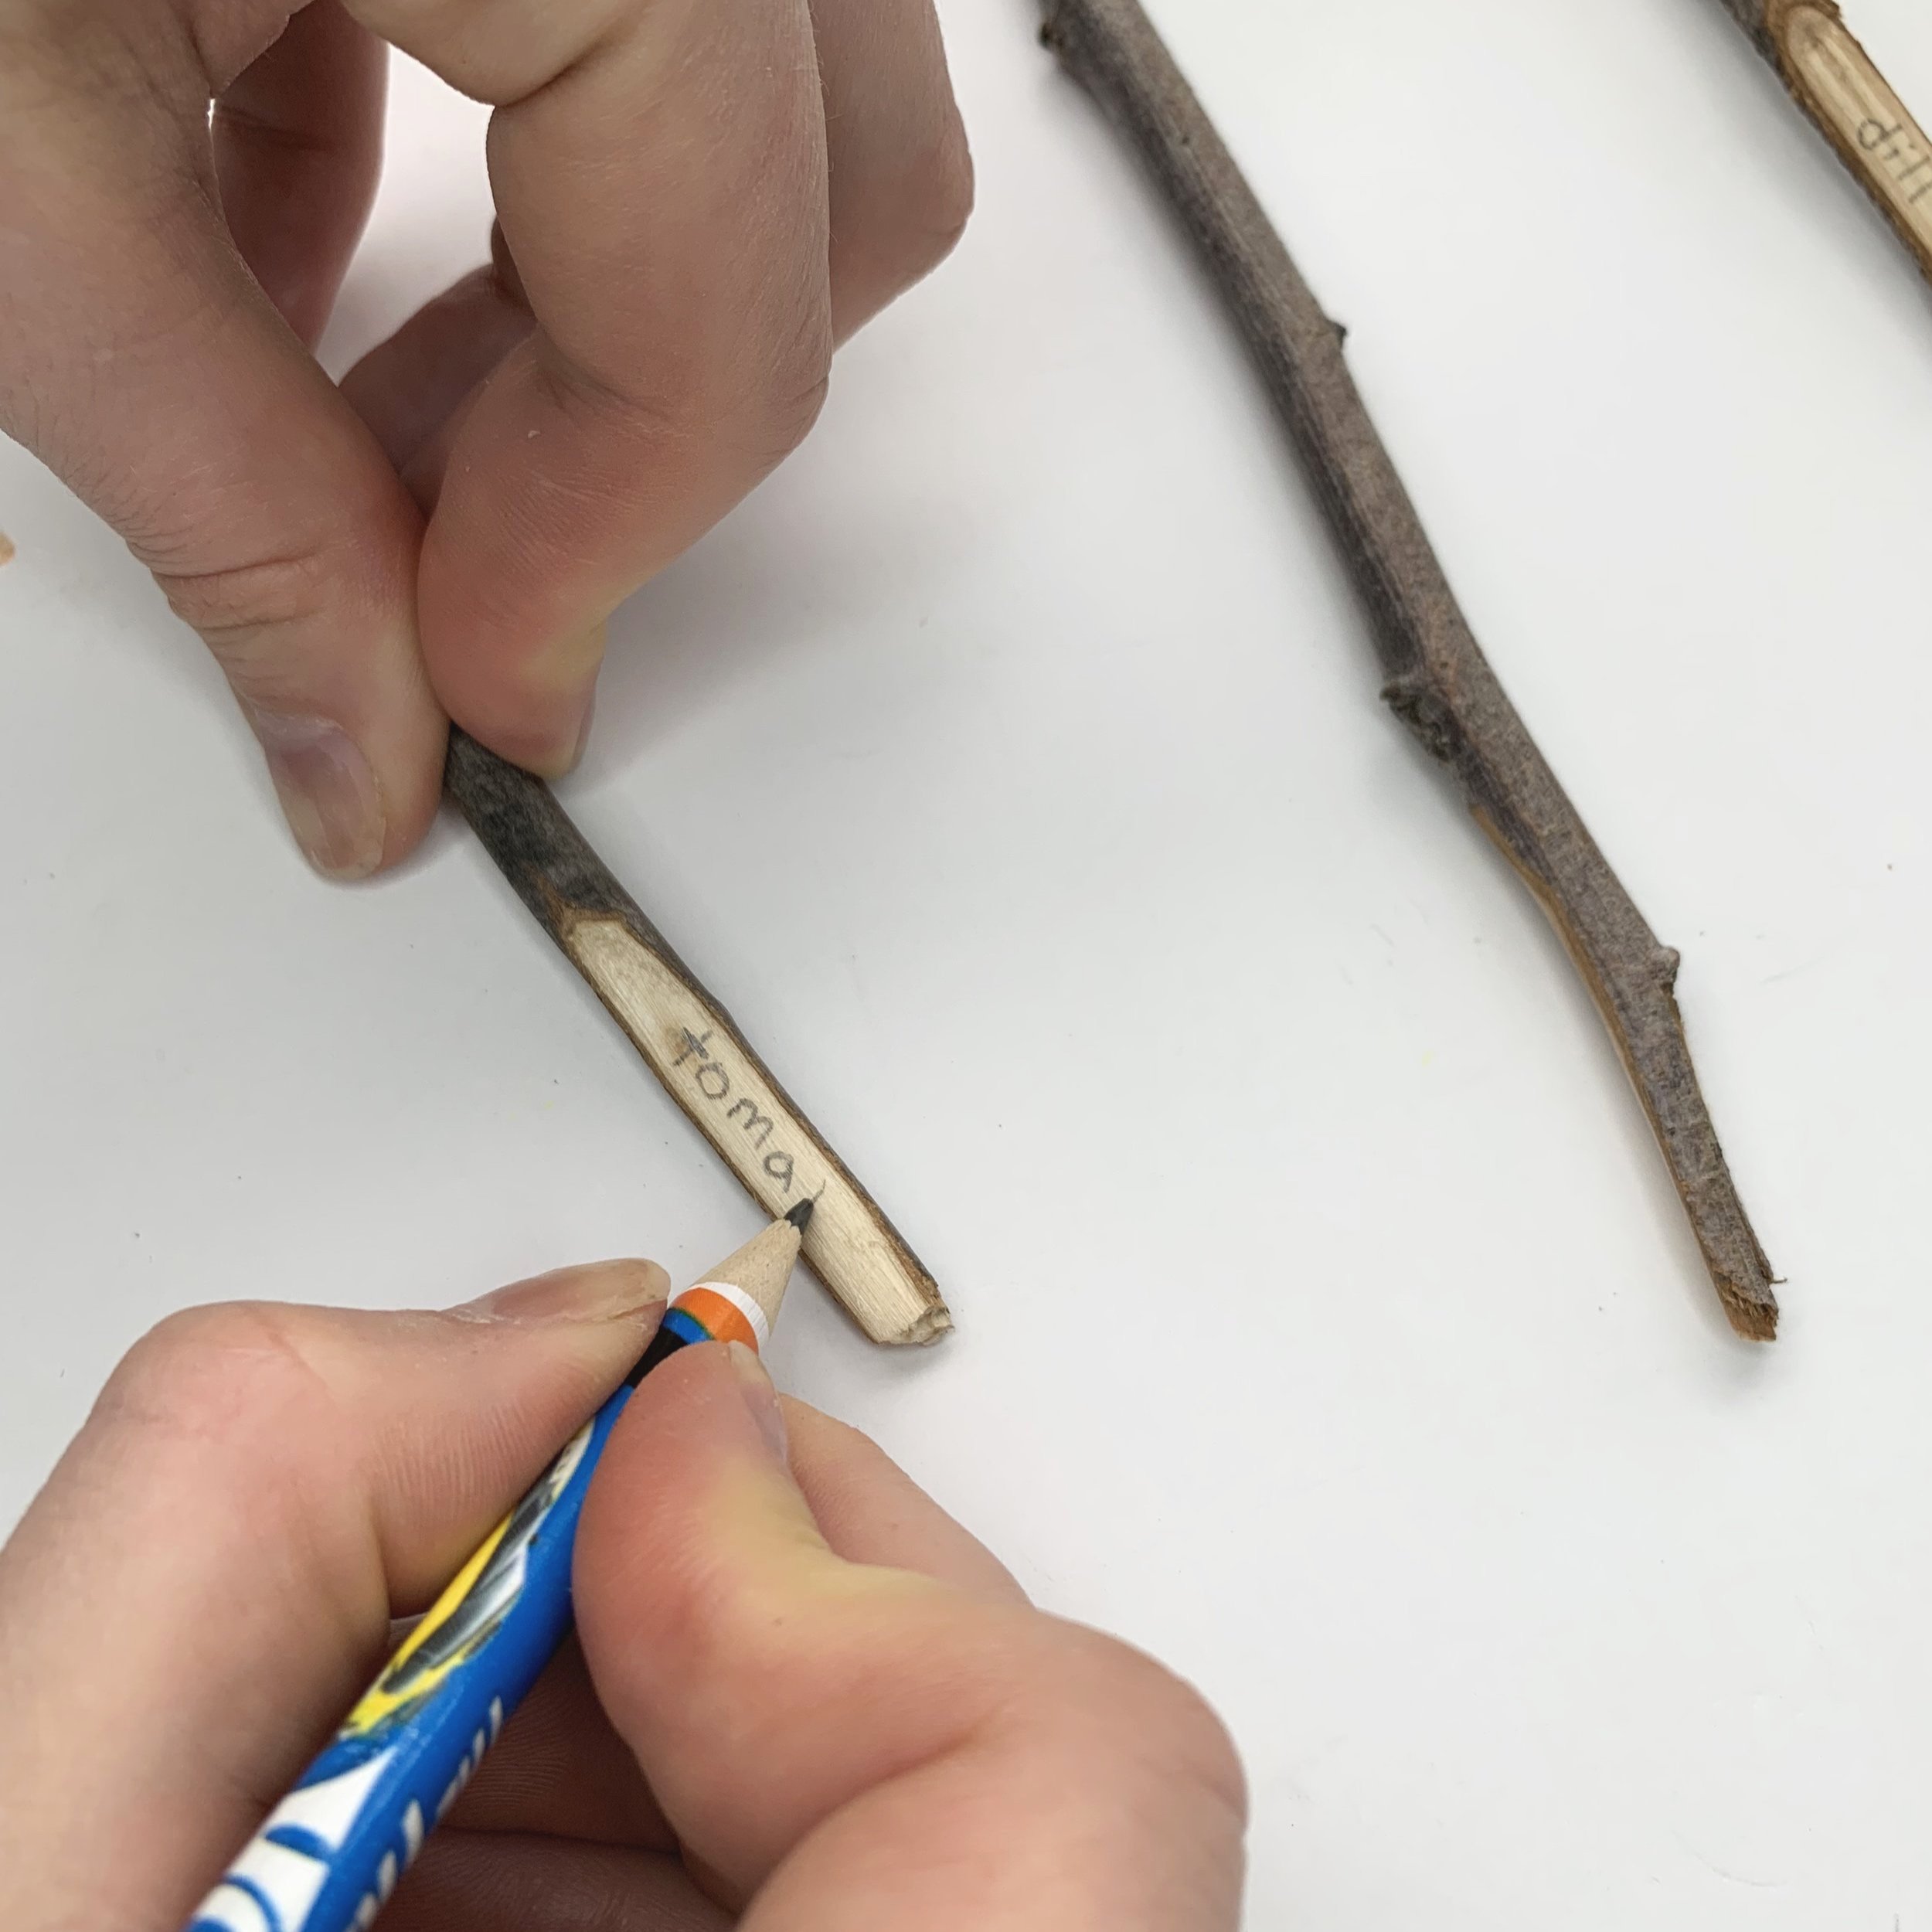
Using a pencil, lightly sketch the name of your plant, herb or vegetable (or whatever design you want to burn onto the wood). This will act as a guide for your wood burning tool. You do not have to follow it exactly, and can erase any lines you adjusted mid burn. Drawing it out first helps to find the centre of the area.

4. Burn it

garden-markers-woodburned-project

For smaller wood pieces that are tricky to hold, use tape to hold them down while you burn.

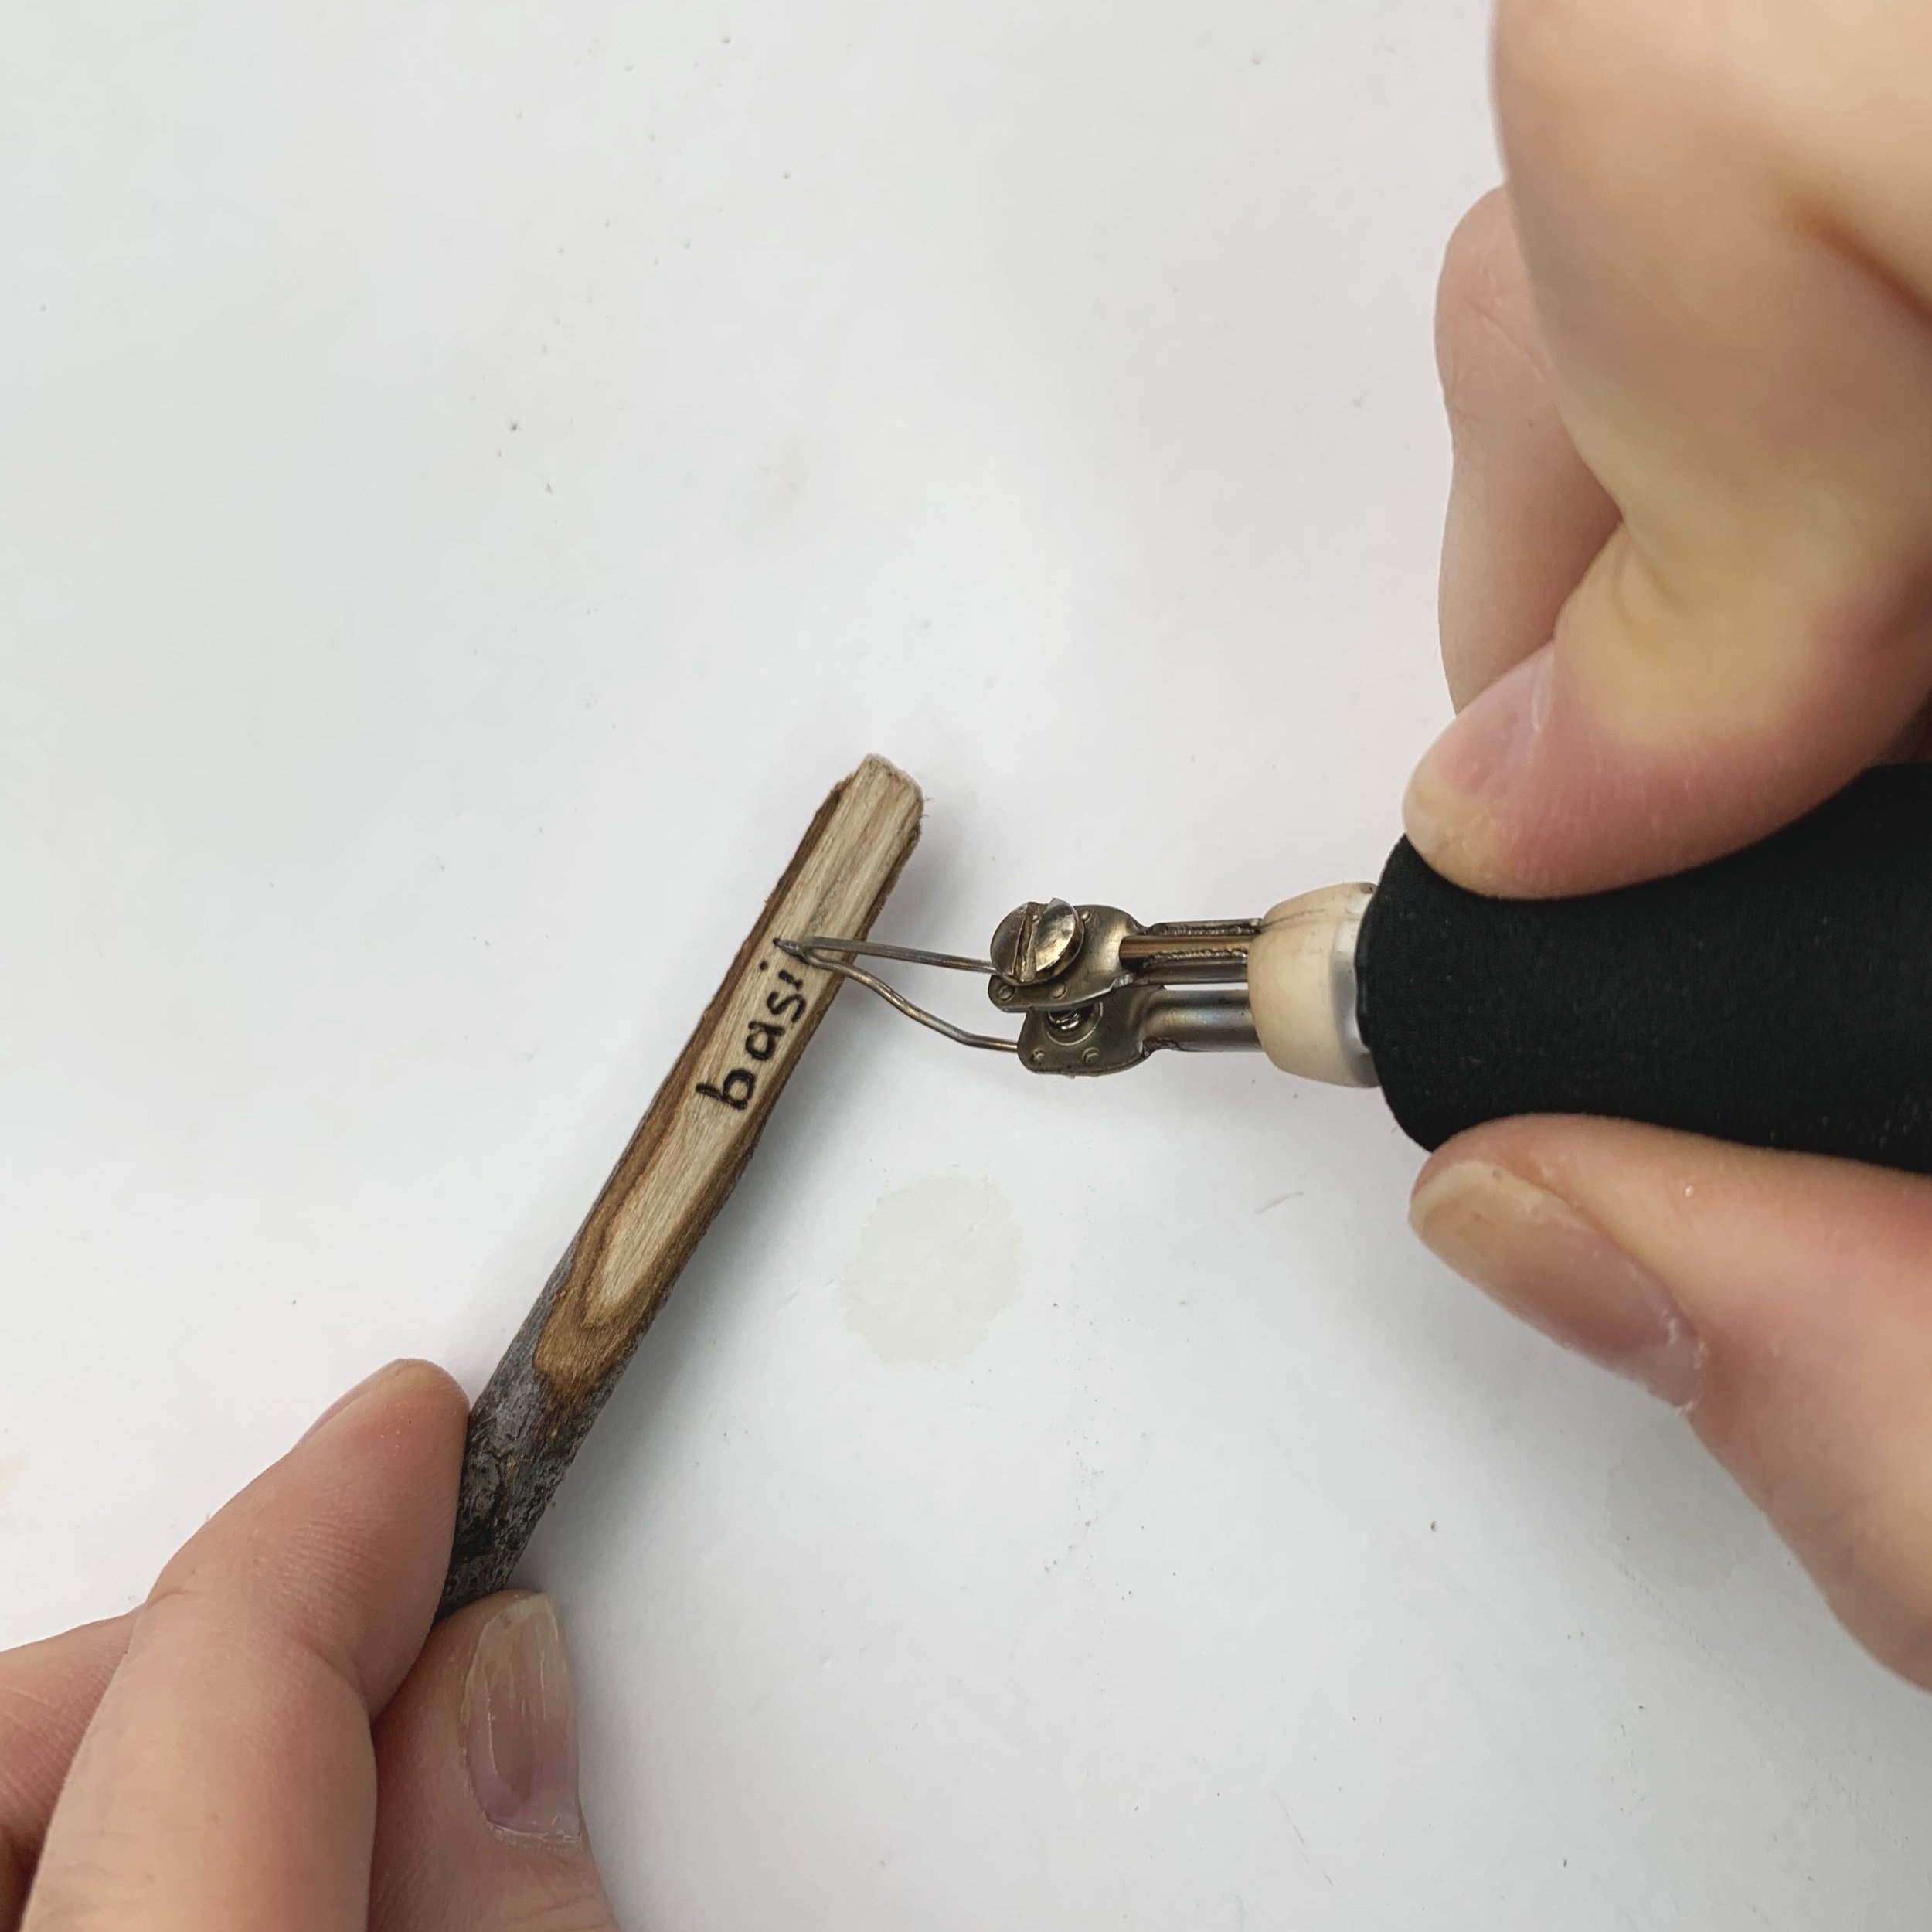
Heat up your wood burning tool and select the tip you want to use for your design.

Use your safety gear (check out our safety tips and free downloadable guide here).

Start Burning. Carefully trace over your pencil sketch to burn the design onto the wood. Take your time and go slowler than you think you should and let the burner do the work. Turn down the heat if you feel like you are not in control.

I like to burn deep and hard so that my piece lasts longer. This causes some over-burn or glowing lines so I use sandpaper after I burn to get rid of those. The sandpaper also helps get rid of the pencil marks. Click here if you want more tips on getting rid of leftover marks or fixing mistakes.

 
garden-markers-pyrography-project
 

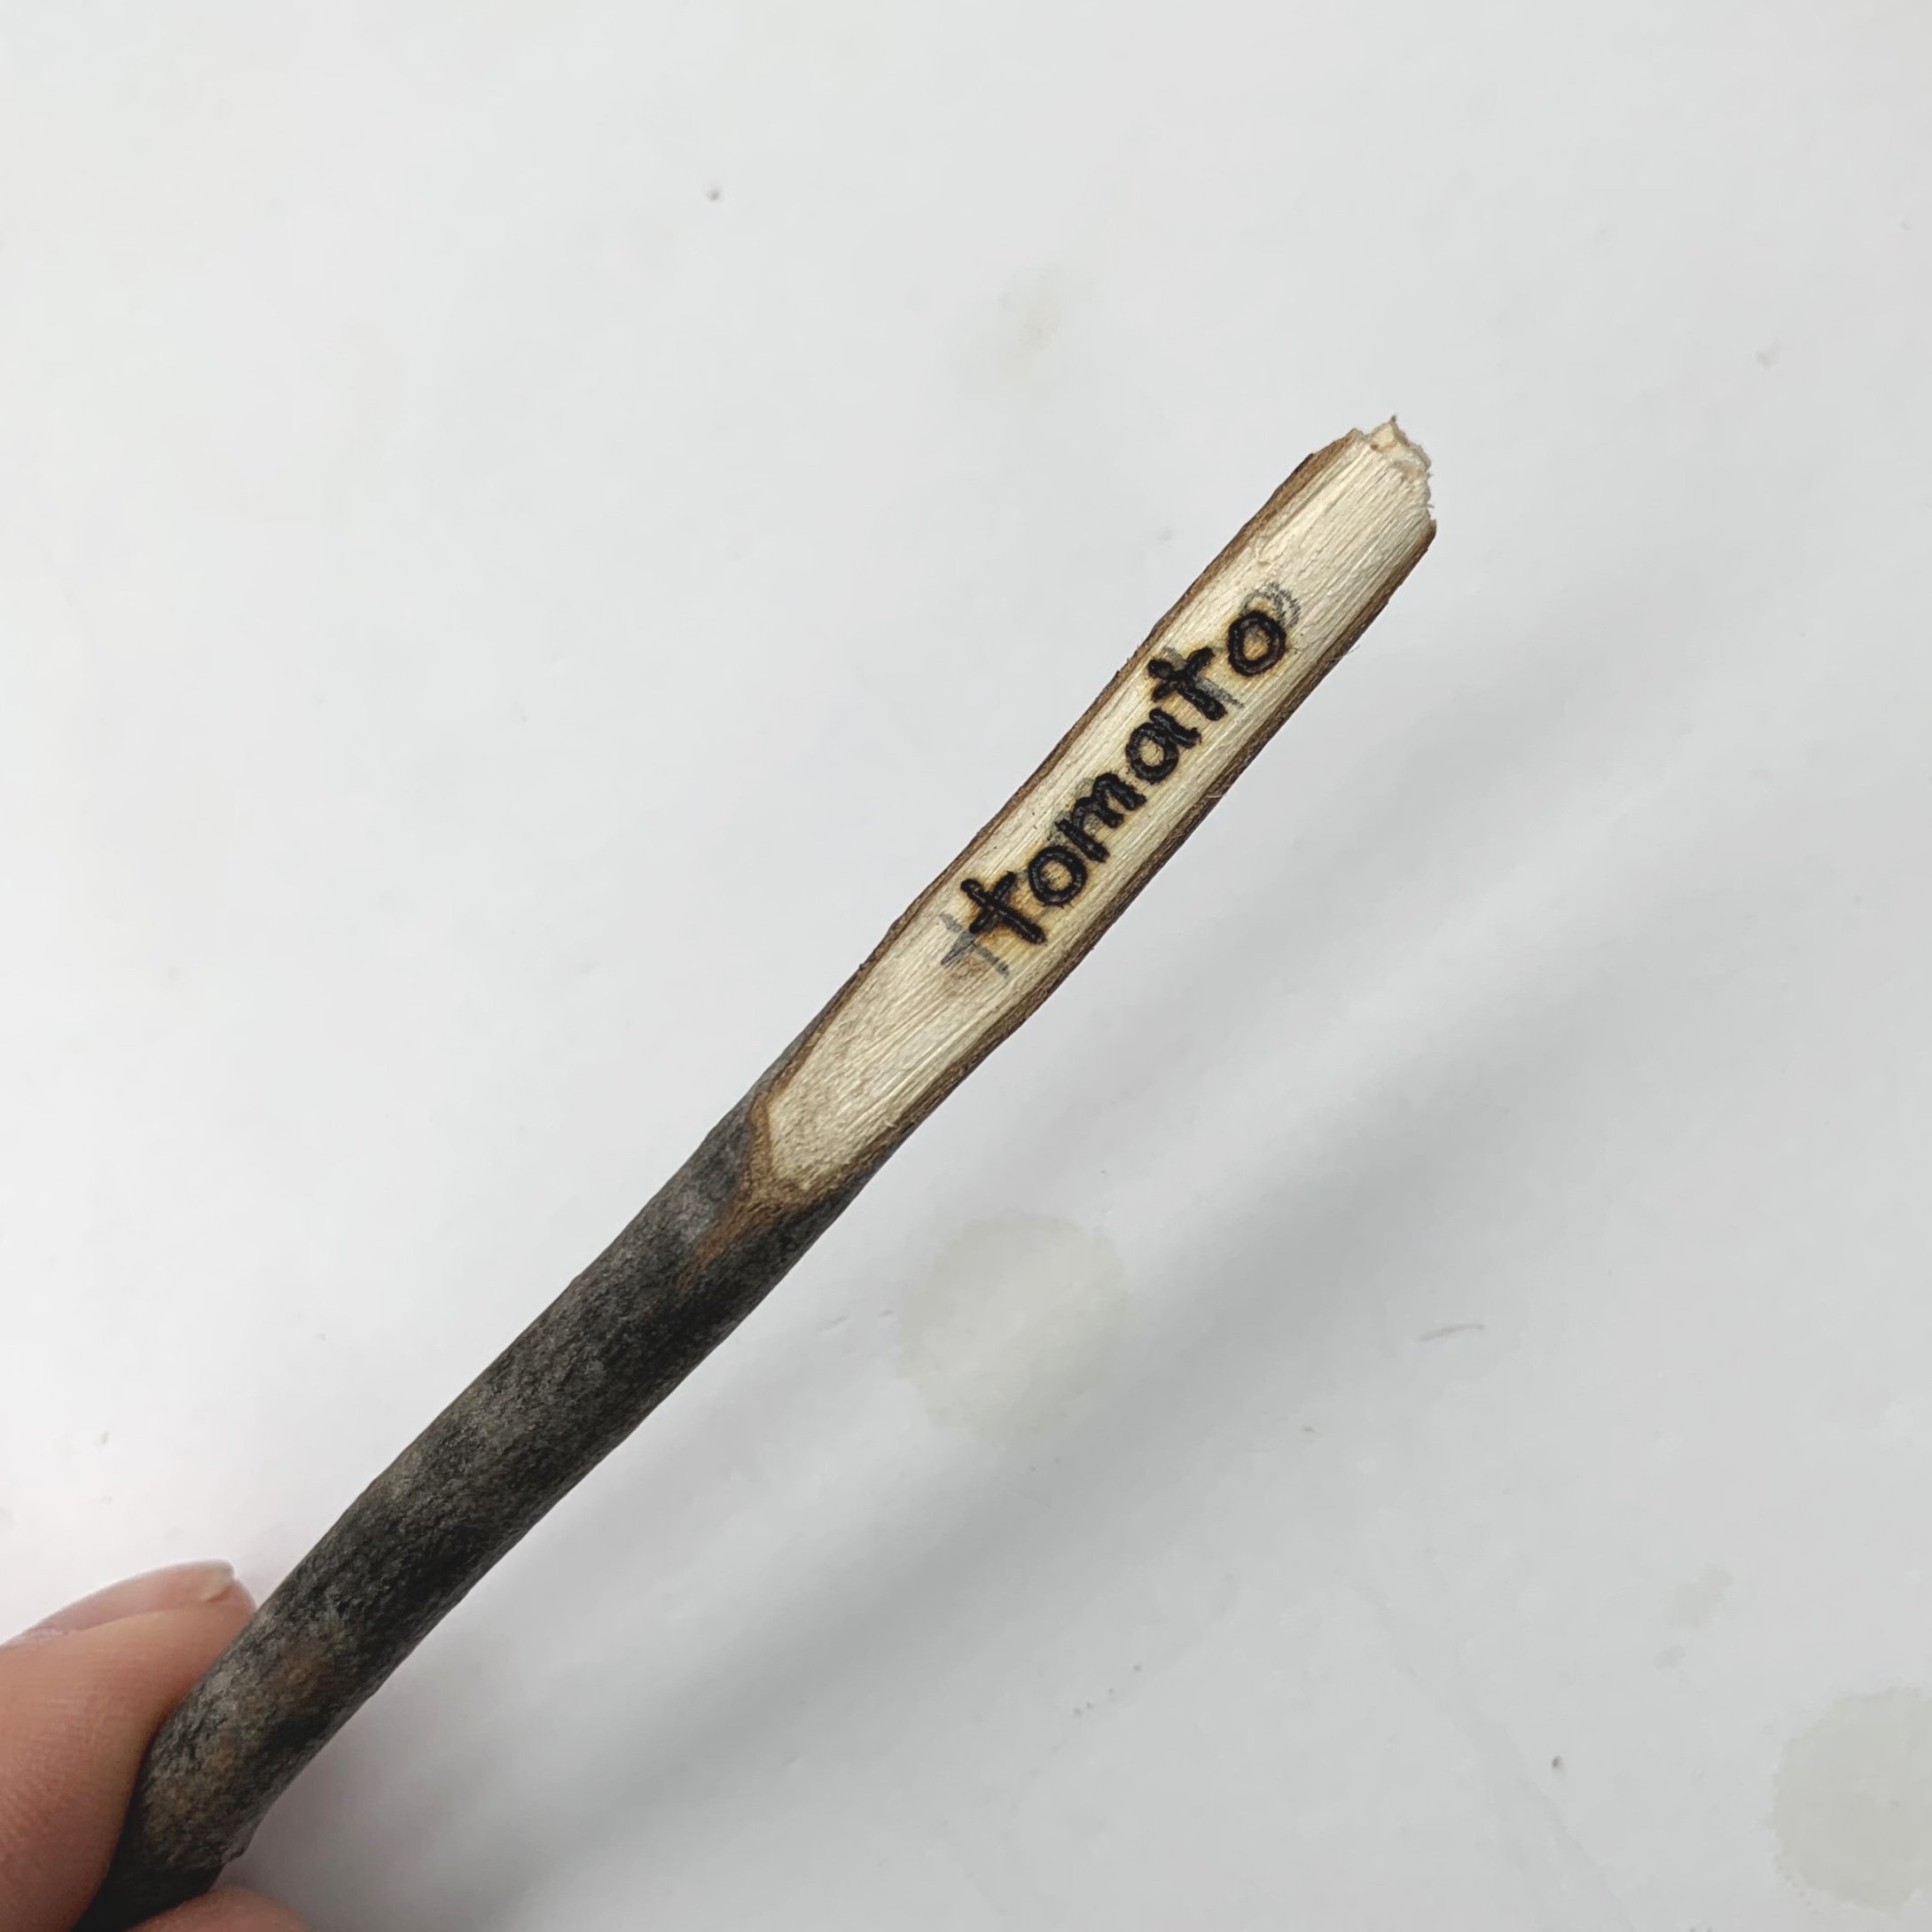
Wipe off any residual ash or debris from the wood with a clean, dry cloth (microfibre works best) or an old clean toothbrush works too!

Sanding will remove some of the burn marks so go in and touch up any spots that got removed when sanding until you are happy with the final product.

 
garden-markers-pyrography-project
 

5. finish it (optional)

Applying beeswax to you garden markers can help to protect it from moisture, weathering, and insects. Beeswax is a natural wax that has water-resistant properties.

On you cleaned surface, use a soft cloth to apply a thin layer of melted beeswax, rubbing it in with circular motions until the entire surface is covered. Allow the beeswax to dry and harden, and then buff the surface of the marker with a clean, dry cloth to bring out the shine. Beeswax can be reapplied as needed to maintain the protective coating on the garden marker.

6. Enjoy it

Finally, place your wood burned garden markers in your garden next to the plants they are labeling or in your potted plants indoors.

That's it! Hope this inspires you to make some fun, functional and personalized art!

 
DIY-plant-marker


Want to learn more about pyrography??

Check out this blog post: Start Here if You Are New To Wood Burning

And grow with the community: Subscribe to our free Burn Club Newsletter and join Burn Club+, a place where you can ask questions, and get the full answers, meet twice a month to burn with your fellow pyros and so much more.


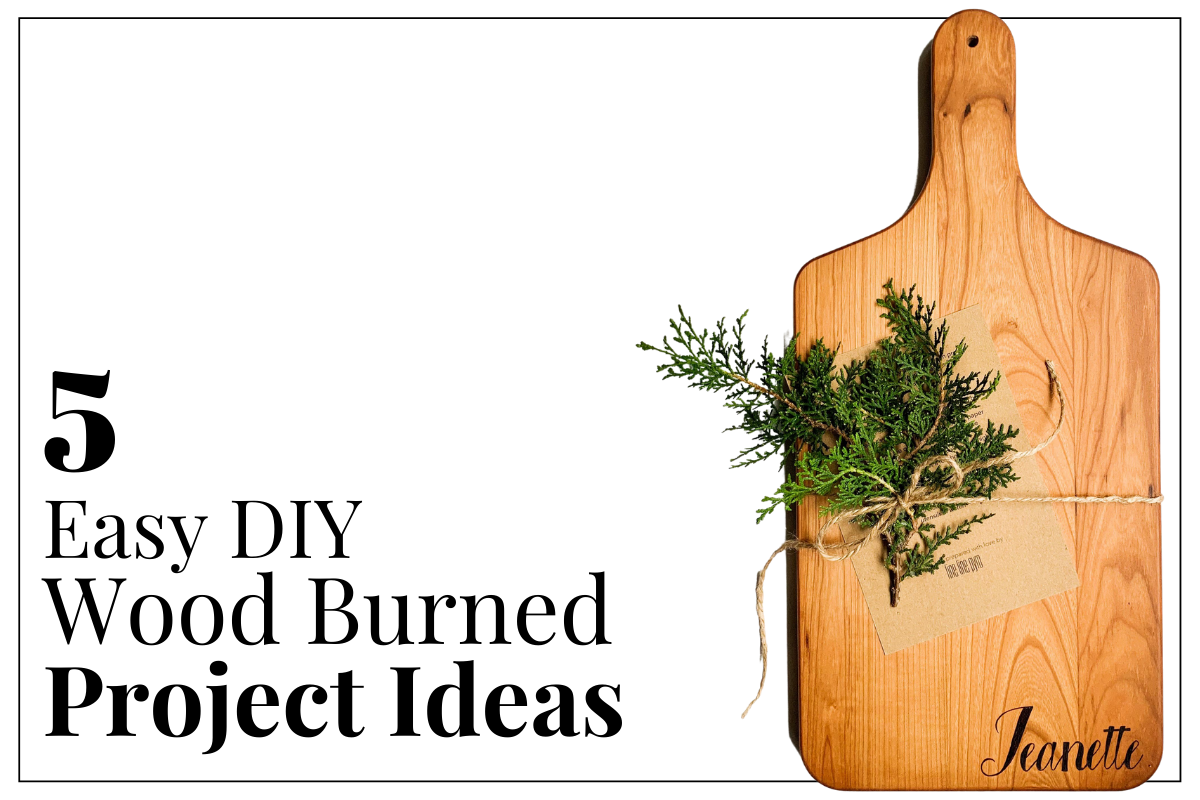
5 Easy DIY Wood Burned Project Ideas

 
diy-pyrography-project-ideas
 

Want to make your own personalized DIY gifts for a loved one?? Pyrography is such a versatile hobby, below are 5 very easy projects you can make yourself and personalize in any way!

New to wood burning?

Check out our blog post: Start Here if you are NEW to Wood Burning

Here you will learn all about the tools you need, wood you should be using, safety you should be following and tips and tricks to help you make your own DIY wood slice project ideas come to life!


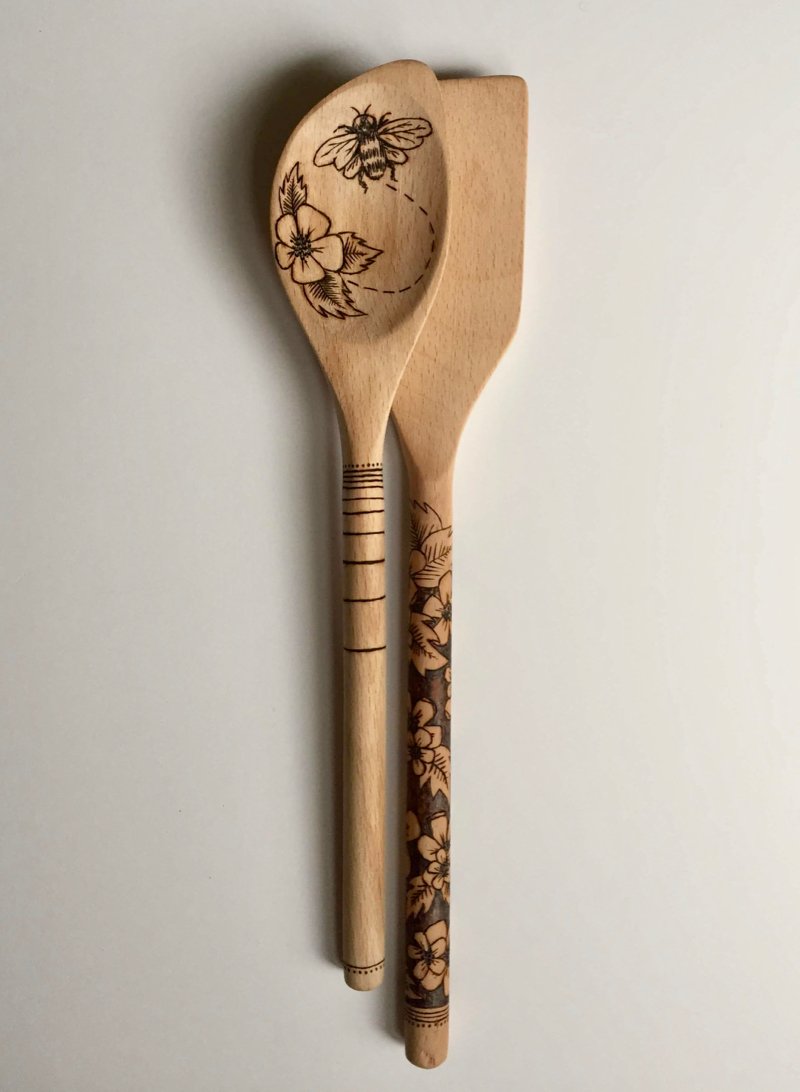
1. Wood Burned Spoons

Practical, useful gifts are always a good choice! Choose wooden spoons, spatulas, or salad servers with a simple design, or customize it with their name or their favorite quote. You really can’t go wrong with this functional art piece. Remind your gift receiver to not wash wood in the dishwasher, or to leave it soaking in water. Oil it with a food-grade safe oil, and recommend that your recipient re-oil them as needed to keep them looking good! I recommend Howards Butcher Block Conditioner or Howards Cutting Board Oil.

 
wood-burned-magnet-gifts

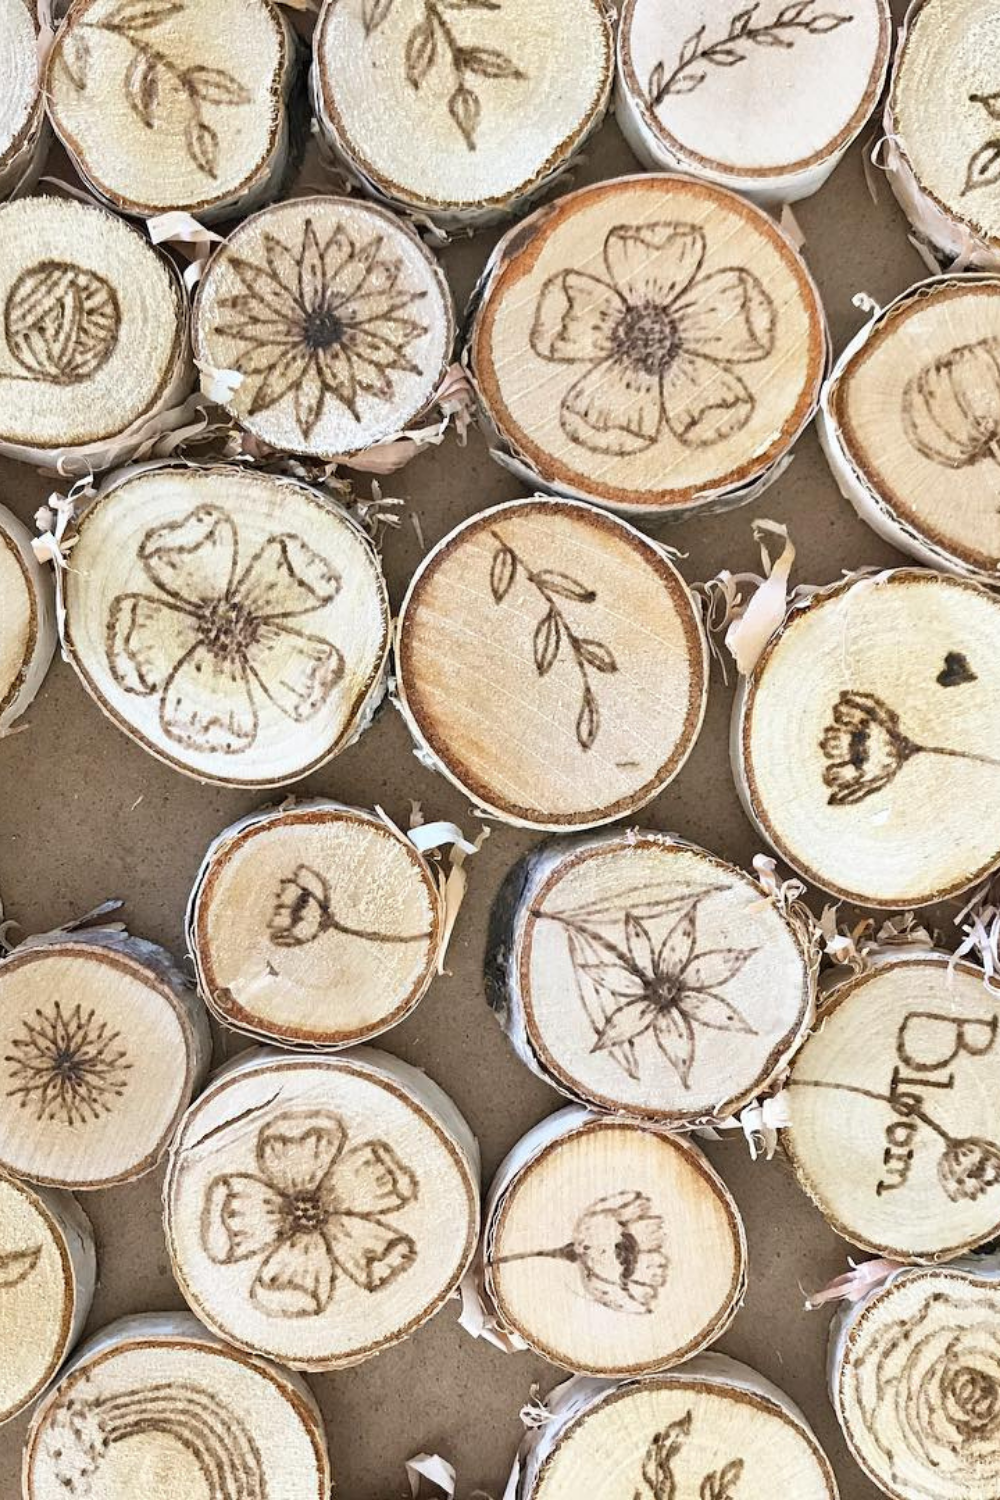
2. Fridge Magnets

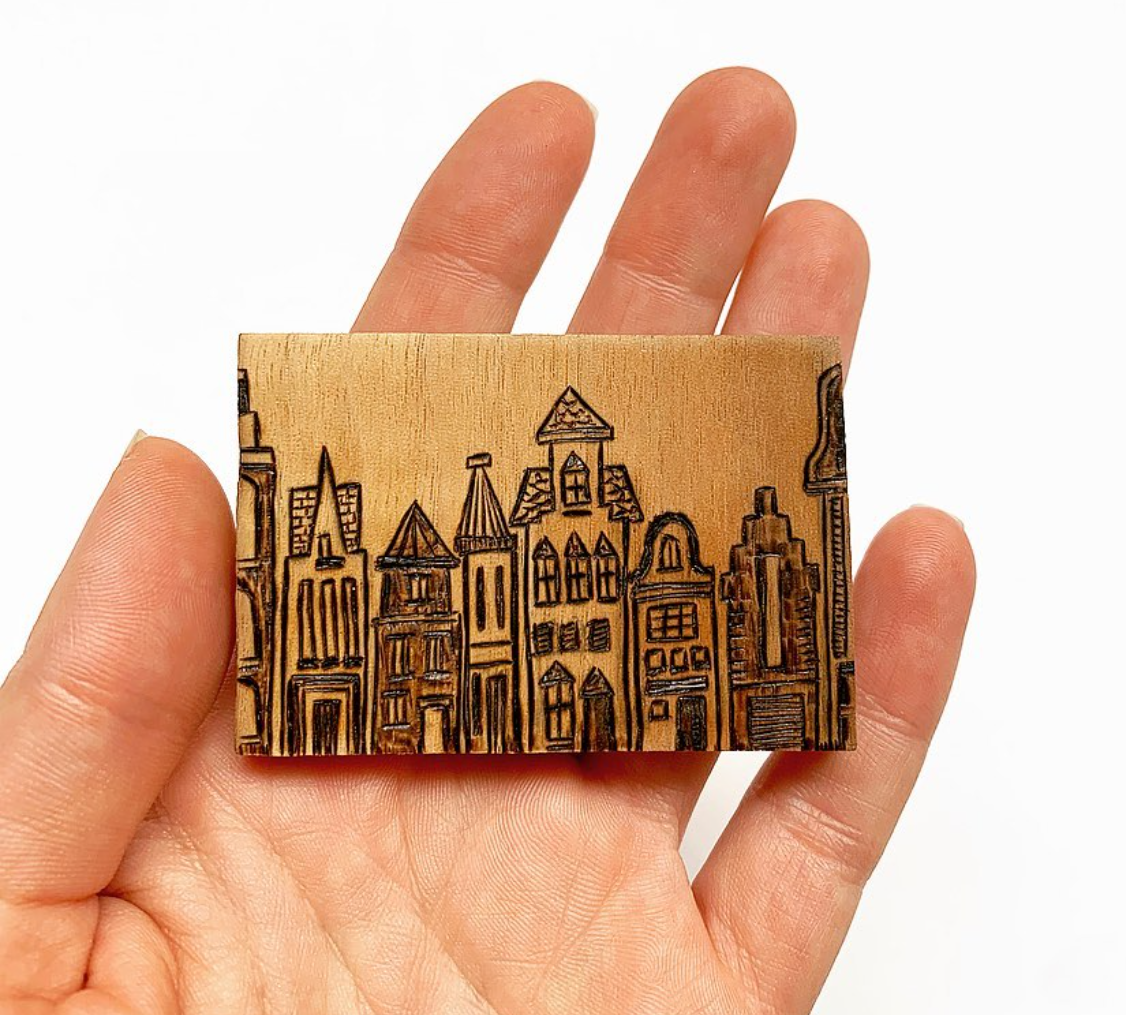
These can make such a cute gift. Create a set to give, and customize them for each person. I like to use mini birch slices, some E6000 glue (this stuff works!) and a strong magnet. You want your magnets that you give to be useful, so choosing a magnet that is strong enough is key! I like this magnet from Amazon. I think the size is great and they are super strong. I make these magnets in bulk so I have them on hand to customize when I need to put together a gift. Give it a try!


3. Cutting Board

Another practical, useful and functional art gift! Wood burning is so versatile, and I love how everything can be customized. Turn a favorite photo of them into functional art. Add their name to a cutting board, or their favorite food/plant/flower/animal/etc to a serving board. Make it special to them. Remind them to hand wash only and to use a food-grade safe cutting board oil and reapply as necessary. I like these two board options. A classic board and a long rectangle.


4. Name Sign or Welcome Sign

New house? New marriage? New Baby? Create a family name sign! These are always well received. I like to keep my design simple so it can fit with other people’s decor. You could also add color, their house, or a special date if you have that information. Customize it to them! I love using a Basswood Country Round for a rustic feel, and a Basswood Canvas for a modern look.

 
wood-burned-clock

5. Wood Burned Clock

This is such a gorgeous, unique and thoughtful gift. It adds a warmth to any space, and is not only beautiful, but quite helpful. To create this piece I used a drill, Clock Parts from Walnut Hollow and a slice of Basswood. I sized and printed the numbers in the font of my choosing to fit the canvas. I then transferred the design using graphite paper and an embossing tool, and then burned the numbers using a Versatool burner. Then I used the drill to poke a hole in the center and added the clock parts. I used a Basswood Country Round, but you could also use a Circular Wood Canvas. I did not put a finish my clock, because I want to be able to darken it over time, as need be.


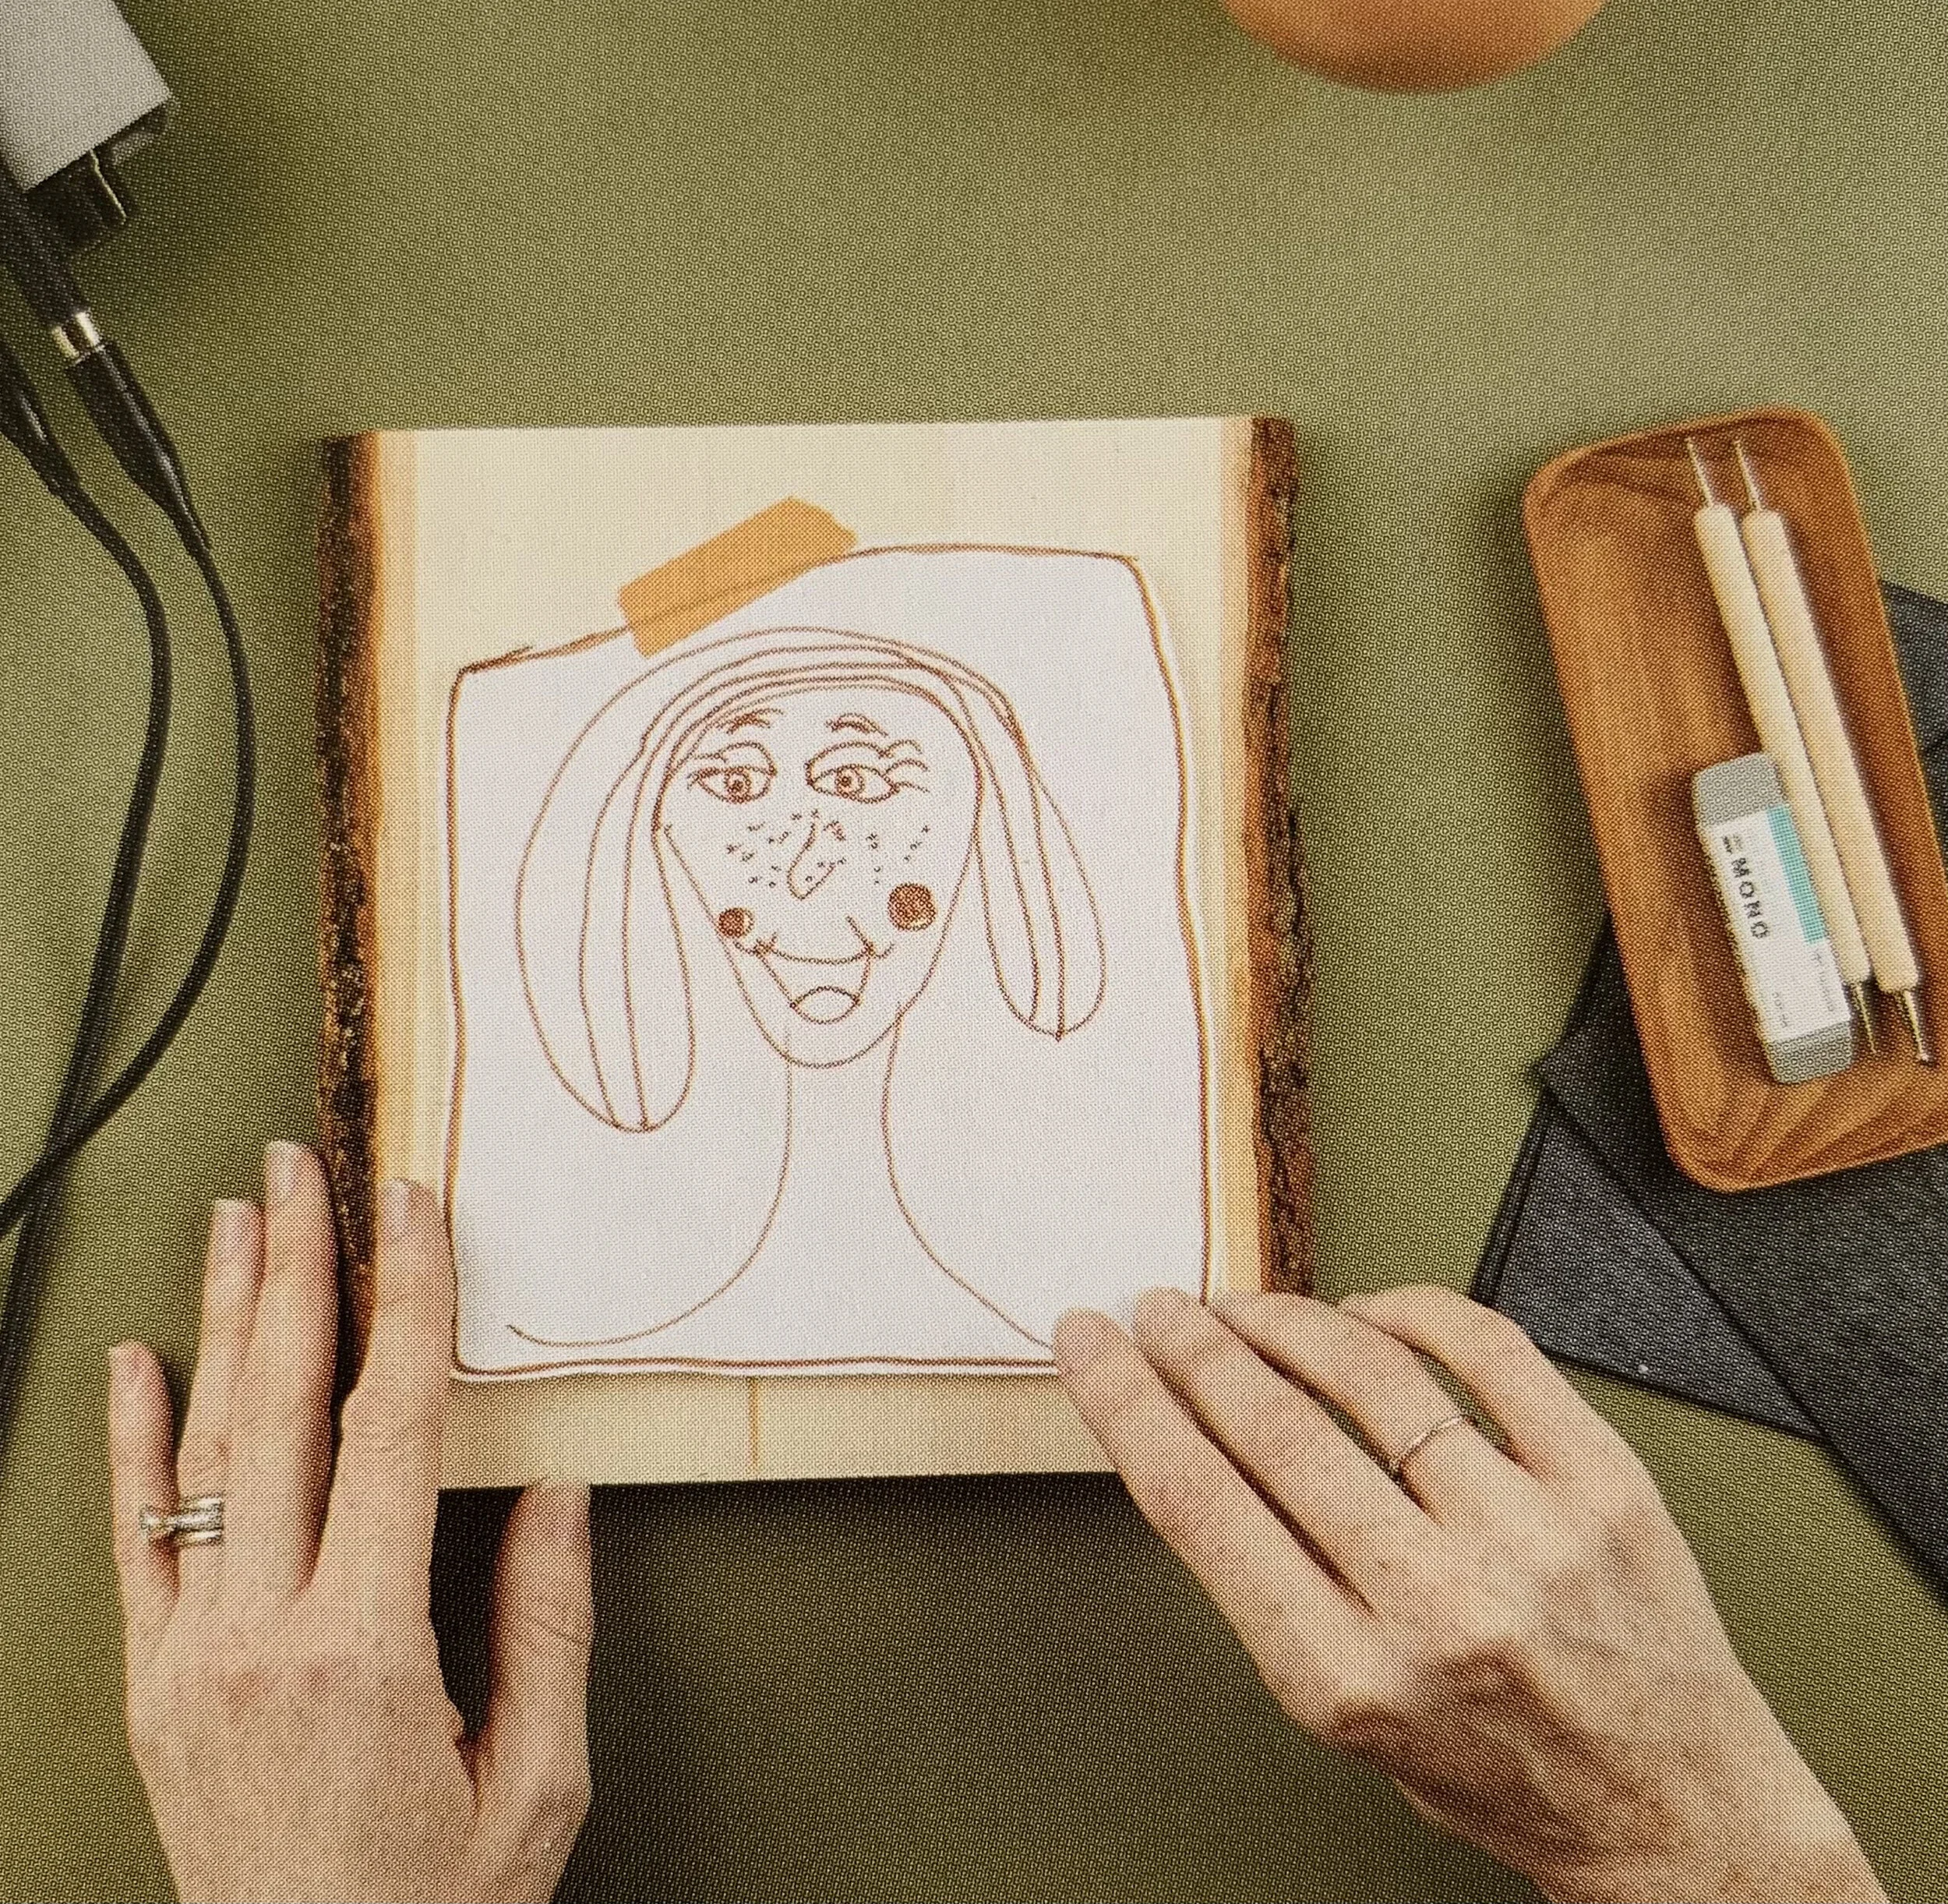
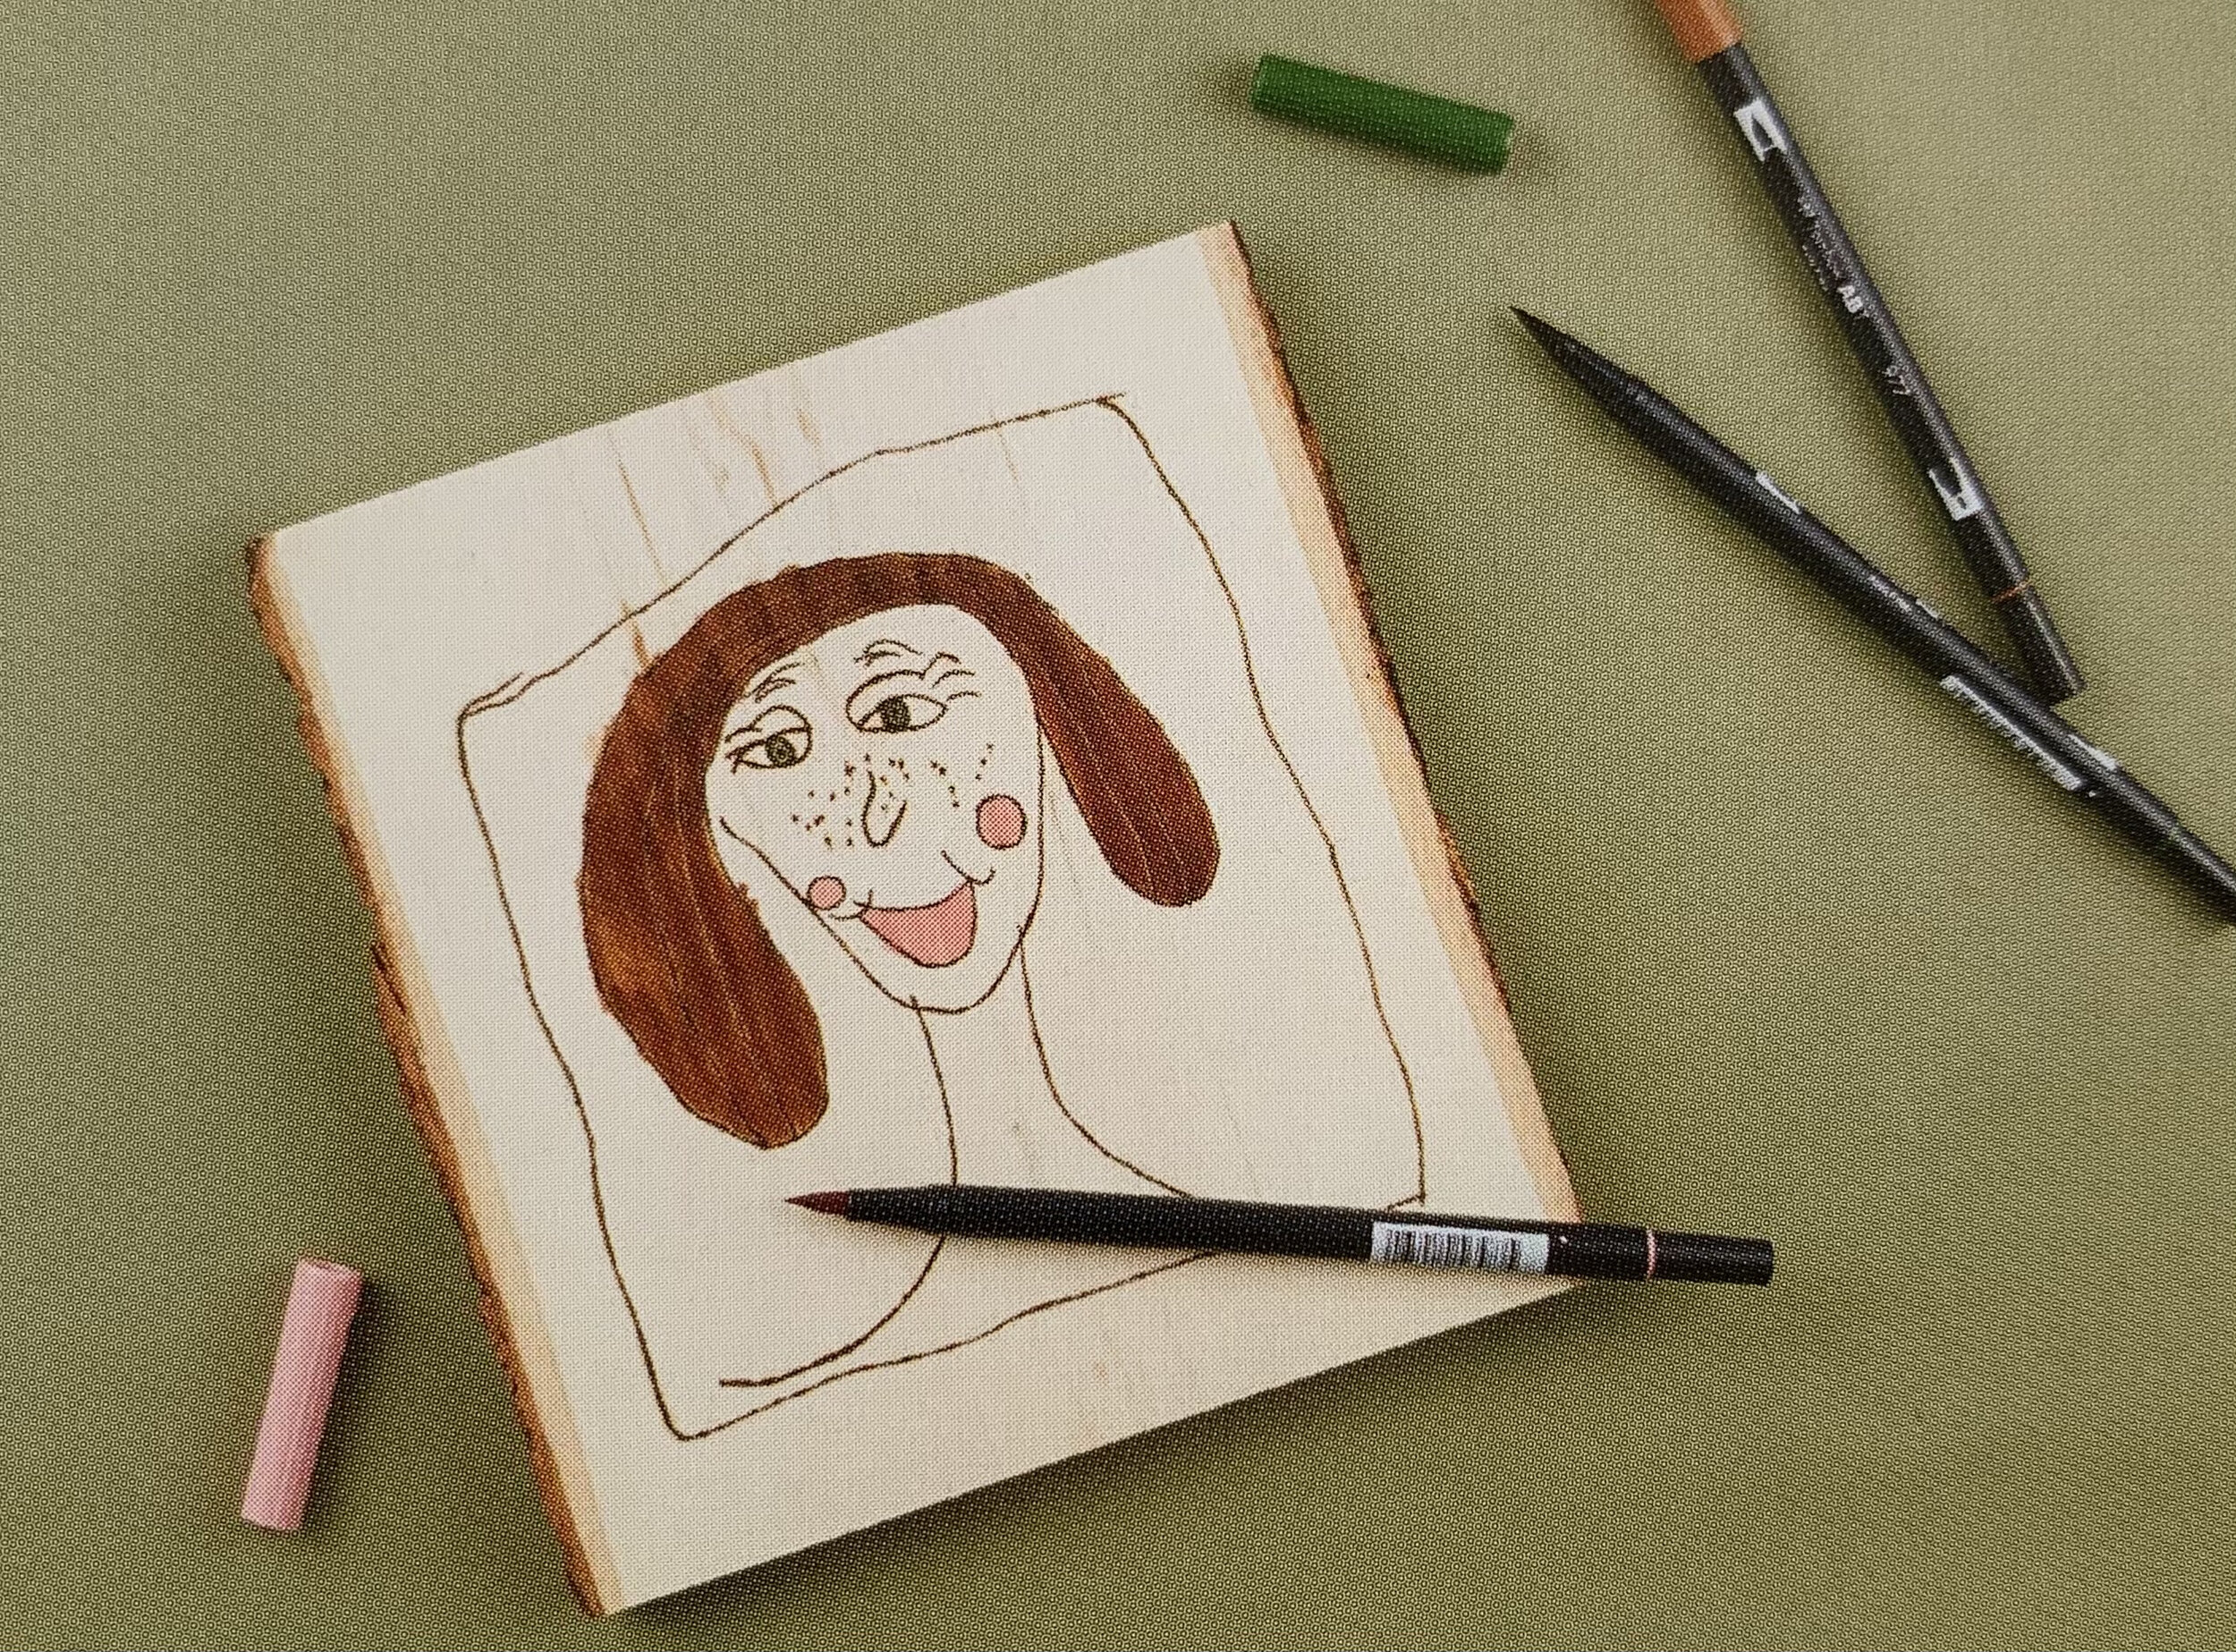
Click here to learn how to transfer your child’s artwork onto wood and wood burn it for a lasting and personalized gift!

For more gift ideas and things to make next with your wood burning tool, check out this blog post with over 150 ideas of what to burn next!

And if you are just getting started in your pyrography journey, head here.

You can also find more project ideas and a full how-to in The Wood Burn Book or get yourself one of the Wood Burn Community Book of Template books full of traceable templates you can practice pyrography with!

Transferring and Burning Your Children's Artwork

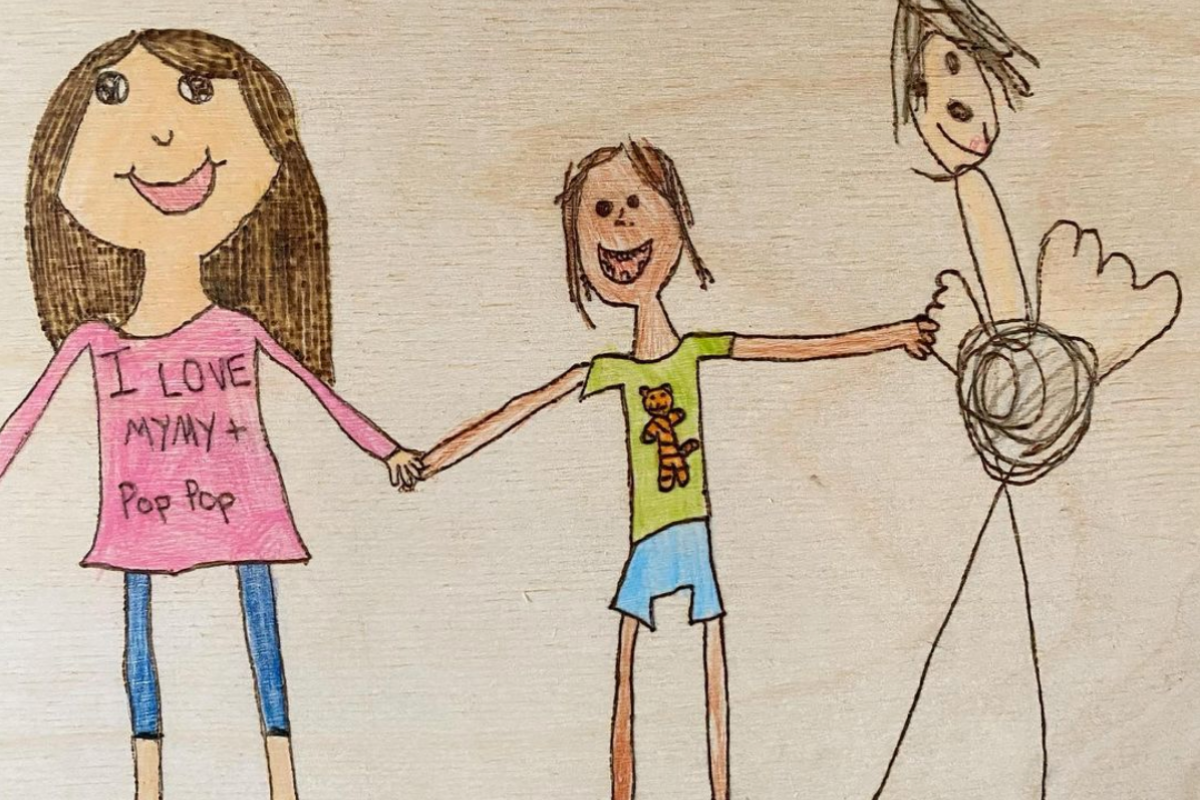
Parents are always looking for a way to preserve their children's art. I personally think woodburning is the best way to do that. It's a great keepsake, it makes for a great personalized gift, and it's so much fun to do with kids.

wood burning children's art

Kids of all ages can participate in this collaboration. You could use a tracing of a babies hand or foot print you can use the scribbles of a toddler or the self portrait of an eight-year-old. You can use original art drawn directly on the wood piece itself or transfer a treasured drawing that the child has already created.

These techniques also work for lettering, hand written recipes, love notes, you name it! Pyrography is such a great way to preserve those memories.

Let's talk about supplies. You don't need many supplies or expensive equipment in order to create a beautiful piece of art that you can cherish forever.


What you will need:


Instructions:

Step 1.

Choose your design or have your child draw the design directly onto the piece of wood. Make sure that your wood is sanded smooth, clean, dried, and unfinished. Check out this blog post on: Prepping Wood Surfaces for Wood Burning.

 
IMG_4388.jpg
 

Step 2.

Place your design on your wood (make sure it is right where you want it) and tape down on one side (two if it's a large design.)

 
IMG_4389.jpg
 

Step 3.

Slide your graphite paper with the black side facing the wood underneath your design.

 
IMG_4390.jpg
 

Step 4.

Use your embossing tool or a pencil to trace your design using medium pressure. The more accurate you are with the transfer, the better your burn will be. Make sure you transferred everything before you remove your design and graphite paper.


Step 5.

Ensure you are in a well ventilated space, and don any safety equipment. Check out my FREE Safety guide here. Do remind children of the dangers of a hot tool. Warm up your burner, and get started. Some children may be old enough to do the burning with adult supervision. Kids and adults, no matter the age, will get a kick out of watching the wood burn take shape, just do it safely.

 
IMG_4391.jpg


Step 6.

Carefully wood burn the art by simply following your transferred lines. Go slowly. Let the burner do the work. Glide along the surface. When you're finish you can remove any remaining graphite lines with a quick sand with some sandpaper or a Tombow sand eraser. For more tricks and tips, check out: Start Here if you are NEW to Wood Burning

Step 7.

Optional, add a finish or let the child artist finish off their masterpiece with some watercolor or markers. Check out this blog post on adding watercolor to wood for tricks and tips as well as my go to supplies!

 
IMG_4393.jpg
 

Step 8.

Add a picture hanger and hang it on your wall to enjoy for years to come.

 
IMG_4392.jpg
 

Be sure to share about your project with your kiddo or the finished masterpiece on instagram and/or Pinterest and tag me @woodburncorner. I would love to see it! You can also find this full project in my book, The Wood Burn Book.


Want to watch a video of this process instead?

Click Here to watch the process of me burning my children’s artwork for a Micheal’s class.


How to get your kids involved in pyrography

E4DD1206-F8A6-4A83-BD8D-D5744C621CA5.jpeg

My kids are always so excited to see what I am making. They watch the process, they see the finished results, and they cheer me on, which is why getting them involved is so much fun. Collaborating with them to create a unique piece gives them such pride. You can use a design they have already drawn, or have them create something new.

I like to do the burning while they watch, and then have them finish it off with markers, colored pencils or watercolor.

This makes an amazing gift for a grandparent, spouse, or loved one. It is also a great class option if you teach, especially around Mothers/Father’s Day.

What you will need:

Watch the FREE video below or click here for written step-by-step instructions!

Make your own Pyrography Canvas Backpack

 
canvas+backpack.jpg
 

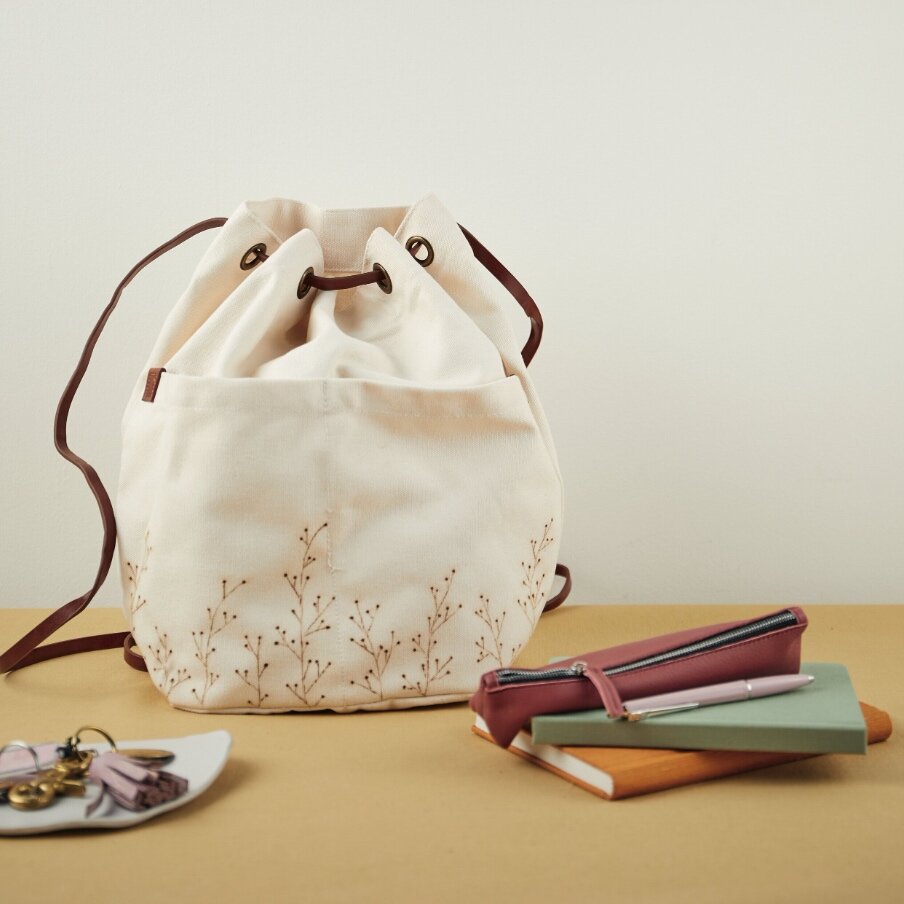
Canvas is another amazing non-wood surface to embellish with pyrography. You will find canvas material in many different forms and adding wood burned touches to any of these canvas materials will add that personalized touch that will step up your canvas game. It is a bit smelly to burn, and you will need to clean your wood burning tool often, but it will look cool and be totally worth it. Be sure to utilize your safety equipment. You and those around you won’t want to be inhaling the fumes from burning on canvas, so be sure to work in a well-ventilated space and have fun with it!

Materials

  • Canvas backback

  • Water-soluble fabric pen

  • Damp sponge

  • Safety Equipment

  • Wood Burning Tool, Spade and Flow Nibs or Ball-Point

Step 1: Choose your canvas backpack. Wash and dry before getting started.Step 2: Lay your backpack flat on your table.

Step 1: Choose your canvas backpack. Wash and dry before getting started.

Step 2: Lay your backpack flat on your table.

Step 3: With your water soluble pen, draw lines of varying lengths and arches from the bottom of the pack going up. These can be close together or spread apart, depending on how you envision the end result.

Step 3: With your water soluble pen, draw lines of varying lengths and arches from the bottom of the pack going up. These can be close together or spread apart, depending on how you envision the end result.

Step 4: Add lines of varying lengths to the right and left sides on these initial lines. Mix up the spacing between the lines to add interest.

Step 4: Add lines of varying lengths to the right and left sides on these initial lines. Mix up the spacing between the lines to add interest.

Step 5: Put on safety gear. Canvas can be quite smelly, you don’t want to be breathing the fumes. An outdoor environment with plenty of air flow would be best.

Step 5: Put on safety gear. Canvas can be quite smelly, you don’t want to be breathing the fumes. An outdoor environment with plenty of air flow would be best.

Step 6: Turn on your wood burning tool. The temperature will depend on how quickly you would like to burn. The lower the temperature, the more controlled the burn. Start lower and turn up the temperature as needed. Using a spade or writing nib, burn…

Step 6: Turn on your wood burning tool. The temperature will depend on how quickly you would like to burn. The lower the temperature, the more controlled the burn. Start lower and turn up the temperature as needed. Using a spade or writing nib, burn by tracing over all of your drawn lines with the wood burning tool.

Step 7: Once you’ve traced all the lines, turn off your burning tool and carefully switch to a flow nib, preferably a ball-point. Reheat the burner and start adding the dots to the ends of your lines. To make a dot, simply hold the burner in place b…

Step 7: Once you’ve traced all the lines, turn off your burning tool and carefully switch to a flow nib, preferably a ball-point. Reheat the burner and start adding the dots to the ends of your lines. To make a dot, simply hold the burner in place briefly. Be careful not to hold it too long, or you can burn a hole in your pack. Add burned dot ends until all lines are topped off with them.

Step 8: Rinse off your burned backpack or use a sponge and some water to carefully remove all water-soluble pen lines. Set out to dry.

Step 8: Rinse off your burned backpack or use a sponge and some water to carefully remove all water-soluble pen lines. Set out to dry.

Step 9: Wear your bag proudly, and enjoy the compliments.

Step 9: Wear your bag proudly, and enjoy the compliments.

SHOW OFF YOUR WORK!

Be sure to share your finished pieces on instagram using #thewoodburnbook

 
the wood burn book

More projects in the book!

This essential guide opens with a brief background to the art of wood burning, a list of tools and how to use them, basic techniques that can be used over and over again, and even what to burn (projects, designs and inspiration) and how to be safe doing it.


Make Your Own Poppy Wall Art

3+poppy+woodburn.jpg

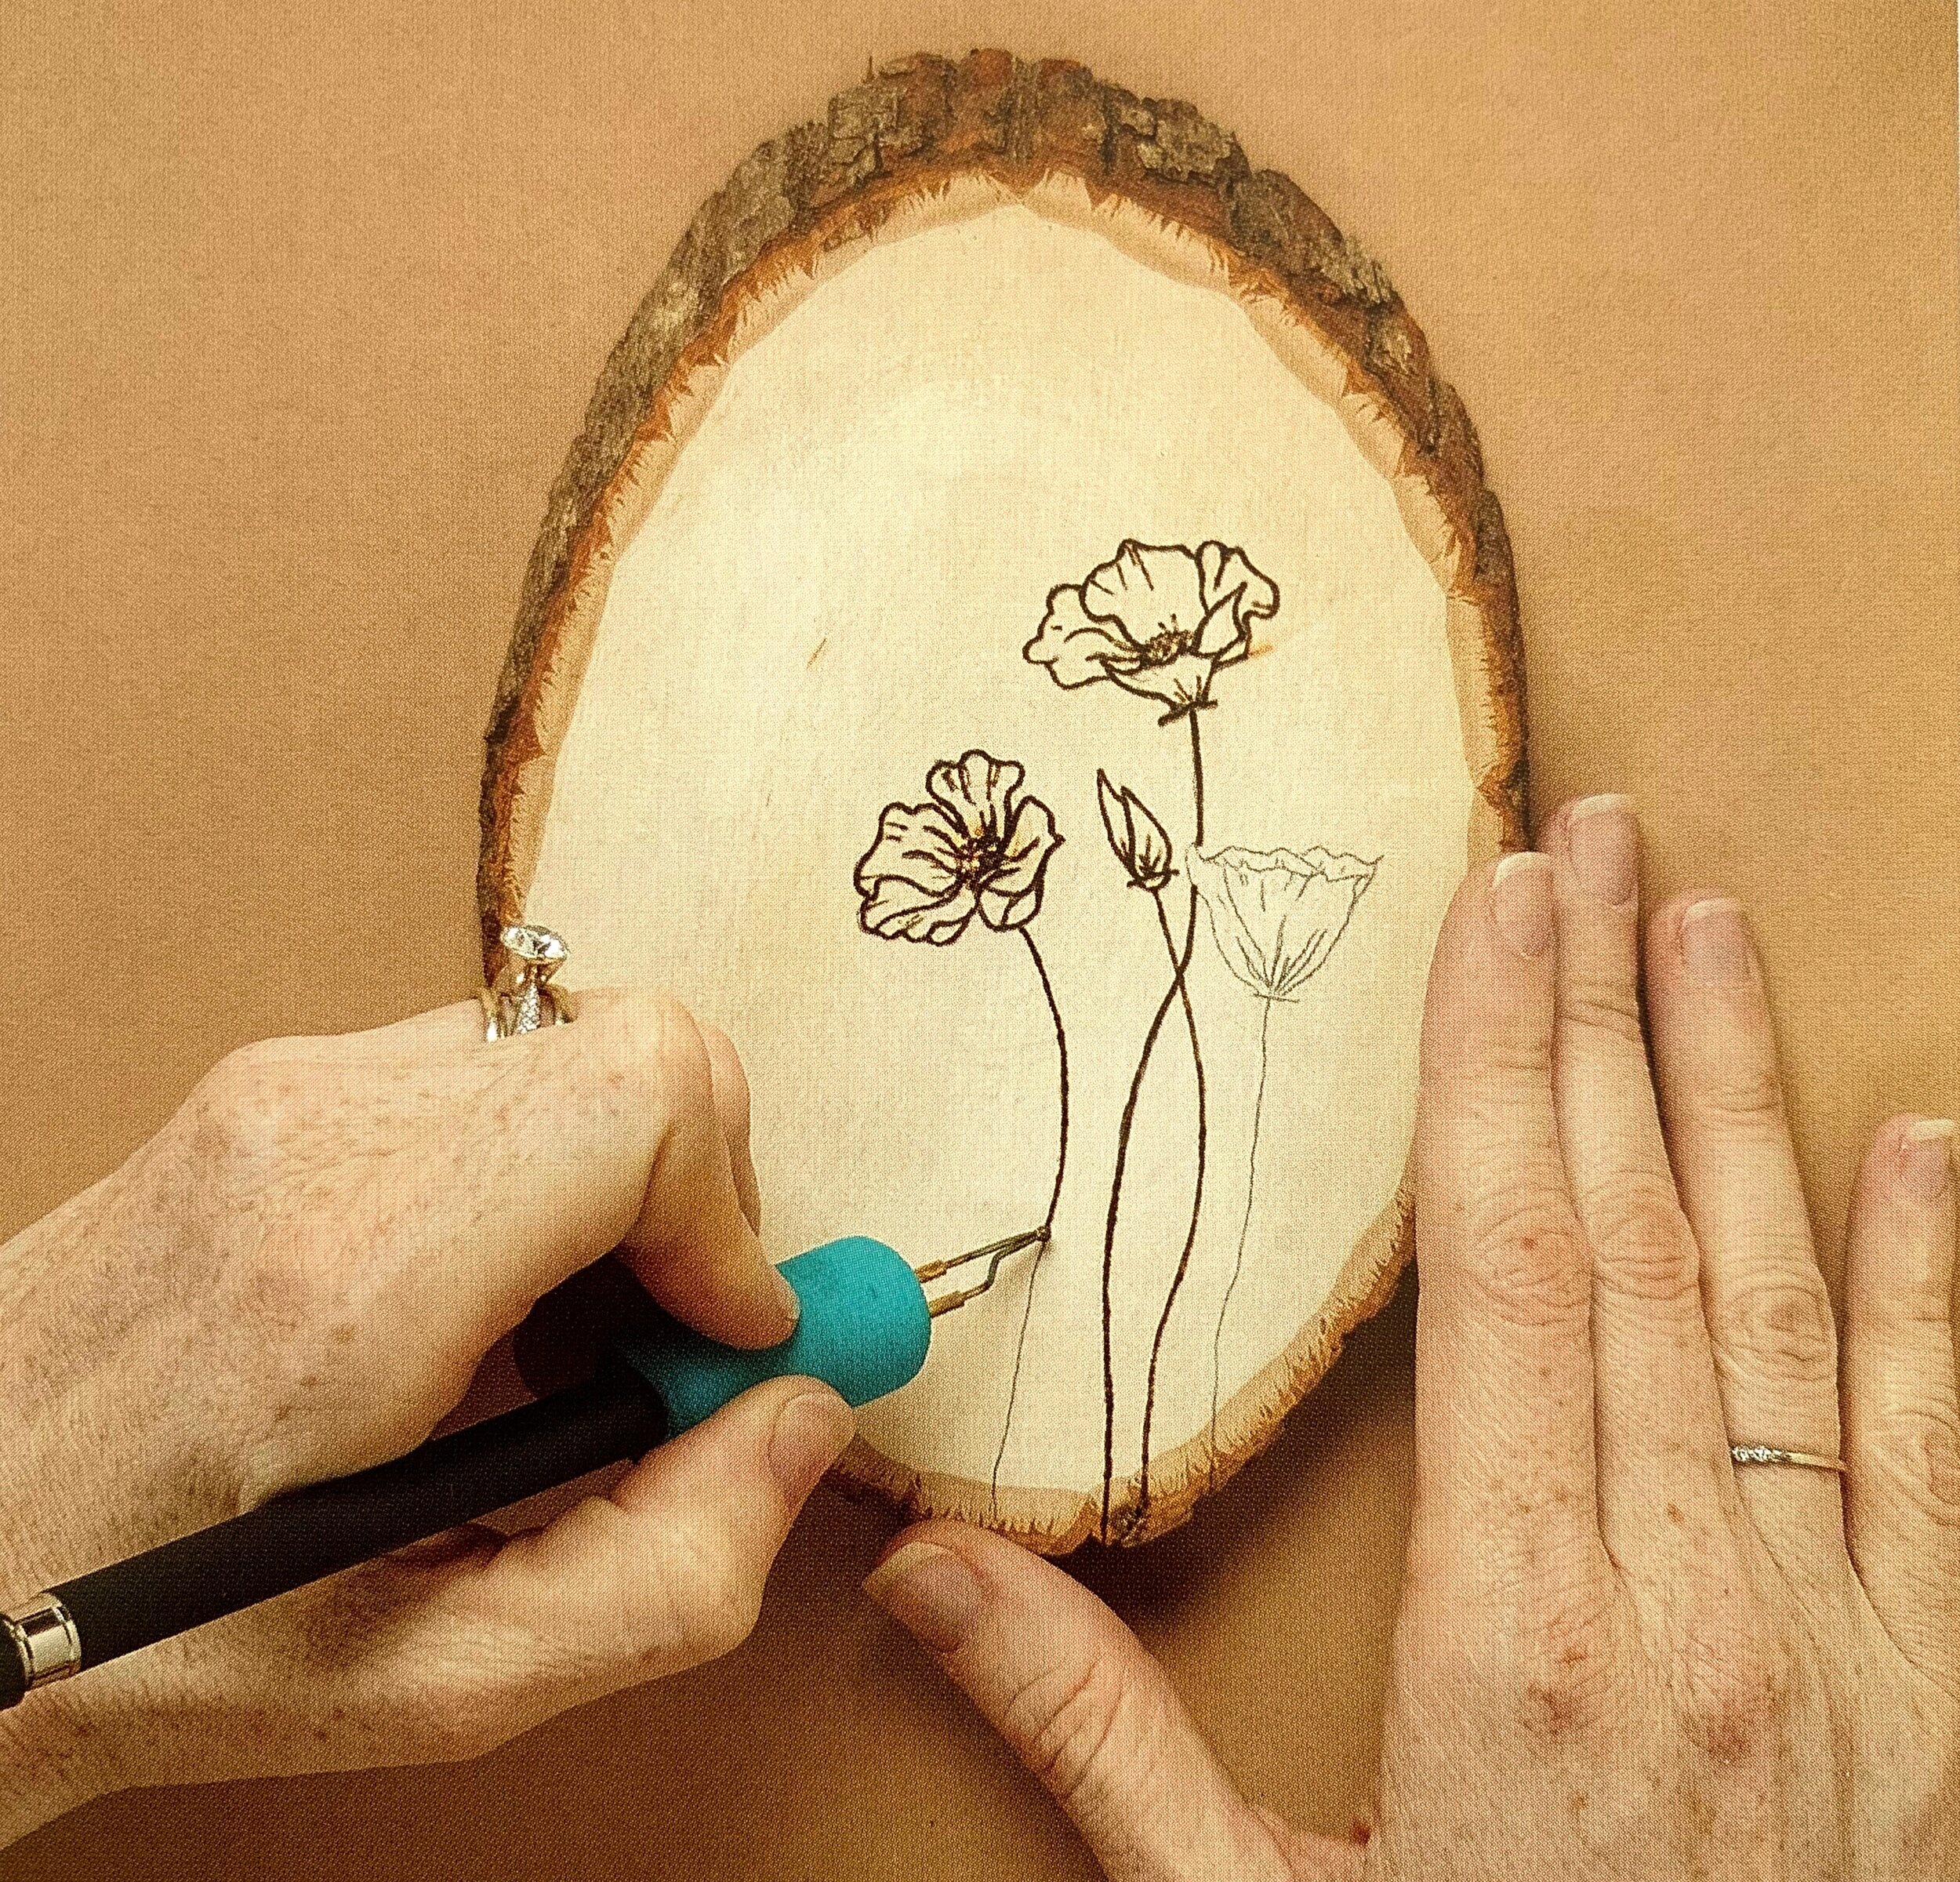
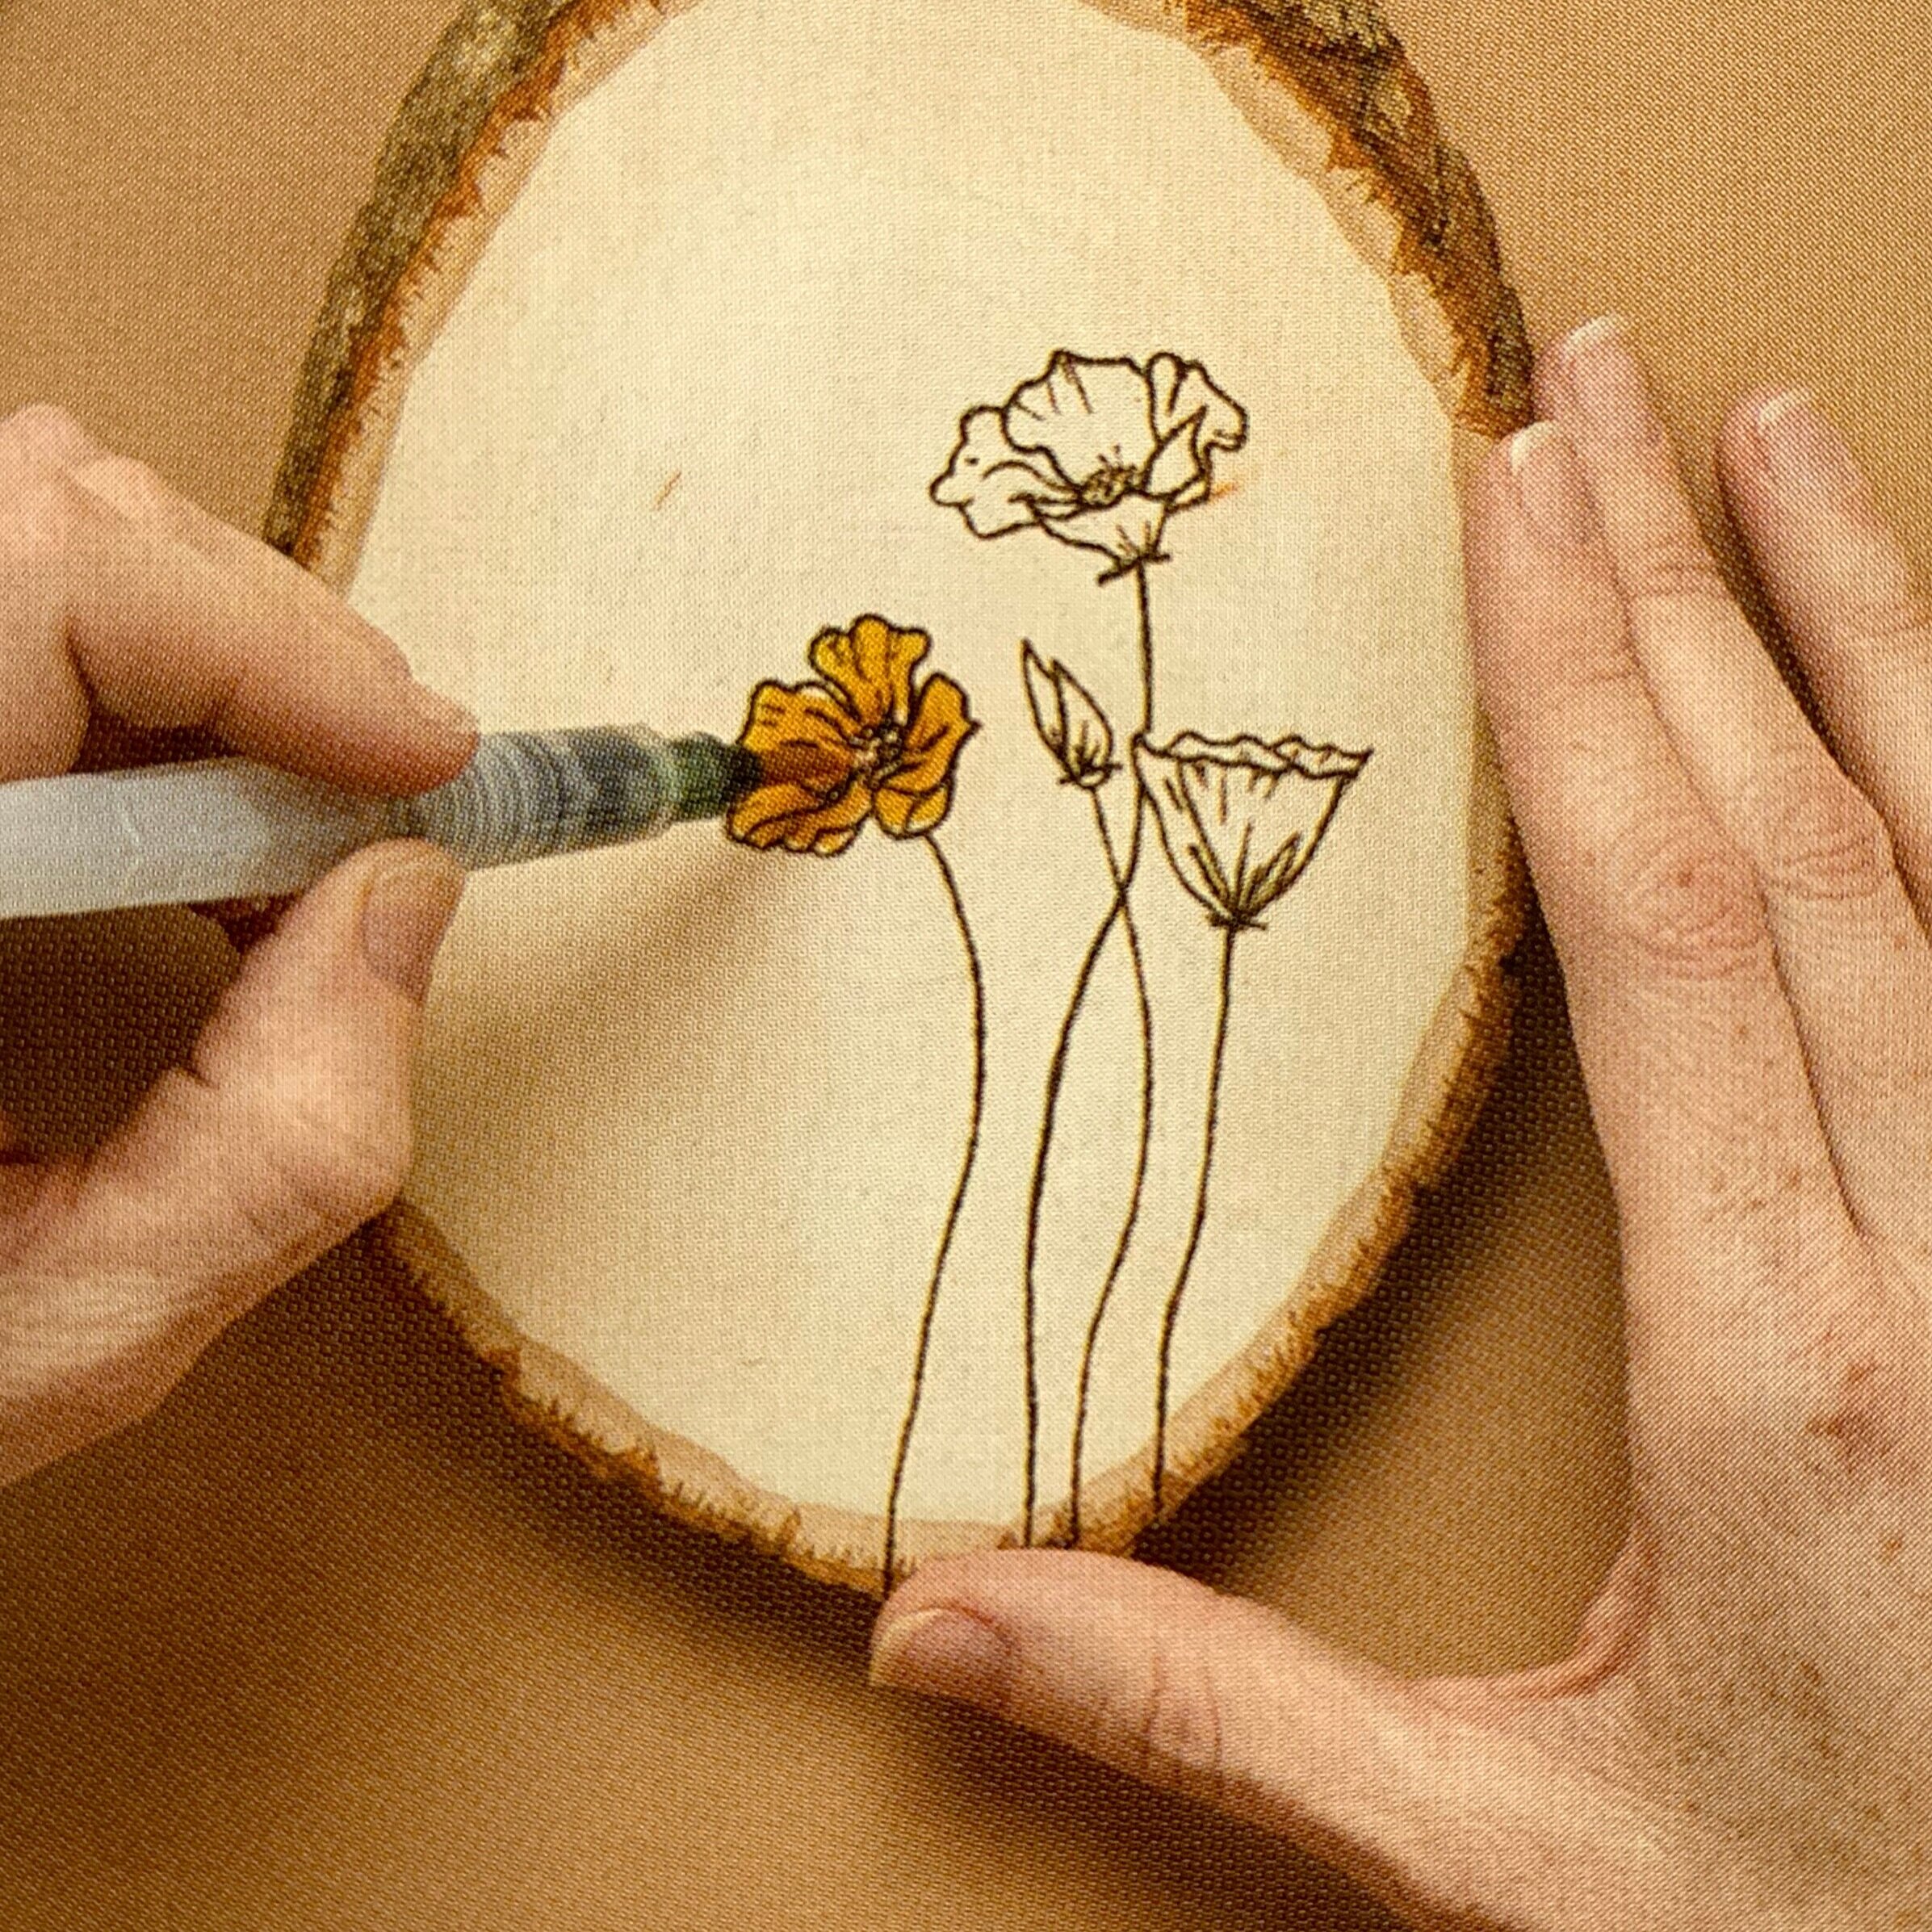
Watercolor is one of my favorite mediums to add to wood. It is quite liberating to add watercolor in this unique and loose way. You can take any simple line drawing and quickly turn it into a beautiful piece of art that will add vibrancy and warmth to any space. You can create a dramatic and playful effect by adding these fun and perfectly imperfect splashes of watercolor. Those splashes of bright color change the whole look of the piece, and really bring it to life.

I chose the California poppy for this particular piece for its bright colors and because I am absolutely obsessed with them. They pop up everywhere, are super vibrant, and just make me happy.

Download your FREE poppy design printable template

Materials

Step 1: Choose any simple line-drawn floral design. This can be a hand drawn doodle, a drawing from a photograph, or a design in this book. Then choose a wood slice to fit the design.

Step 1: Choose any simple line-drawn floral design. This can be a hand drawn doodle, a drawing from a photograph, or a design in this book. Then choose a wood slice to fit the design.

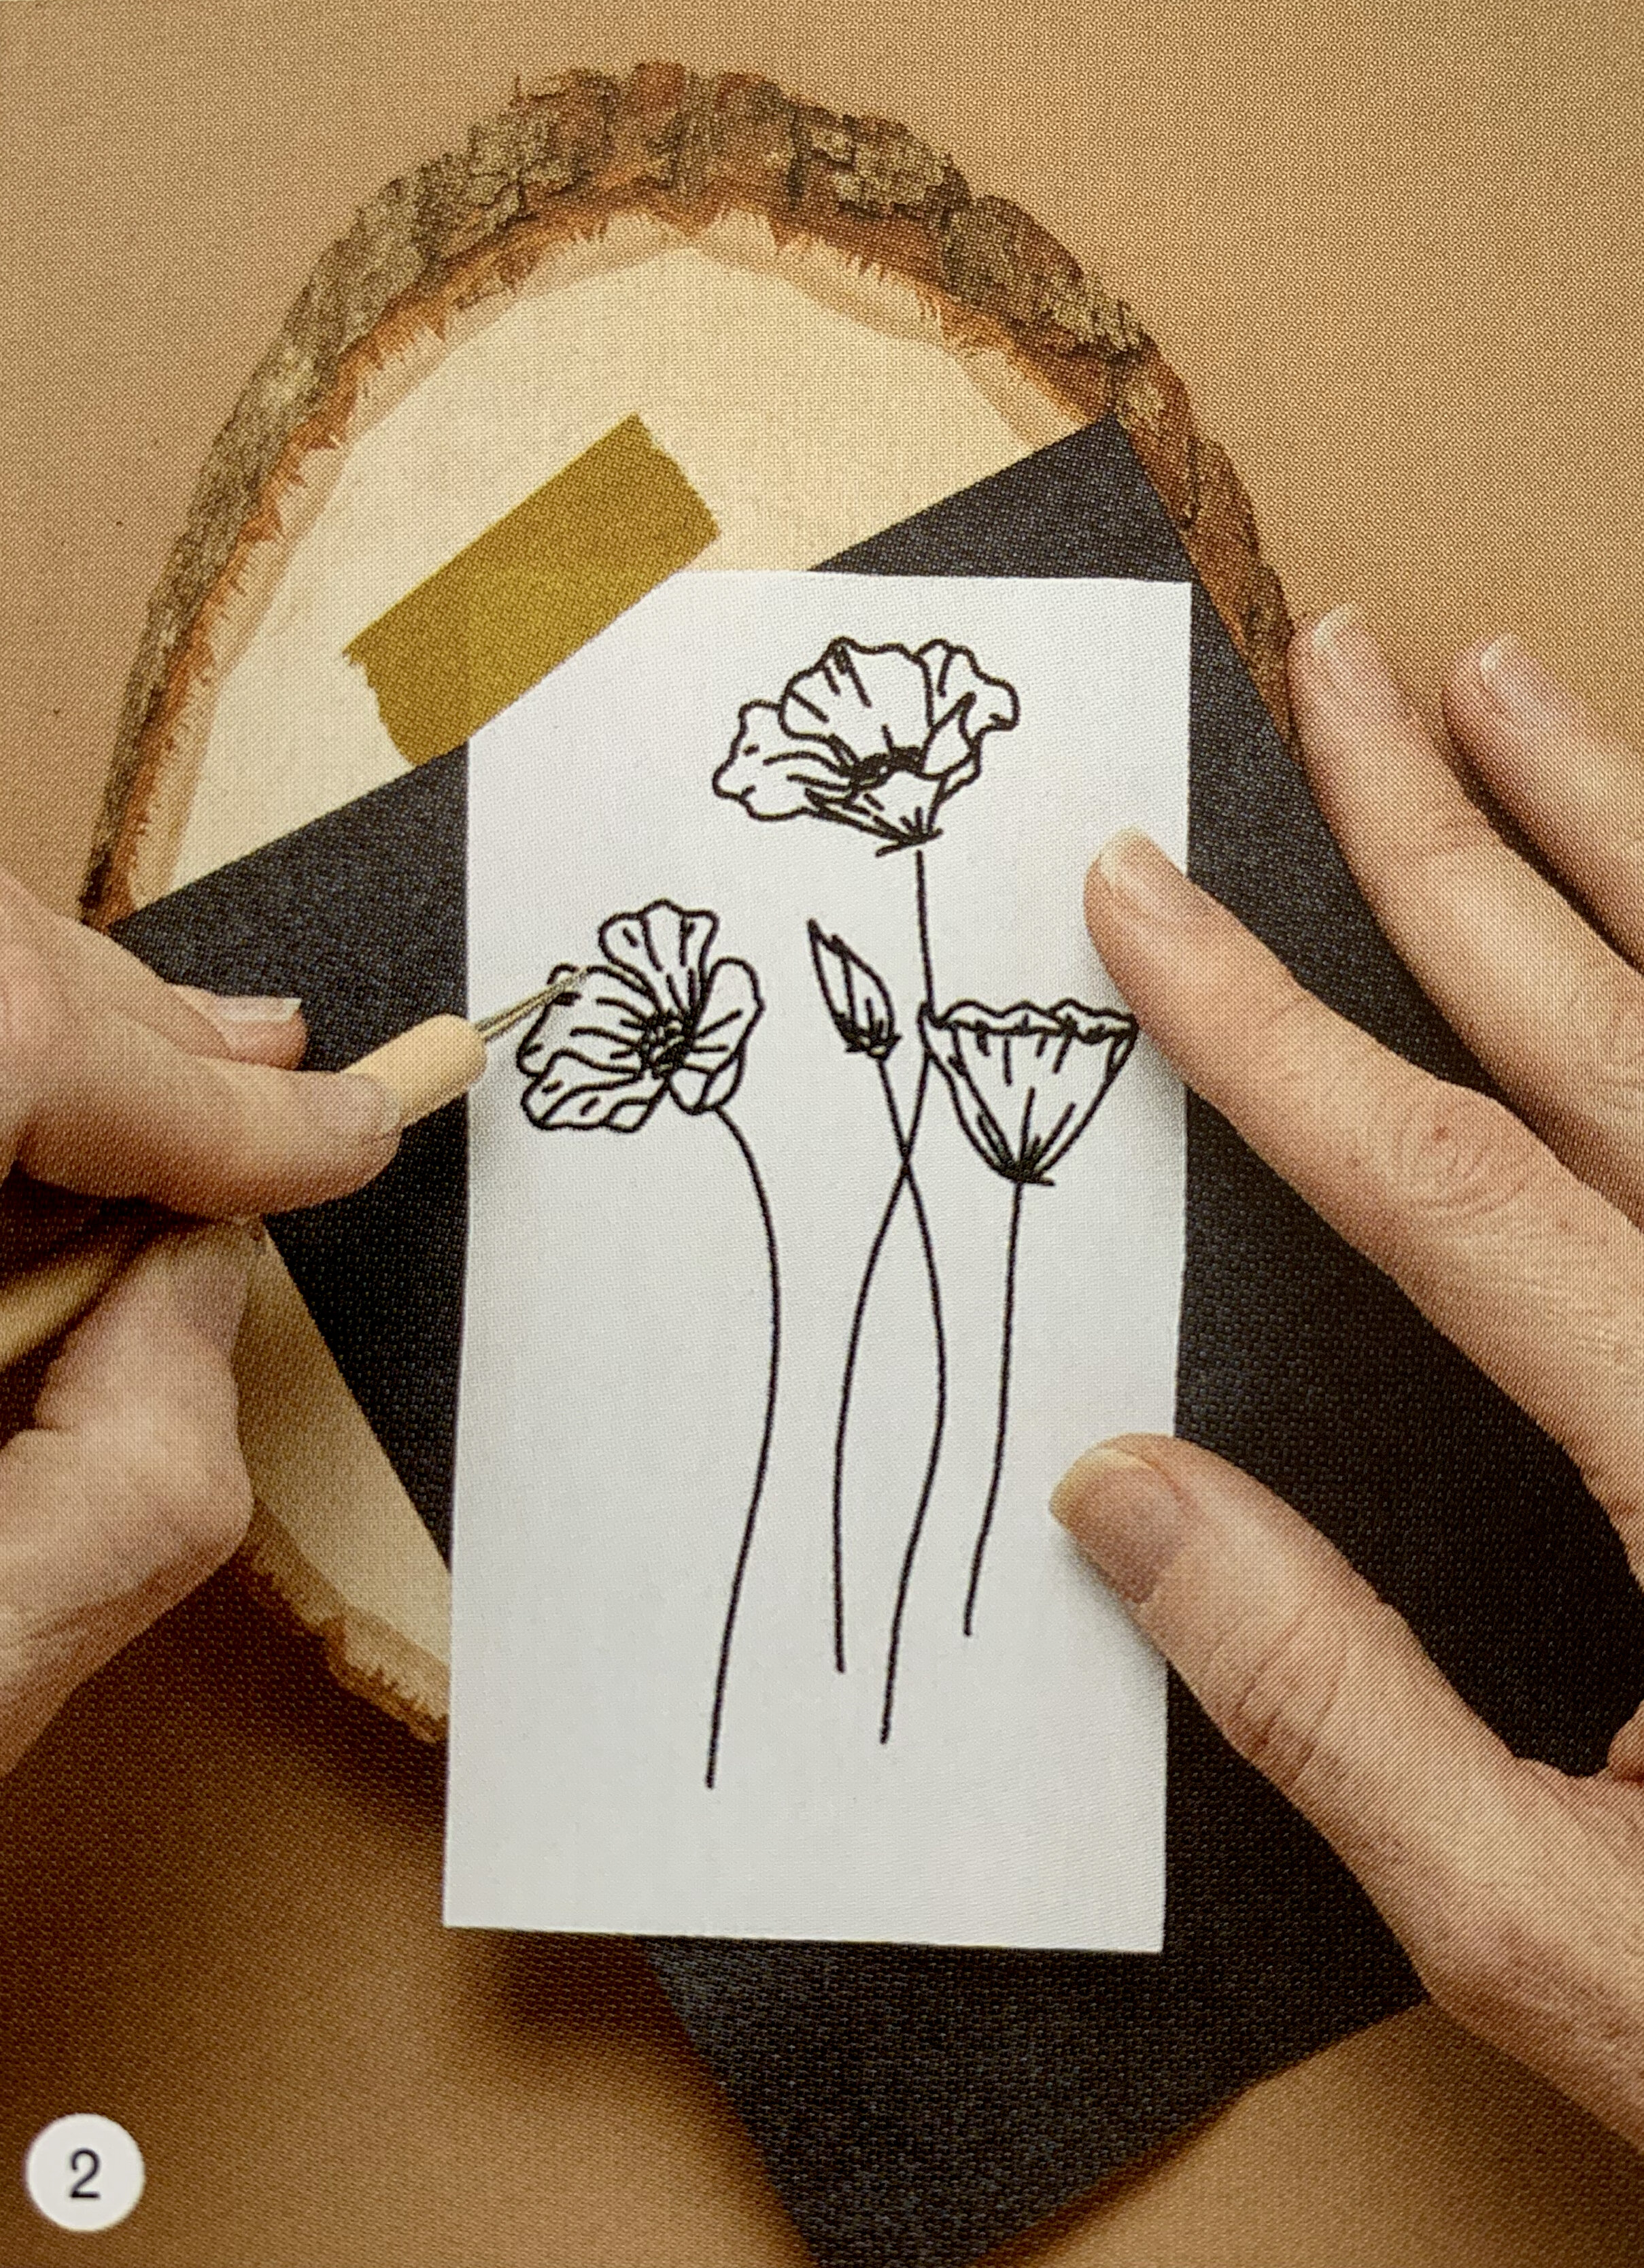
Step 2: Transfer the design to the wood. I am using graphite paper and a slice of basswood with a live edge. Make sure you have transferred the entire design before removing the design.

Step 2: Transfer the design to the wood. I am using graphite paper and a slice of basswood with a live edge. Make sure you have transferred the entire design before removing the design.

Step 3: Choose your nib and burn. For this particular piece I like to use a flow or writing nib. This gives me the freedom to burn smoothly in all directions, without catching an edge of the nib.

Step 3: Choose your nib and burn. For this particular piece I like to use a flow or writing nib. This gives me the freedom to burn smoothly in all directions, without catching an edge of the nib.

Step 4: Remove any remaining transfer lines after the design has been burned in its entirety.

Step 5: Pull out your watercolors, palette, water glass, paper towels, and paintbrushes.

Step 6: Color the flower fully, or at least the parts you want colored. Don’t use too much water or you may split your wood. It’s OK if you go over the lines on this particular piece - you actually should! A loose watercolor look is what we are goin…

Step 6: Color the flower fully, or at least the parts you want colored. Don’t use too much water or you may split your wood. It’s OK if you go over the lines on this particular piece - you actually should! A loose watercolor look is what we are going for. This technique gives the feeling that the flower is extending past the lines you have given it.

Step 7: Add the splashes of paint once you have completed the coloring of the flower. Practice on a scrap piece of paper or on the backside of your piece first. Dip into the same color, hold your brush close to the wood, pull back on the bristles an…

Step 7: Add the splashes of paint once you have completed the coloring of the flower. Practice on a scrap piece of paper or on the backside of your piece first. Dip into the same color, hold your brush close to the wood, pull back on the bristles and let them go. This will create a splashed look. You can go heavy on the splashes, or very subtle, it is entirely up to you.

Step 8: Wait for the piece to dry, then attach a sawtooth picture hanger to the back

Step 8: Wait for the piece to dry, then attach a sawtooth picture hanger to the back

Step 9: Complete your piece with a finish of your choosing. I prefer a spray finish over watercolors, so as to not unintentionally spread the paint on the wood.

Step 9: Complete your piece with a finish of your choosing. I prefer a spray finish over watercolors, so as to not unintentionally spread the paint on the wood.

Step 10: Hang it on your wall, or wrap it up and give it as a gift!

SHOW OFF YOUR WORK!

Be sure to share your finished piece on instagram using #thewoodburnbook

the wood burn book

More projects in the book!

This essential guide opens with a brief background to the art of wood burning, a list of tools and how to use them, basic techniques that can be used over and over again, and even what to burn (projects, designs and inspiration) and how to be safe doing it.

Make Mini Fridge Magnets

IMG_2110.jpg

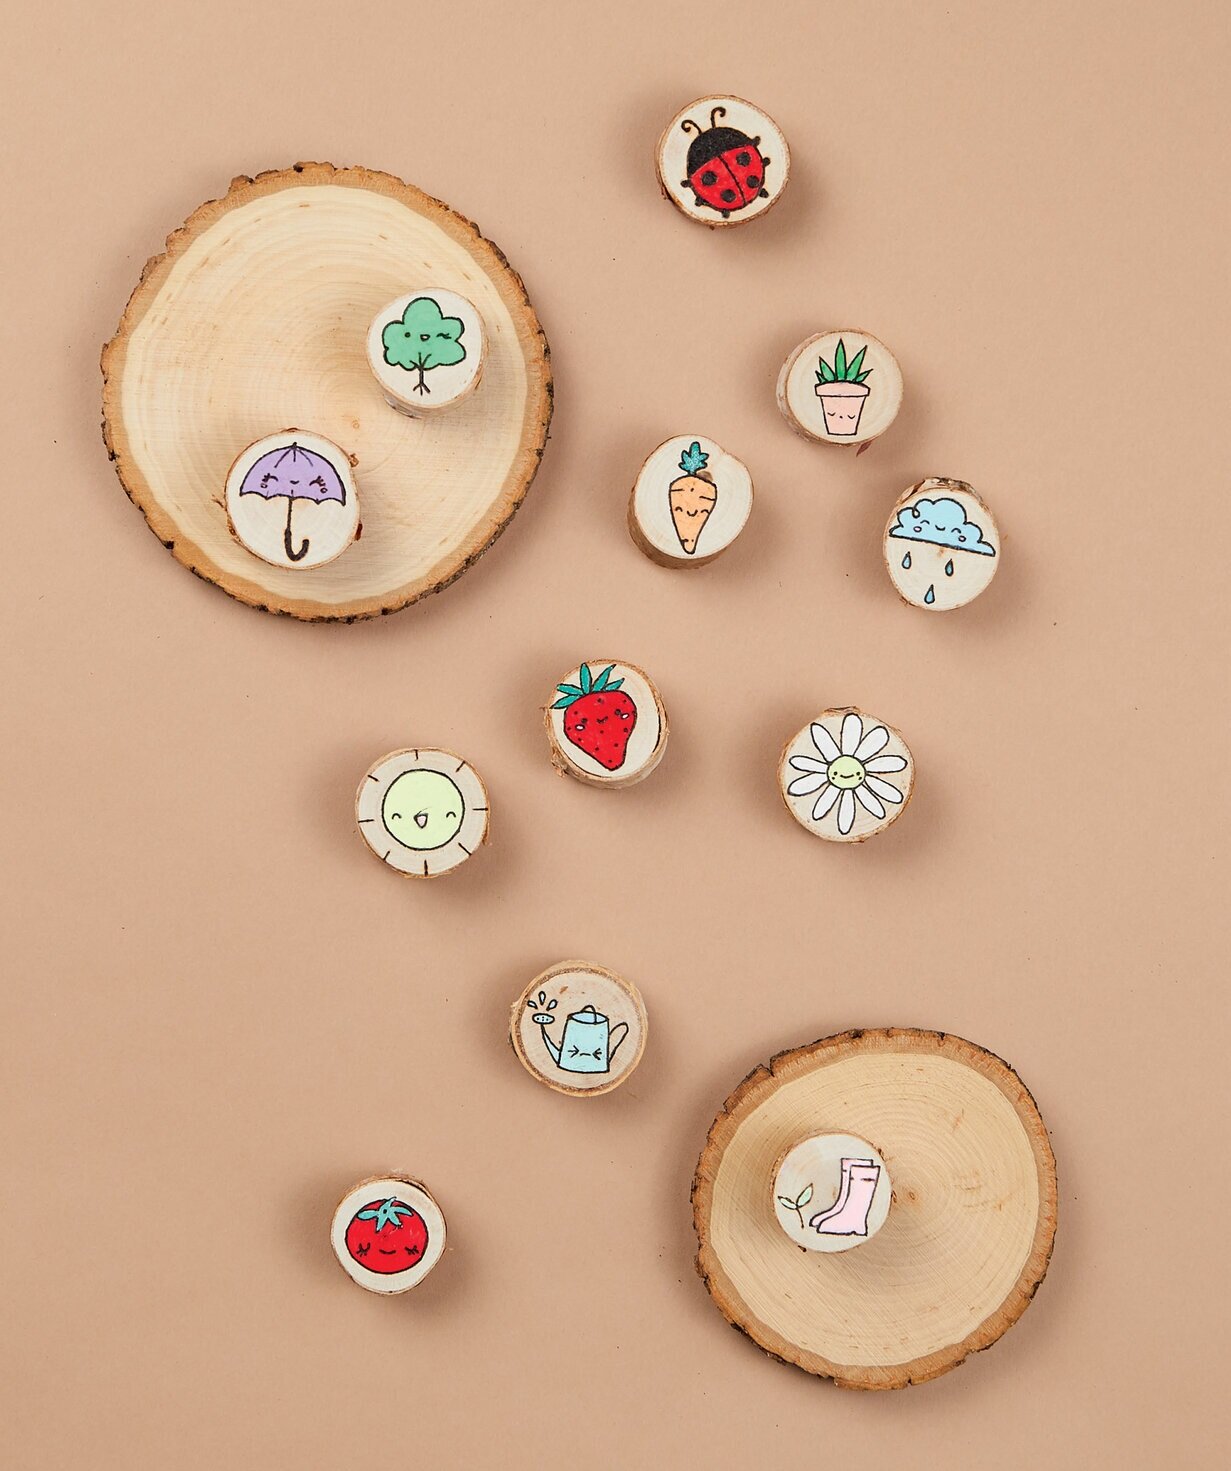
Gel pens are great for using on wood burned projects because they are easily accessible, not messy, come in so many colors, metallics and neons, and are easy to apply to small areas. These fun little gel pen magnets are just so perfect for the adorable designs by Jess from @jeshypark.

These magnets are both useful and whimsical, and who doesn’t love that?! They are super simple to make but will surely add character to any refrigerator.

Materials

Step 1. Choose your designs, size them, print them.

Step 1. Choose your designs, size them, print them.

Step 2. Sand your tiny wood slices smooth. I am using mini birch slices. Basswood is also a popular wood choice.

Step 2. Sand your tiny wood slices smooth. I am using mini birch slices. Basswood is also a popular wood choice.

Step 3. Cut and place the designs on the wood slices.

Step 3. Cut and place the designs on the wood slices.

Step 4: Choose a transfer method. A variety of these are discussed in the book. I suggest a graphite, blue Chaco, or pencil on paper methods. Here I am using the pencil on paper method.

Step 4: Choose a transfer method. A variety of these are discussed in the book. I suggest a graphite, blue Chaco, or pencil on paper methods. Here I am using the pencil on paper method.

Step 5: Tape your tiny wood pieces to a larger wood slice from the backside.Taping them down will hold them in place and allow you to easily turn them while you transfer and burn without worrying about getting burned. I learned this trick from @nort…

Step 5: Tape your tiny wood pieces to a larger wood slice from the backside.

Taping them down will hold them in place and allow you to easily turn them while you transfer and burn without worrying about getting burned. I learned this trick from @northstar_pyrogrpahy.

Step 6: Transfer the design. Remember, the more accurate the transfer, the cleaner the burn will be

Step 6: Transfer the design. Remember, the more accurate the transfer, the cleaner the burn will be

Step 7: Warm up your burner with your nib of choice securely attached. 

* Be sure to TAKE YOUR HEALTH & SAFETY SERIOUSLY. Check out the Safety Blog outlining all the steps you can take to burn safely, download your FREE safety guide and always follow the guidelines listed by the manufacturer.

Test your temperature on the back of one of your wood slices or a scrap piece of the same type of wood before getting started.

Step 8: Follow your transfer lines. Go slowly and be careful. Keep your fingers out of the way.Consider using a different wood slice or object of equal thickness as a working surface on which to rest your hand.This will allow you to burn more carefu…

Step 8: Follow your transfer lines. Go slowly and be careful. Keep your fingers out of the way.

Consider using a different wood slice or object of equal thickness as a working surface on which to rest your hand.

This will allow you to burn more carefully and precisely with a steadier hand, which is especially important when working on something small.

Step 9: Remove any remaining transfer markings.Step 10: Embellish your tiny wood burned designs with gel pens. There is no wrong way to do it, and I encourage you to go for it! Use metallic, neon, or monochrome colors. Color the whole thing, or just…

Step 9: Remove any remaining transfer markings.

Step 10: Embellish your tiny wood burned designs with gel pens. There is no wrong way to do it, and I encourage you to go for it! Use metallic, neon, or monochrome colors. Color the whole thing, or just add accents. It is completely up to you!

Step 11: Once you are happy with the look, add a finish to keep them looking great for a long time. Allow to fully dry.

Step 12: Pull out magnets, E6000 glue, and cotton swabs. Flip the tiny burned slices over so the backside is facing up.

Step 13: Get a good amount of E6000 glue on the cotton swab and rub it on one side of a magnet.

Quickly place and slightly squish the magnet onto the backside of the wood burned piece.

pyrography projects

Check on them after a few minutes to re-center any of the magnets which may have shifted position. Allow the glue to dry overnight.

*Be sure to work in a well-ventilated space because the glue can be quite stinky, and follow the guidelines listed by the manufacturer

 
pyrography magnet collection
 

Step 14: Once dry, your adorable handmade magnets are ready for use!

Show off your work!

I cant wait to see how you take these designs and add your own twist! Be sure to share your finished pieces on instagram using #thewoodburnbook

the wood burn book

More projects in the book!

This essential guide opens with a brief background to the art of wood burning, a list of tools and how to use them, basic techniques that can be used over and over again, and even what to burn (projects, designs and inspiration) and how to be safe doing it.


Pyrography on Odd Objects

Alternative Surfaces to Burn on.png

Will it burn? Pyrography is such a versatile art! You can burn on almost everything.

I have been working on a little passion project over on TikTok of experimenting with pyrography on all kinds of odd things. It has been so much fun.

IMG_2911.jpg

I usually involve my kids in the process of filming, design, editing, etc… They have been having as much fun as I have been having at using my wood burning tool in new and weird ways.

So far, we have been burning on a lot of different food items, and it has been so interesting to see what burns well, and what does not. I have plans to try burning on so many different objects, so stay tuned for all the weird and the fun.


List of what I’ve burned on:

  • a hundred dollar bill

  • paper

  • antler

  • lime

  • pasta

  • mango

  • tortilla

  • radish

  • canvas

  • onion

  • lasagna

  • leather

  • cantaloupe

  • watermelon

  • orange

  • carrot

  • toast

  • potato

  • egg

  • apple

  • pasta

For me, making a lasagna with Garfield’s image burned into it has been my favorite. I have also burned Shrek’s face into a tortilla, and burned on mango! Check it out.

I know I am not alone in my experiments. I have seen pyrographers burn on all sorts of odd objects. Who said the wood burning tool was just for wood, anyway?

What have you tried to burn on? What has been your favorite?

As always, safety is important. Protect yourself and those around you when experimenting, and use your best judgement when choosing things to burn. I do my experiments outdoors, with a mask and fan.

Check out this blog post on Common Wood Types to Avoid Burning on!

and Feel free to download our free guide to safety, here.

For more ideas on fun random things to burn on, follow my Pinterest board: Alternative Surfaces To Burn On.

WANT TO LEARN MORE ABOUT WOOD BURNING AND IMPROVE PYROGRAPHY SKILLS?

Learn everything you need to know at your own pace from your home with The Complete Wood Burning Toolkit.

Grow with the community: Join Burn Club+, a place where you can ask questions, and get the full answers, a place of fun and learning.

Check out my one-on-one creative business coaching to boost your business in the right direction.


160 Ideas of Things To Wood Burn Next

Creativity ruts are a very real thing. When the options are endless for things you can wood burn, choosing one can be difficult. I have found that if I give myself some sort of constraint, whether it be an object, a subject matter, or a word, that it tends to spark an idea much easier. This is a place I hope you visit when you need inspiration of what to burn next.

My suggestion for utilizing this list would be to close your eyes, twirl your finger around, point, and see where you land. You can choose to point again, or let your mind wander with how you could create that object with your unique wood burned touches. I think you will find inspiration quite quickly.

woodburned-spatula-and-spoon-mandalas

I also recommend looking at old #burntmonthchallenge prompts (#burntmarch, #burntfebruary), and #burntday prompts for inspiration. Check out this blog post to learn more about these challenges!

If you need patterns and designs to burn, visit the templates store full of individual patterns for sale, like the one on these wooden spoons or grab yourself one of the community template books.


160 Ideas of What to Wood Burn Next:

wood-burned-comb

spoons + serving ware + cutting boards + plaques + baseball bats + hammer + key chain + leather jacket + notebooks + ring dish + growth blocks + baby blocks + growth wall charts + toys + wall art + food display + candle display + pet portraits + coasters + ornaments + trophies + tables + cake knife + violin + guitar + desk + chairs + salad bowl + candy dish + wooden cups + cell phone covers + earrings + necklaces + bracelets + hair clips + chopsticks + baby bowls + baby plates + candle holders + serving tray + dice tray + toy box + shelving unit + bed headboard + wooden watch + clock + rolling pin + wooden apple + trivets + wooden tongs + pen holder + business card holder + jewelry holder +  shirts + jackets + canvas bag + leather key chains + salt bowl + coffee scoop + doll house + cabinet + piggy bank + wooden airplane + hand held fan + countertop + wine rack + cheese plate + cheese knives + toilet seat + memory box + plates + vase + comb + brush  + wall sign + open/closed sign + drawer fronts + lazy susans + puzzles + matching games + bathroom signs + kids’ room signs + chess pieces + checkers + trinket tray + cane + walking stick + map + key hook + magnets + boomerang + coat hangers + watercolor paper + driftwood + tool handles + skateboard deck + napkin holders + stools + magic wands + brooms + cork + dried gourd + pumpkin + nesting dolls + shoehorn + wooden bookmark + fishing pole + jenga + belts + purse + shoes + toy train + tablet cover + light switch cover + outlet cover + coffee table + animal ID tag + door knobs + bird house + dog bowl holder + wooden eggs + essential oil diffuser + dog name sign + welcome sign + step stool + bone + antler + tooth + horn + tree bark + cotton + pencil + stylus + recipe box + hats + leather backpack + canvas tote + rings + napkin rings + table number displays + logo sign + displays for business + cups + cribbage board + wooden pipe + tie clip + cuff links + figurines + wooden peg doll + bed frame + sandwich boards + chalkboard + picture frame  + pool cue + alphabet blocks + leather bookmarks + catchall + paper cards


The options are endless, and oh-so fun to imagine.


Check out some of these fun projects:

garden-marker-plant-tag
 
wood-burned-magnets-project


Need more pyrography inspiration or project ideas?

Check out the Pinterest board: Ideas and Items to Burn On for everyday and unique items made from wood or burnable surfaces.