Parents are always looking for a way to preserve their children's art. I personally think woodburning is the best way to do that. It's a great keepsake, it makes for a great personalized gift, and it's so much fun to do with kids.
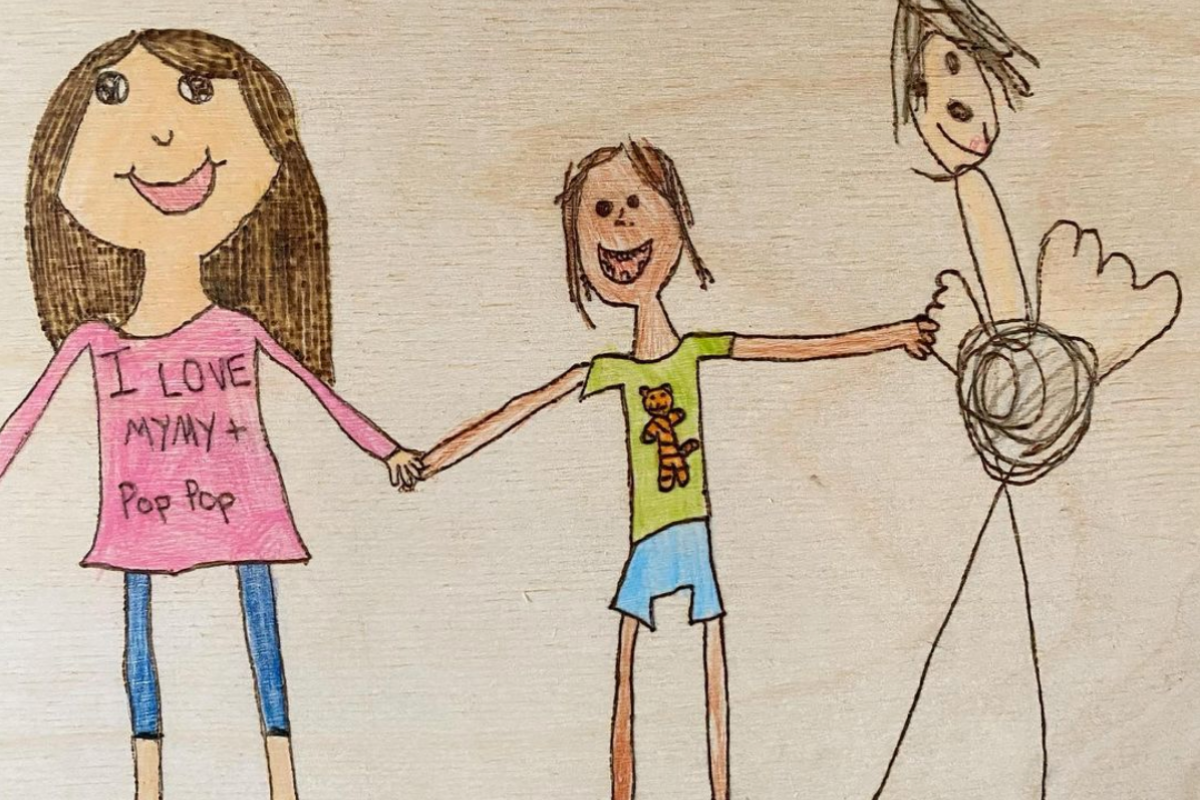
Kids of all ages can participate in this collaboration. You could use a tracing of a babies hand or foot print you can use the scribbles of a toddler or the self portrait of an eight-year-old. You can use original art drawn directly on the wood piece itself or transfer a treasured drawing that the child has already created.
These techniques also work for lettering, hand written recipes, love notes, you name it! Pyrography is such a great way to preserve those memories.
Let's talk about supplies. You don't need many supplies or expensive equipment in order to create a beautiful piece of art that you can cherish forever.
What you will need:
A drawing or design
Wood (unfinished, dried, sanded smooth)
Burner (I used a Walnut Hollow Versatool and recommend it as a starting point. Head over to the following blog post: What Tool Is Right for Me, if you want to learn about a variety of pyro tools, uses and price points for each.)
Embossing Tool (or pen or pencil)
Markers or other medium to add colour (optional - check out: Alternative Mediums to use with Pyrography)
Safety Equipment (click here for the safety guide)
Instructions:
Step 1.
Choose your design or have your child draw the design directly onto the piece of wood. Make sure that your wood is sanded smooth, clean, dried, and unfinished.
Check out this blog post on: Prepping Wood Surfaces for Wood Burning.
Step 2.
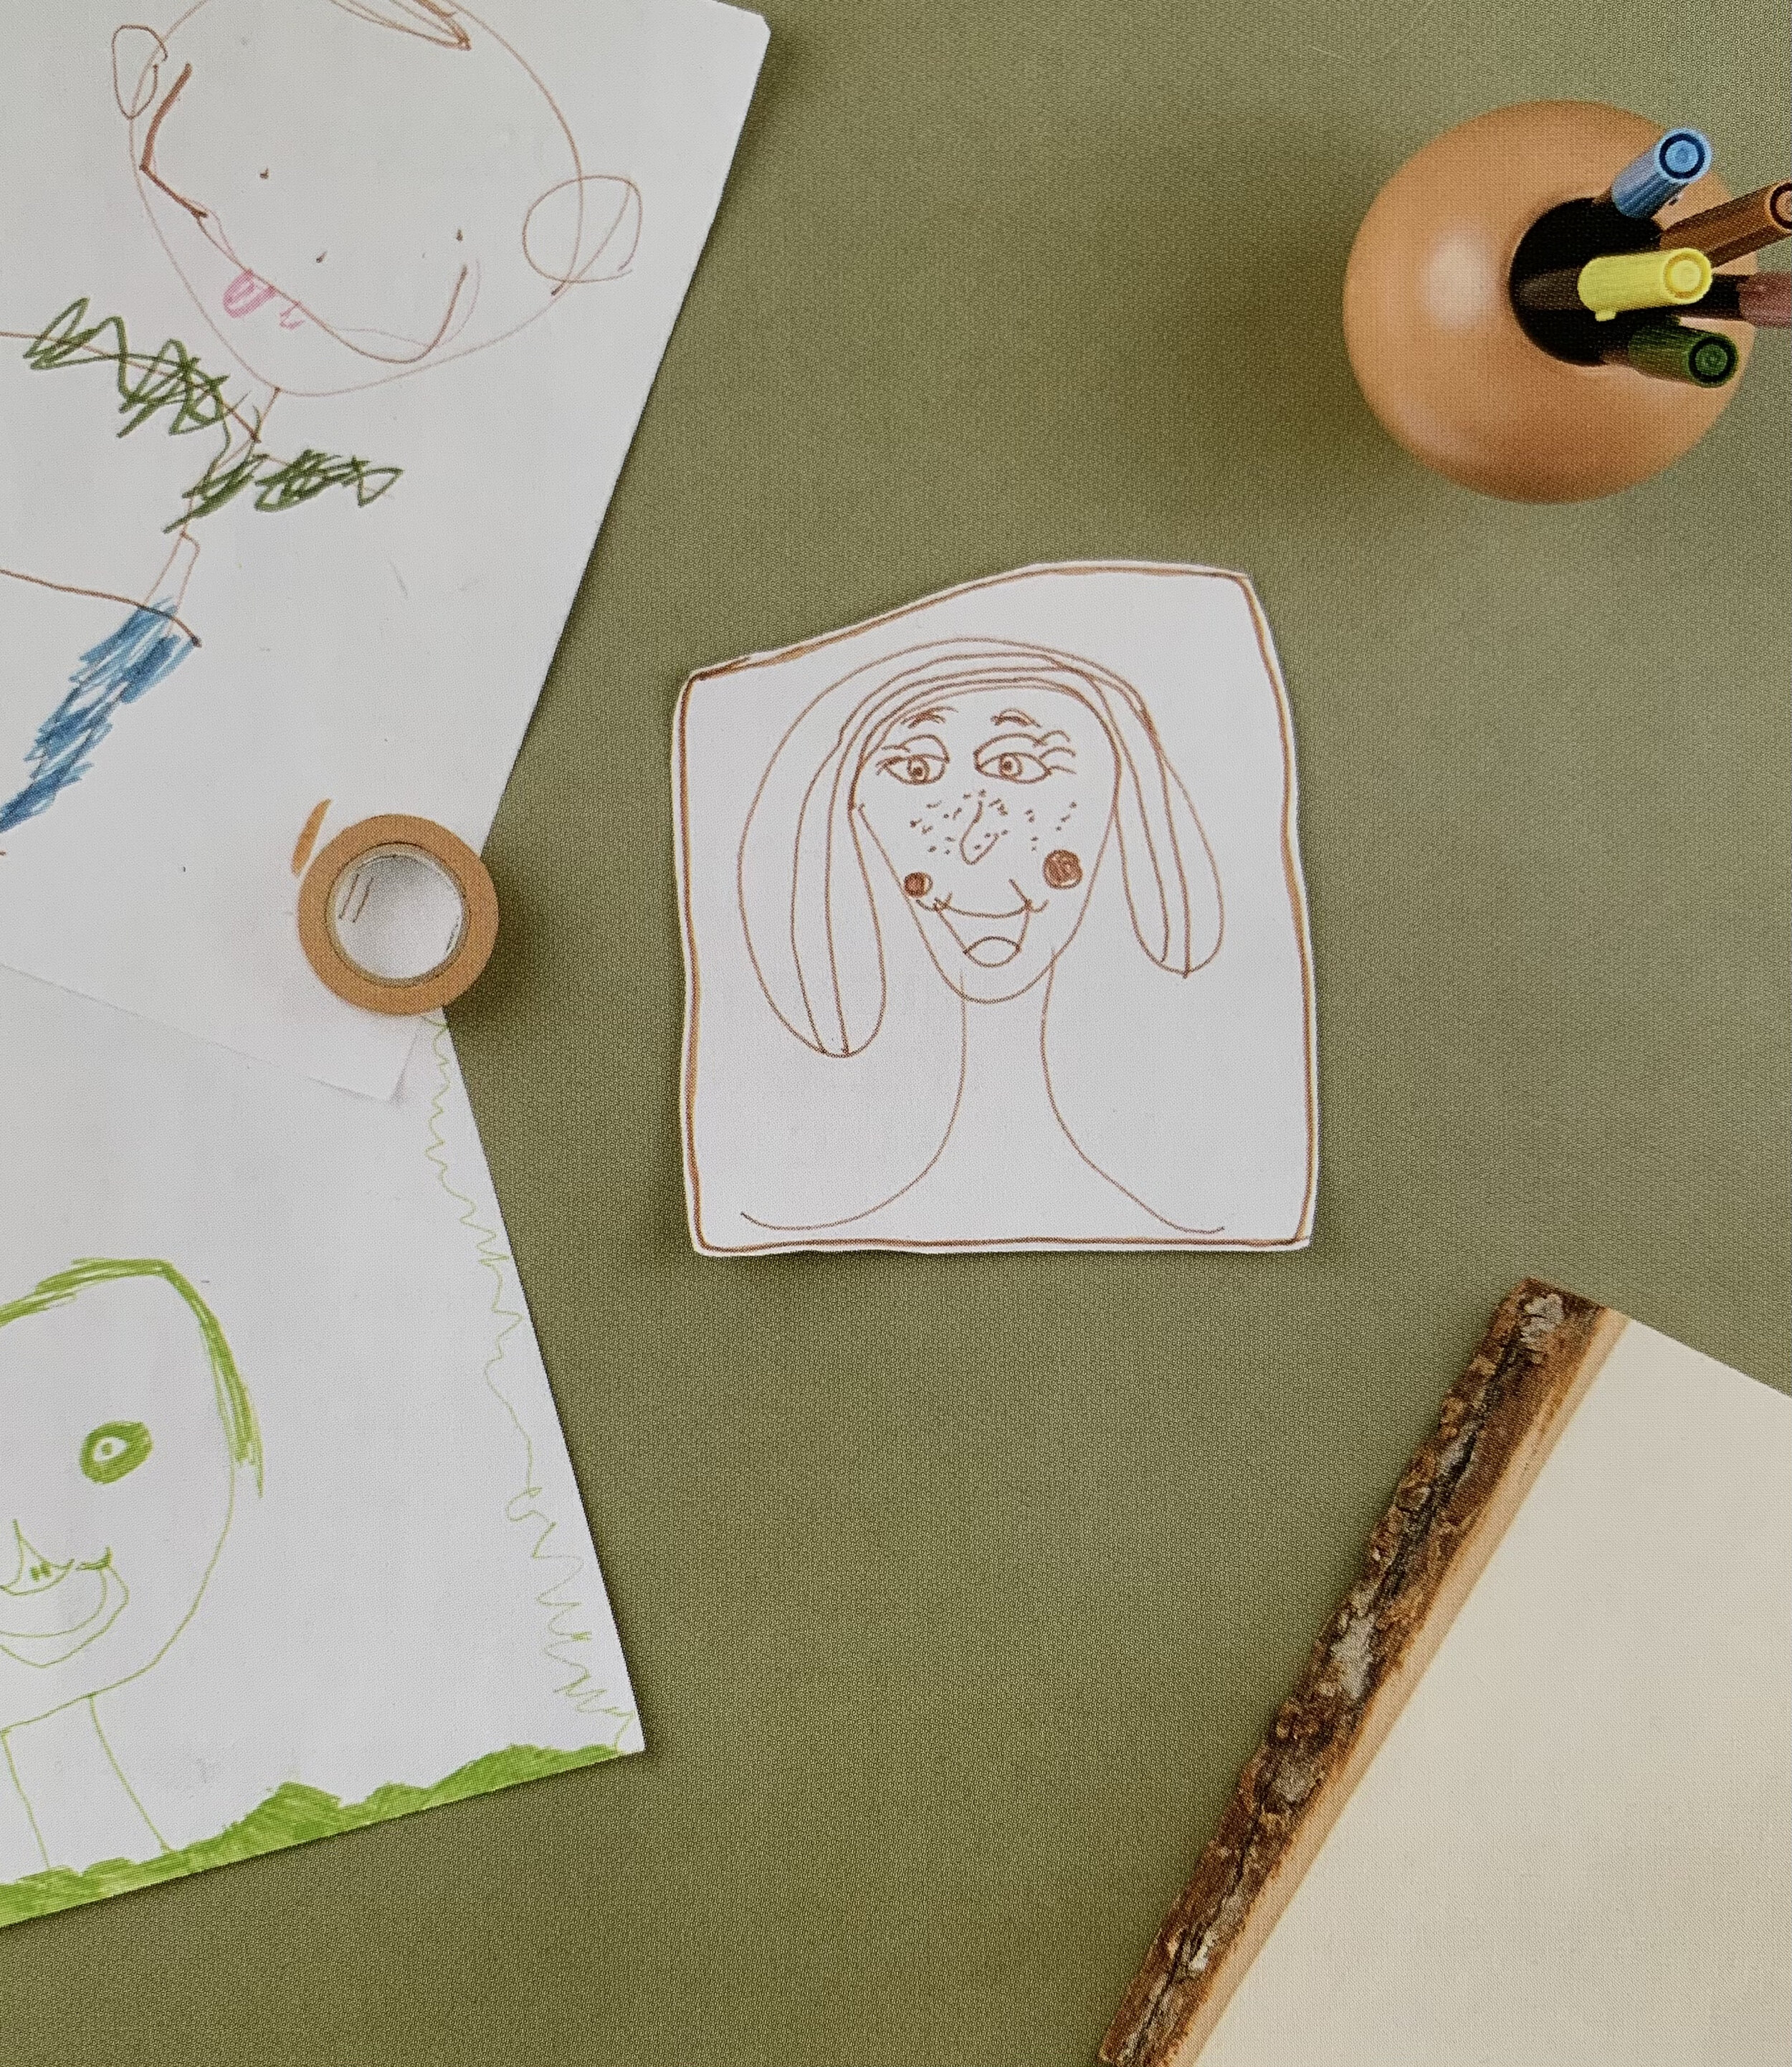
Place your design on your wood (make sure it is right where you want it) and tape down on one side (two if it's a large design). Make sure it can’t wigggle around.
Step 3.
Slide your graphite paper with the black/darker side facing the wood underneath your design.

Step 4.
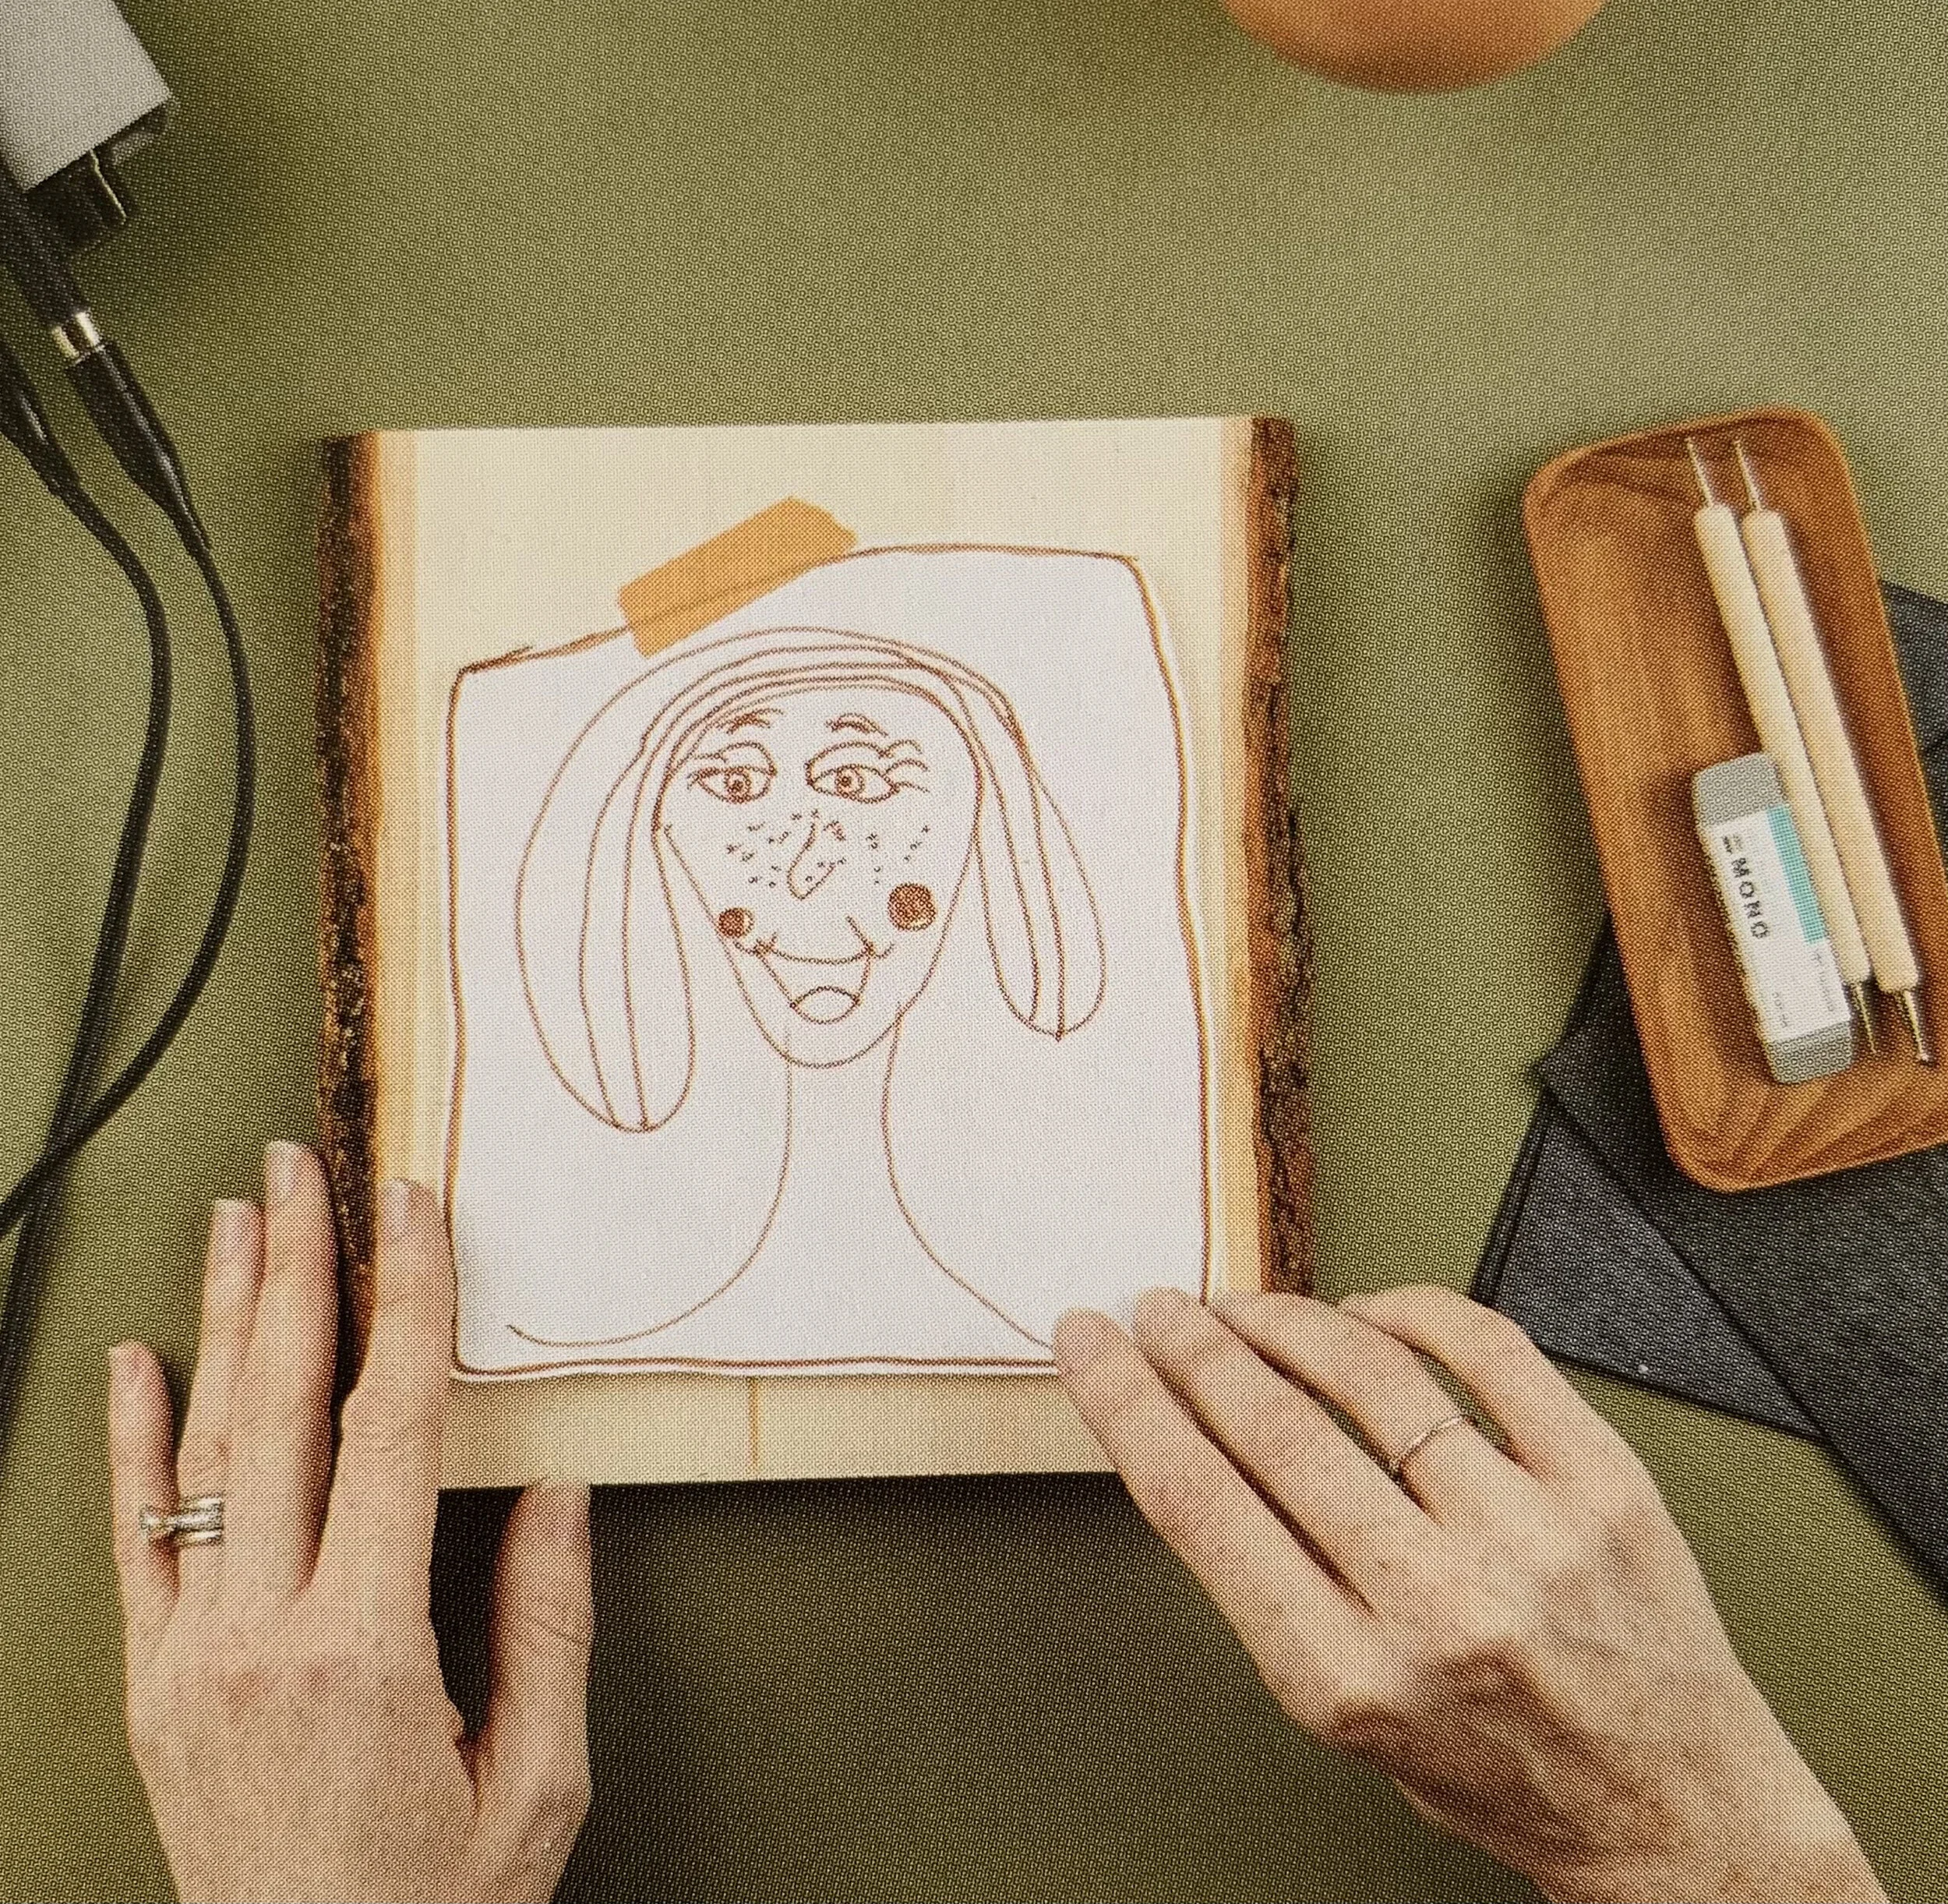
Use your embossing tool or a pencil to trace your design using light to medium pressure. Test out a small line and peek under the design without moving it to ensure you can see it and that it not too dark, otherwise it is hard to get off.
Do not move around the design once you started transferring. I like to lift it from time to time to ensure it looks good, but I do so with great care in keeping it in the exact same spot.
The more accurate you are with the transfer, the better your burn will be.
Make sure you transferred everything before you remove your design and graphite paper.
Step 5.
Ensure you are in a well ventilated space, and don any safety equipment. Check out my FREE Safety guide here. Do remind children of the dangers of a hot tool.
Warm up your burner, and get started. Some children may be old enough to do the burning with adult supervision. Kids and adults, no matter the age, will get a kick out of watching the wood burn take shape, just do it safely.

Step 6.
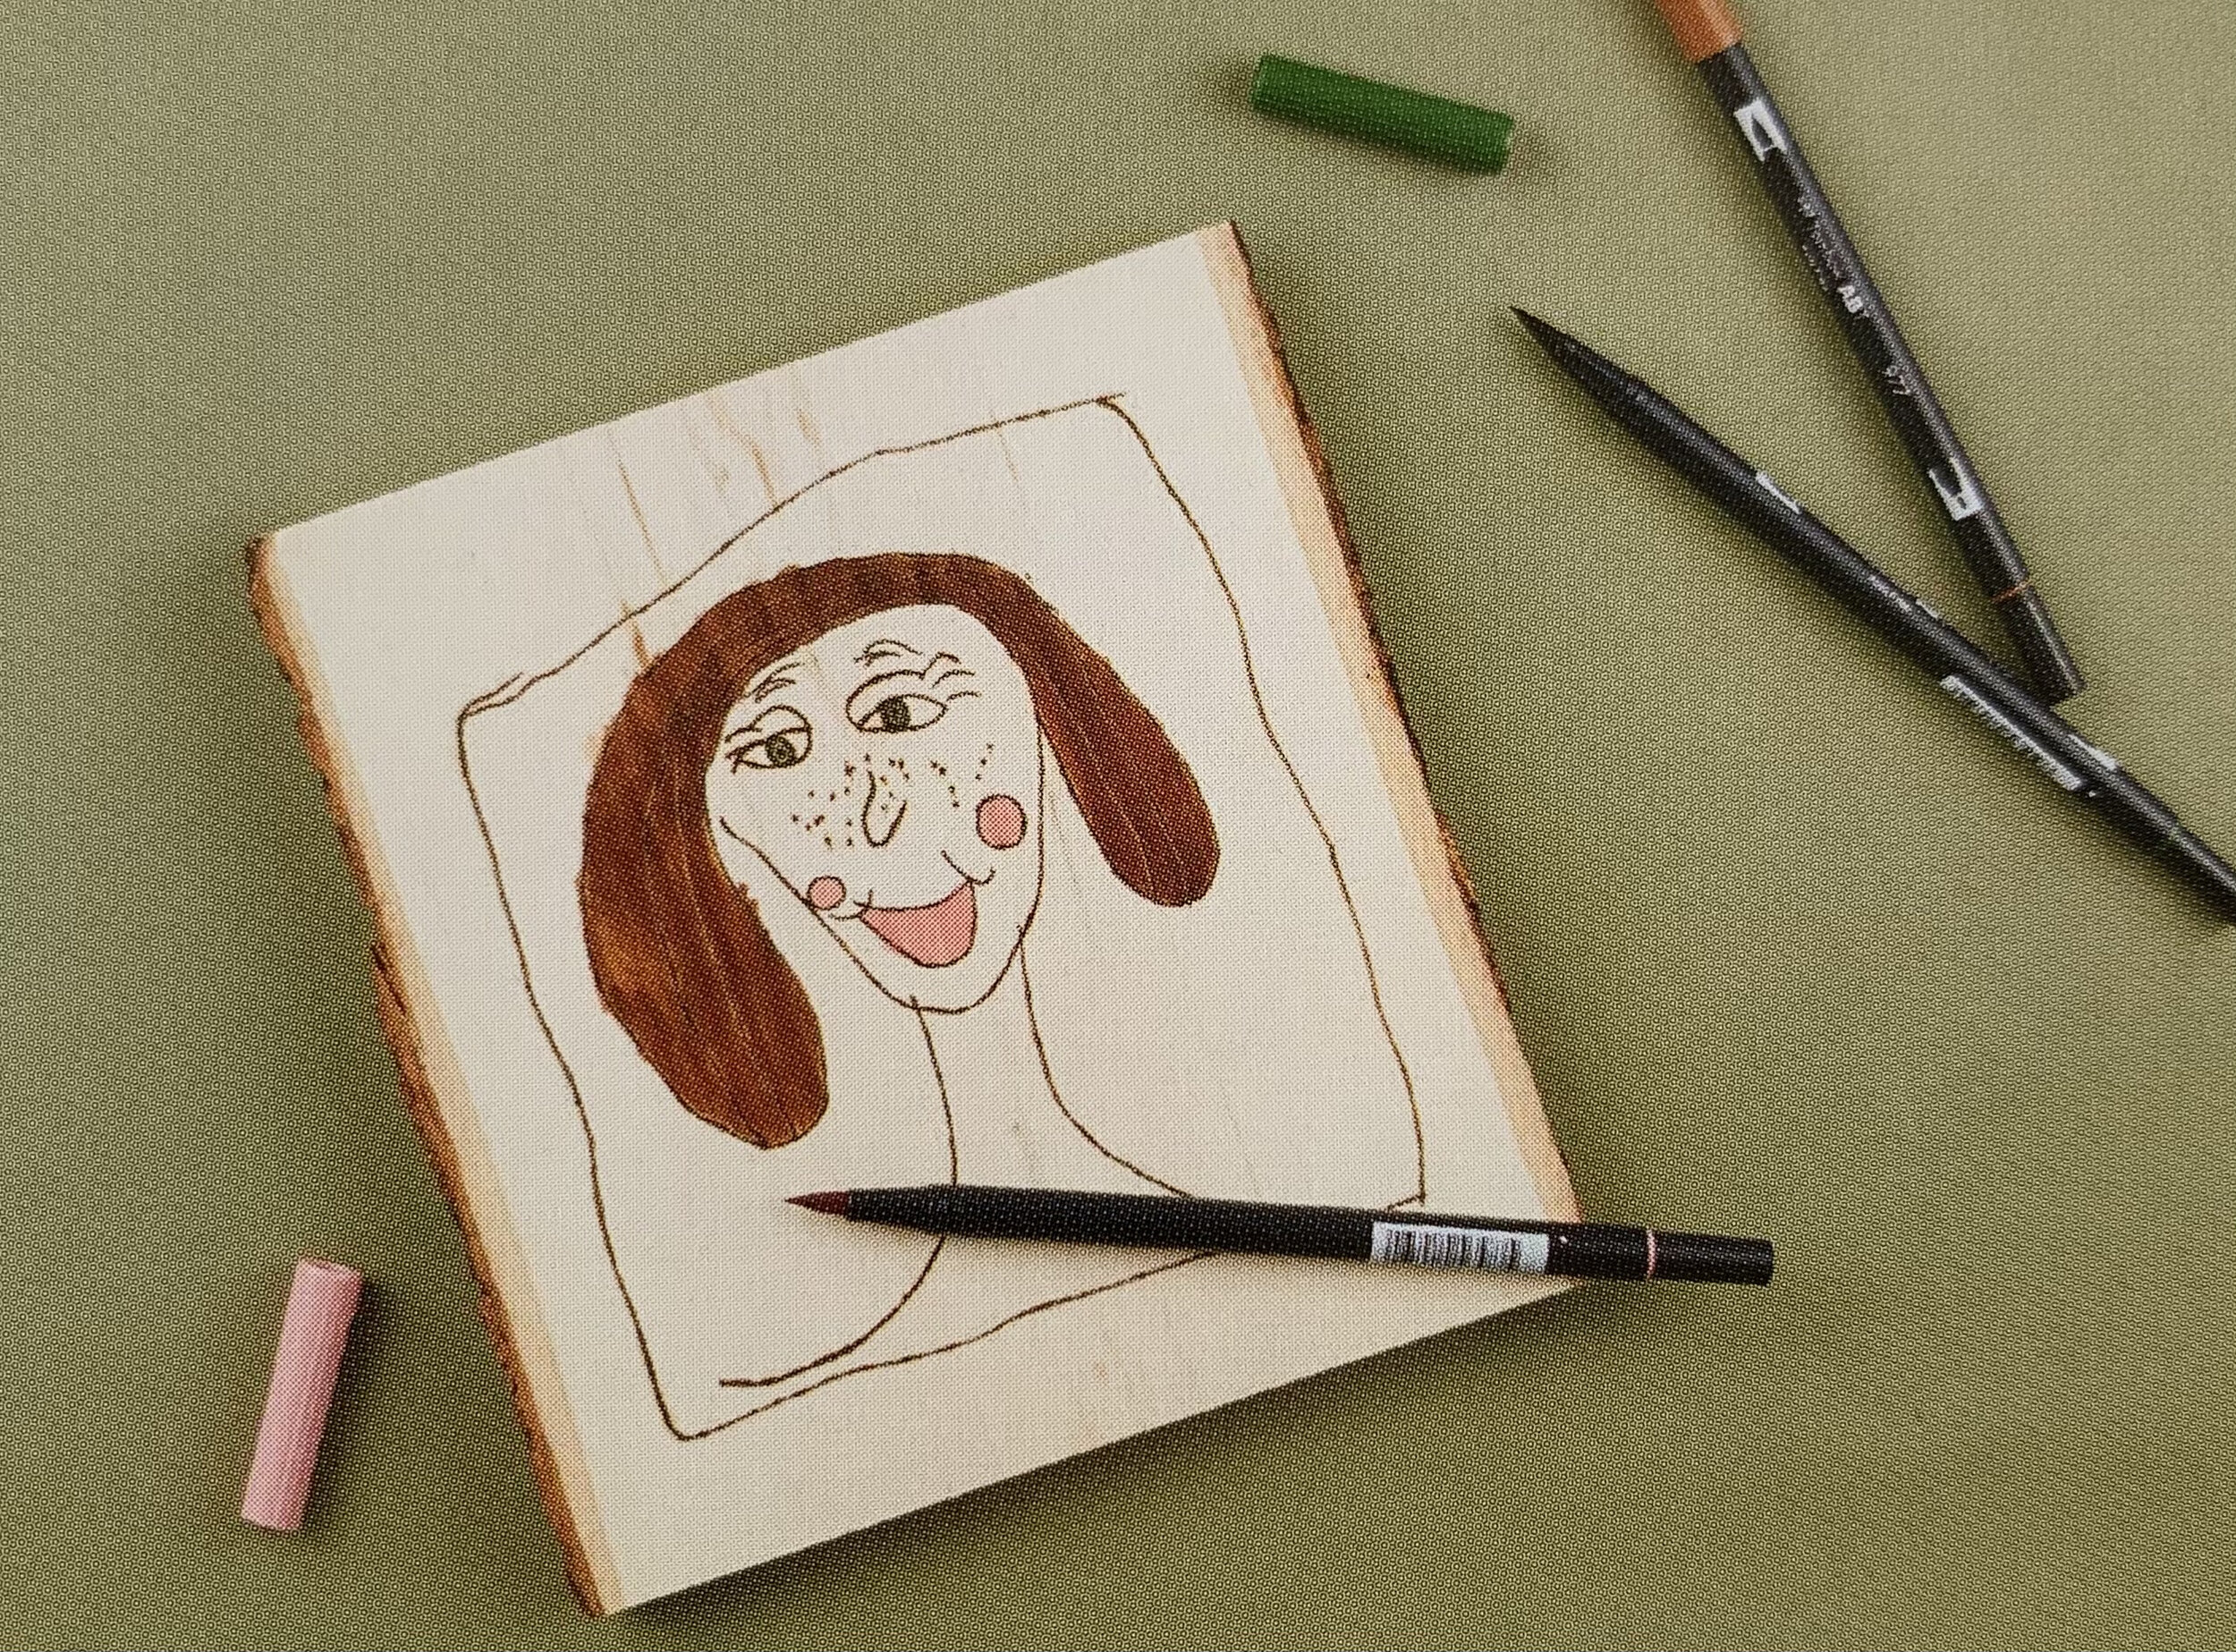
Carefully wood burn the art by simply following your transferred lines. Go slowly. Let the burner do the work. Glide along the surface. When you're finish you can remove any remaining graphite lines with a quick sand with some sandpaper or a Tombow sand eraser.
For more tricks and tips, check out: The Pyrography Troubleshooting Guide
Step 7.
Optional, add a finish or let the child artist finish off their masterpiece with some watercolor or markers. Check out this blog post on adding watercolor to wood for tricks and tips or Alternative Mediums to use with Pyrography for even more ideas!
Step 8.
Add a picture hanger to the back and hang it on your wall to enjoy for years to come.

Be sure to share about your project with your kiddo or the finished masterpiece on instagram and/or Pinterest and tag us @woodburncorner. We would love to see it! You can also find this full project and others in The Wood Burn Book.
Want to watch a video of this process instead?
Click Here to watch the process of me burning my children’s artwork for a Micheal’s class.
Want one of our artists to make the art for you?
Burn Club+ is a global community of artists who specialize in handmade wood burned art! When you place an order, you are directly supporting these independent creators, with 100% of the proceeds going to them.