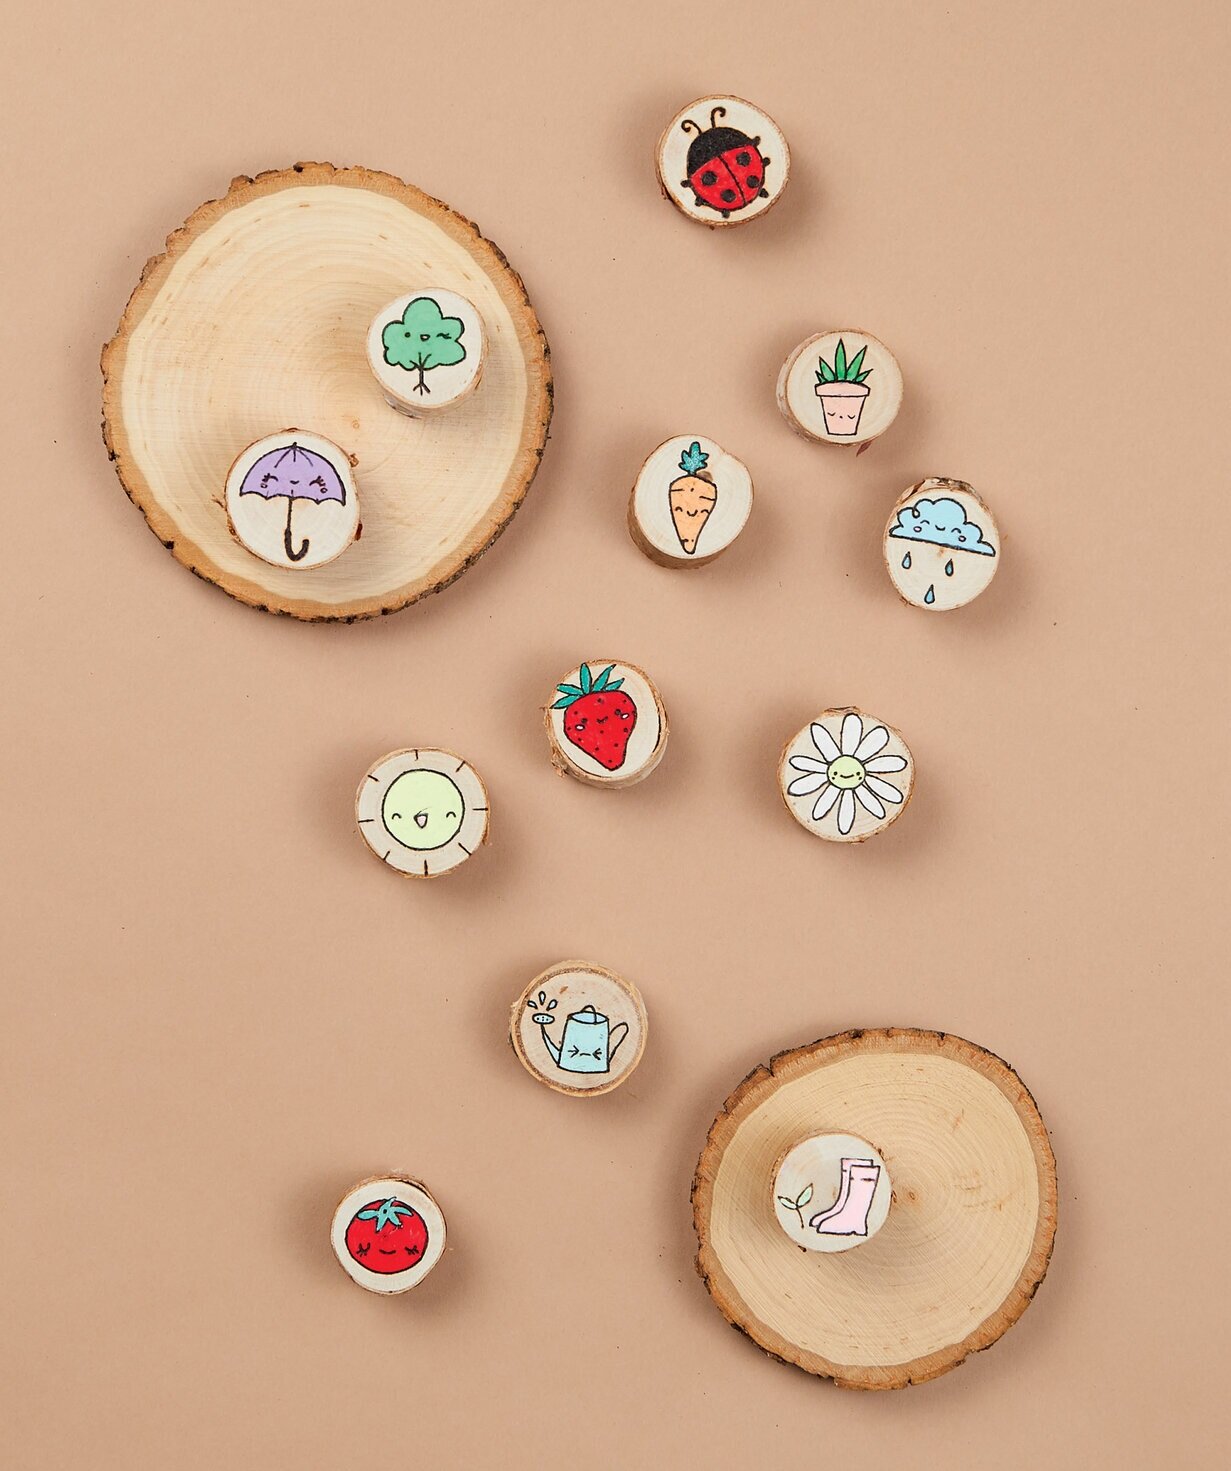
Gel pens are great for using on wood burned projects because they are easily accessible, not messy, come in so many colors, metallics and neons, and are easy to apply to small areas. These fun little gel pen magnets are just so perfect for the adorable designs by Jess from @jeshypark.
These magnets are both useful and whimsical, and who doesn’t love that?! They are super simple to make but will surely add character to any refrigerator.
Materials
Tiny Wood Slices (unfinished, dried, sanded smooth)
A drawing or design (or you can draw it by hand)
Burner (I like to use the Walnut Hollow Versatool and recommend it as a starting point. Head over to the following blog post: What Tool Is Right for Me, if you want to learn about a variety of pyro tools, uses and price points for each.)
Embossing Tool (or pen or pencil)
Markers or Gel Pens other medium to add colour (optional - check out: Alternative Mediums to use with Pyrography)
Safety Equipment (click here for the safety guide)
Cotton Swabs

Step 1. Choose your designs, size them, print them.

Step 2. Sand your tiny wood slices smooth. I am using mini birch slices. Basswood is also a popular wood choice.

Step 3. Cut and place the designs on the wood slices.

Step 4: Choose a transfer method. A variety of these are discussed in the book. I suggest a graphite, blue Chaco, or pencil on paper methods. Here I am using the pencil on paper method.
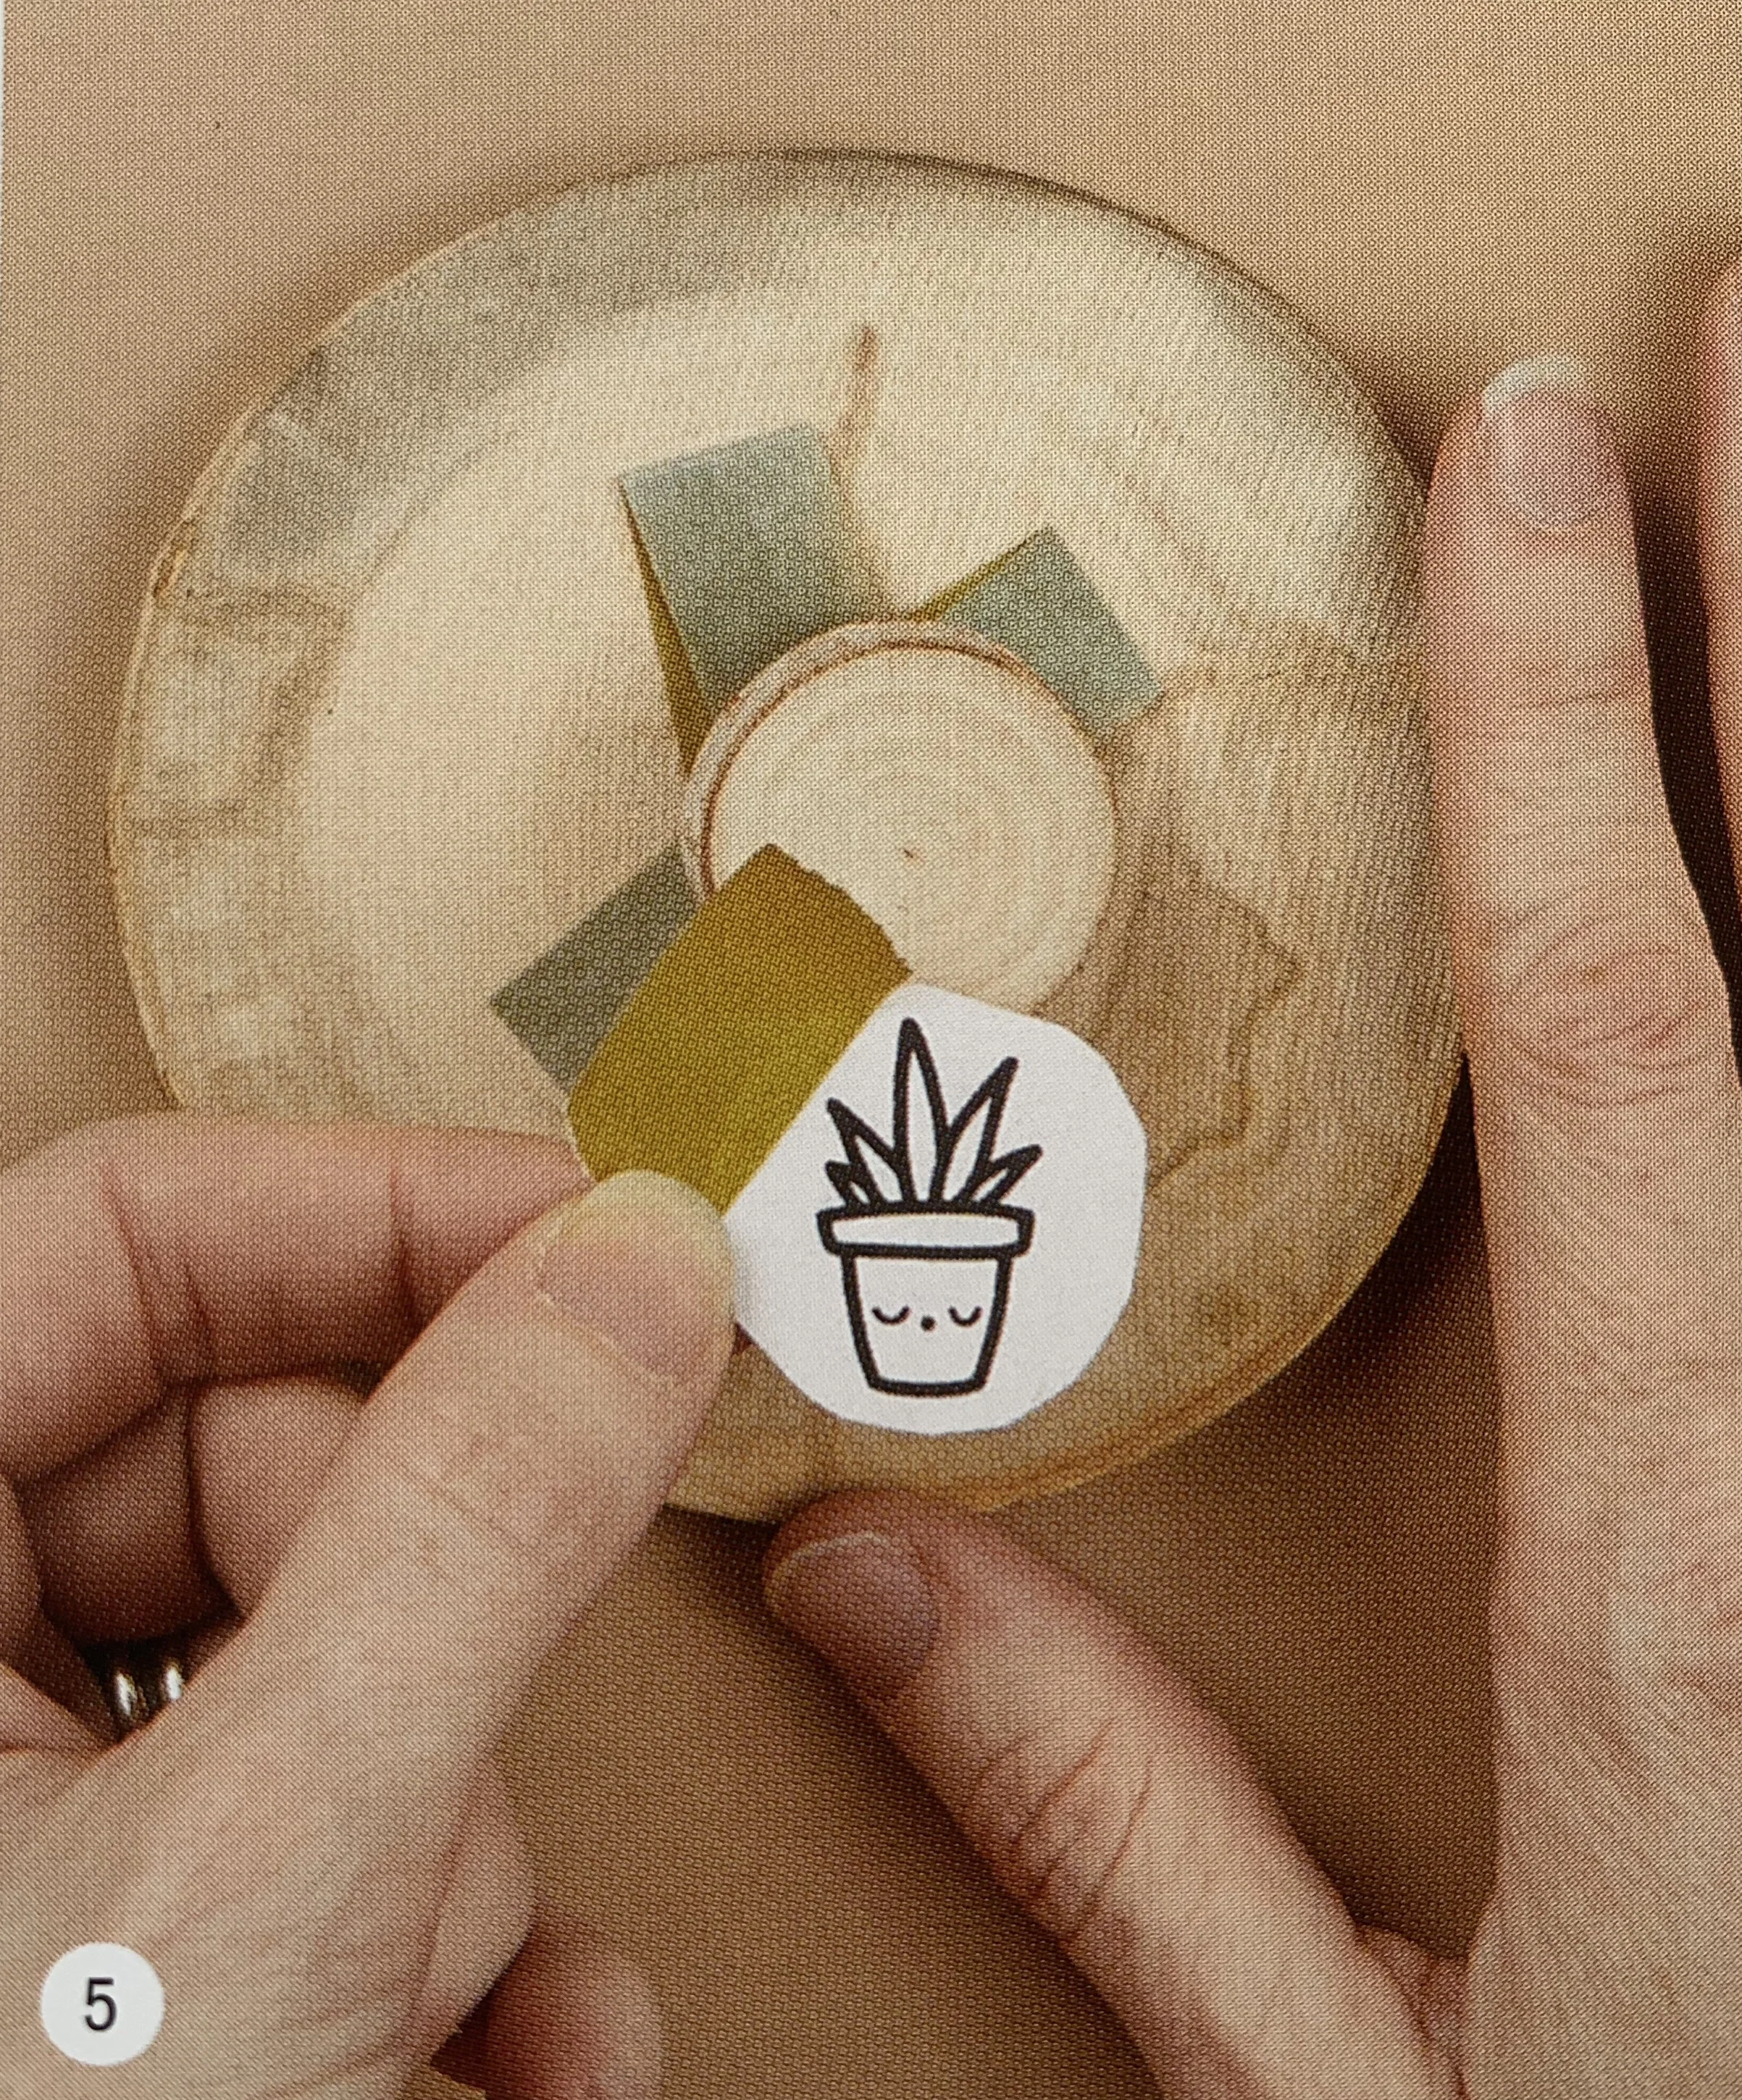
Step 5: Tape your tiny wood pieces to a larger wood slice from the backside.
Taping them down will hold them in place and allow you to easily turn them while you transfer and burn without worrying about getting burned. I learned this trick from @northstar_pyrogrpahy.

Step 6: Transfer the design. Remember, the more accurate the transfer, the cleaner the burn will be
Step 7: Warm up your burner with your nib of choice securely attached.
* Be sure to TAKE YOUR HEALTH & SAFETY SERIOUSLY. Check out the Safety Blog outlining all the steps you can take to burn safely, download your FREE safety guide and always follow the guidelines listed by the manufacturer.
Test your temperature on the back of one of your wood slices or a scrap piece of the same type of wood before getting started.

Step 8: Follow your transfer lines. Go slowly and be careful. Keep your fingers out of the way.
Consider using a different wood slice or object of equal thickness as a working surface on which to rest your hand.
This will allow you to burn more carefully and precisely with a steadier hand, which is especially important when working on something small.

Step 9: Remove any remaining transfer markings.
Step 10: Embellish your tiny wood burned designs with gel pens. There is no wrong way to do it, and I encourage you to go for it! Use metallic, neon, or monochrome colors. Color the whole thing, or just add accents. It is completely up to you!
Step 11: Once you are happy with the look, add a finish to keep them looking great for a long time. Allow to fully dry.
Step 12: Pull out magnets, E6000 glue, and cotton swabs. Flip the tiny burned slices over so the backside is facing up.
Step 13: Get a good amount of E6000 glue on the cotton swab and rub it on one side of a magnet.
Quickly place and slightly squish the magnet onto the backside of the wood burned piece.

Check on them after a few minutes to re-center any of the magnets which may have shifted position. Allow the glue to dry overnight.
*Be sure to work in a well-ventilated space because the glue can be quite stinky, and follow the guidelines listed by the manufacturer

Step 14: Once dry, your adorable handmade magnets are ready for use!
Show off your work!
I cant wait to see how you take these designs and add your own twist! Be sure to share your finished pieces on instagram using #thewoodburnbook

More projects in the book!
This essential guide opens with a brief background to the art of wood burning, a list of tools and how to use them, basic techniques that can be used over and over again, and even what to burn (projects, designs and inspiration) and how to be safe doing it.