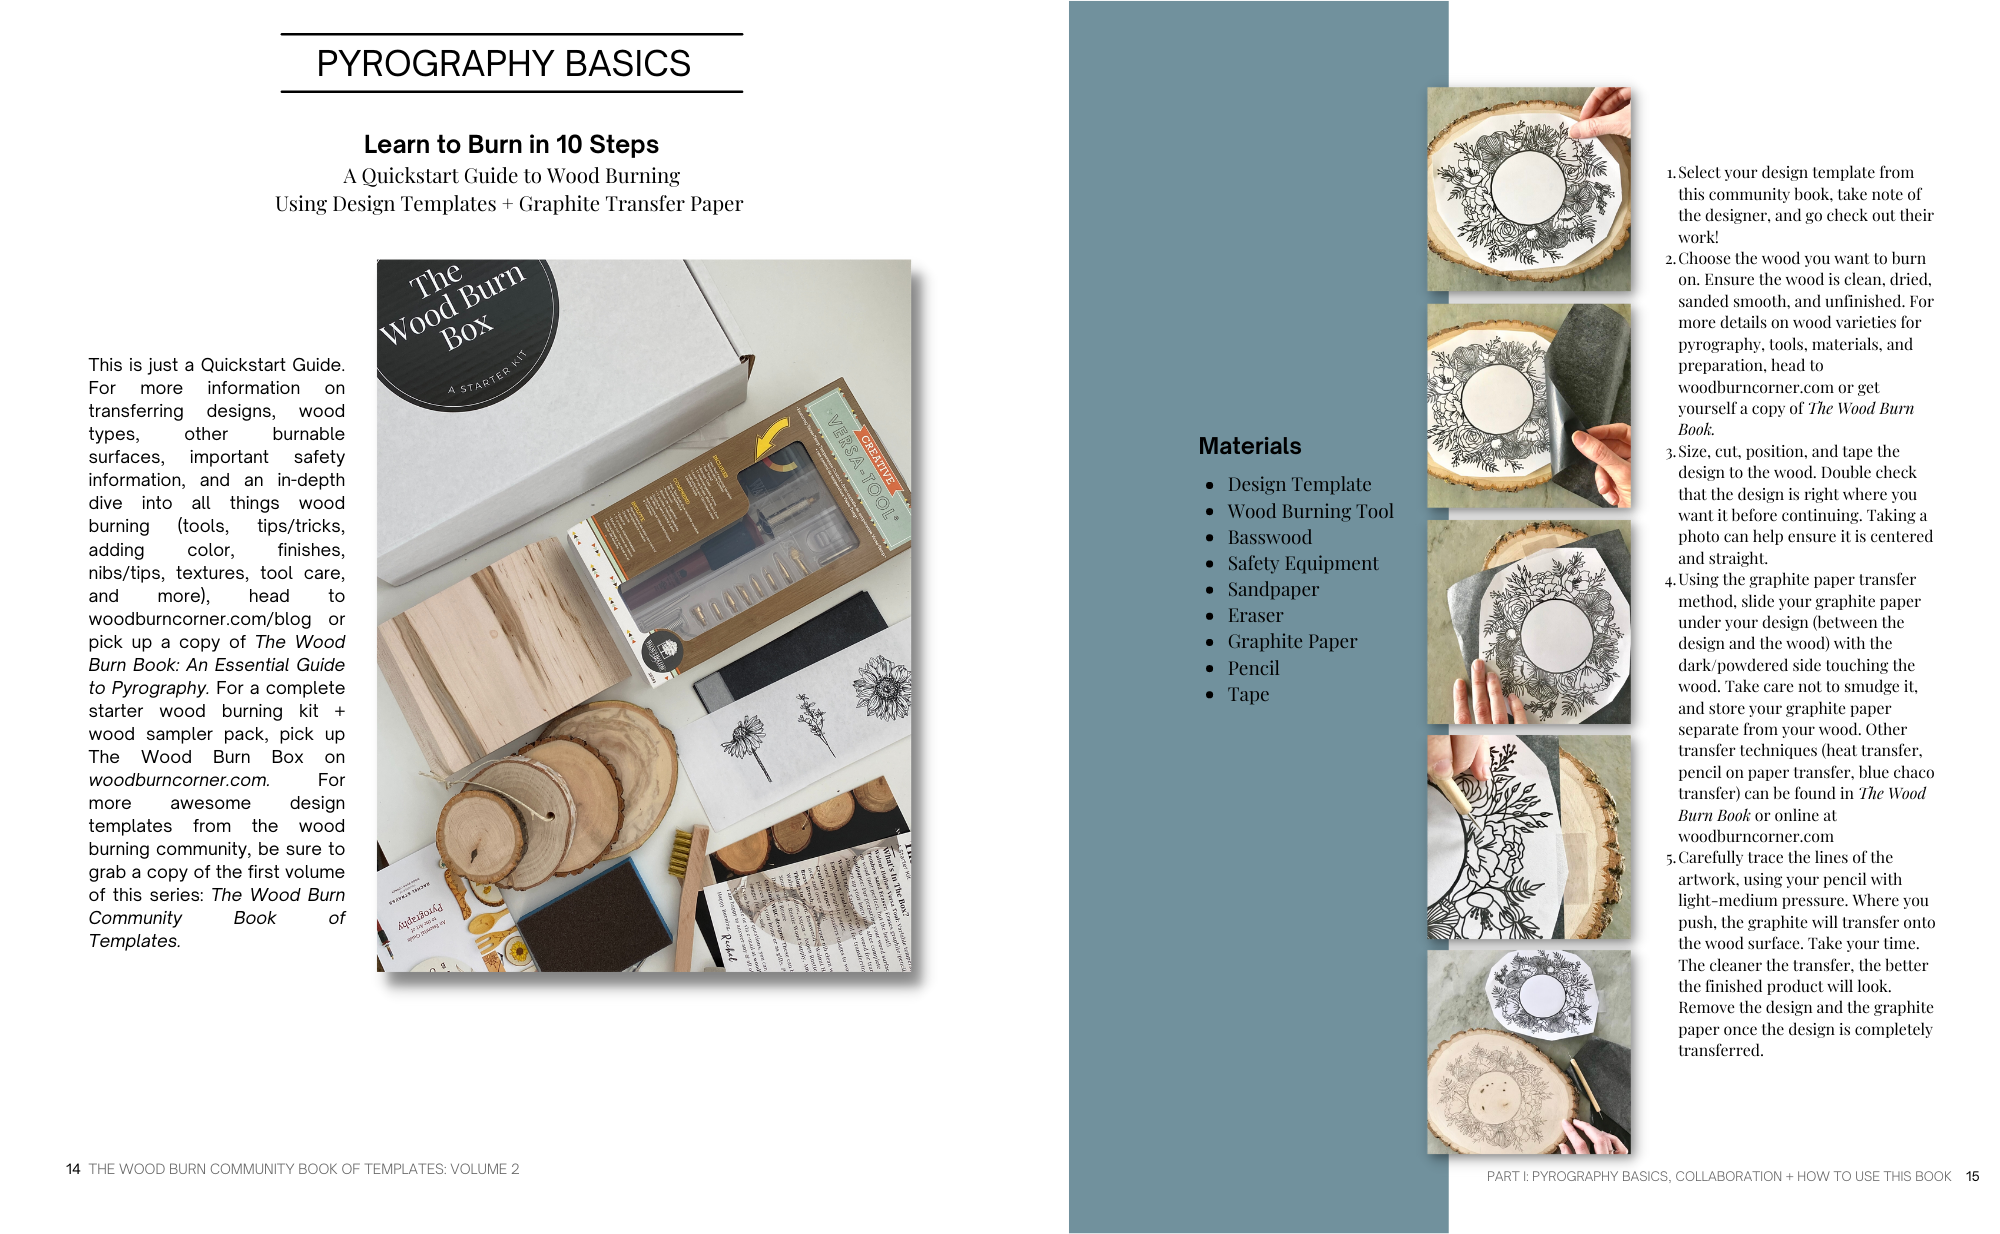
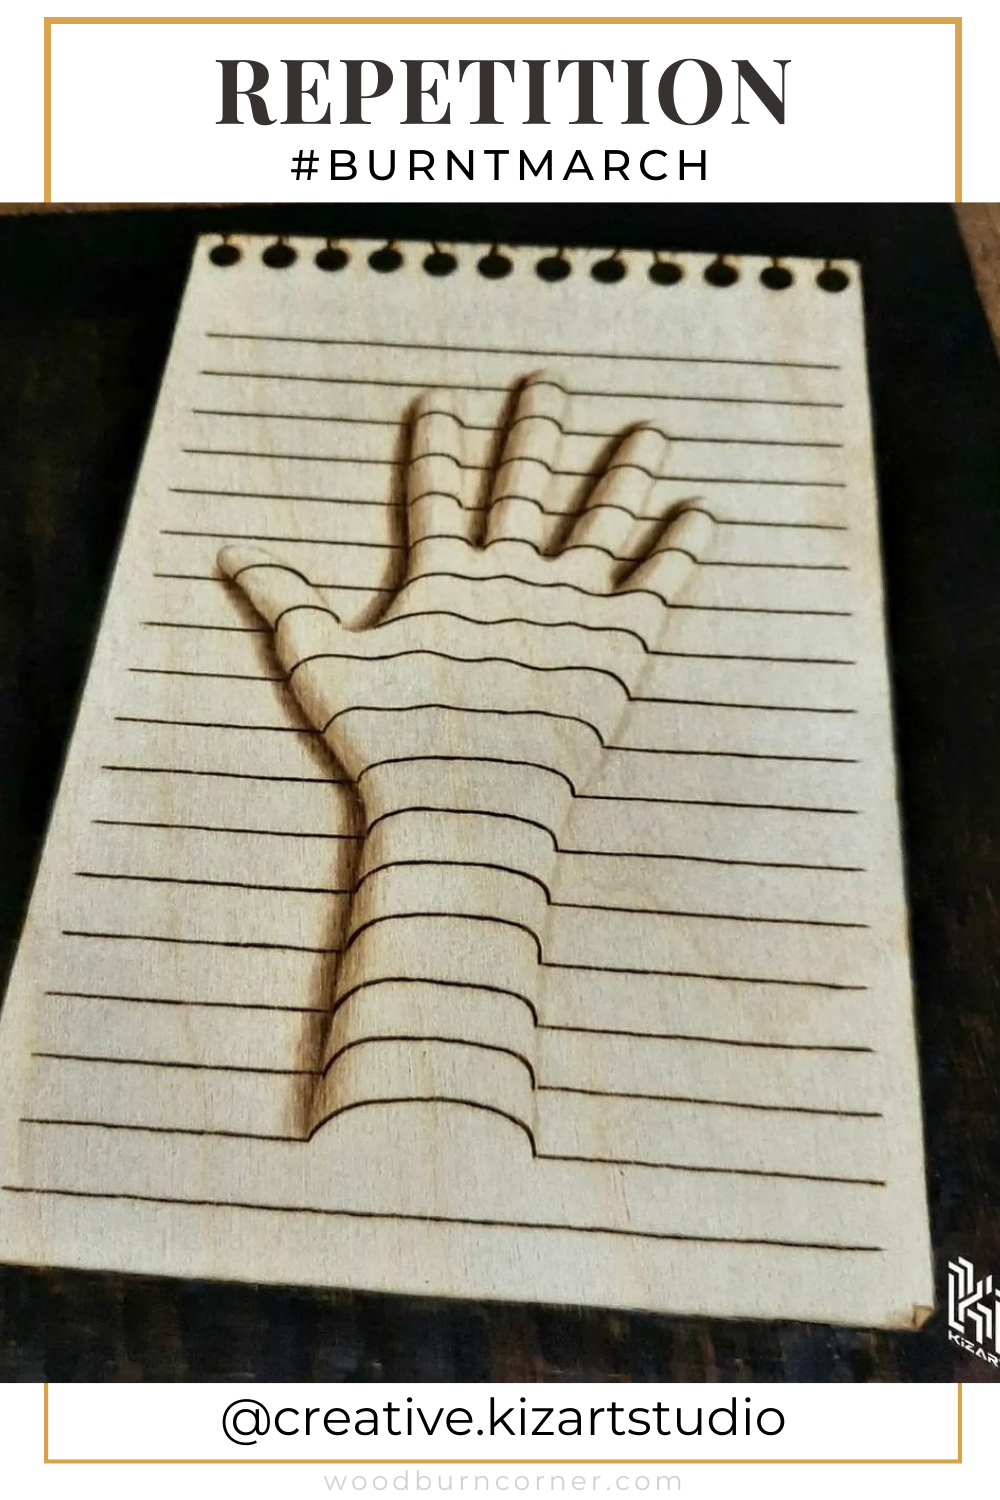
Burnt Challenges are a call to artists of all skill levels to create an original piece of pyrography artwork based on a specific word, or what we like to call, a prompt! Check out Some past challenges here.
This challenge is an excellent way for wood burning artists to grow their portfolio, try new things, push their craft, meet other pyrographers, hone their skills, gain followers, sell art, and have a ton of fun while they are at it!
Having a restriction, like following a specific prompt, can really bring out creativity in people. These prompts are known to get people inspired and trying new things. Things they perhaps wouldn’t have tried otherwise.
The challenges are living in the wood burning community on Instagram. Follow us there or join Burn Club+ to get your prompts in advance for the next Burnt Challenge and to suggest your own prompts.
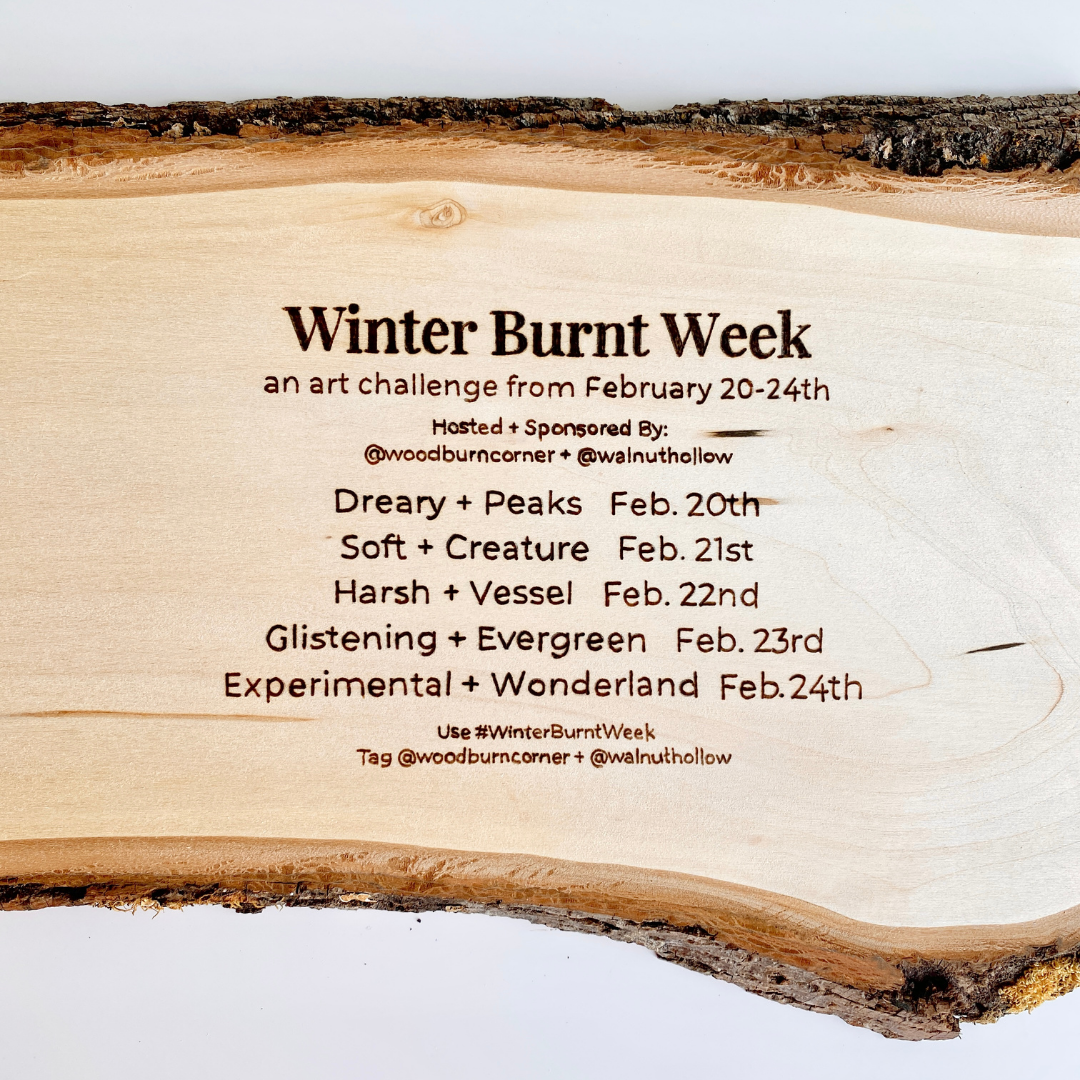
WINTER Burnt Week 2023
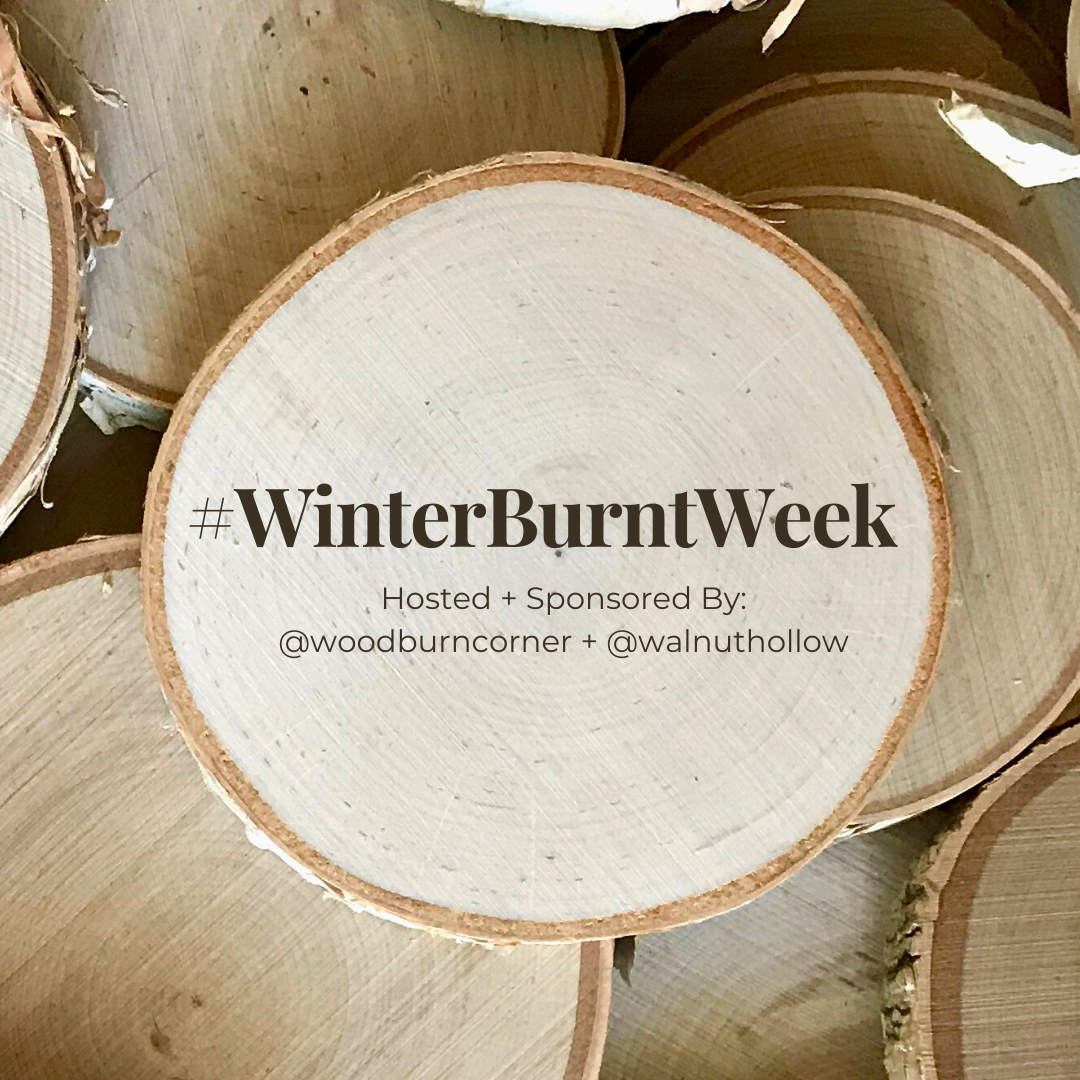
We are so excited to be teaming up with our sponsor, Walnut Hollow, to bring you this challenge that runs from February 20th to February 24th!!
The prompts were suggested by the Burn Club community members. We got a whole list of really funny and unique but very random nouns + adjectives. To make it even more fun and to keep artists thinking outside of the box, we pulled one noun and one adjective randomly out of a hat and put the two together!
OUR FEATURED ARTISTS
DREARY + PEAKS by @taciejensen

@taciejensen created this beautiful piece for the DREARY PEAKS prompt. You can almost feel the fog and gloom through the photo. You can tell this character is on a very important journey... So much texture and the way the color was added really makes this piece quite dreary, giving off many feels. The message Tacie writes is very empowering and brings me right out of the fog with hope and inspiration:
“When life looks bleak, hold your head up because you came this far. You have the strength and determination, you’ve got this!”
Beautifully done @taciejensen! Everyone, please go give @taciejensen a follow for more beautiful art in this unique style.
SOFT + CREATURE by @burnedblossoms

@burnedblossoms created this original design for the prompt of SOFT CREATURE! This burn is absolutely beautiful with its textures, shapes, composition, and shading, and those white outlines and that circular lined background!!!! Do yourself a favor and zoom in on all those details. The softness is in the cute little creature and also the encompassing flowers which look like are making the goats day! Go give @burnedblossoms a follow to see this little cuteness as well as all of her other stunning pyrography work!
HARSH + VESSEL by @wild.earth.artwork

Talk about harsh vessel! This little bird found its home in the bright neon lights in a busy city. I love @wild.earth.artwork’s out of the box thinking on this one. Her use of color here is spectacular. You can feel the warmth of these lights! I also love how the image is zoomed in. We don’t need the full neon sign to see the whole picture here. It’s fabulous! Great work by @wild.earth.artwork.
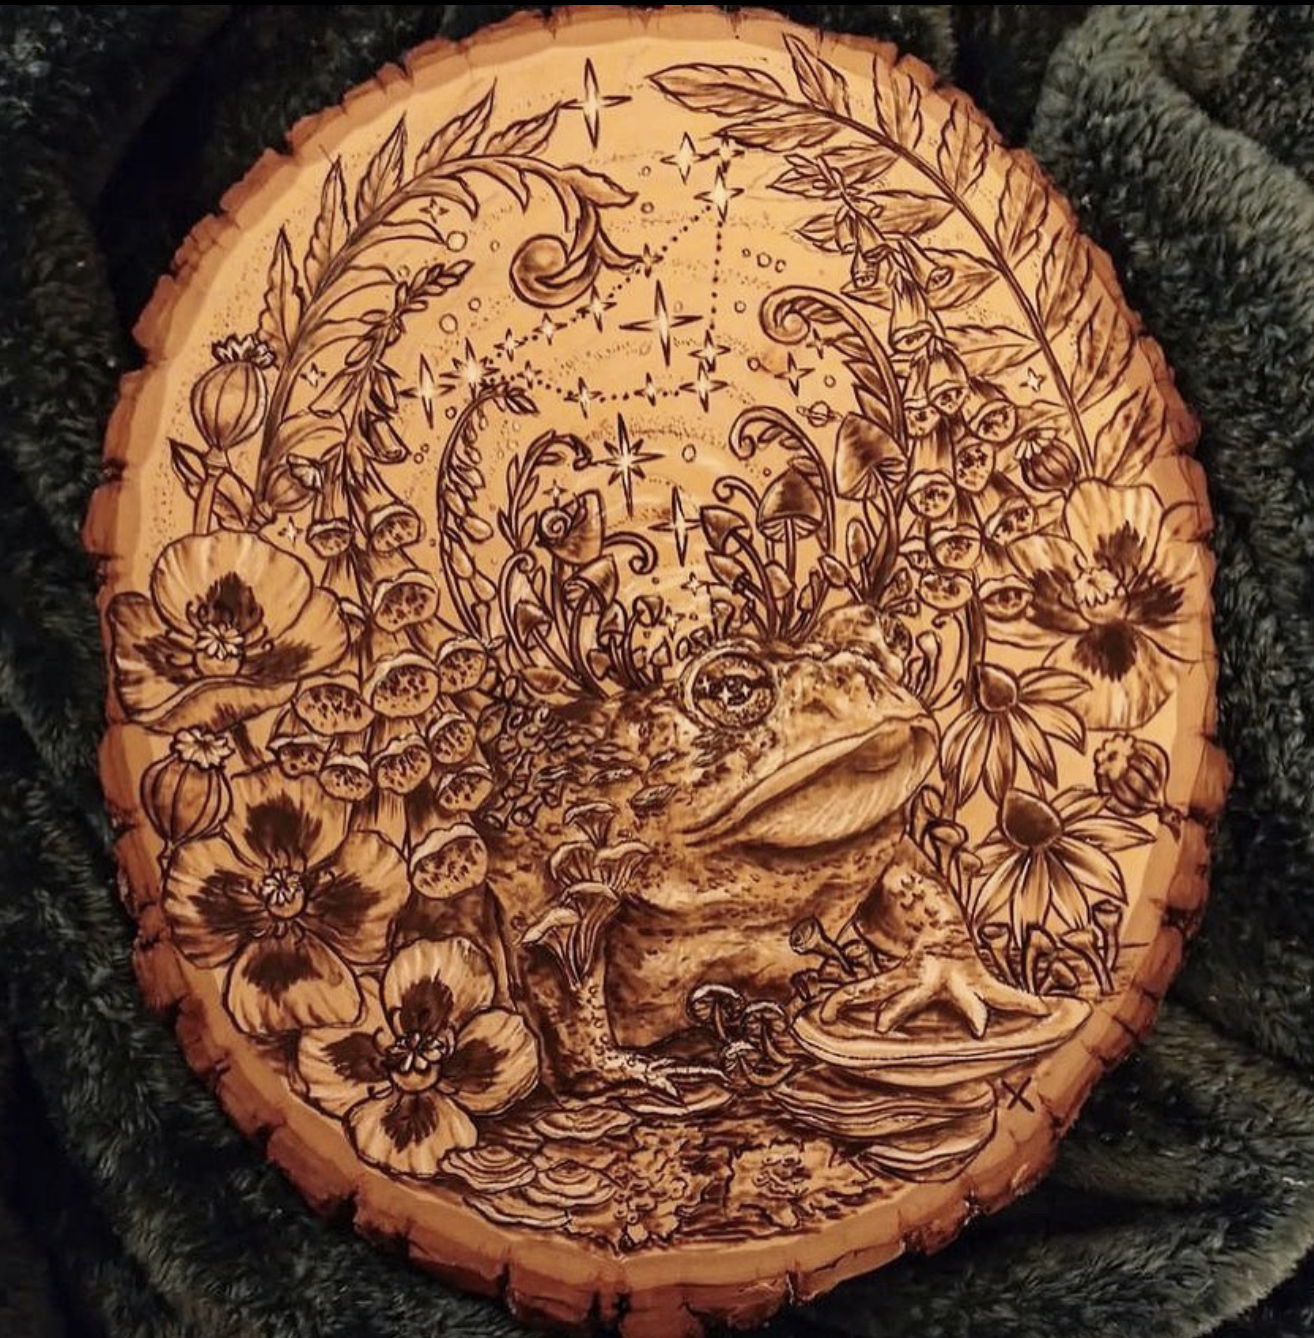
GLISTENING + PEAKS by @allie_and_nyx_crafts

@allie_and_nyx_crafts created this beautiful piece for the prompt: GLISTENING EVERGREEN! The lines and illustration style of the rocky area paired with the realistic glistening evergreens on it makes them really pop out and even look superimposed! The colors and gradients are stunning and the burn is just so clean and crisp! Well done, @allie_and_nyx_crafts. Everyone please go follow this awesome artist. Let’s show them all the love!
EXPERIMENTAL + WONDERLAND by @xedesarte
@xedesarte created this stunning piece for the prompt EXPERIMENTAL WONDERLAND. The details, the textures, the magical vibe of the stars that look like they are actually aglow! It is a dream turned into art with some very special and personal meaning and it is just so so beautiful! Everyone go give @xedesarte a follow!
Make sure to follow the #winterburntweek hashtag and check out our stories as well as @walnuthollow for some of our favorite posts and features!
How to join in on the challenge NExt time
Learn about the next challenge by joining the Burn Club!
To participate in this everyday wood burning challenge, post a photo of your prompt-inspired piece (on instagram) on the date listed using #WinterBurntWeek and mention both @woodburncorner + @walnuthollow.
That’s it! It’s that easy.
Where CAN you and your artwork get featured?
Both @walnuthollow (our Sponsor) + @woodburncorner select artists for each prompt to feature in:
both Walnut Hollow + Wood Burn Corner Instagram posts + stories
on this blog post once the challenge is over
our Facebook page
as well as on Pinterest
What CAN YOU win?
There are many prizes and a pre-challenge giveaway just for sharing about the challenge.
Wood Burn Corner gives away a daily prize! Each winner got to choose from the following:
Digital Copy of Template Book (Volume 1)
Digital Copy of Template Book (Volume 2)
Digital Copy of Template Book (Radial Symmetry Edition)
Access to The Sessions Recordings (Value $100)
Complete Wood Burning and Business Toolkit (Value $749)
Access to Pyrography and Business Summit Recordings (Value $240)
Walnut Hollow also gives away a daily prize; a mystery box of goodies from www.walnuthollow.com!
Can I still join in but not burn?
If you are not able to participate by making art, you can still show your fellow pyro pals some love by sharing, commenting, saving, and liking all the art! Spread the news about the event by posting about it in your stories, reels and posts.
We are always blown away at what your uniquely creative minds come up with.
Make sure to follow #WINTERBurntWeek to see the all the artworks made during the challenge or Check out Some past challenges here.
Let’s join our voices together and raise the entire community up. Keep spreading the love and happy burning!