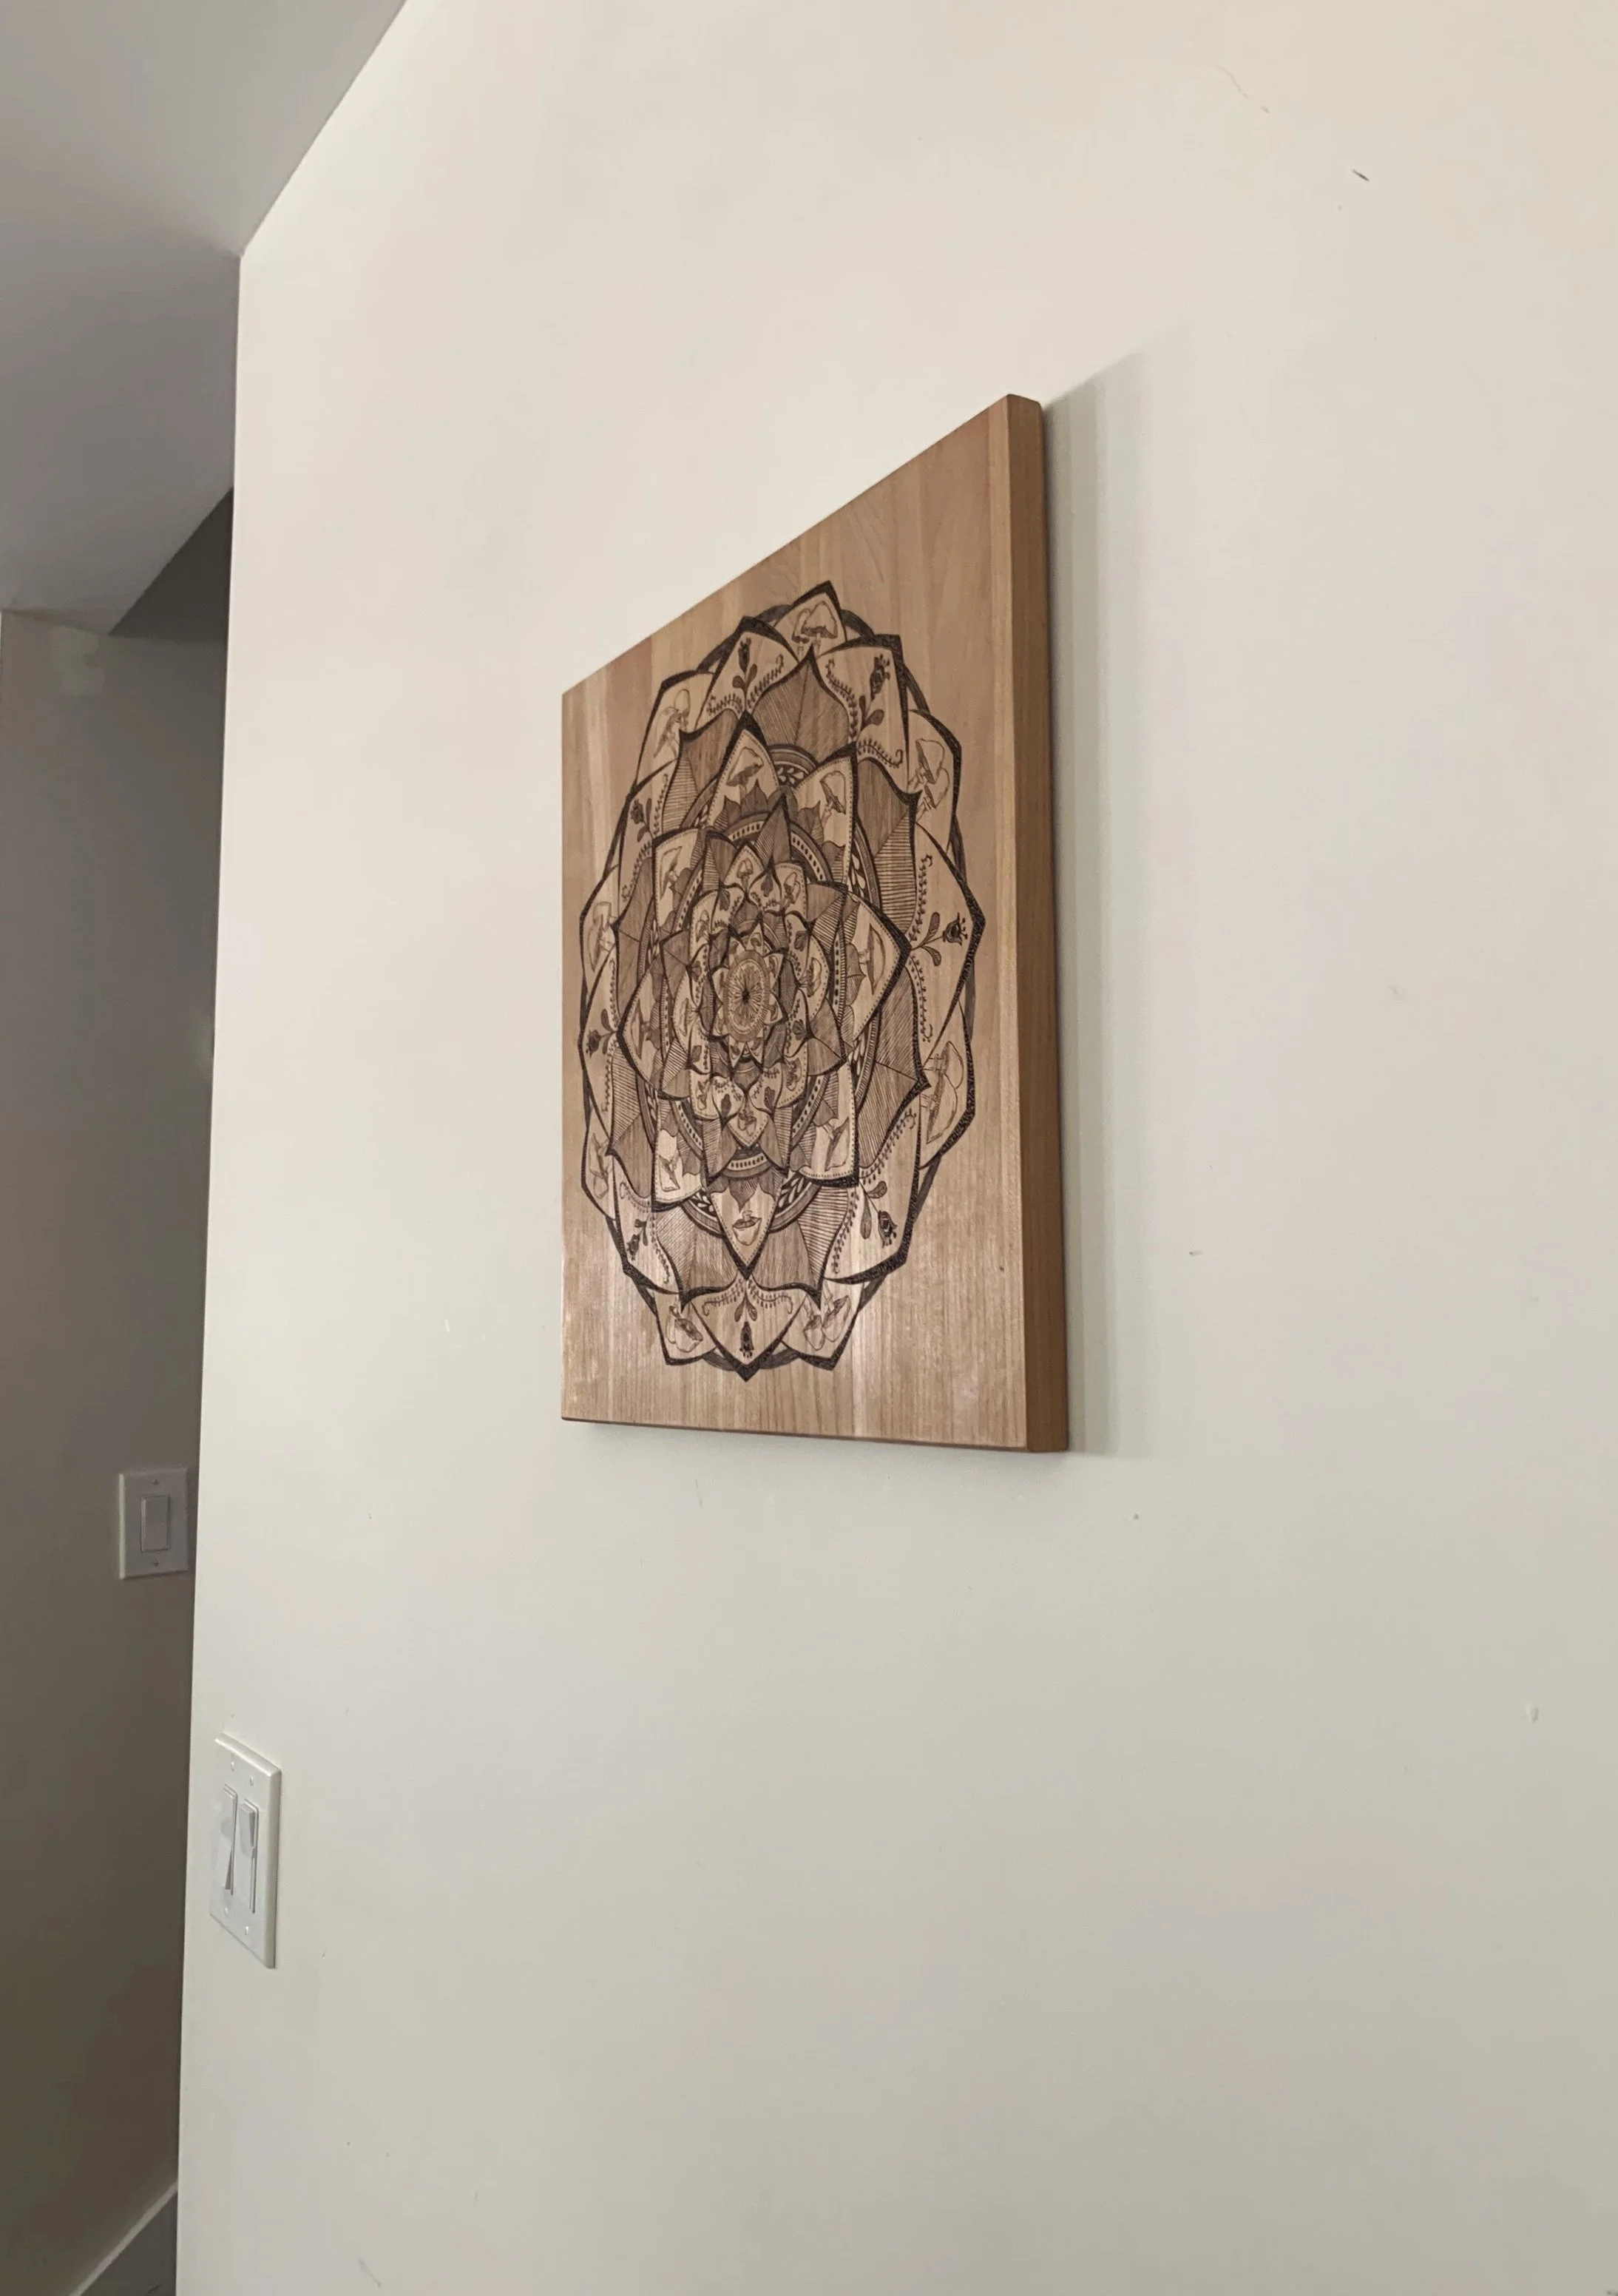
One way to hang your wood slice art is by using a keyhole hanger (also known as a mounting slot), which allows the slice to be hung flush against the wall.
In this guide, I will provide step-by-step instructions on how to make a keyhole hanger on a wood slice.
By following these simple steps, you can create a unique and personalized way to display your wood slice art.
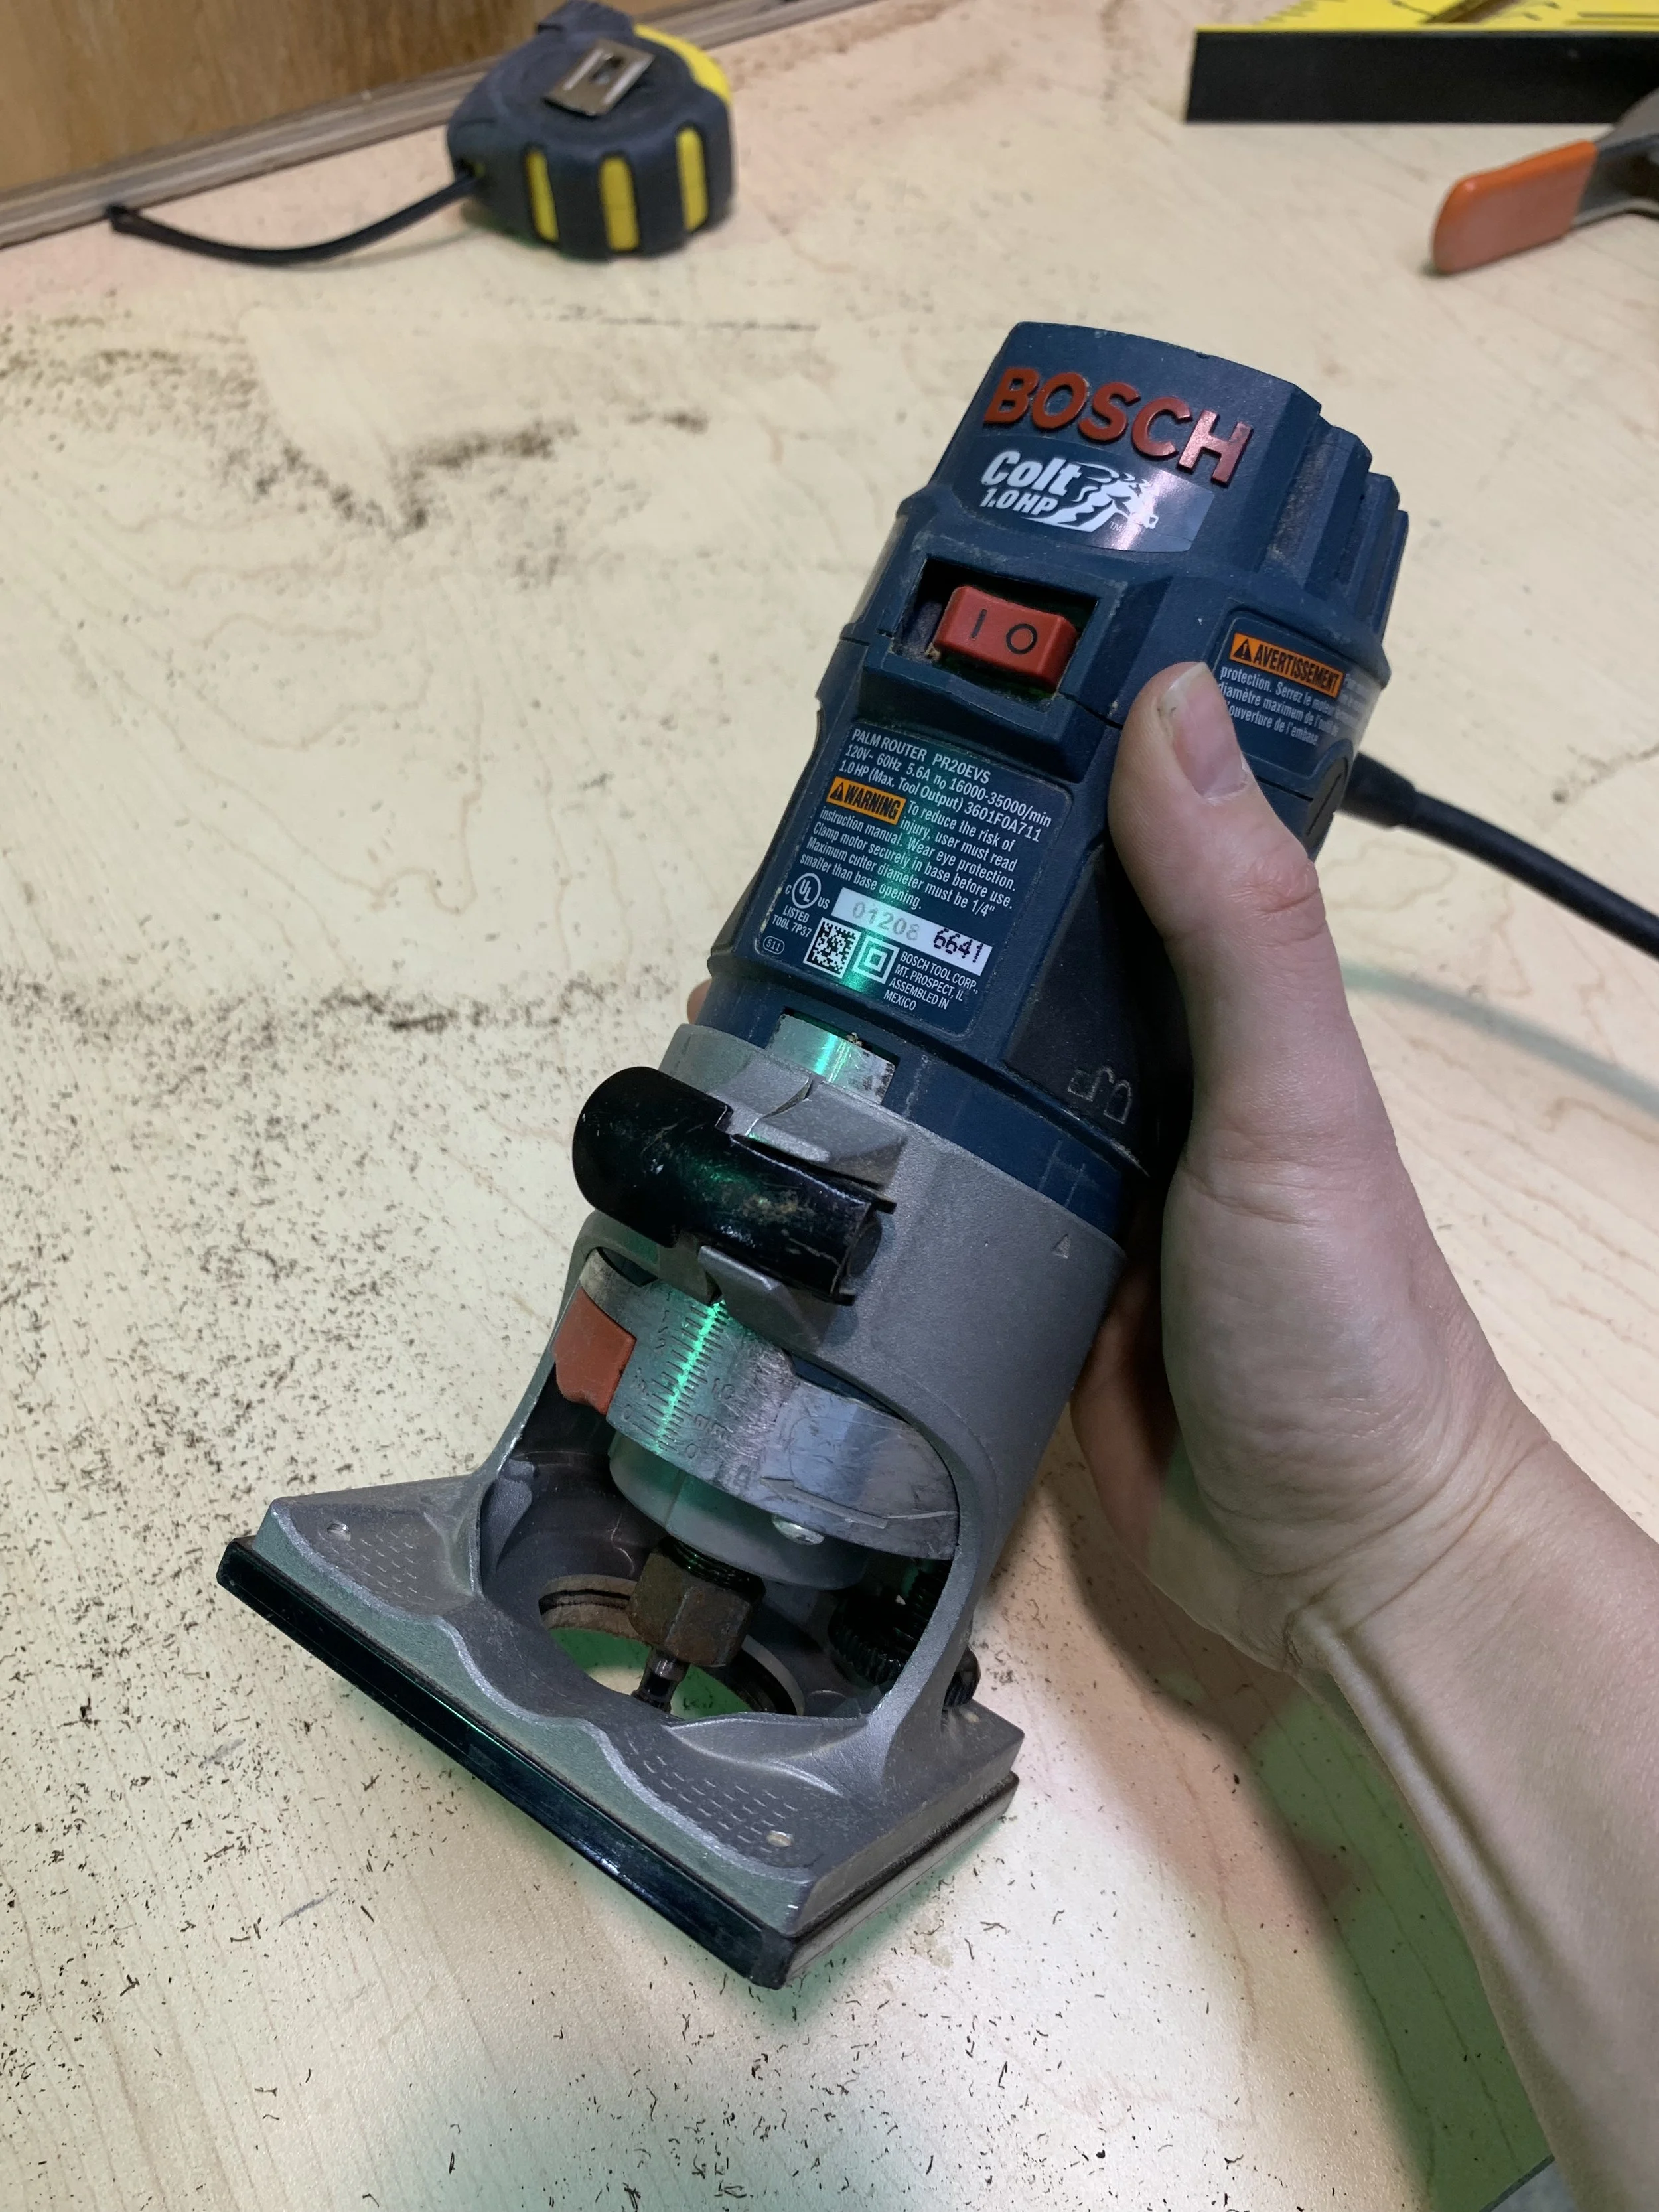
This method uses a hand held router (which you can borrow from someone or rent from your local tool library if available!) along with a specific bit called the keyhole bit.
You can also use a router table if you have one.

Please note, any links below are affiliate links to the exact tools I am actually using and love!
Materials needed:
Your wood slice
Pencil and eraser
Measuring tape
Clamps or easy DIY guide: a straight edged scrap wood piece and nail gun or hammer and nails
Sandpaper
Router and a Tipped Keyhole Bit
Wood comes in all different sizes, thicknesses and shapes.
Measure the router bit with your wood slice to ensure the length is correct and doesn't go through your slice.
How to make a keyhole hanger on a wood slice
Step 1: Determine the Placement of the Keyhole Hanger
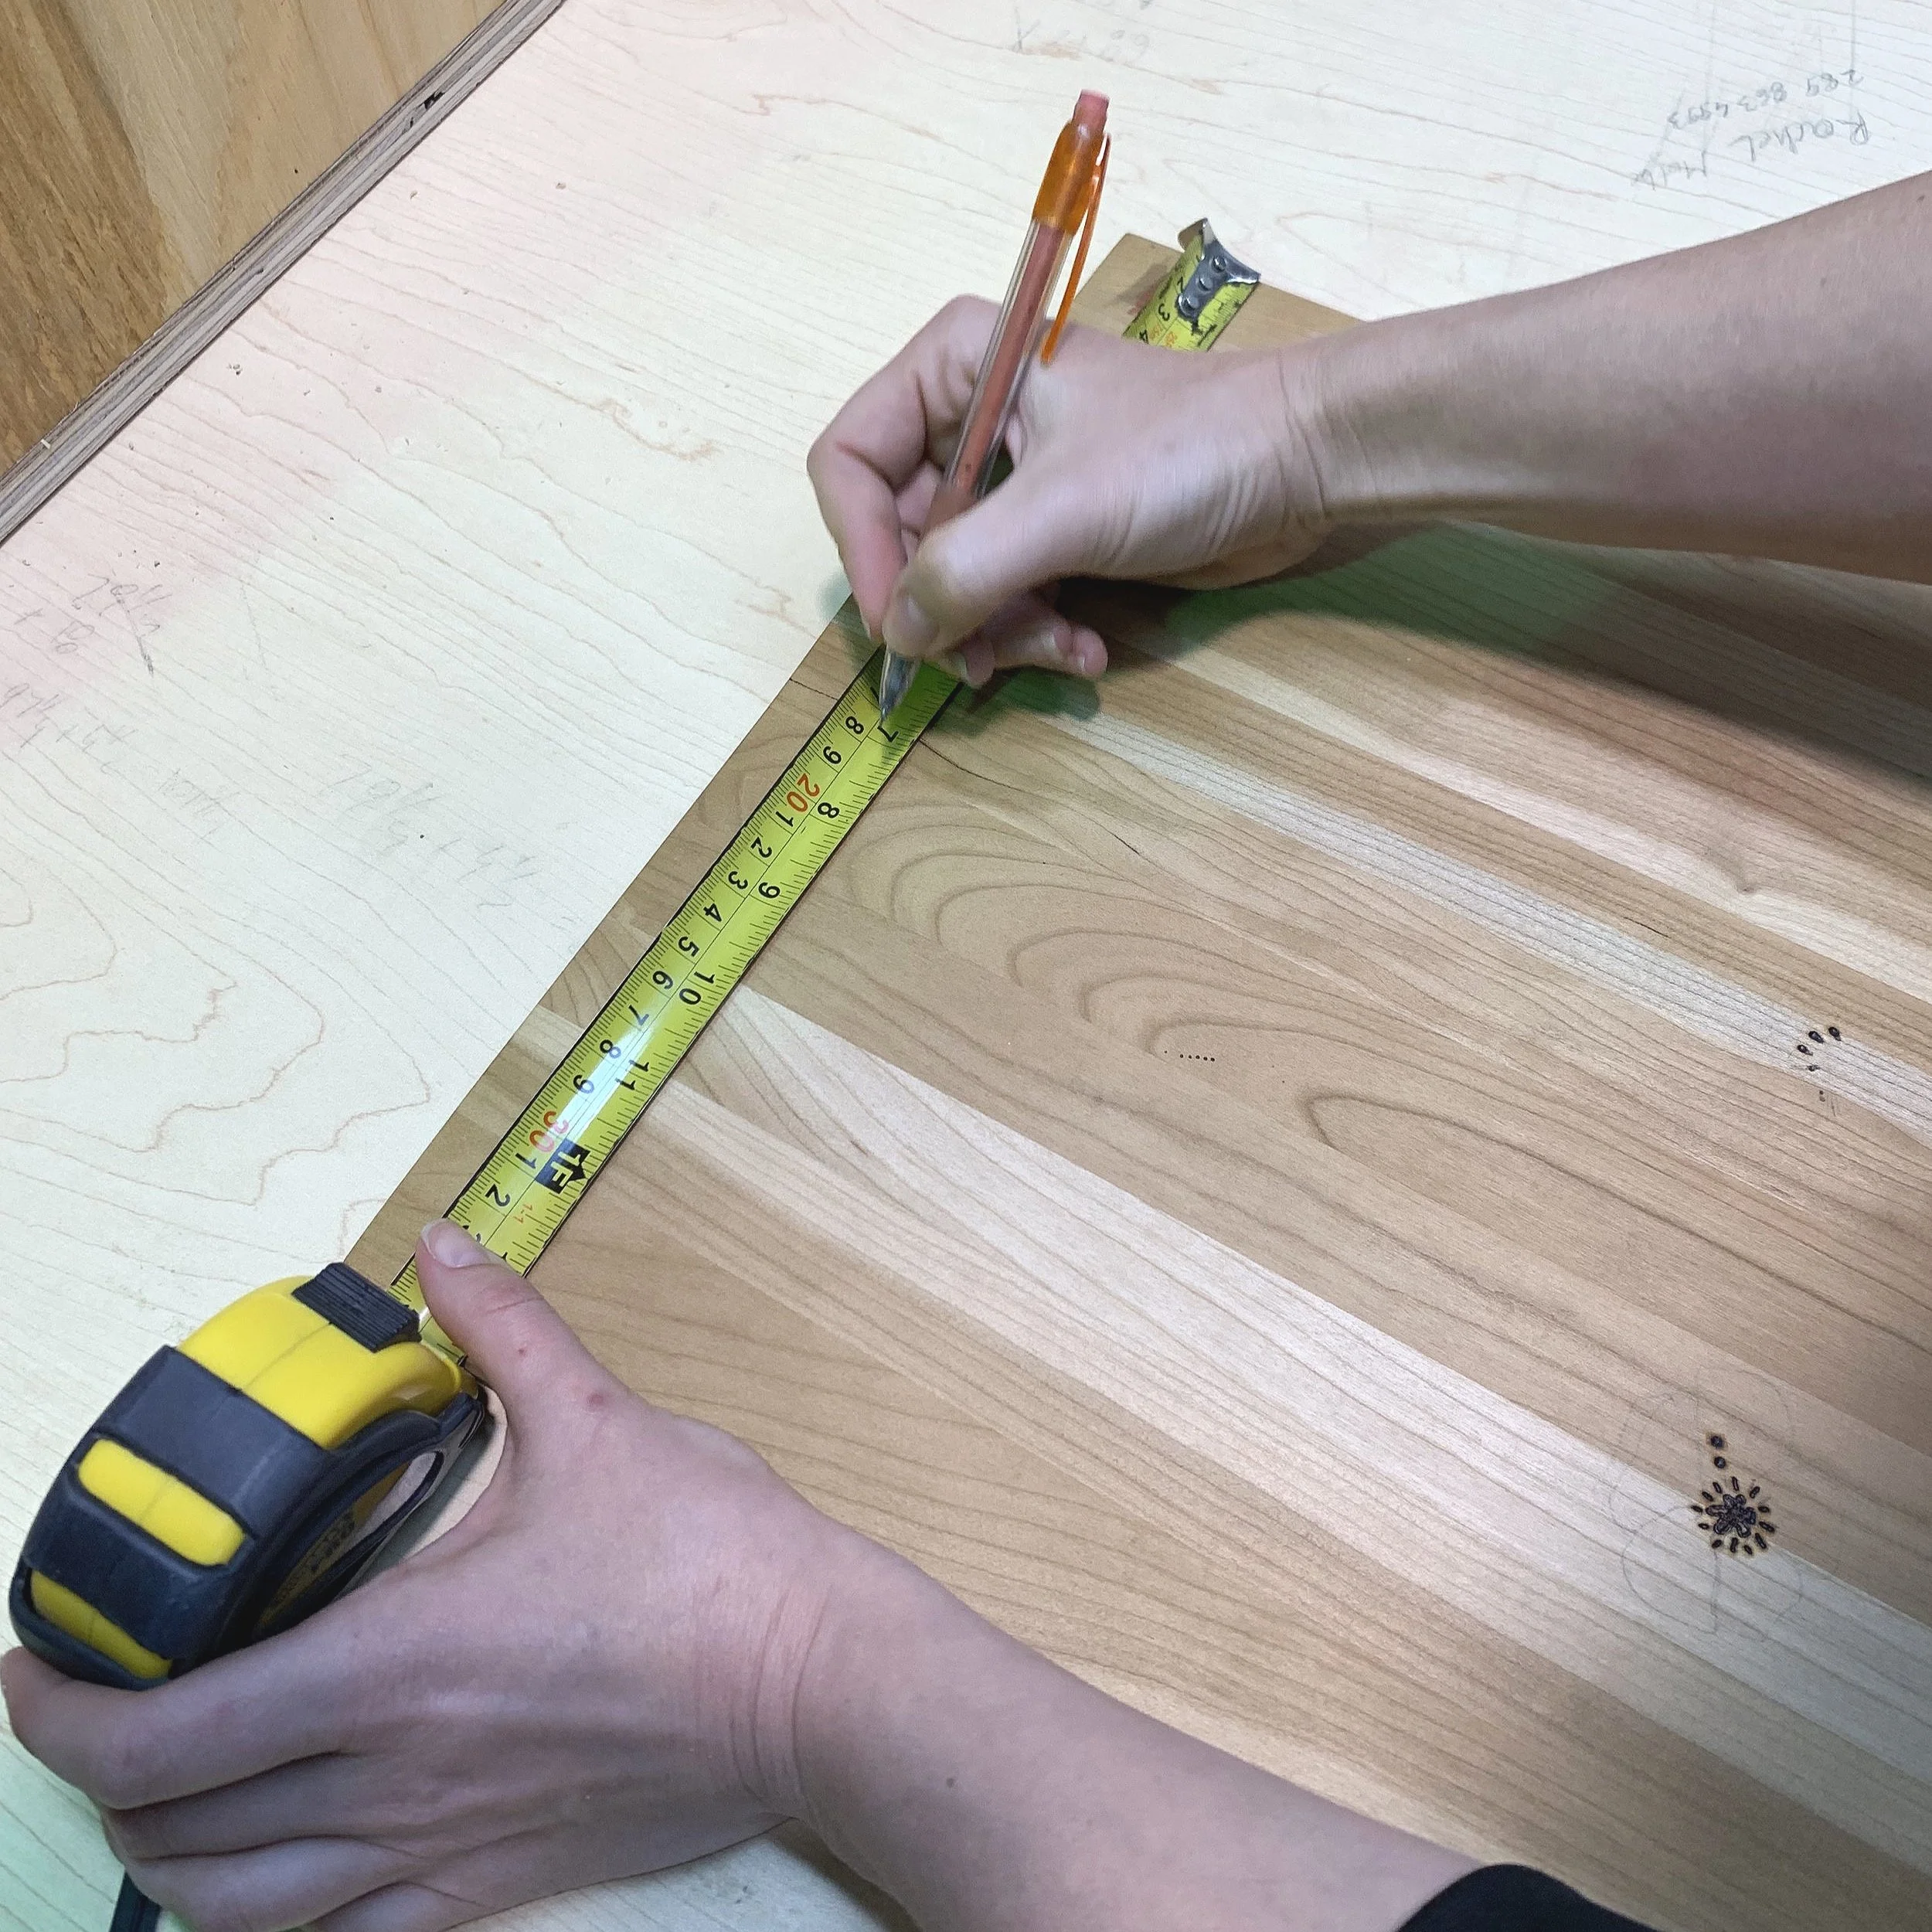
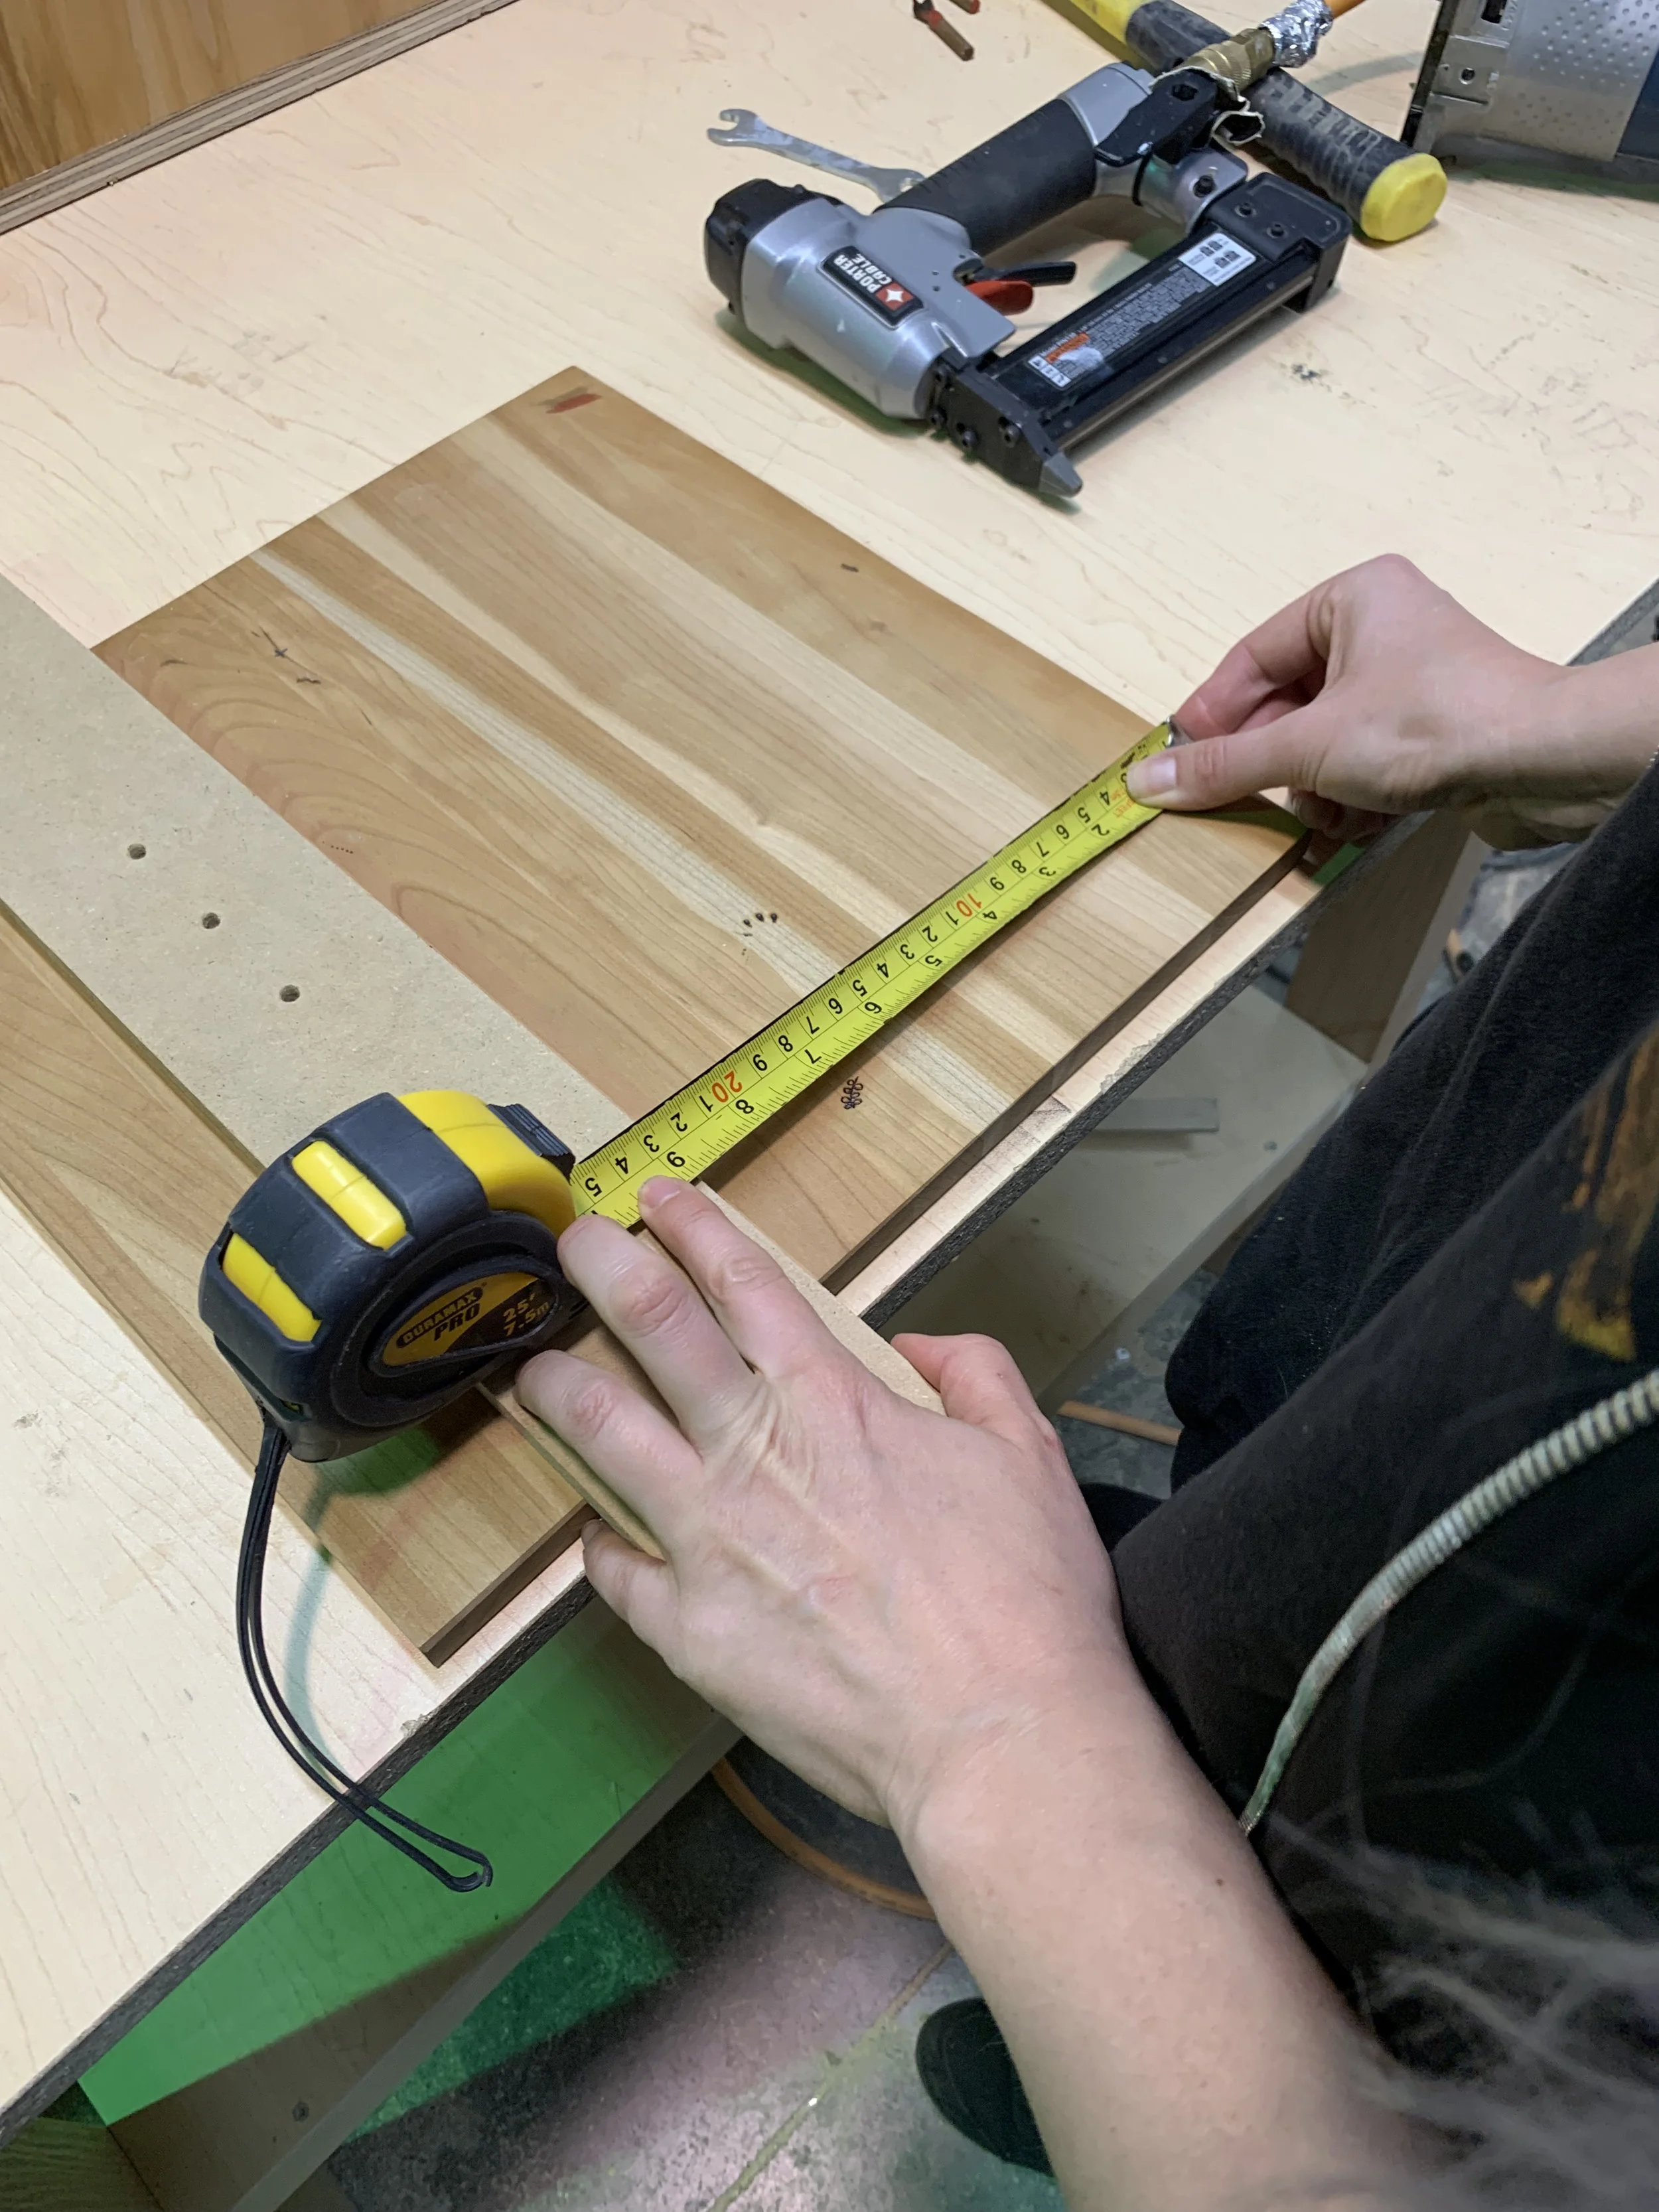
Decide where you want to place the keyhole hanger on the back of the wood slice. Make sure it is centered and level. Use a pencil to mark the spot.
I like to measure 2 inches from the top of all my wood slices to ensure there is enough space for the hole and enough wood left at the top to keep the hole strong. If it is too close to the edge, the wood can split or crack.
Measuring a square or rectangle piece is easy, but rounds are a little trickier, especially if they are imperfect circles, ovals or other shapes…
My trick to measure a wood slice that is not a square or rectangle:
This is not a 100% exact method. Wood rounds are often imperfect and come in all kinds of unique shapes and sizes. What I like about the keyhole hanger technique is that when the slice is hanging, it’s flush against the wall. So even if your measurements were off slightly, the friction of the wood on the wall allows for some forgiveness in the levelling and you can tweak it a bit once it is up. For really stubborn pieces that you may have mismeasured and they really don’t hang level, you can apply a tiny amount of double sided sticky tape or even sticky tack to the back side to make it more level. Do not try adjusting the keyhole by making it bigger or longer as the structure of the wood will deteriorate when manipulated enough times… Also, know that any sticky substances on wood will stain in, but this will be on the back of the wood piece.
First measure the largest point across your wood slice.
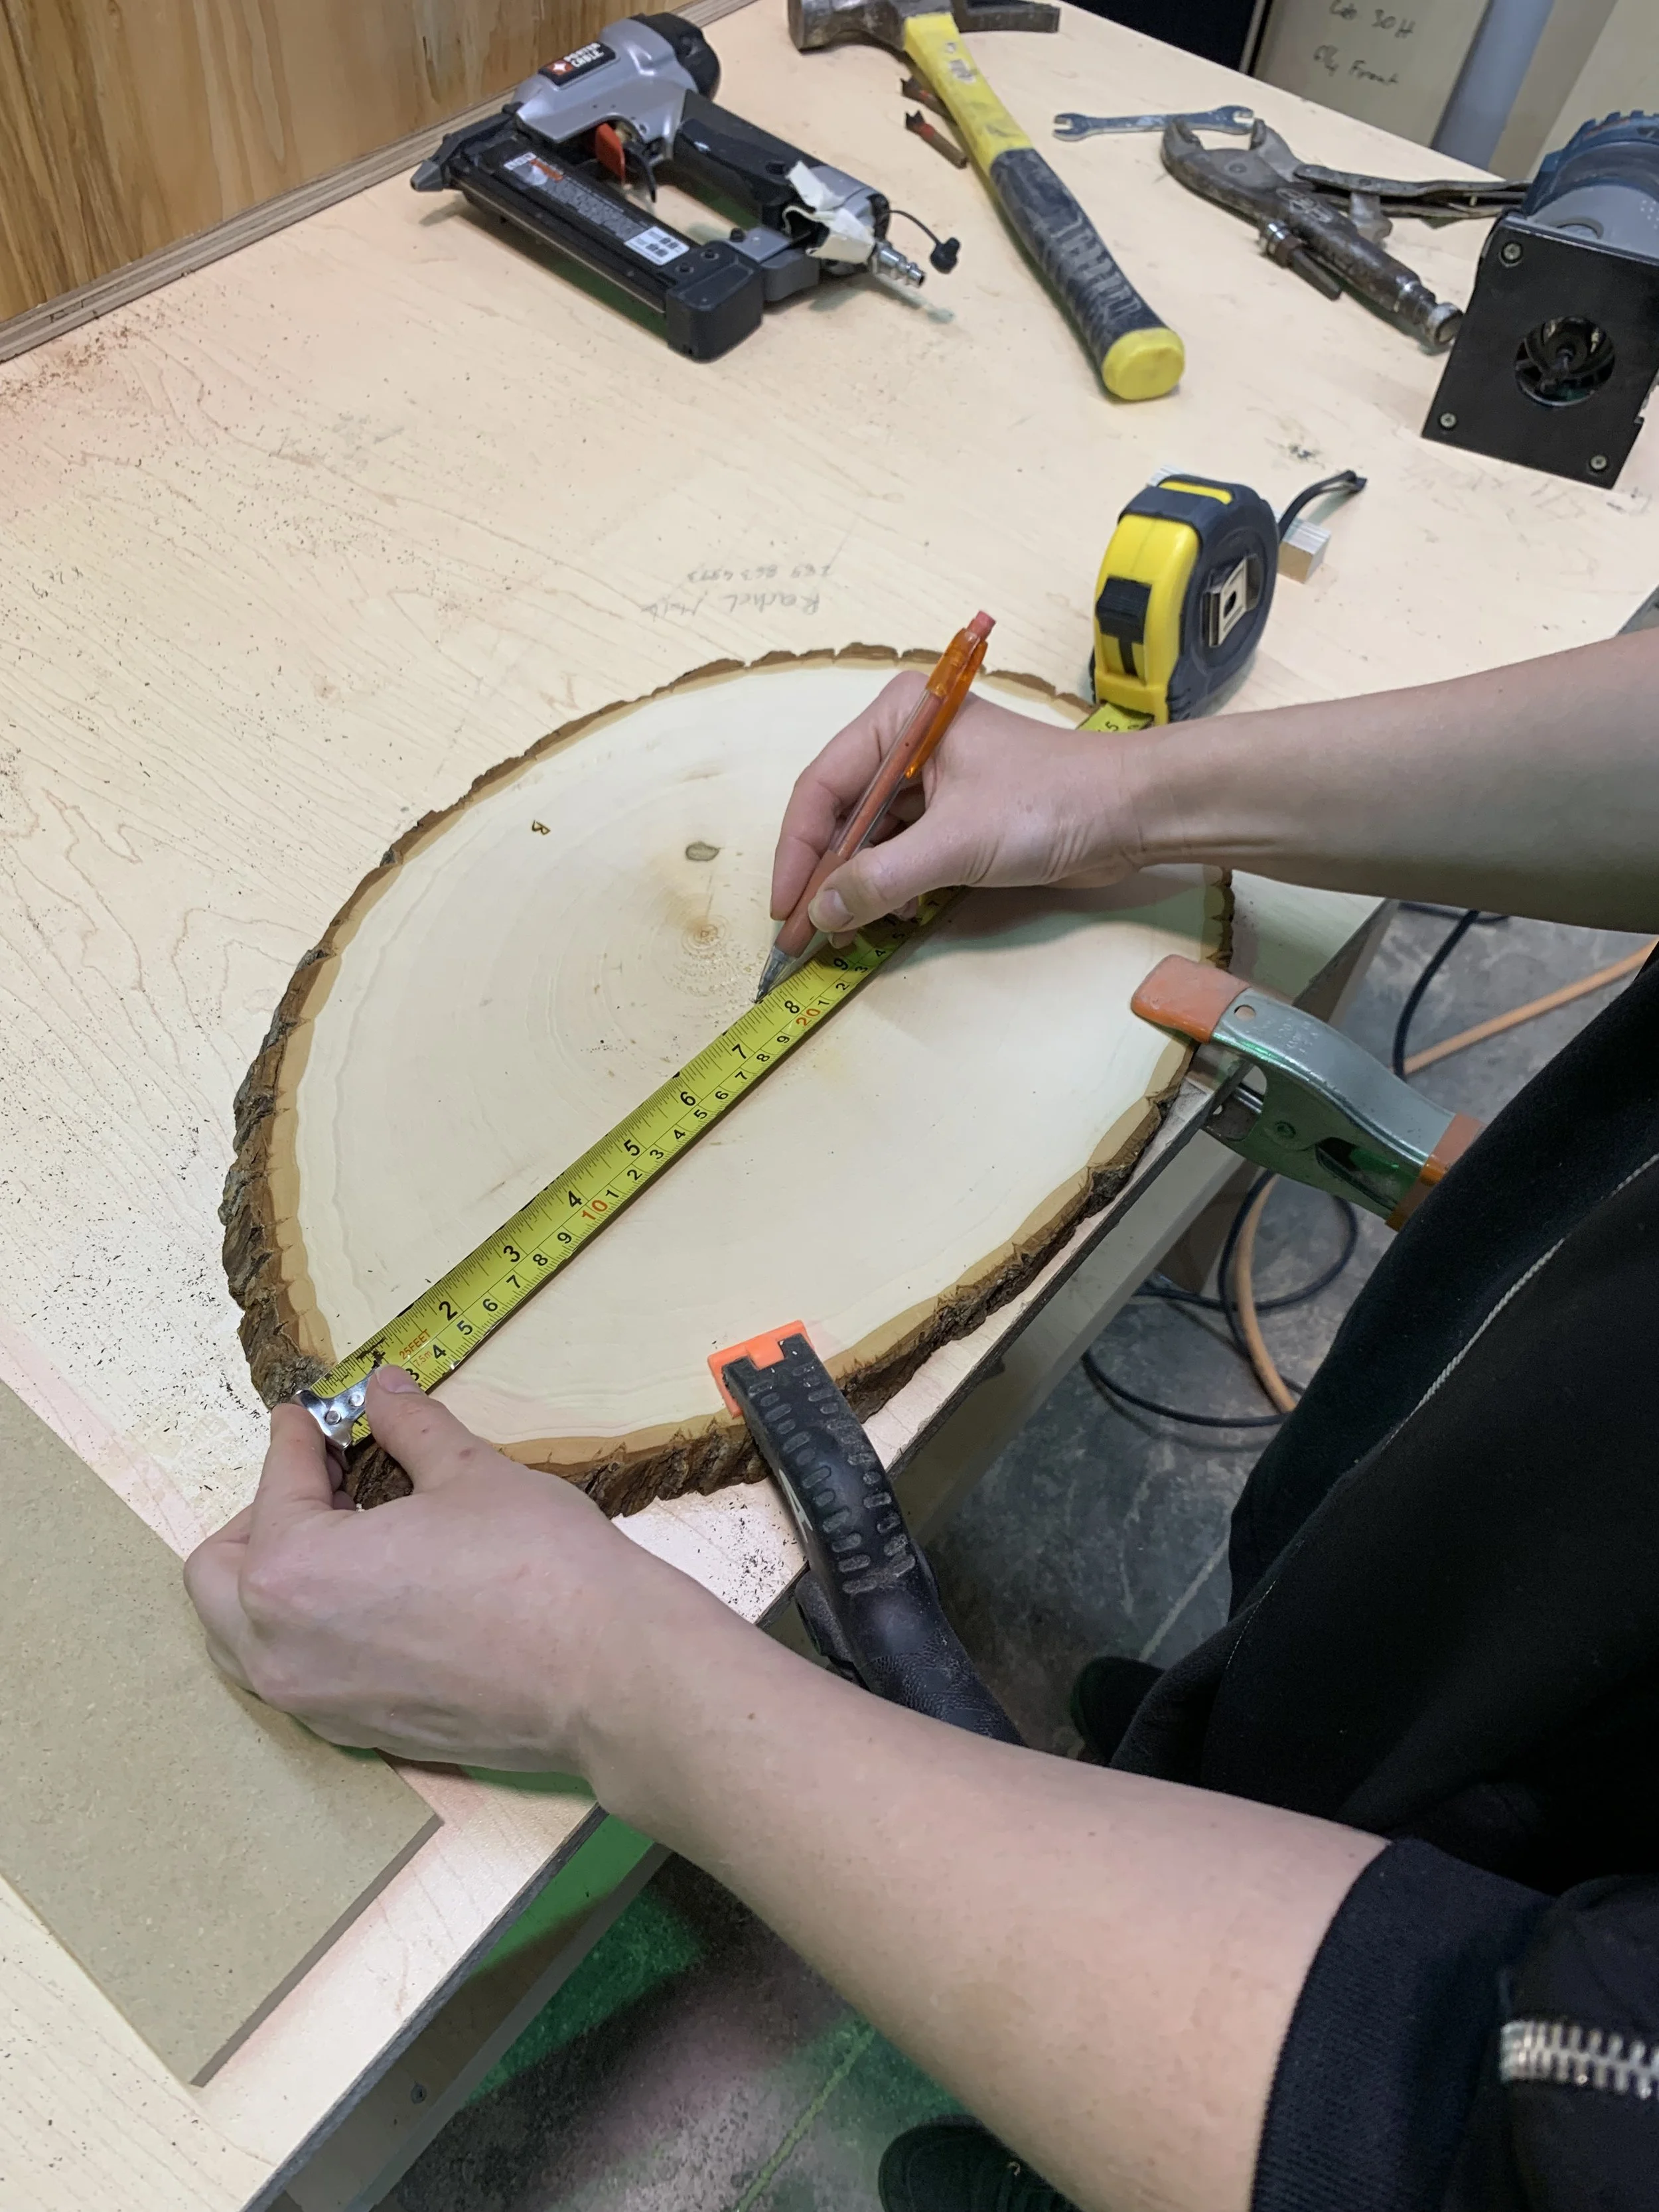
Then take a square tool and roughly eyeball the level. I use the edge of the table that I am working as a guide, lining up the bottom of my square to the edge.
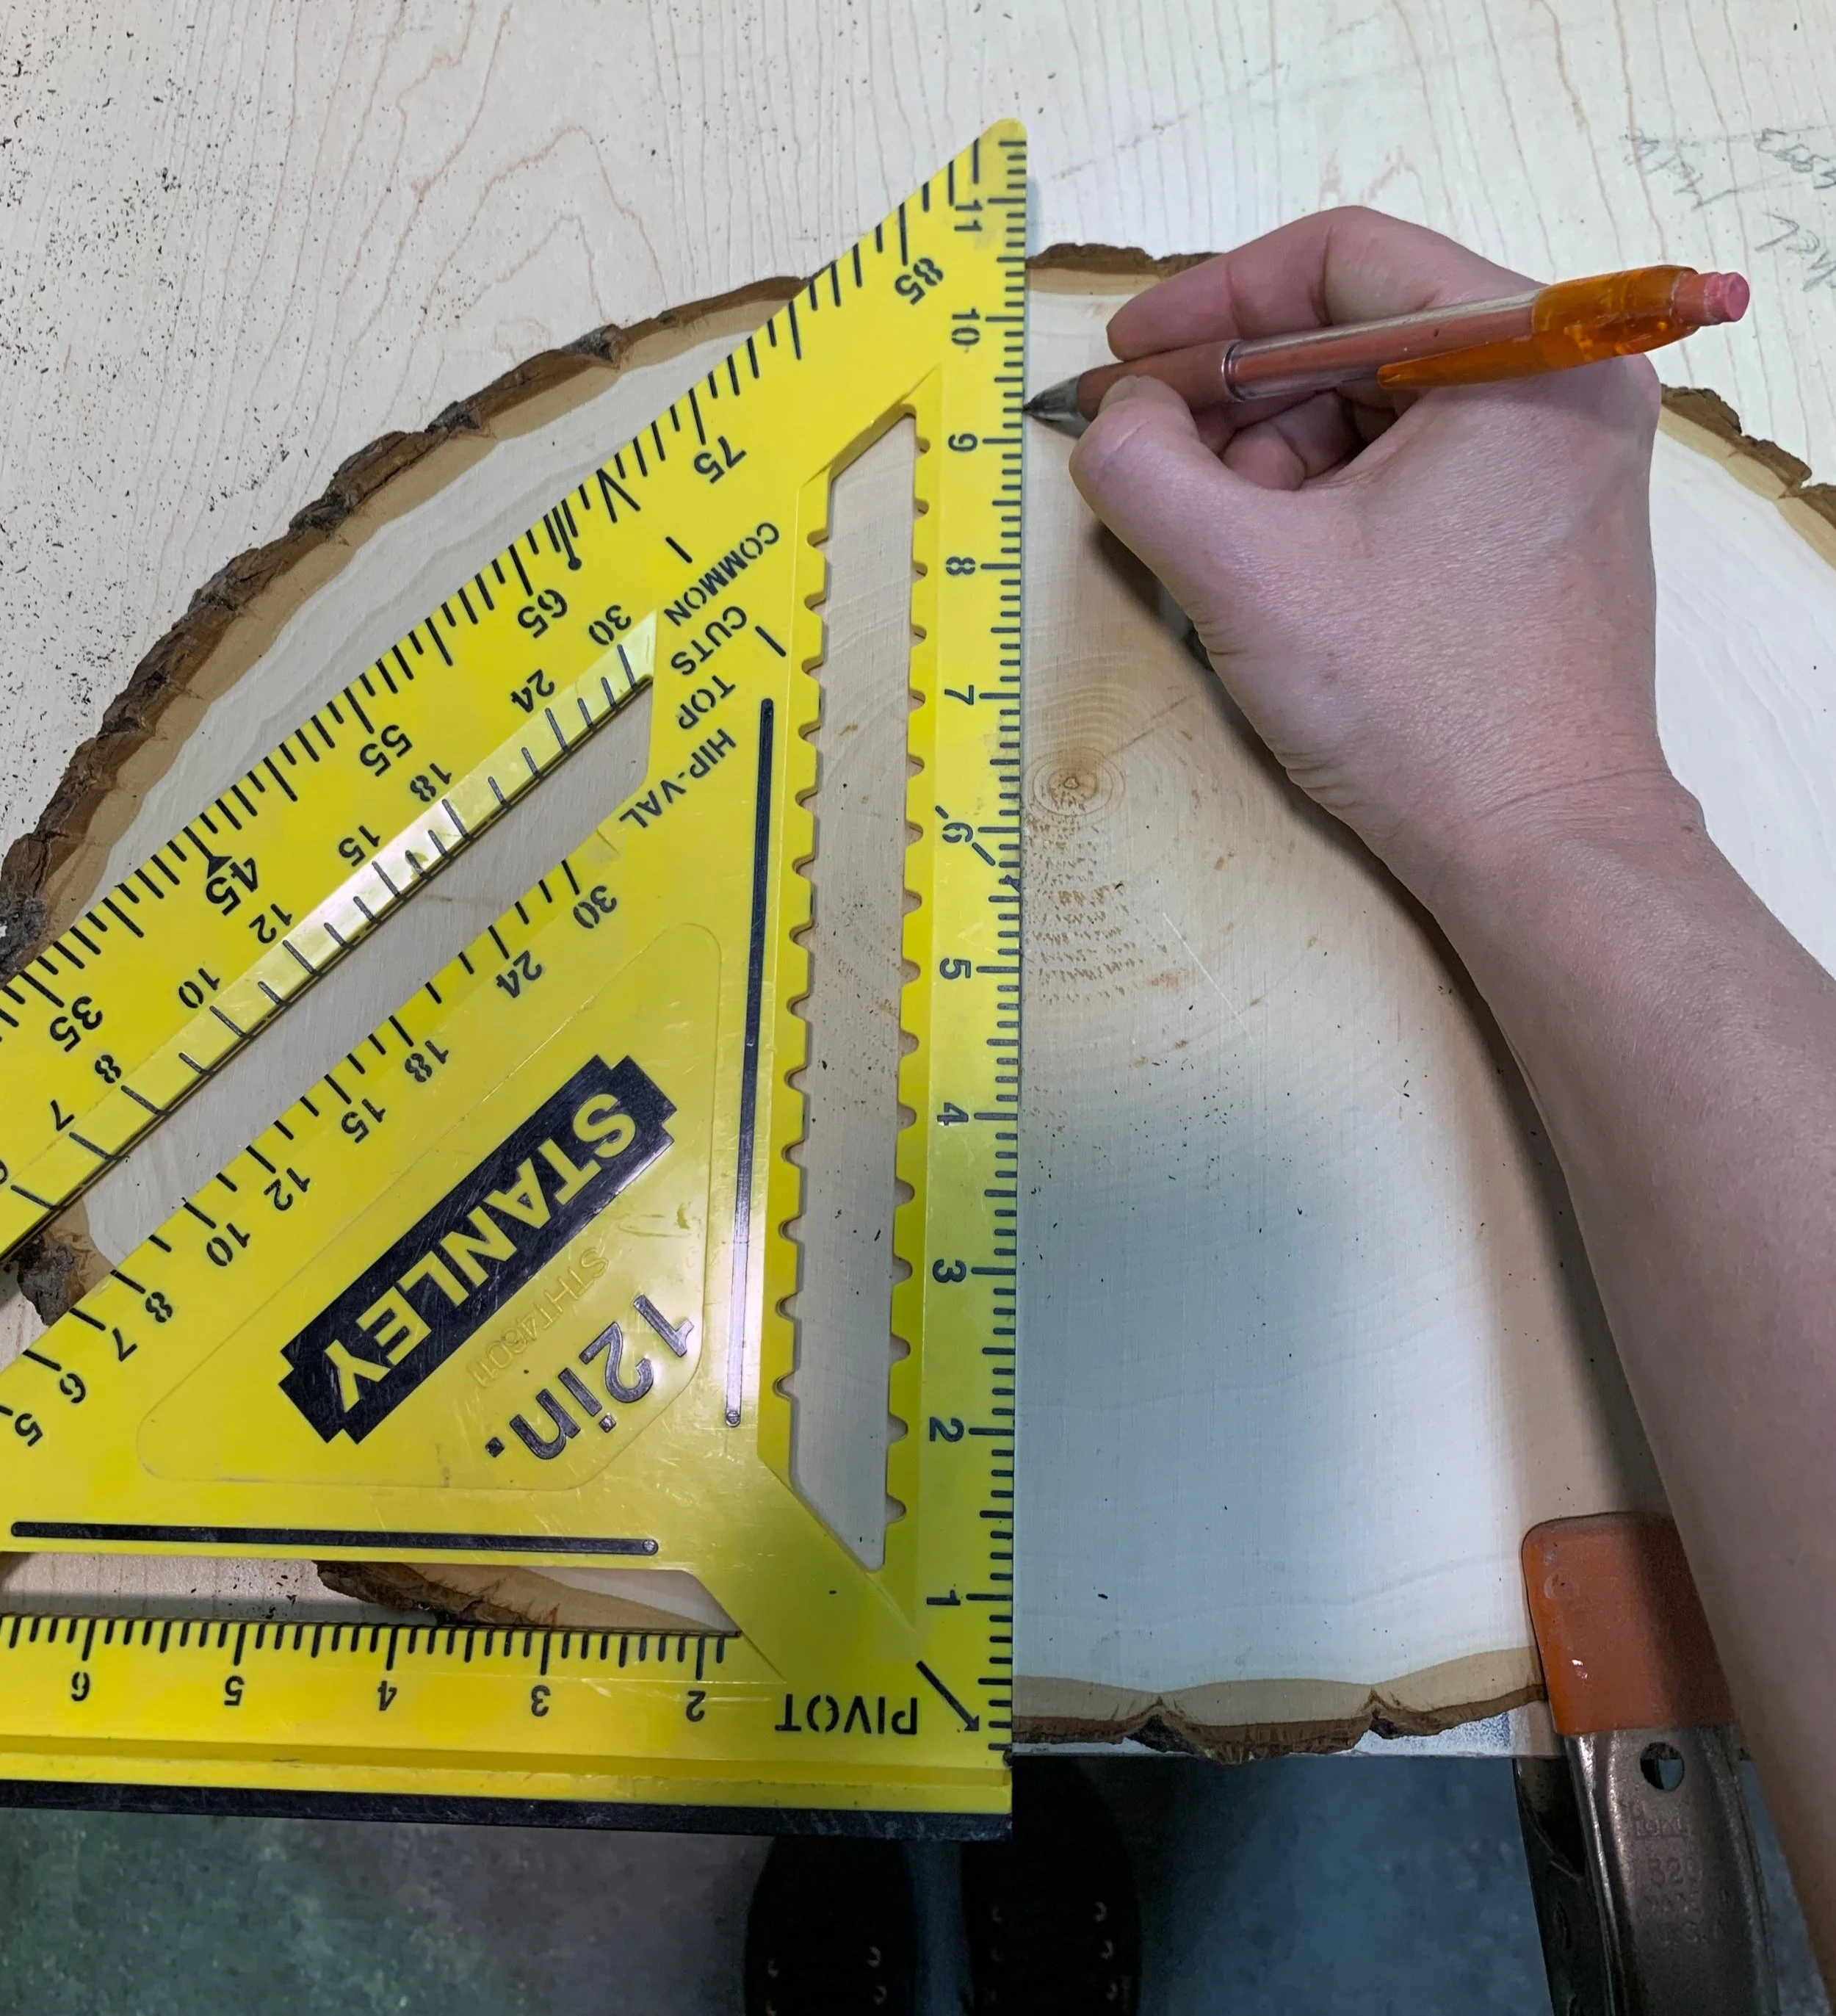
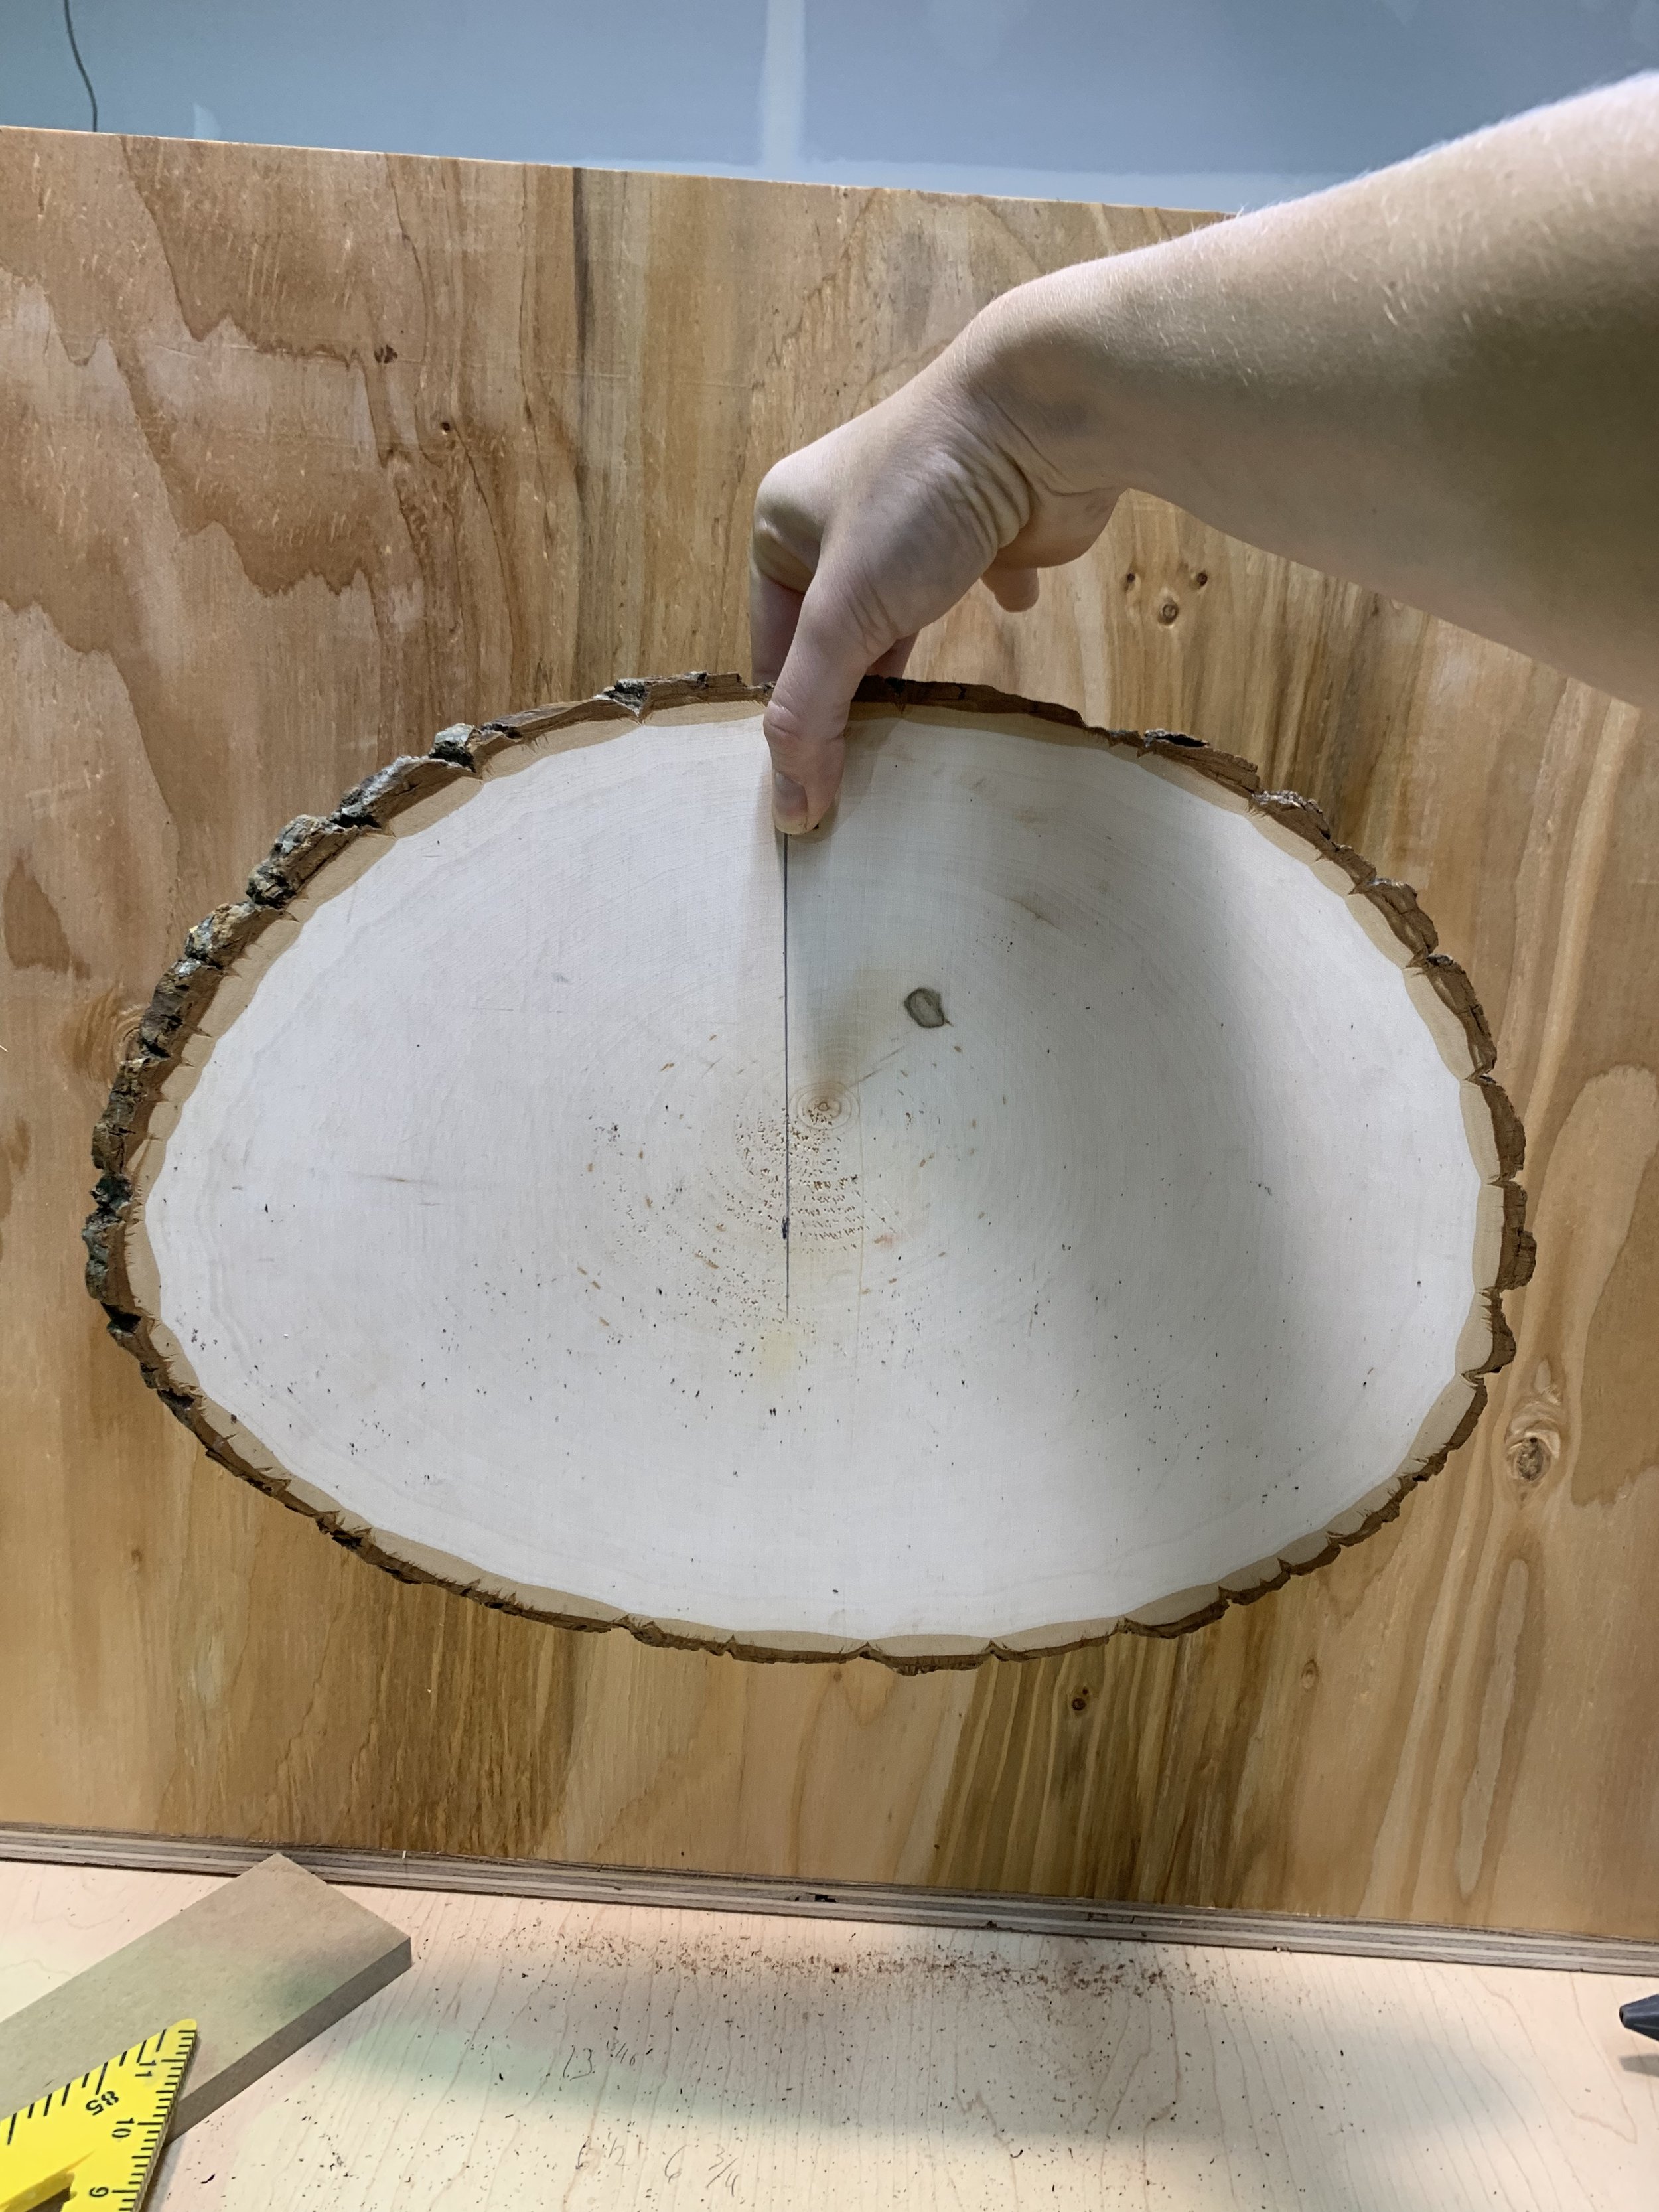
Once I draw a line up, 2 inches away from the tops, I test how it hangs before I drill a hole by holding it up on the mark I just made and roughly seeing if it hangs level.
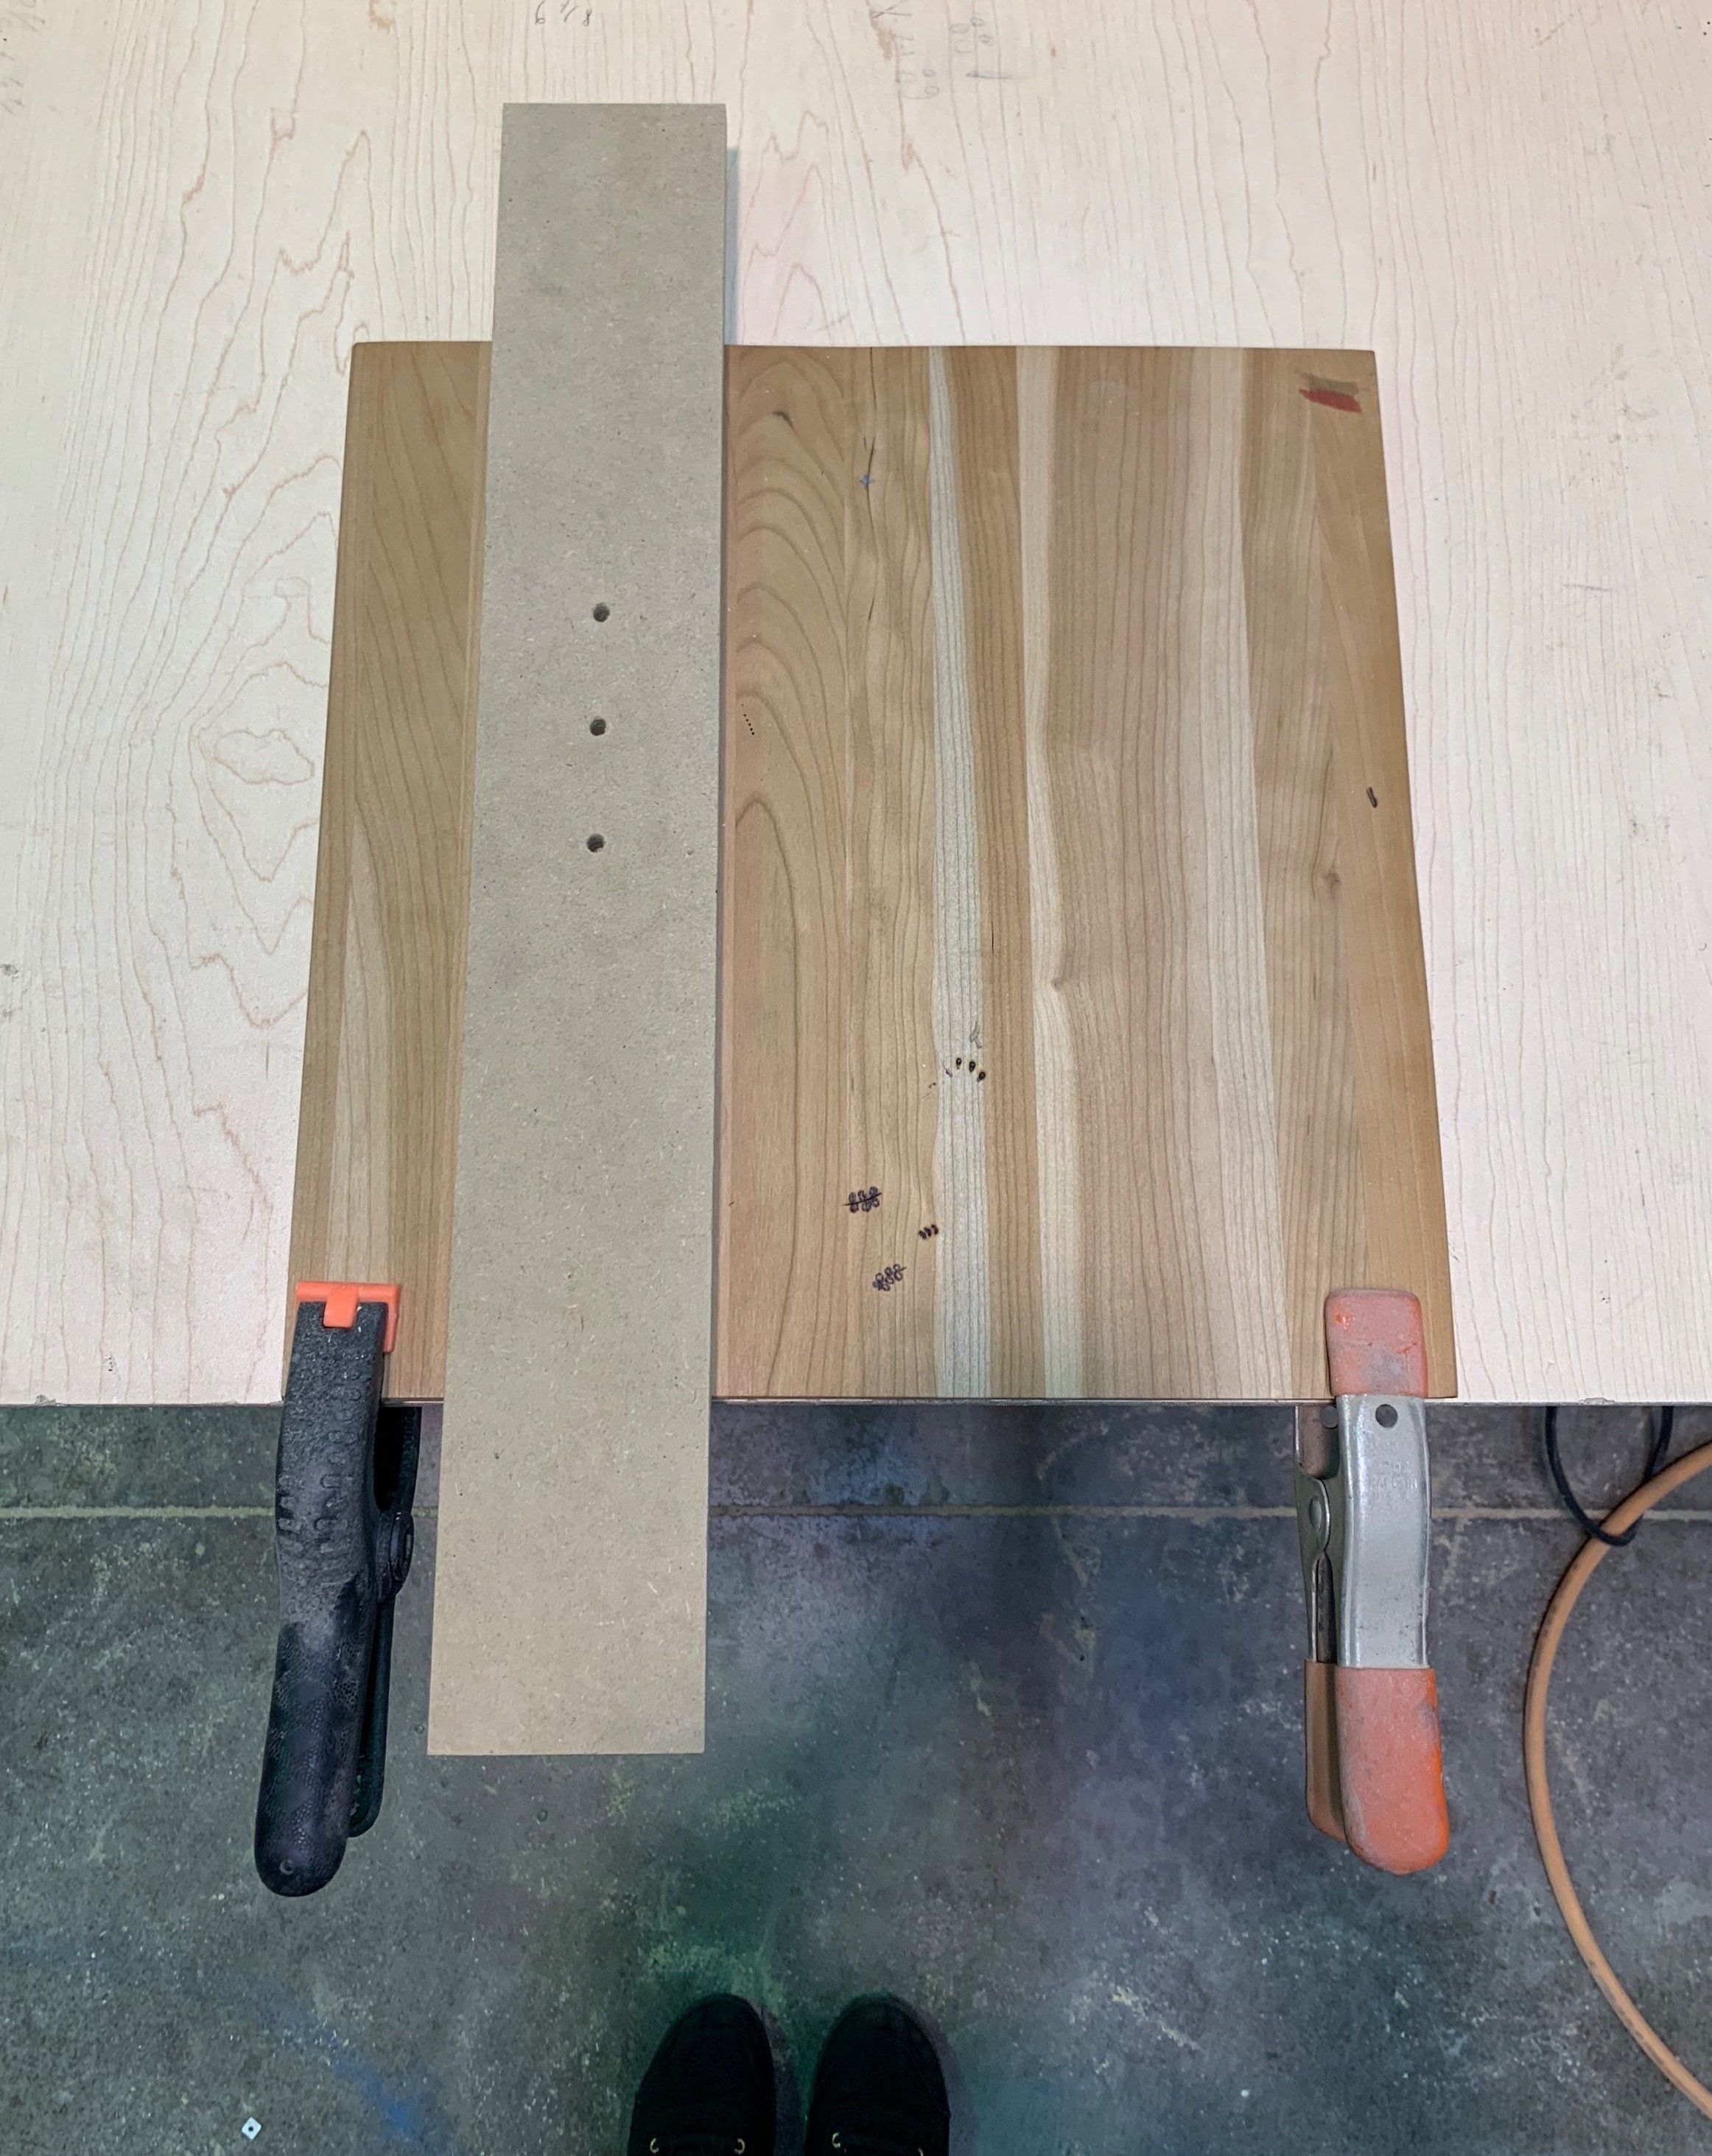
step 2: make a quick guide (optional) and clamp down your slice
This DIY guide is optional because you can essentially free-hand the hole. I like to make the guide because it only takes seconds and then keeps my holes nice and straight.
Start by grabbing any scrap wood (ensure it has a straight edge - this edge will be your guide) and attach it to your artwork. I am nailing it in temporarily but you can use clamps if you do not have a nail gun (clamps get in the way a little which is why I prefer to nail it). If your wood slice is big enough, you can hang the clamps over the edge of the table, or clamp the guide AND the slice to the table for maximum stability.
First, I measure the distance from the furthest edge at the top, and then the bottom - this ensures that it’s level.

Make sure to measure for the size of your tool.
Tip: Once I measure everything out, before I nail down my guide, I line up the router to where I am about to drill the hole just to double check my measurements!
Ensure that the nail you choose will not go through your wood slice. I used a 23 gauge headless finishing nailer because the nails are small and short which make them easy to take off once complete and you don’t have a big nail hole after the guide comes off. You can simply hammer in two temporary nails (two so the guide stays in one spot - one at the top and one at the bottom of your scrap wood).
Once my guide is on, I clamp my art down to the table.
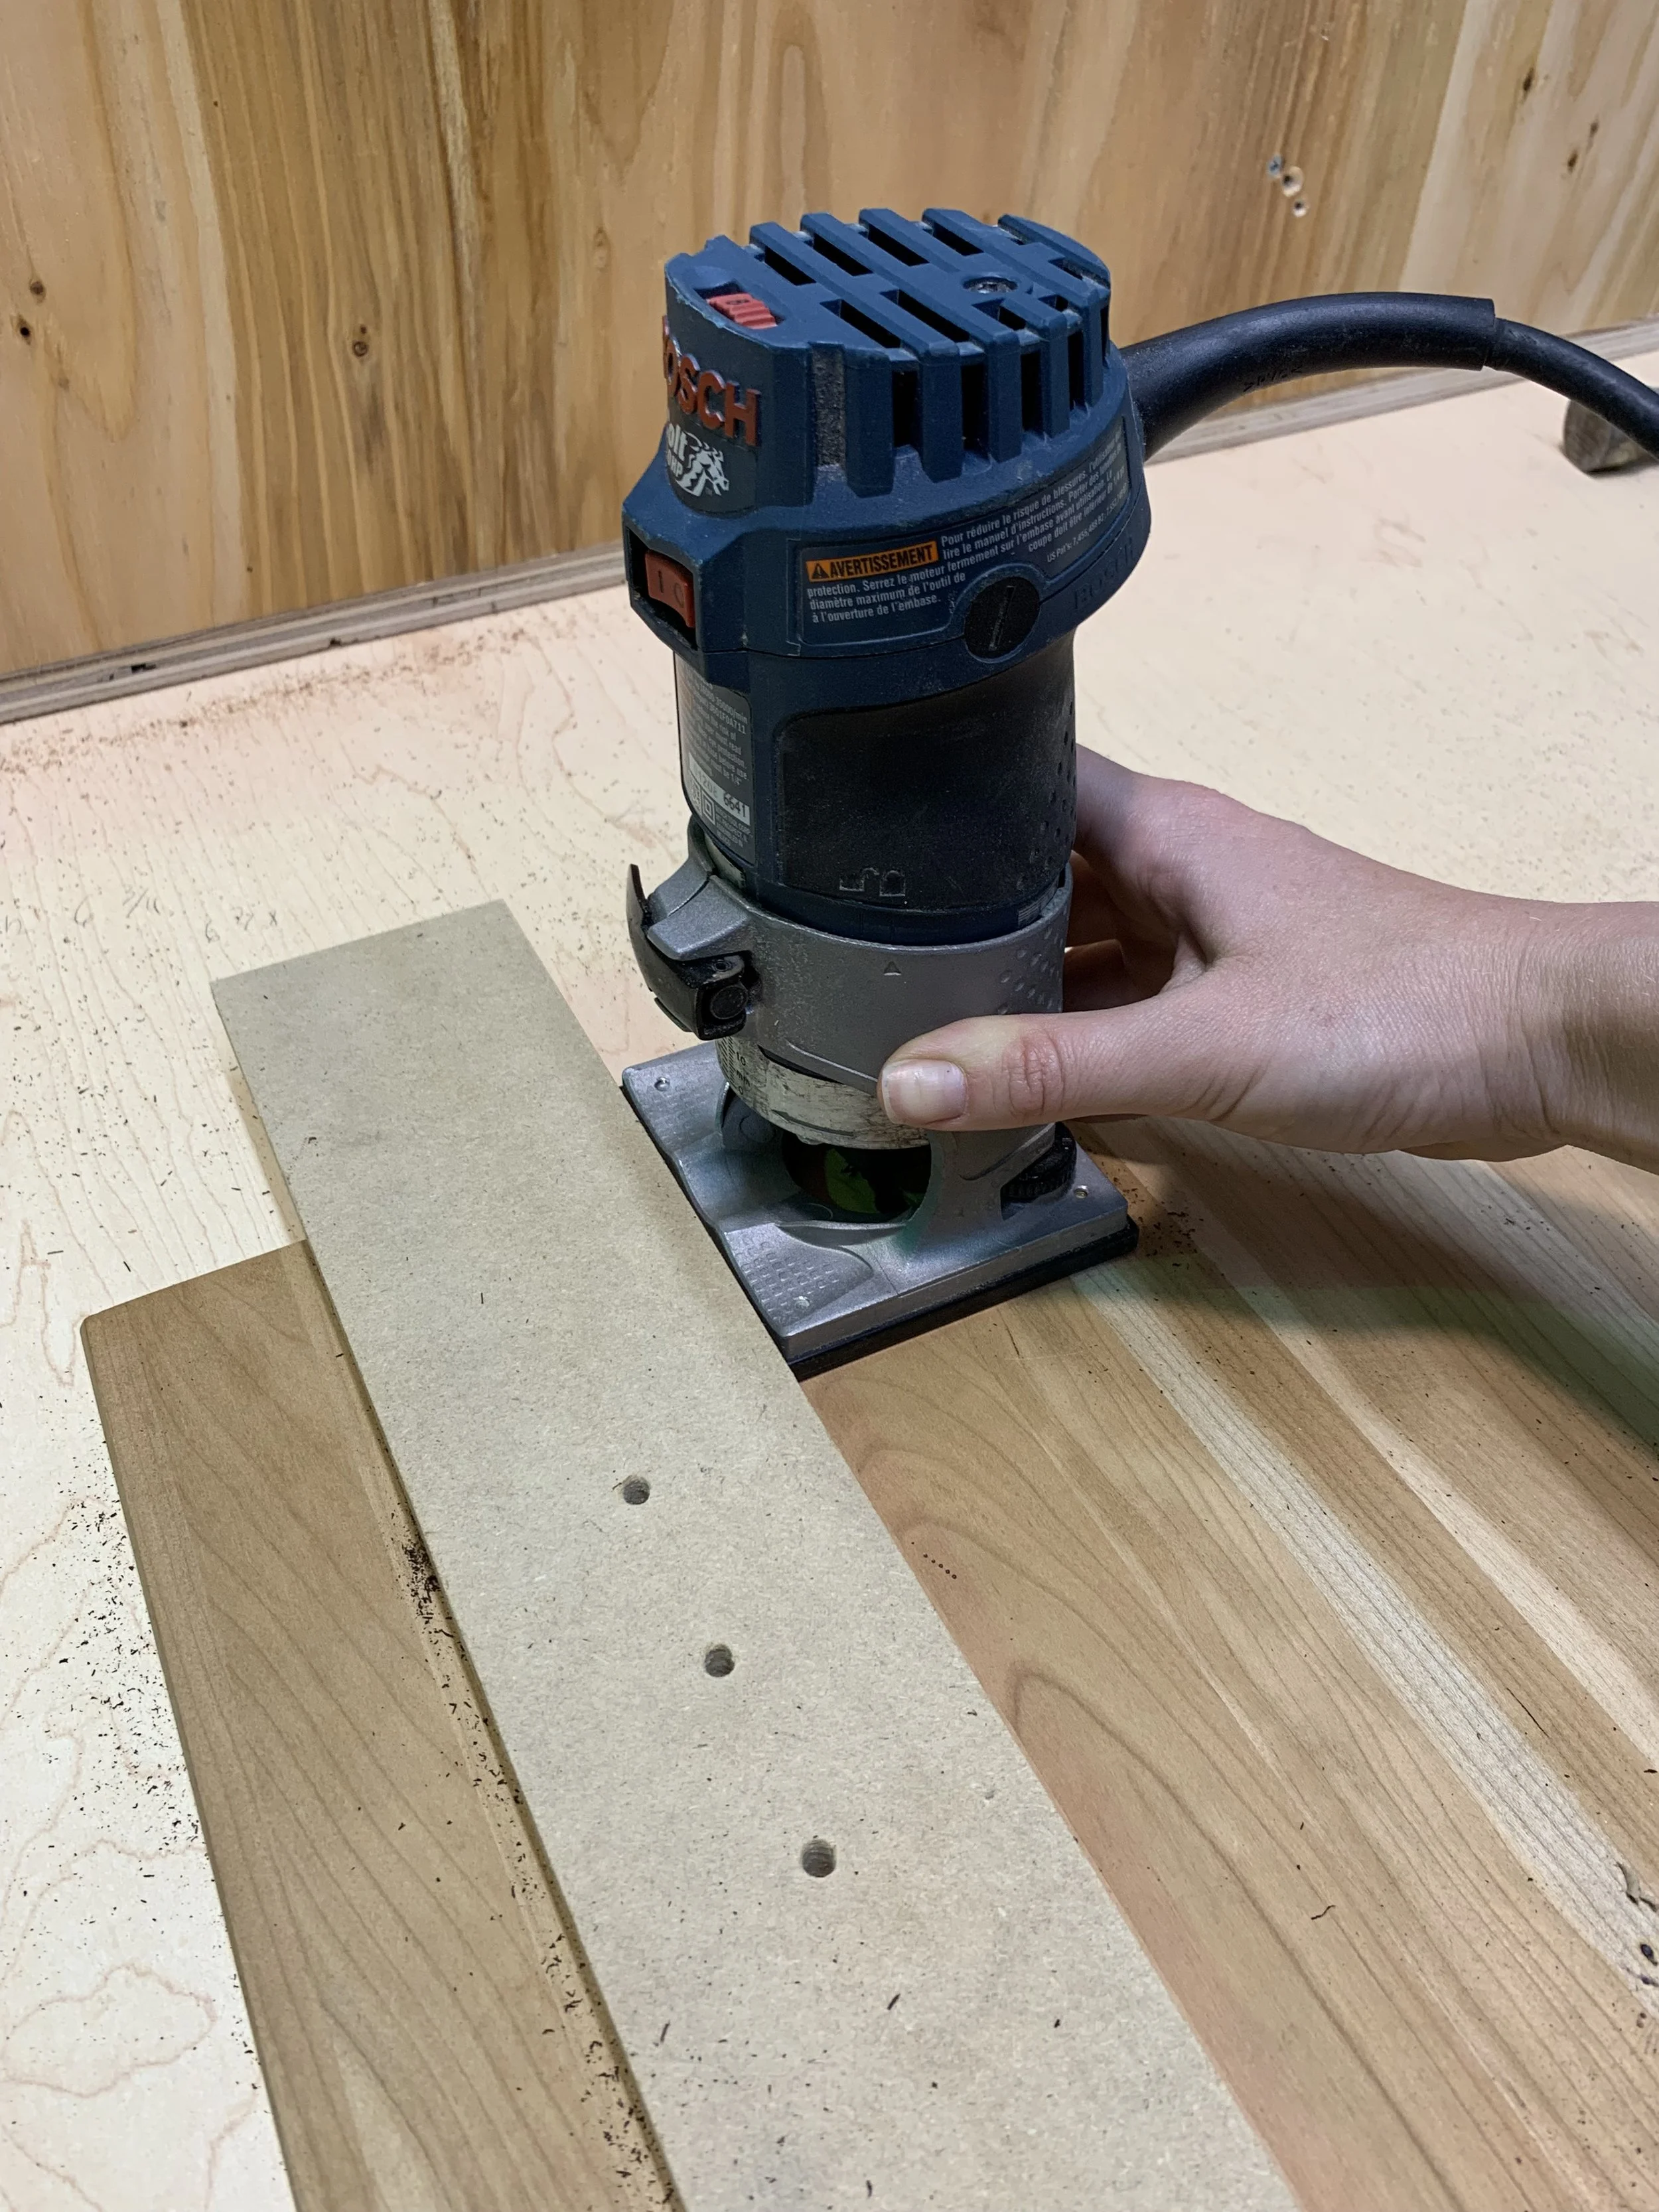
step 3: drill your hole
Now comes the fun part, drilling the hole.

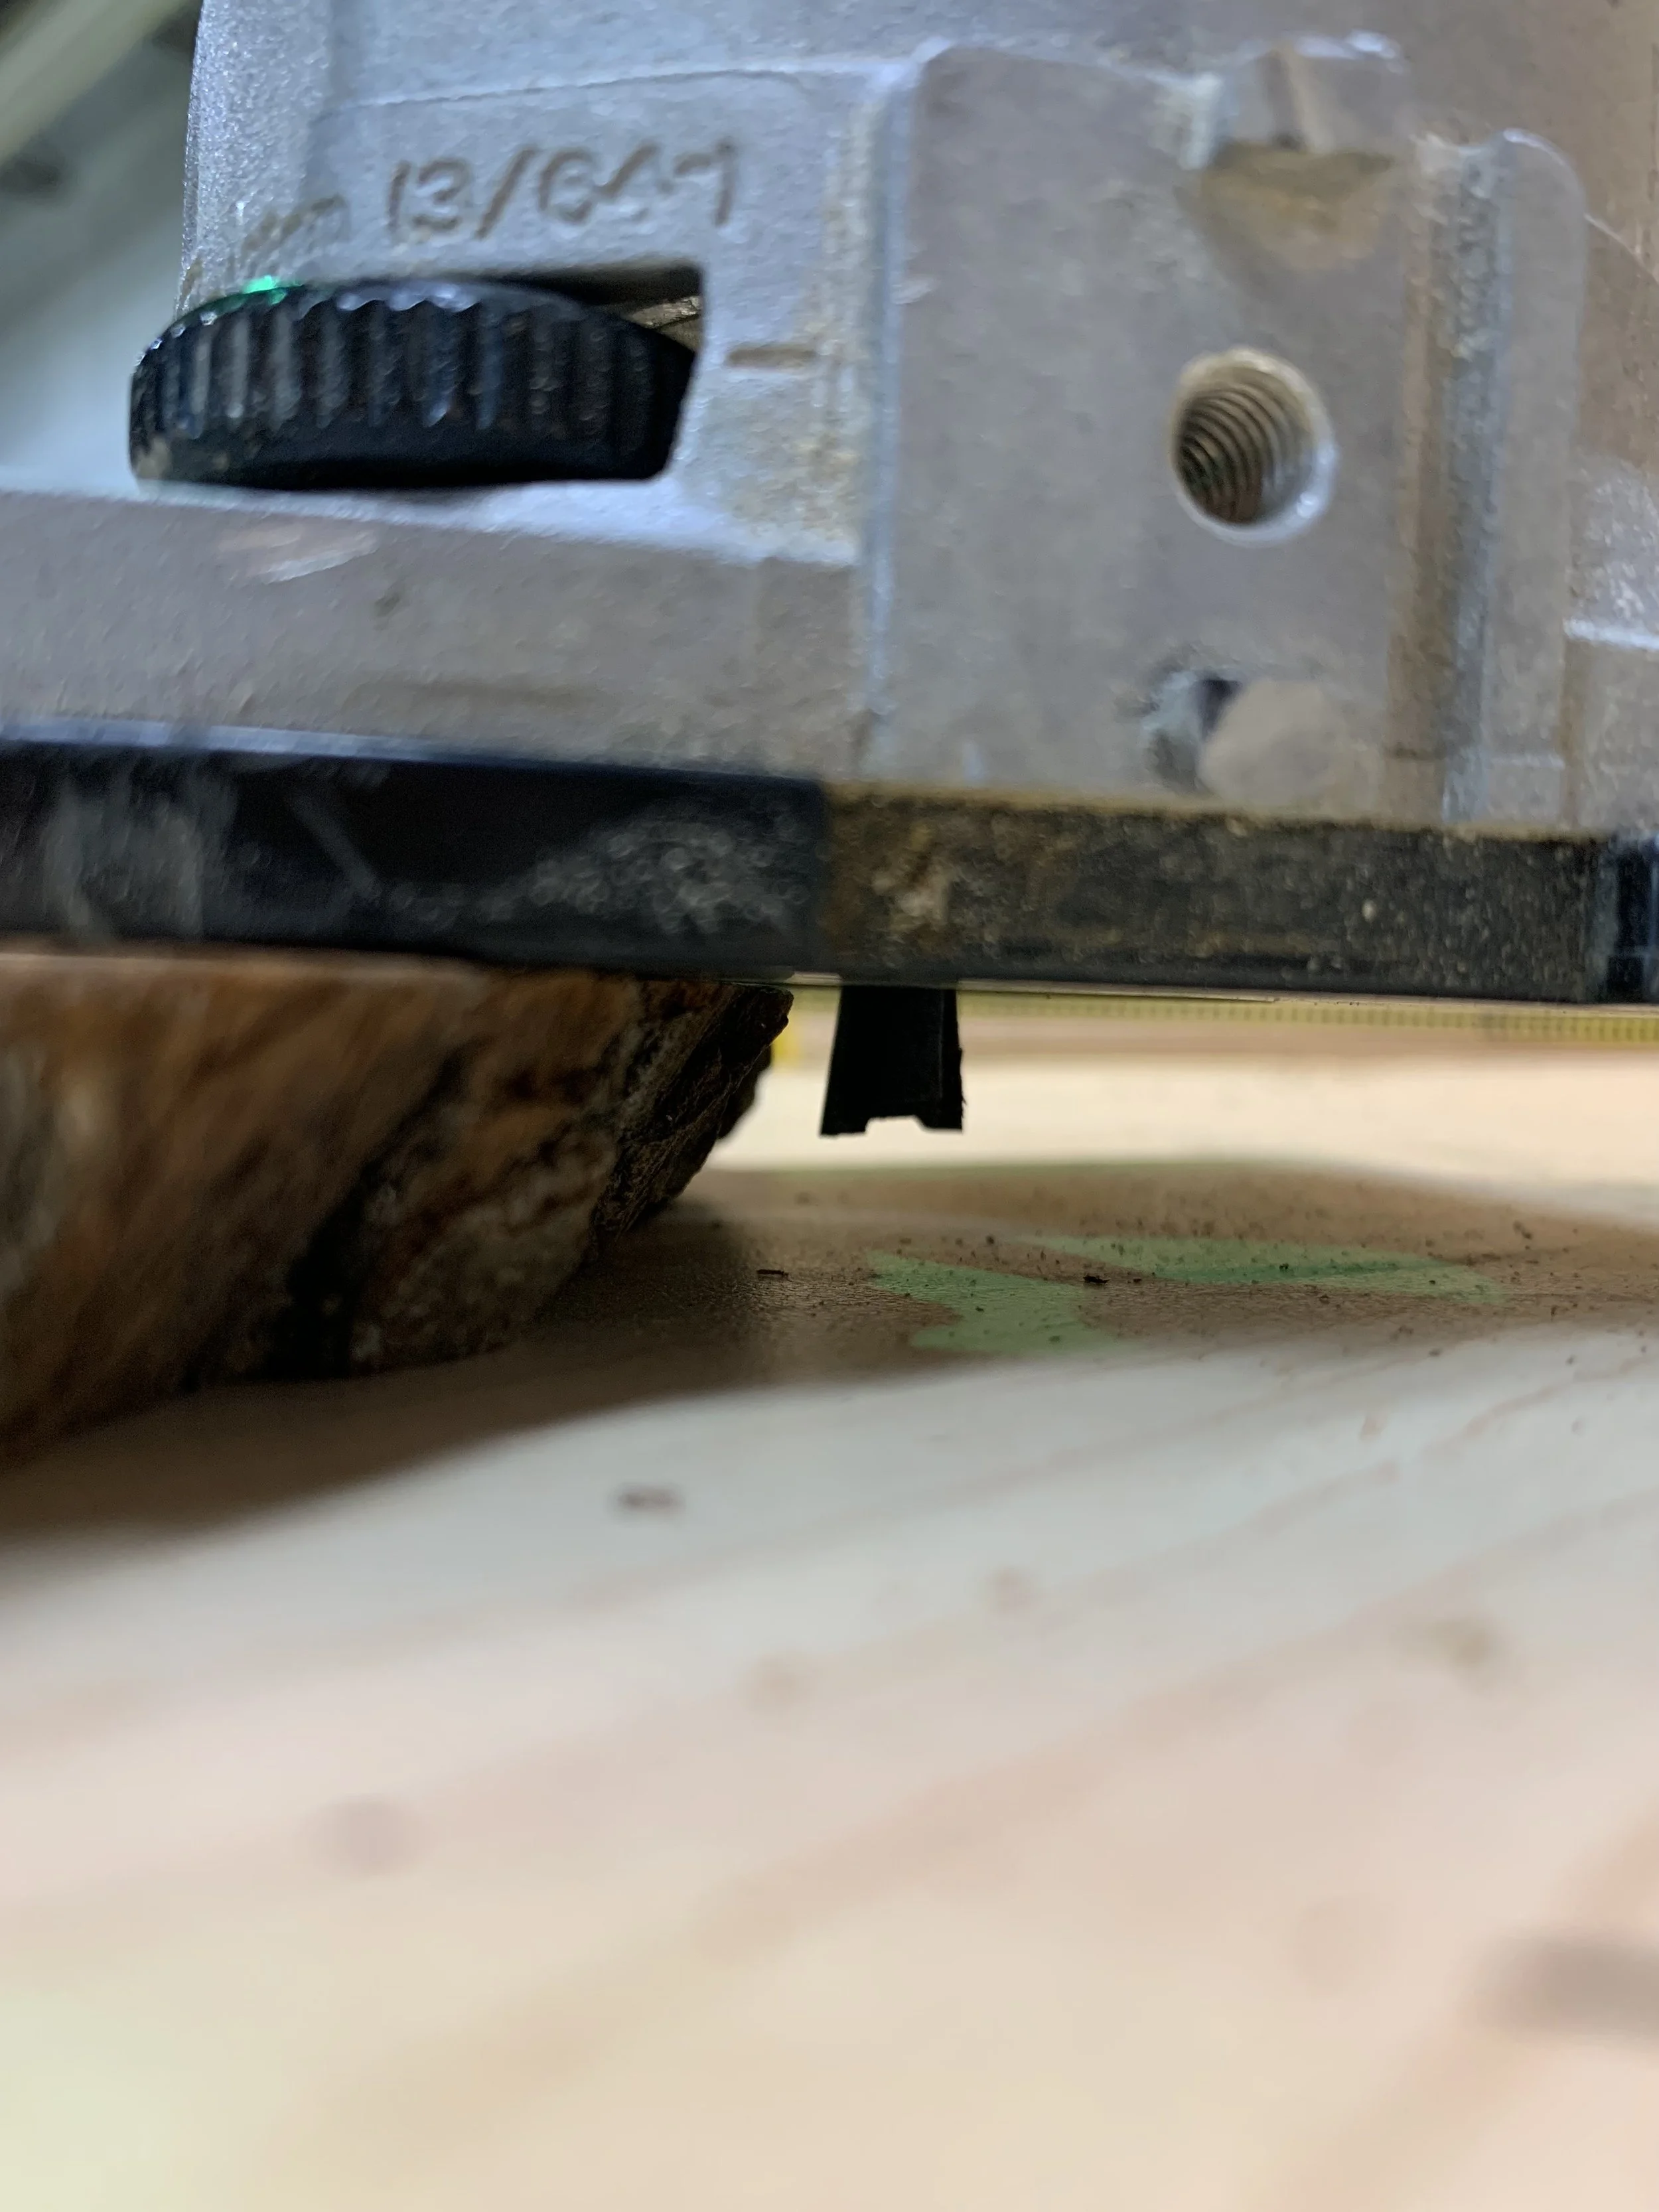
Using the router, I line up my bit against my guide and over the mark I made on the wood slice and I drill a hole, but only straight down at first.
I like to slightly lean the edge of the tool on the guide, coming in on a bit of an angle so the weight and pressure of the tool is on the guide, not me trying to hold it up in position. If you are doing it freehand, make sure to keep a sturdy grip.
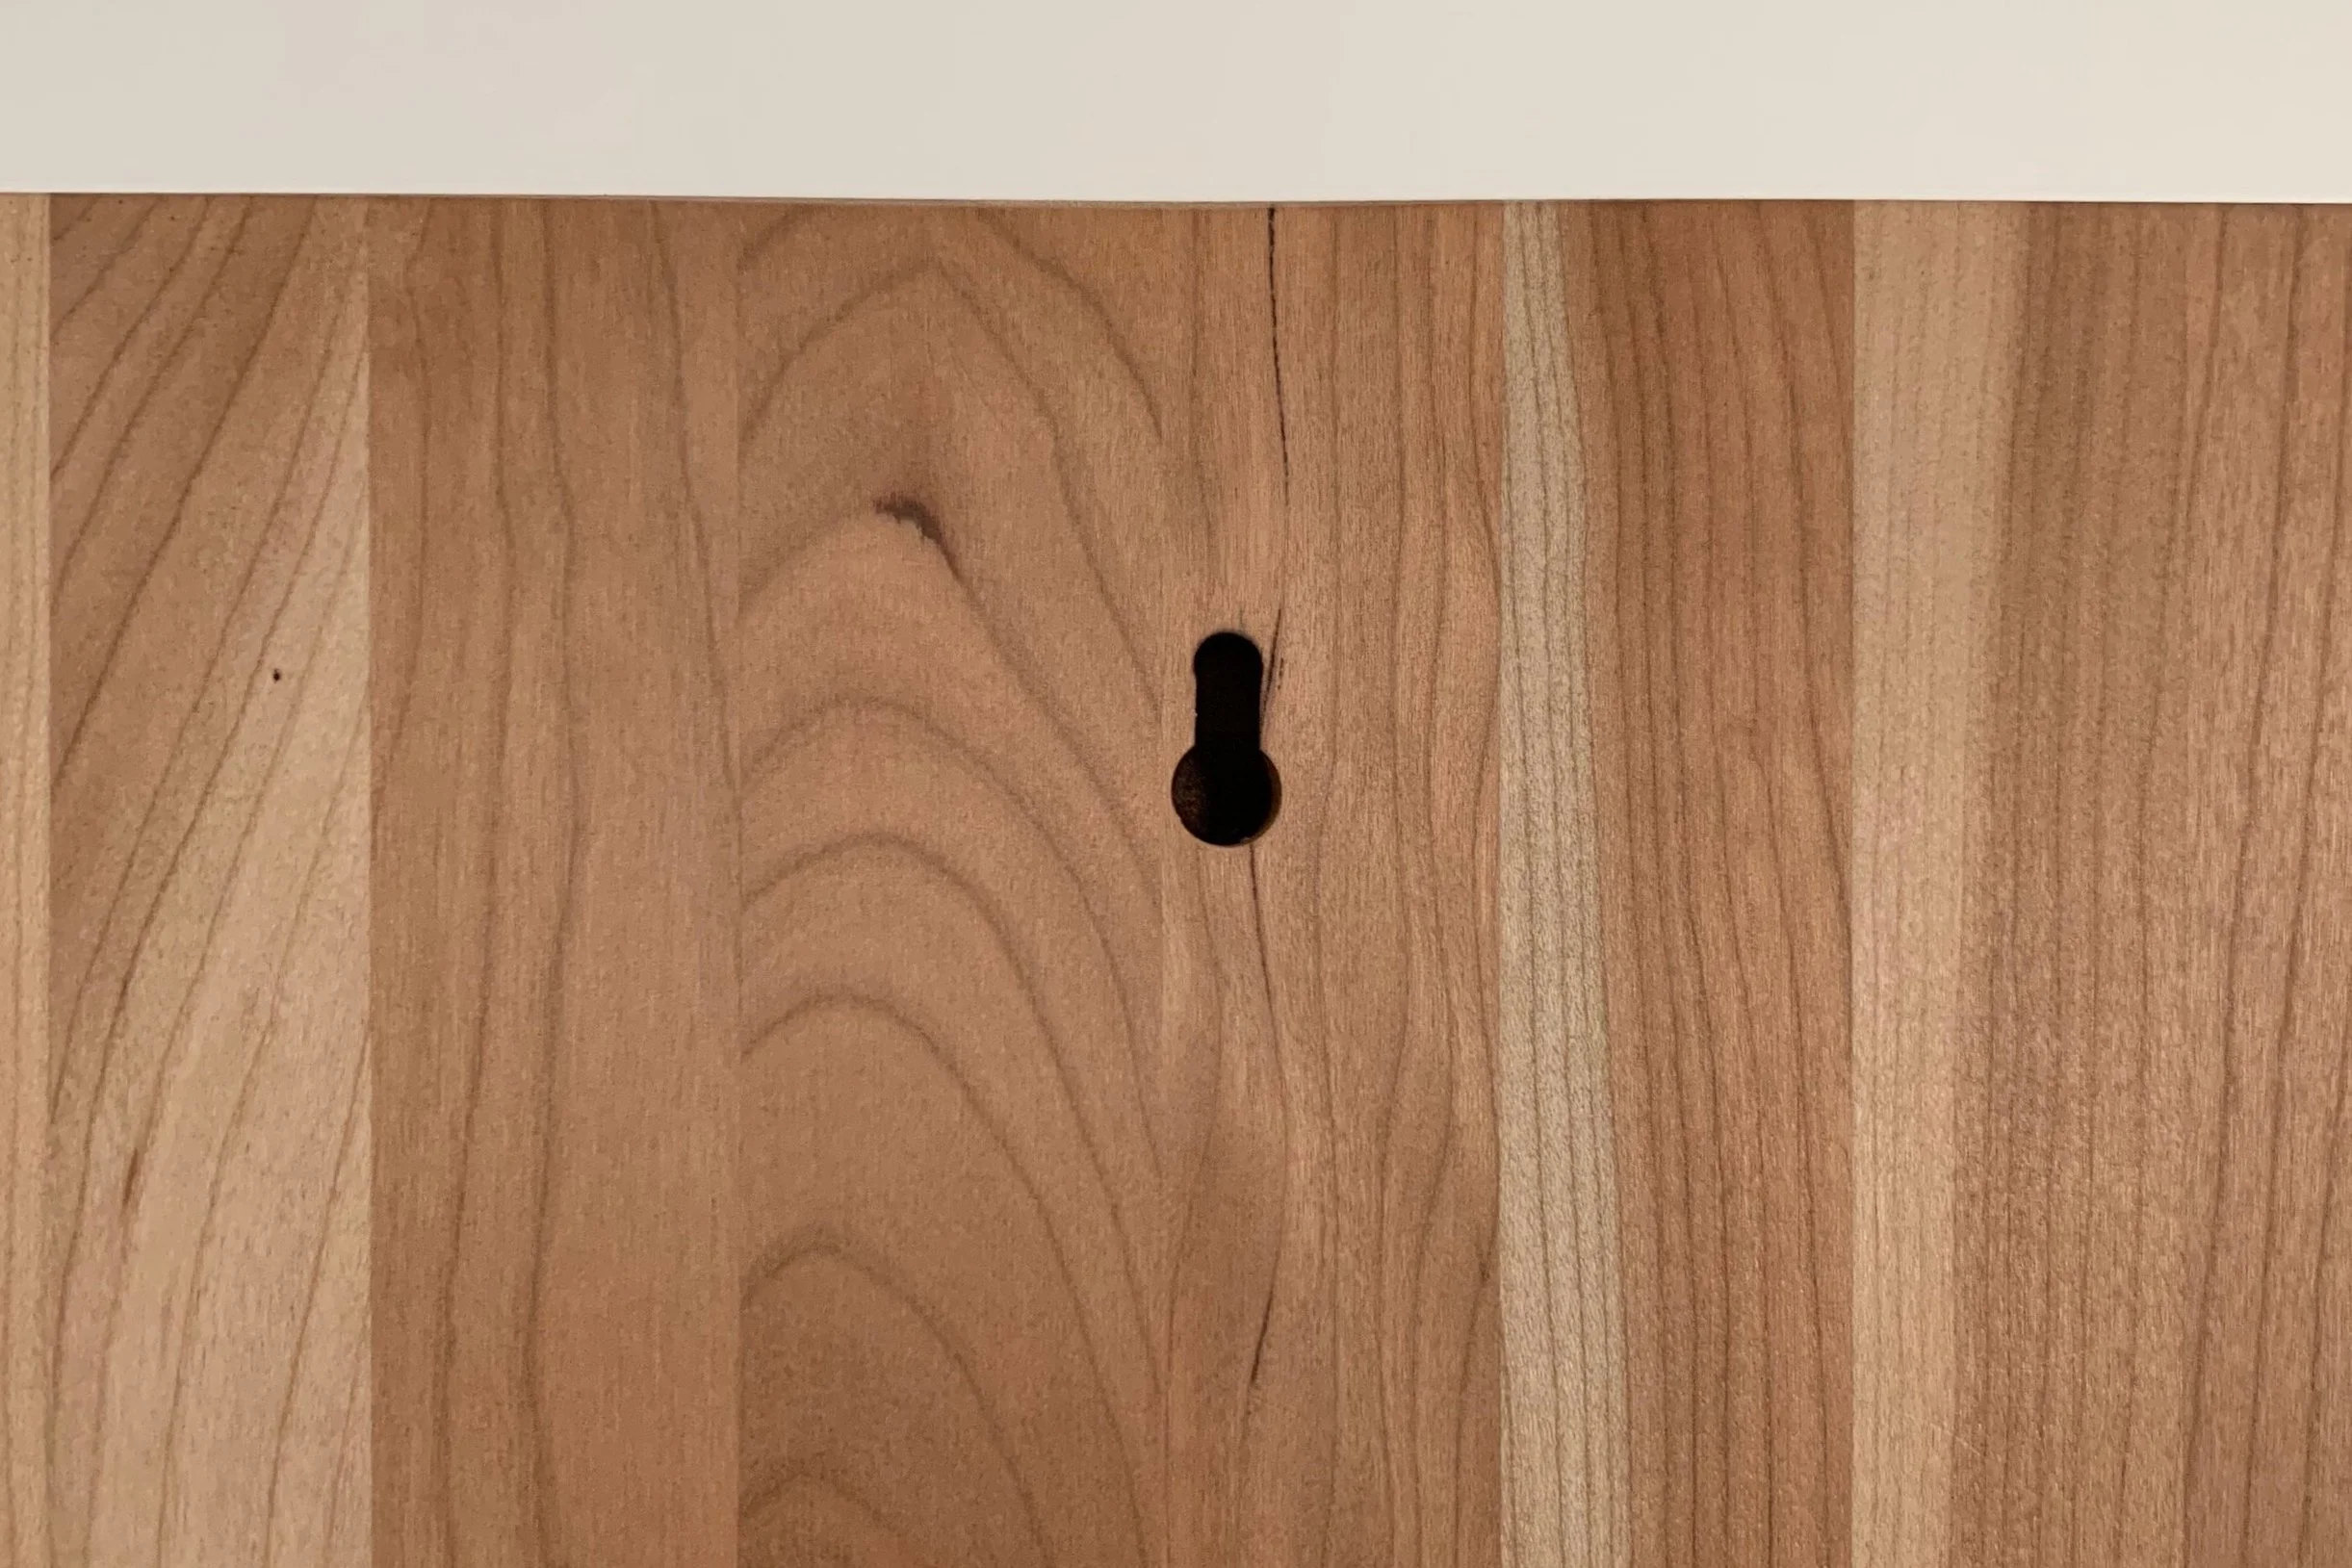
Once you've drilled your hole, your tool will lay flat on the wood.
The hole should be at least 1/4 inch deep so a nail can fit snugly in the slot, just make sure your wood is thick enough so the hole doesn’t go through.
With the bit inside the hole, move the router up, away from you, very slowly to create the nook for the nail to sit in.
Move slowly.
Once you have gone up about 3/4 of an inch, turn off your tool, wait for it to stop and remove the tool from the hole by carefully sliding the bit down and out of the hole at the bottom.
Step 4: Sand the Wood Slice
Use sandpaper to smooth out any rough edges around the drilled hole and the wood slice.
And voila! You made a keyhole hanger!
You can now hang your art, flush to a wall anywhere you like by sliding the wood slice onto a screw. Adjust the wood slice until it is level and centered on the screw.